User Guide for Smartflows: Workflow Automation Extension for Magento 2
Smartflows is a visual, event-driven workflow automation engine for Magento 2.
Extension Installation
For Magento Marketplace customers
Find the Composer name and version of the extension in its
composer.jsonfile.Log in to your server via SSH and run:
composer require meetanshi/module-smart-flows
Enter your Magento authentication keys when prompted (public key = username, private key = password).
Verify the module is recognized:
php bin/magento module:status Meetanshi_SmartFlows
Enable the module and run setup:
php bin/magento module:enable Meetanshi_SmartFlows
php bin/magento setup:upgrade
For Meetanshi customers
Extract the ZIP file and upload the extension to the root of your Magento 2 directory via FTP.
Log in to your server via SSH and run:
php bin/magento setup:upgrade
Deploy static content (both methods)
- Magento 2.0.x to 2.1.x
php bin/magento setup:static-content:deploy - Magento 2.2.x & above
php bin/magento setup:static-content:deploy -f - Flush the cache
php bin/magento cache:flush
Admin Configuration
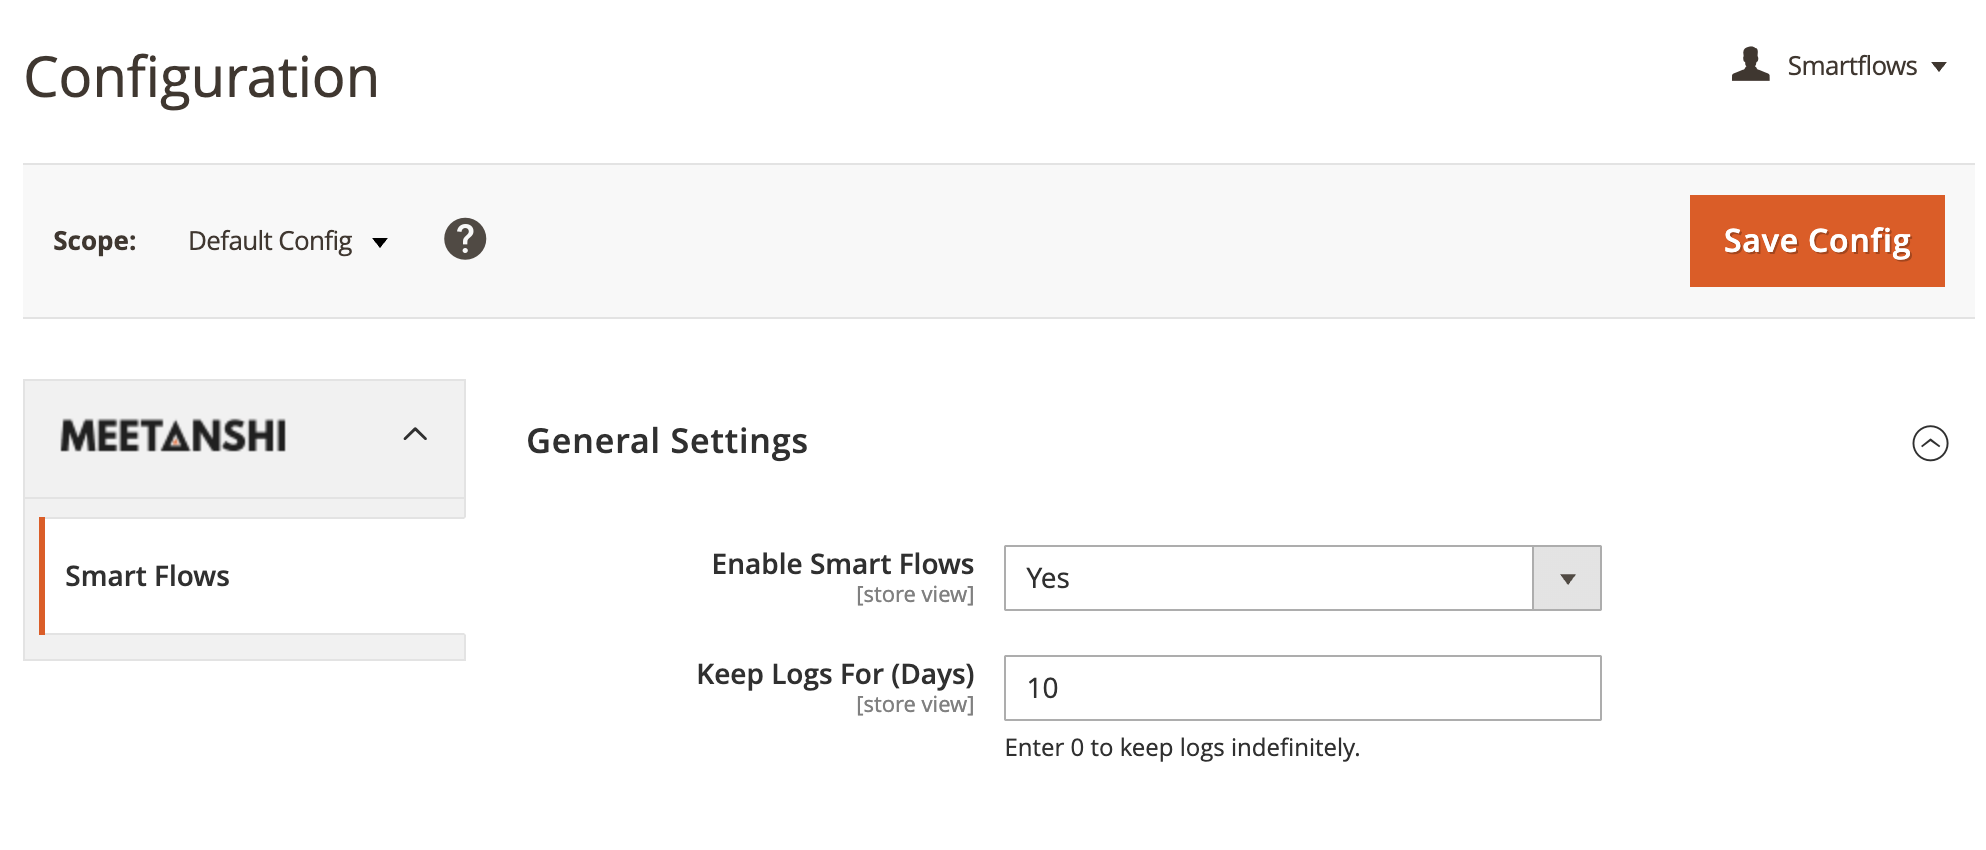
To configure global settings, log in to the Magento admin and go to Stores > Configuration > Meetanshi > Smart Flows.
- Enable Smart Flows: Enable or disable the entire automation engine globally.
- Keep Logs For (Days): How long execution logs are retained. Logs are cleaned up automatically by the daily cleanup cron (
smartflows_cleanup_logs, runs at 2:00 AM). The default is30. Enter0to keep logs indefinitely. - Enable Retry / Max Retries: Turn on automatic recovery attempts for actions that fail due to transient issues (e.g. external API timeouts), and set how many times to retry.
Cron requirement: SmartFlows uses Magento cron for scheduled workflows and log cleanup. Make sure cron is running (php bin/magento cron:run).
Core Concepts
A SmartFlows automation is a workflow built on a visual canvas as a network of nodes connected by edges:
- A Trigger starts the workflow (a Magento event, a webhook, or a file upload).
- Action, Logic, and Data nodes run in sequence, passing data along the edges.
- Data moves through the flow as a payload you can read and modify with expressions.
As the workflow runs, three data scopes are available to every node:
$json, the current workflow payload (starts from the trigger data).$context, metadata about this run (e.g.workflow_id,trigger_time).$node, outputs from previously executed nodes, by their label.
Building Your First Workflow
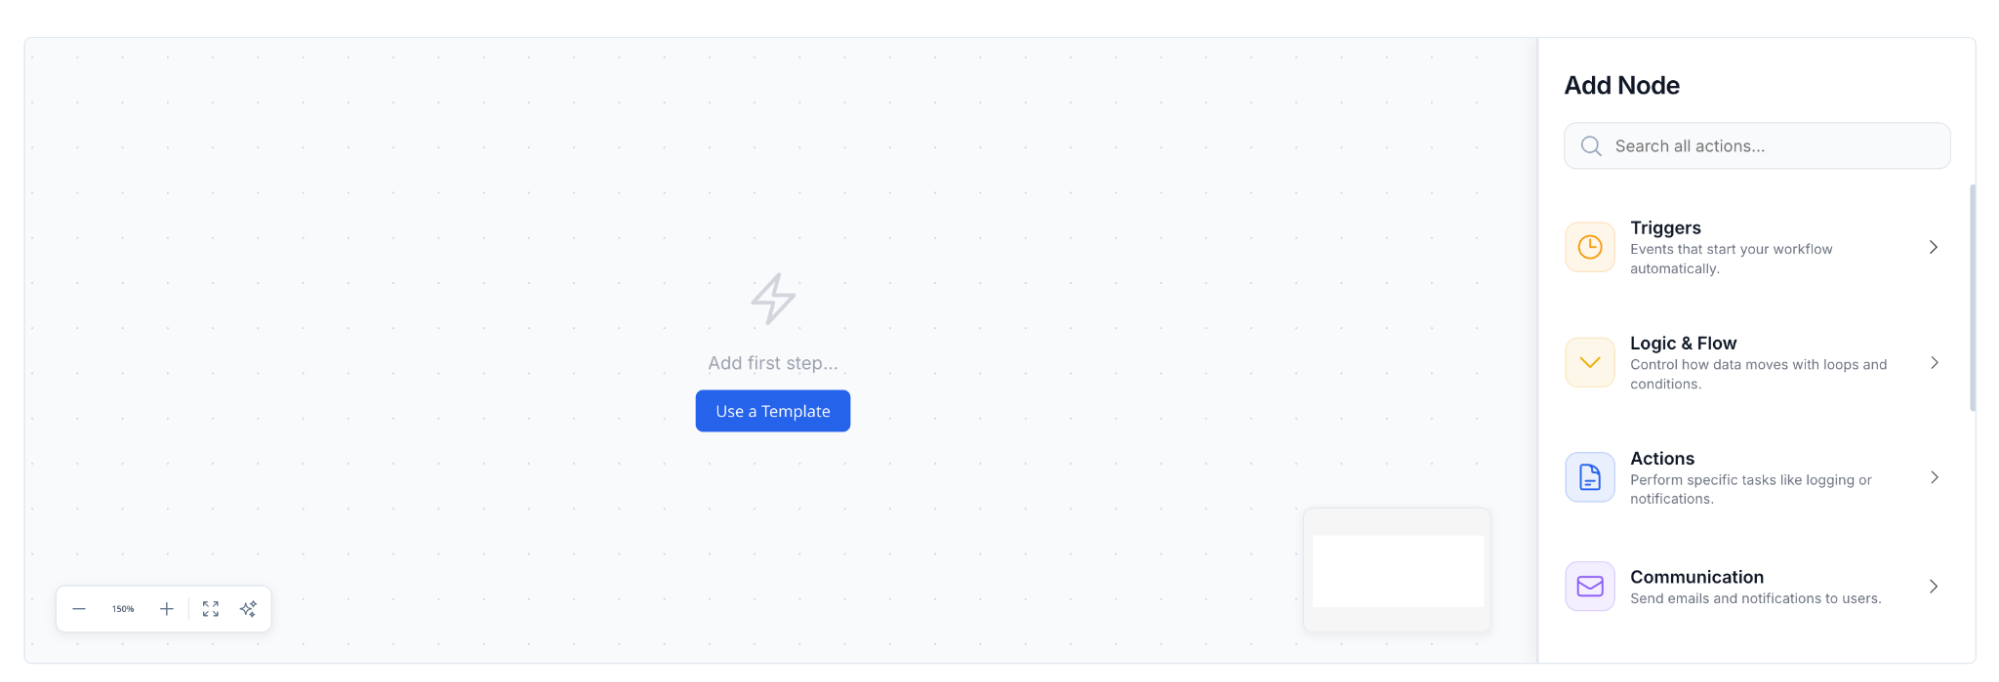
- Go to the SmartFlows builder in the admin and click to create a new workflow.
- Enter a workflow name so you can identify it later.
- Add a Trigger node and choose what starts the workflow (an event, webhook, or file upload, Triggers).
- Add action / logic / data nodes to the canvas and connect them with edges in the order they should run.
- Open each node and configure its fields. Use expressions like
{{ $json.order.grand_total }}to pull live data. - Save the workflow, then toggle it to Enabled.
- Trigger it (place a test order, send a webhook, etc.) and open the execution log to confirm it ran and inspect each step.
Triggers
SmartFlows starts workflows from three sources: native Magento events, incoming webhooks, and file uploads.
Native Magento events
Set the trigger to one of the supported Magento events:
| Event | Fires when… |
|---|---|
sales_order_place_after |
A new order is placed |
sales_order_save_after |
An order changes state or status |
sales_order_invoice_save_after |
An invoice is generated |
sales_order_shipment_save_after |
A shipment is created |
sales_order_creditmemo_save_after |
A credit memo (refund) is processed |
sales_order_payment_pay |
A payment is registered |
customer_save_after |
A customer record is created or updated |
customer_register_success |
A new customer registers |
customer_login |
A customer logs in |
catalog_product_save_after |
A product's details change |
cataloginventory_stock_item_save_after |
A product's stock item is modified |
Webhook triggers
A workflow can be started by an incoming HTTP POST. The webhook controller extracts query variables and parses the JSON request body, then merges the body into the root of $json for direct access. It also exposes _request_method and _request_headers.
NEEDS INPUT: confirm the public webhook URL pattern to publish here (e.g. https://yourstore.com/smartflows/webhook/execute).
File-upload webhook triggers
A workflow can accept an uploaded file (CSV, JSON, XML, or TXT), which is parsed automatically:
- CSV: first row is treated as headers; rows are passed as a JSON array at
$json.content.rows. - JSON: decoded directly into object structures.
- XML: decoded into XML tree structures.
- TXT: split by newlines into a row array.
File metadata (name, size, type, and absolute server path) is also provided for further processing.
Using Expressions
Wrap expressions in double braces {{ ... }}. They resolve against the scopes below:
| Scope | Use it for | Example |
|---|---|---|
$json |
The current workflow payload | {{ $json.order.grand_total }} |
$context |
Metadata about this run | {{ $context.trigger_time }} |
$node |
Output of an earlier node, by label | {{ $node["Fetch Product Info"].sku }} |
| (no prefix) | Fallback, checks $json, then $context |
{{ order.entity_id }} |
Notes:
- Variable names are case-sensitive.
- In
$nodereferences, non-alphanumeric characters in a node's name become underscores.
Built-in Nodes Reference
Magento action nodes
| Node | What it does |
|---|---|
| Fetch Order | Retrieve order data by ID or increment ID |
| Fetch Customer | Retrieve customer details by email or ID |
| Fetch Product | Fetch full product details by SKU or ID |
| Fetch Category | Load category attributes |
| Update Stock | Update stock quantity using set, add, or subtract |
| Check Stock | Verify inventory levels with logical checks (e.g. less-than a threshold) |
| Create Invoice | Invoice an order, capture online/offline, and send the receipt email |
| Create Shipment | Create shipments with carrier tracking codes |
| Cancel Order | Cancel an order and update comments |
| Refund Order | Generate a credit memo and process a cash/online refund |
| Assign to Category | Assign a product to a category ID |
| Remove from Category | Remove a product from a category ID |
| Assign Customer Group | Move a customer into a new group (e.g. VIP, Wholesale) |
| Order action | Append order remarks, status updates, or metadata flags |
| Customer action | Modify customer attributes |
| Product action | Modify catalog product details |
Logic & control nodes
- If: Tests a condition (
eq,neq,gt,lt,gte,lte,contains) and routes execution to thetrueorfalsebranch. - Switch: Matches an expression against multiple cases and routes to the first equal match.
- Delay: Pauses execution for a set number of seconds.
Data transformation nodes
- Set Data: Set static or interpolated values in the payload.
- Merge: Combine multiple variables or objects into one map.
- Filter Array: Filter an array by property criteria.
- Map Array: Re-map array elements from one schema to another.
- Aggregate: Compute sum, count, or average over an array.
- Split Array: Split an array into multiple outputs or process items independently.
Communication & system nodes
- Email: Send dynamic HTML emails using Magento's email transport (template
smartflows_notification_email). - HTTP: Make custom REST / GraphQL / SOAP requests (GET, POST, etc.) with custom headers and body to third-party endpoints.
- Log: Write JSON variables to
var/log/debug.logor the system logs for auditing.
Custom Code Node (Sandbox)
The code node lets developers run PHP snippets directly inside a workflow. The return array is merged back into the global $json payload.
For safety, the sandbox validates every snippet against a strict whitelist:
- Blocked: shell execution (
exec,system,shell_exec,passthru,eval,curl_exec…), superglobals ($_GET,$_POST,$_SERVER,$GLOBALS…), structural keywords (class,function,namespace,use…), process termination (die,exit), and filesystem access (file_get_contents,fopen,unlink,mkdir,chmod…). - Allowed: safe string, array, math, date/time, type, and JSON helper functions (e.g.
str_replace,array_map,round,date,json_encode).
Keep snippets to data manipulation only, anything touching the filesystem, shell, or request globals is rejected.
REST API
SmartFlows exposes web API endpoints for programmatic management. All endpoints require the authorization resource Meetanshi_SmartFlows::workflows.
POST /V1/smartflows/workflow
Create or save a workflow. Payload: JSON of the workflow object.
GET /V1/smartflows/workflow/:workflowId
Retrieve a specific workflow configuration.
DELETE /V1/smartflows/workflow/:workflowId
Delete a workflow by its database ID.
GET /V1/smartflows/workflows
List all workflows (supports Search Criteria).
POST /V1/smartflows/trigger/:workflowId
Programmatically fire a workflow. Body: JSON merged into the trigger.
GET /V1/smartflows/execution/latest/:workflowId
Retrieve the latest execution details and status logs.
Developer Guide: Creating Custom Nodes
Add your own node type in two steps.
Step 1, Implement the node class
Create a class under Model/Node/ that extends Meetanshi\SmartFlows\Model\Node\AbstractNode and implement executeNode. The returned array is merged back into the global $json payload.
<?php
namespace Vendor\Module\Model\Node;
use Meetanshi\SmartFlows\Model\Node\AbstractNode;
class CalculateDiscount extends AbstractNode
{
/**
* @param array $contextData Global metadata details
* @param array $jsonData Current running payload ($json)
* @param array $config Node-specific resolved configuration
* @return array
*/
protected function executeNode(array $contextData, array $jsonData, array $config): array
{
$baseTotal = (float)($config['base_total'] ?? 0);
$percent = (float)($config['discount_percent'] ?? 10);
    if ($baseTotal \<= 0\) {
        return \['success' \=\> false, 'error' \=\> 'Base total must be positive'\];
    }

    $discount   \= $baseTotal \* ($percent / 100);
    $finalTotal \= $baseTotal \- $discount;

    return \[
        'success'         \=\> true,
        'discount\_amount' \=\> $discount,
        'final\_total'     \=\> $finalTotal,
    \];
}
}
Step 2, Register the node in di.xml
Add your node to the Pool argument array in your module's etc/di.xml:
<?xml version="1.0"?>
<config xmlns:xsi="http://www.w3.org/2001/XMLSchema-instance" xsi:noNamespaceSchemaLocation="urn:magento:framework:ObjectManager/etc/config.xsd">
<type name="Meetanshi\SmartFlows\Model\Node\Pool">
<arguments>
<argument name="nodes" xsi:type="array">
<item name="custom-discount-calculator" xsi:type="string">Vendor\Module\Model\Node\CalculateDiscount</item>
</argument>
</arguments>
</type>
</config>
Run php bin/magento setup:upgrade and cache:flush, and your node will be available in the builder.
Troubleshooting
Workflow does not execute
- Confirm the workflow is toggled to Enabled in the builder list.
- Confirm Magento cron is running (
php bin/magento cron:run; check thecron_scheduletable). - Confirm your trigger is mapped to an active event or an active webhook endpoint.
Expressions are not resolving
- Check the execution log for typos, variable names are case-sensitive.
- Confirm the field path exists in the previous node's payload.
- Confirm correct wrapping:
{{ $json.nested.property }}.
Execution timeouts
- For slow external integrations, set appropriate timeout thresholds on your HTTP nodes to avoid process locks