Custom Option Image for Magento 2 - User Guide
Extension Installation
For Magento Marketplace Customers
- Find the Composer name and version of the extension in the extension's composer.json file.
- Login to your SSH and run:
composer require meetanshi/magento2-custom-option-image
- Enter your authentication keys . Your public key is your username; your private key is your password.
- Wait for Composer to finish updating your project dependencies and make sure there aren't any errors.
- To verify that the extension installed properly, run the command:
php bin/magento module:status Meetanshi_CustomOptionImage
- By default, the extension is probably disabled.
- Enable the extension and clear static view files:
php bin/magento module:enable Meetanshi_CustomOptionImage --clear-static-content
php bin/magento setup:upgrade
- For Magento version 2.0.x to 2.1.x - php bin/magento setup:static-content:deploy
- For Magento version 2.2.x & above - php bin/magento setup:static-content:deploy --f
php bin/magento cache:flush
For Meetanshi Customers
- Extract the zip folder and upload our extension to the root of your Magento 2 directory via FTP.
- Login to your SSH and run below commands step by step:
php bin/magento setup:upgrade
- For Magento version 2.0.x to 2.1.x -
php bin/magento setup:static-content:deploy
- For Magento version 2.2.x & above -
php bin/magento setup:static-content:deploy --f
php bin/magento cache:flush
Configuration
To configure the Custom Option Image for Magento 2 extension, login to Magento 2, move to Stores > Configuration > Meetanshi > Custom Option Image where you can find setting to enable the extension.
- Custom Option Image: Enable or disable the extension from here.

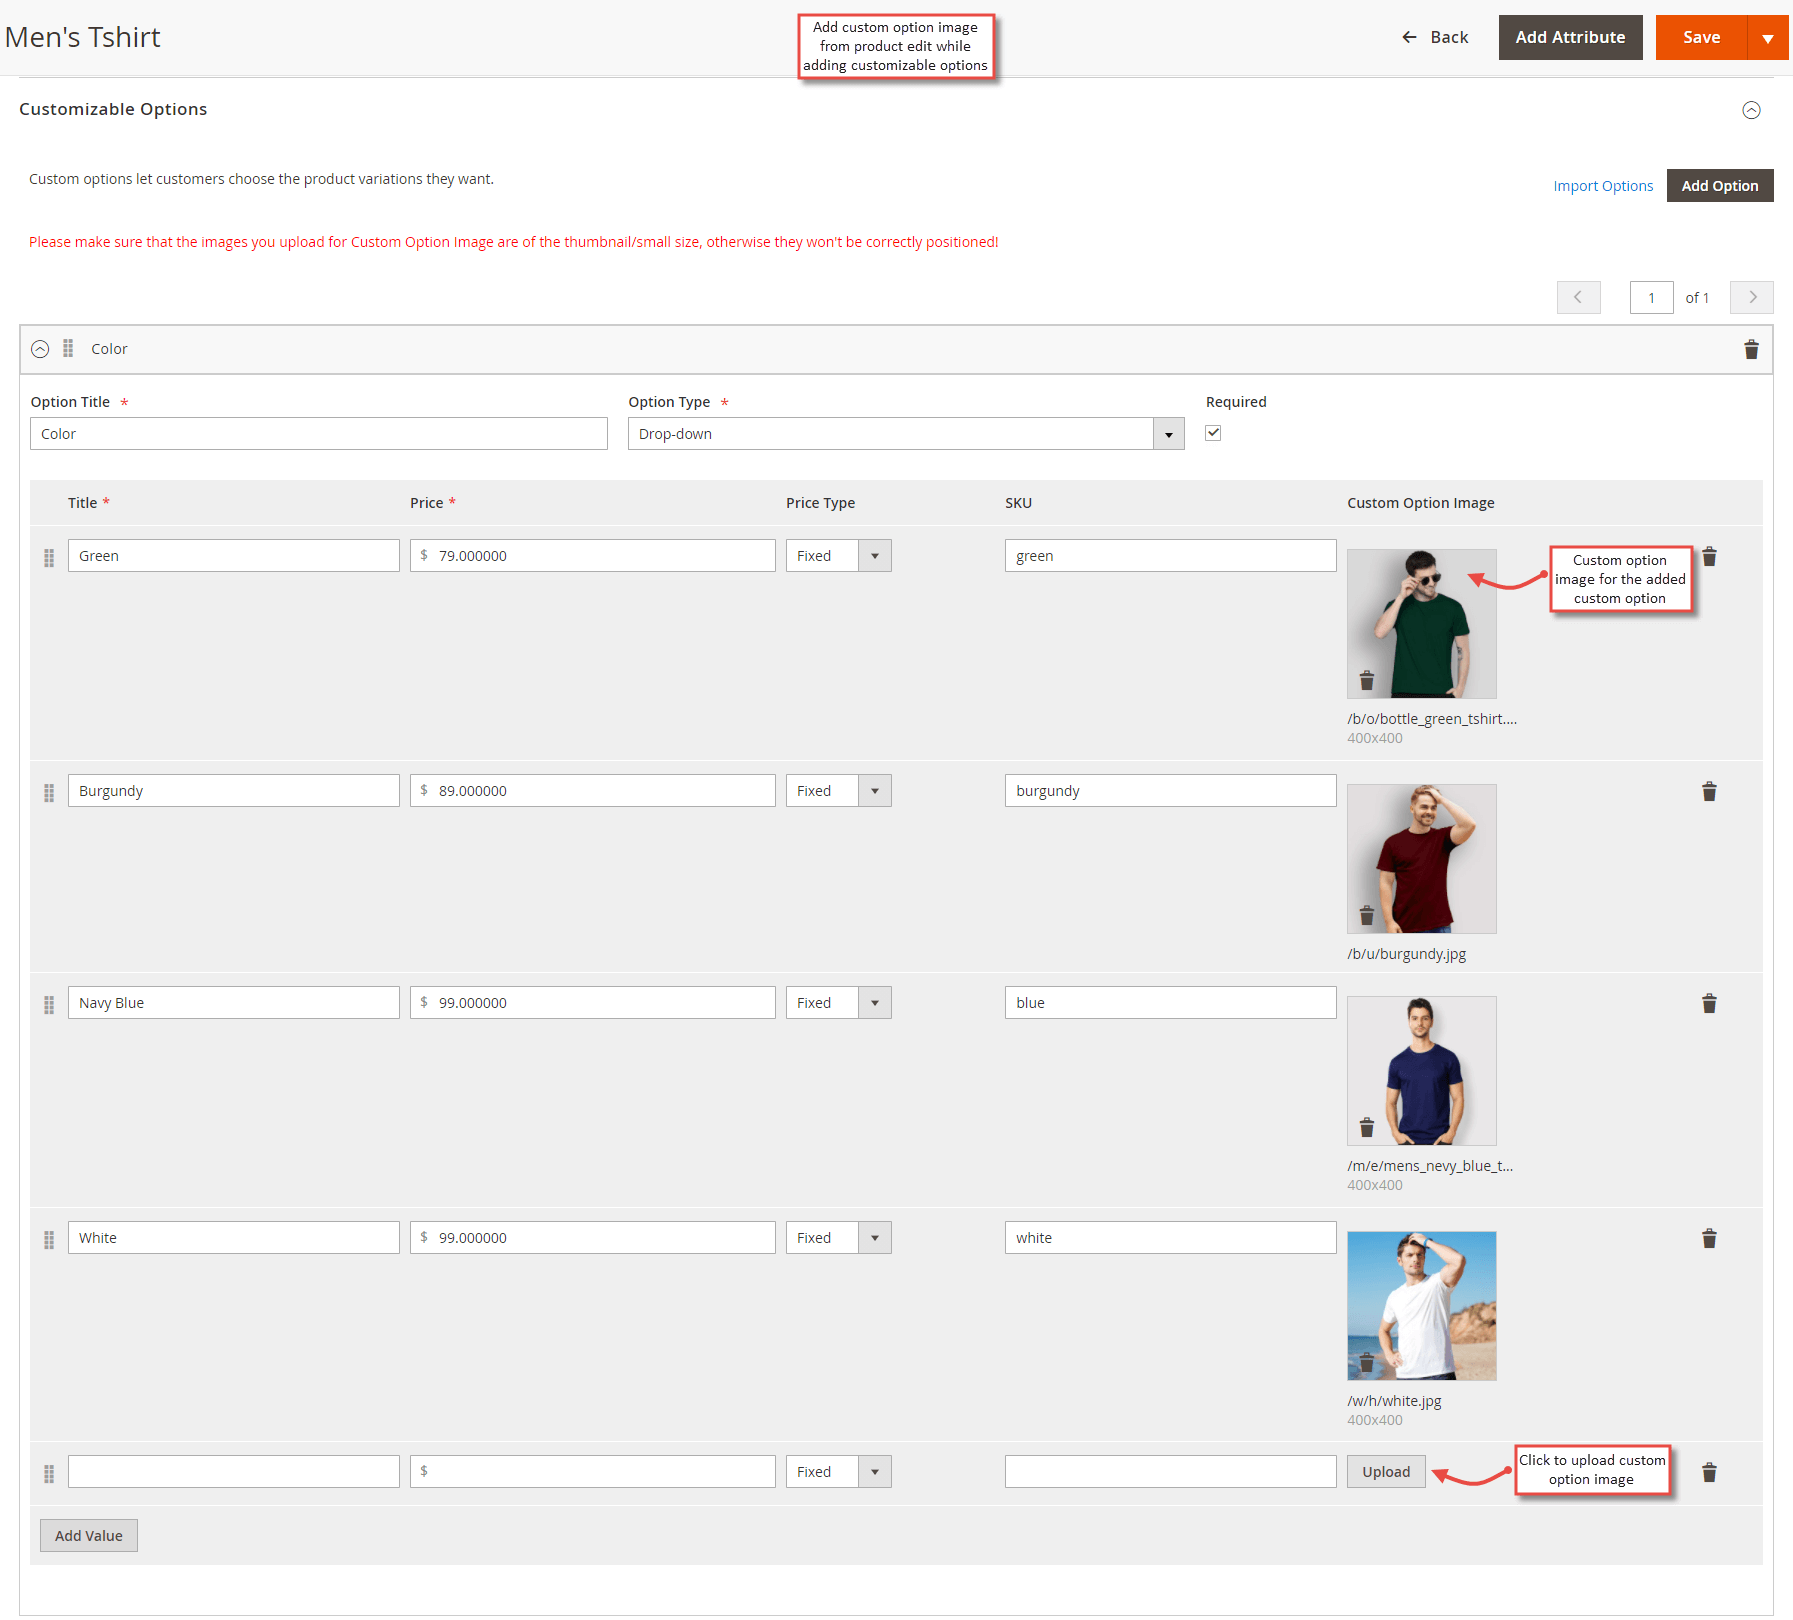
Upload Custom Option Image from Product Edit
After enabling the extension, move to Catalog > Products , edit a product to which you want set custom option images. Go to Customizable Options tab, add custom options and you can see " Upload " button to add respective custom option image.
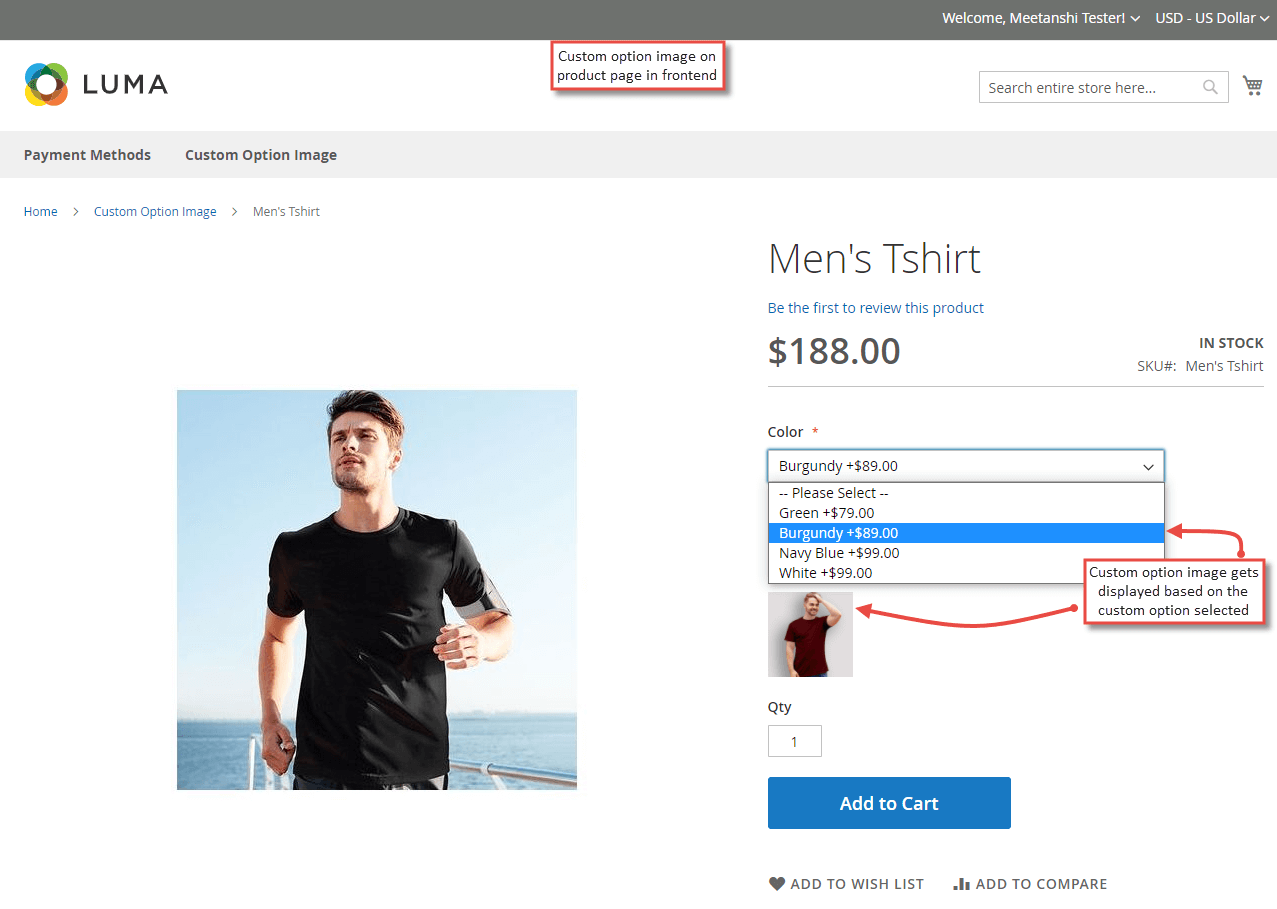
Custom Option Image in Frontend
After uploading the custom option image to product's custom options, whenever a user selects a custom option, its respective custom option image is shown below the dropdown.