Success Page for Magento 2 - User Guide
Extension Installation
- Extract the zip folder and upload our extension to root the of your Magento 2 directory via FTP.
- Login to your SSH and run below commands step by step:
php bin/magento setup:upgrade
- For Magento version 2.0.x to 2.1.x -
php bin/magento setup:static-content:deploy
- For Magento version 2.2.x & above -
php bin/magento setup:static-content:deploy--f
php bin/magento cache:flush
- That's it.
Configuration
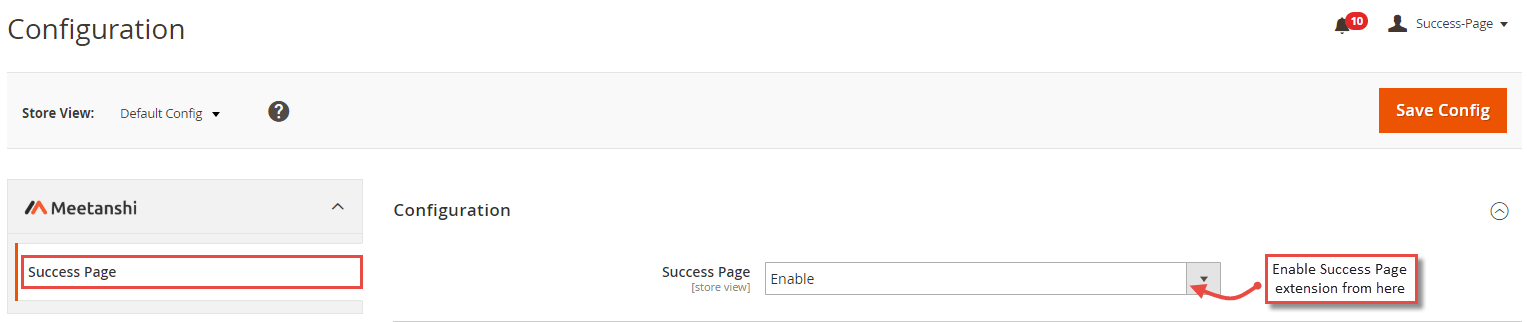
To configure the Success Page for Magento 2 extension, login to Magento 2, move to Stores > Configuration > Success Page where you can find various settings to enable the extension.
- Success Page: Enable the success page extension from here.
Social Share Section Settings
The extension facilitates to enable social share buttons on the success page.
- Display Section: Set YES to enable social share section in the success page.
- Facebook App ID: Enter the Facebook app ID to enable sharing on Facebook.

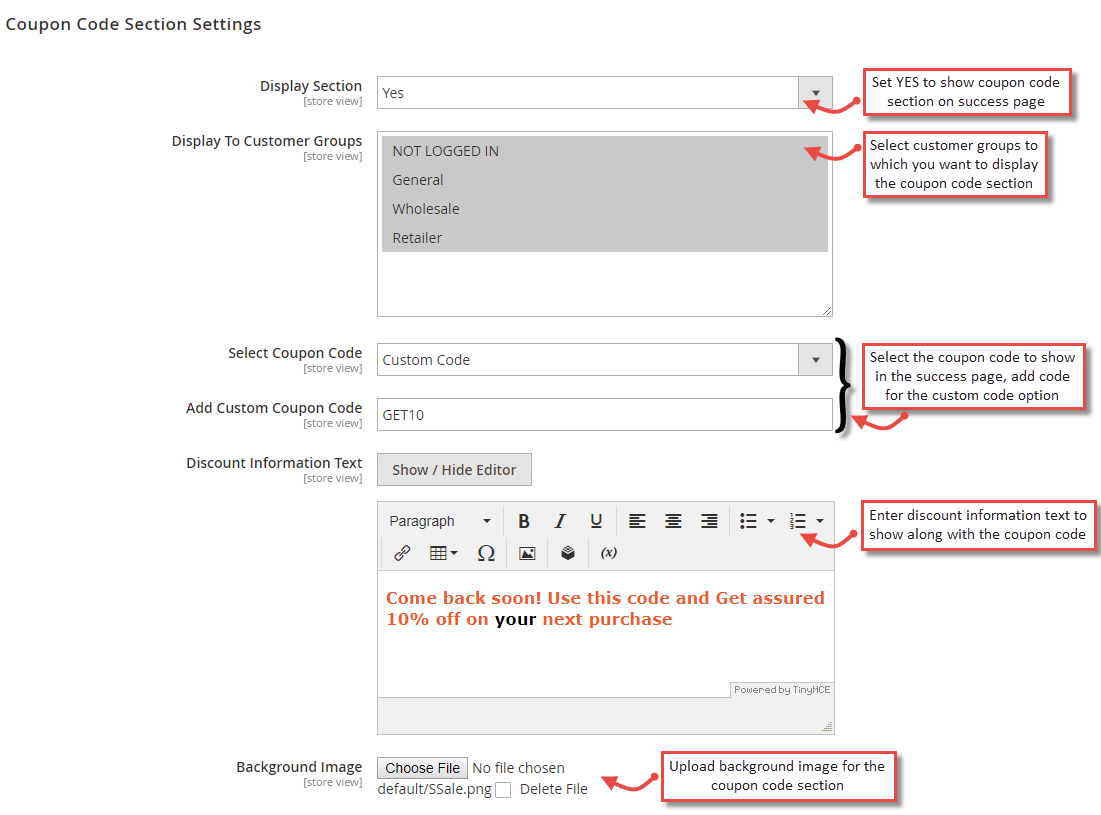
Coupon Code Section Settings
You can show coupon codes and discount offers on the success page to bring customers back for the purchase. Make settings here to display coupon codes on the success page.
- Display Section: Set YES to enable coupon code section in the success page.
- Display To Customer Groups: Select specific or all customer groups to show the coupon code section on the success page.
- Select Coupon Code: Select one of the available coupon codes or add your custom coupon code to show on the success page.
- Add Custom Coupon Code: Enter the code in case of custom coupon code.
- Discount Information Text: Enter discount information text to describe the use and terms of coupon code.
- Background Image: Set the background image to show in the coupon code section.
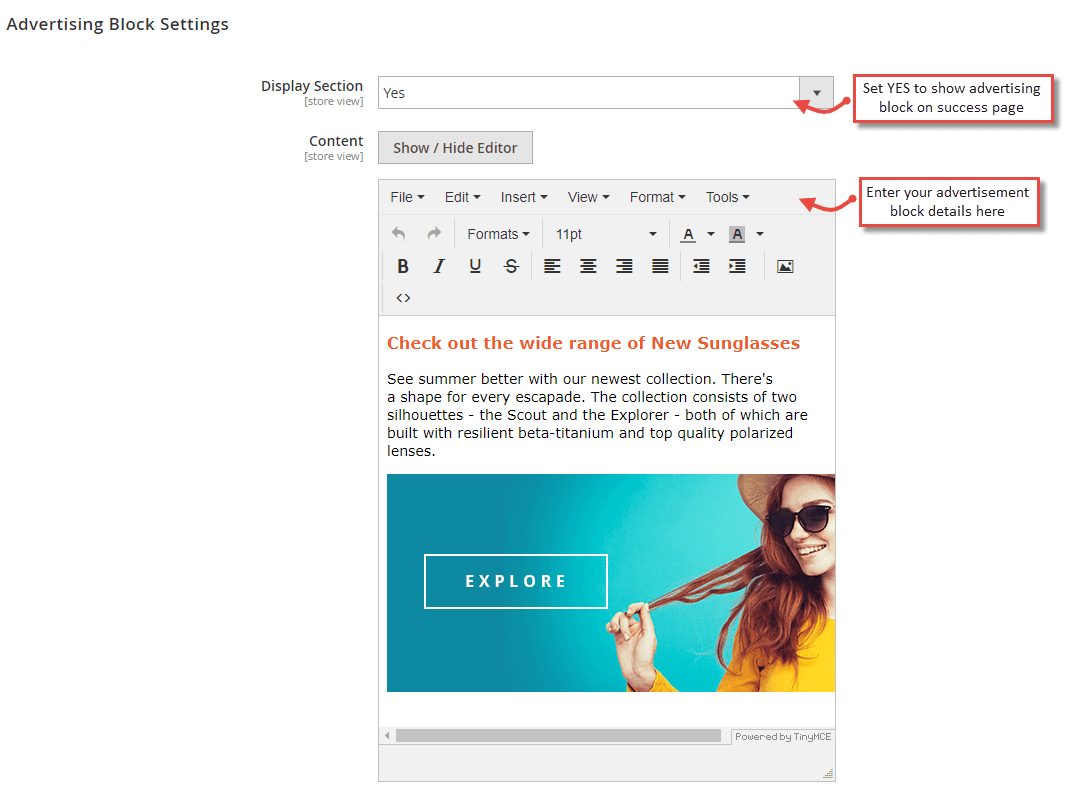
Advertising Block Settings
Make your other store products get the attention using the advertising block on the success page. You can show any offers, products, deals or any content under this block.
- Display Section: Set YES to enable advertising block in the success page.
- Content: Enter your advertising content in the WYSIWYG editor to show on the success page.
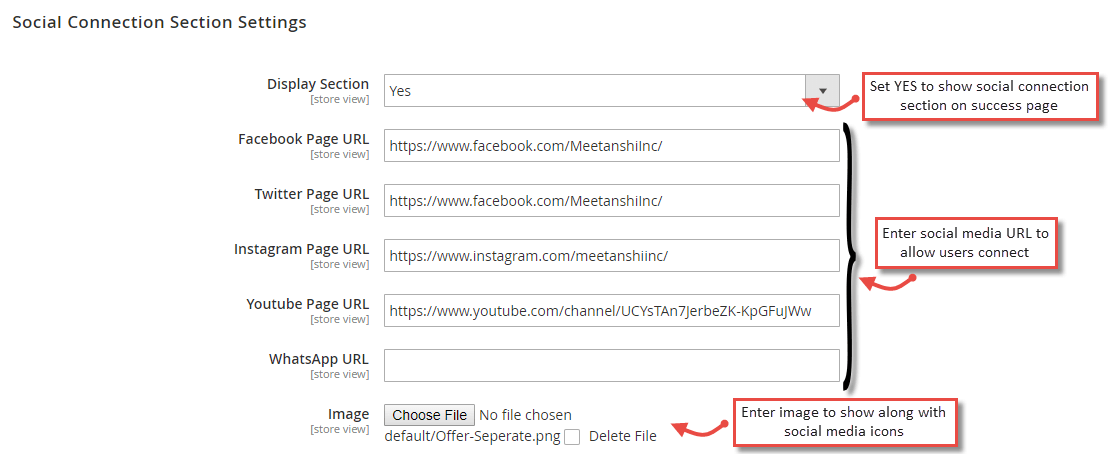
Social Connection Section Settings
You can encourage your customers to connect with you on social media. This can help you make your social presence better and boost your followers.
- Display Section: Select YES to enable social connection buttons on the success page.
- Facebook Page URL: Enter the Facebook URL to show on the success page and allow customers to connect.
- Twitter Page URL: Enter the Twitter URL to show on success page and allow customers to connect.
- Instagram Page URL: Enter the Instagram URL to show on the success page and allow customers to connect.
- YouTube Page URL: Enter the YouTube channel URL to show on the success page and allow customers to connect.
- WhatsApp URL: Enter the WhatsApp group URL to show on success page and allow customers to join.
- Image: Upload an image to show along with the social connect buttons.
Newsletter Subscription Section Settings
Increase the number of newsletter subscribers by showing the newsletter subscription section on the success page.
- Display Section: Set YES to enable the newsletter subscription section in the success page.

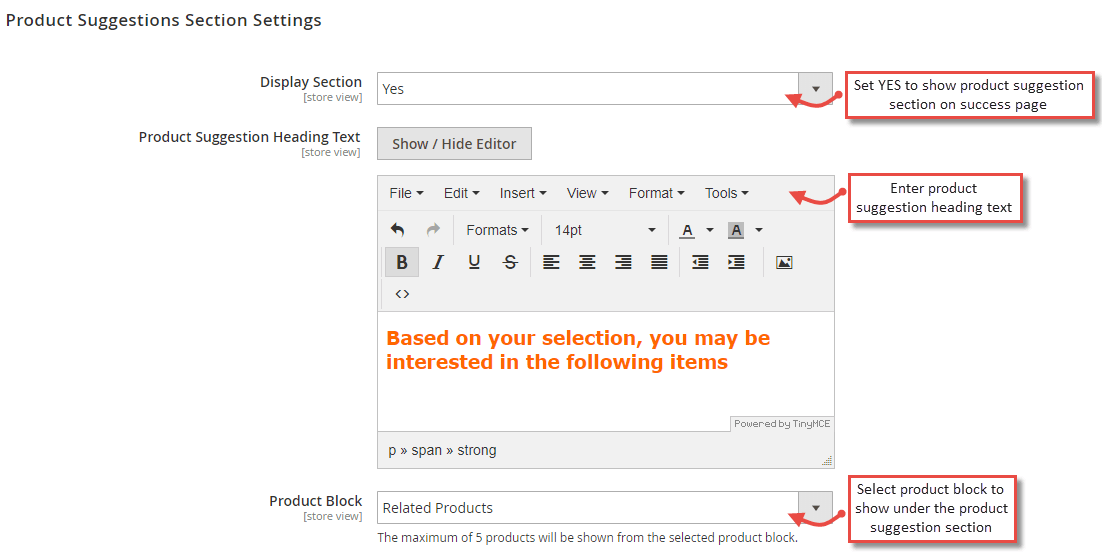
Product Suggestions Section Settings
Based on the current purchase of the customers, you can show related, up-sell and cross-sell products on the success page.
- Display Section: Set YES to enable product suggestions section on the success page.
- Product Suggestion Heading Text: Set the heading text for the product suggestion block.
- Product Block: Select the product block to show products on the success page.
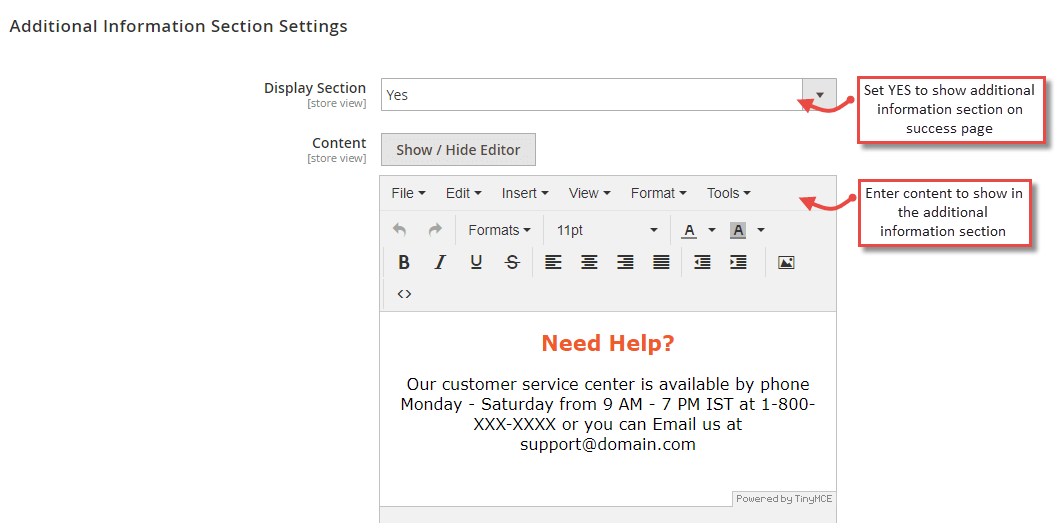
Additional Information Section Settings
Apart from the various marketing and advertising blocks, you can show additional information like support hours, contact Email, phone number, etc. in the additional information section on the success page.
- Display Section: Set YES to enable additional information section in the success page.
- Content: Add content for the additional information section on the success page.
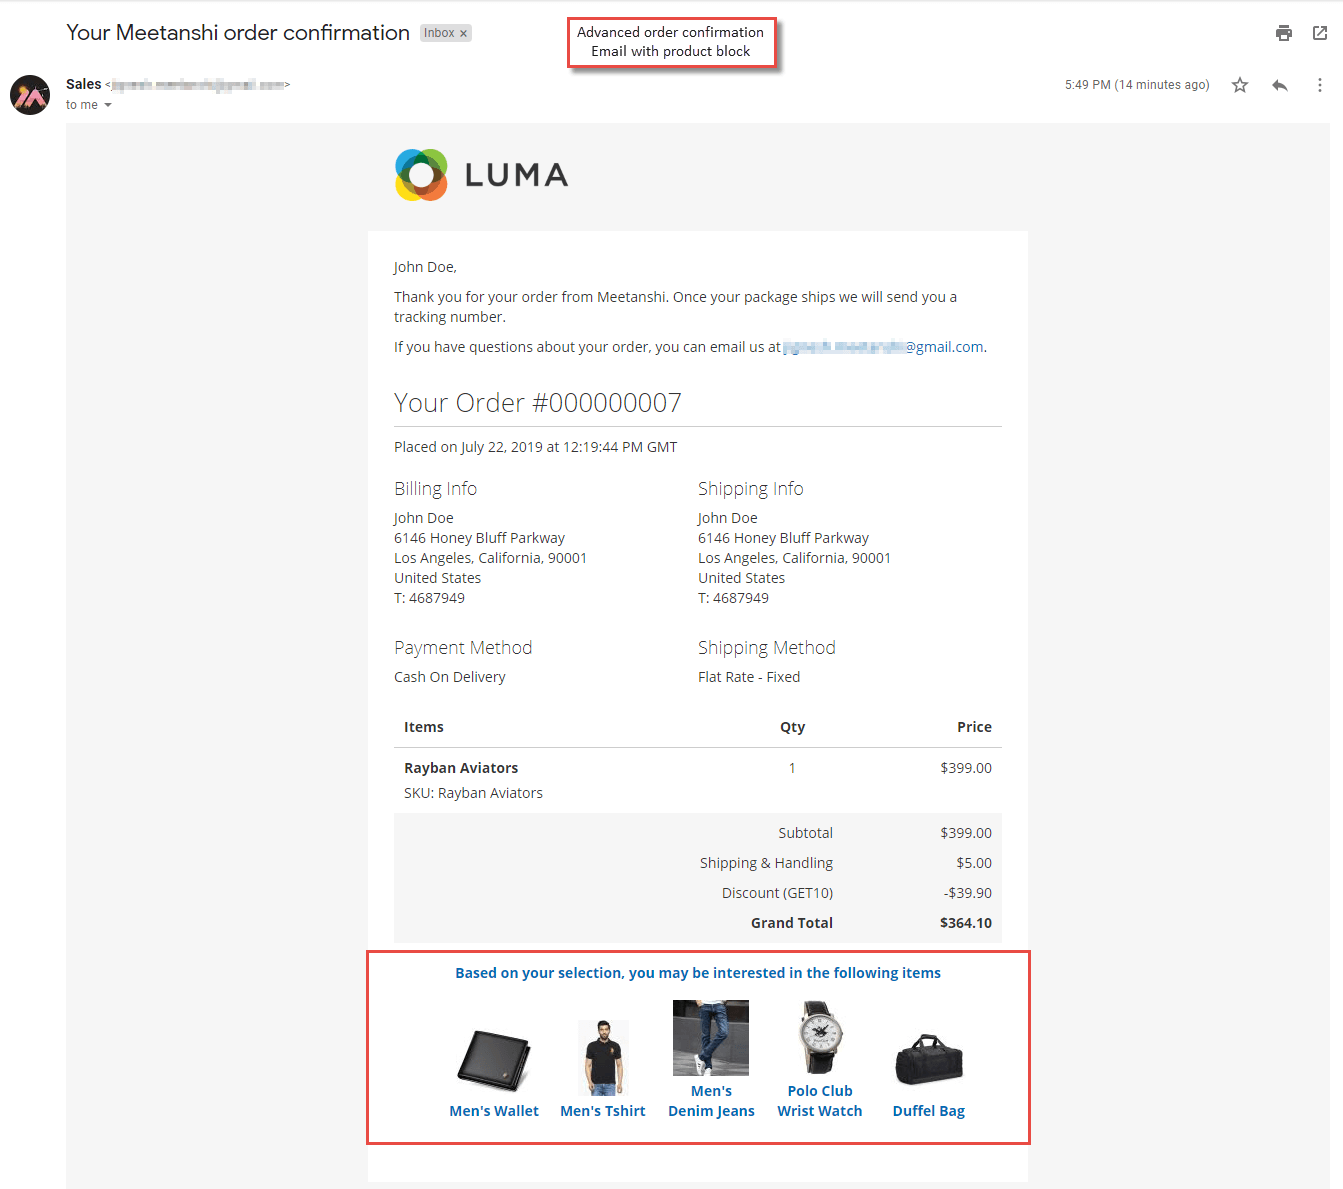
Advanced Order Confirmation Email Settings
The extension facilitates to send advanced order confirmation emails to customers which include the products from the selected product block. It encourages customers to have a look at other products and buy them.
- Send Advanced Order Confirmation Email: Set YES to send advanced order confirmation Email to customers.
- Product Block: Select the product block to show products in the advanced order confirmation Email to customers.

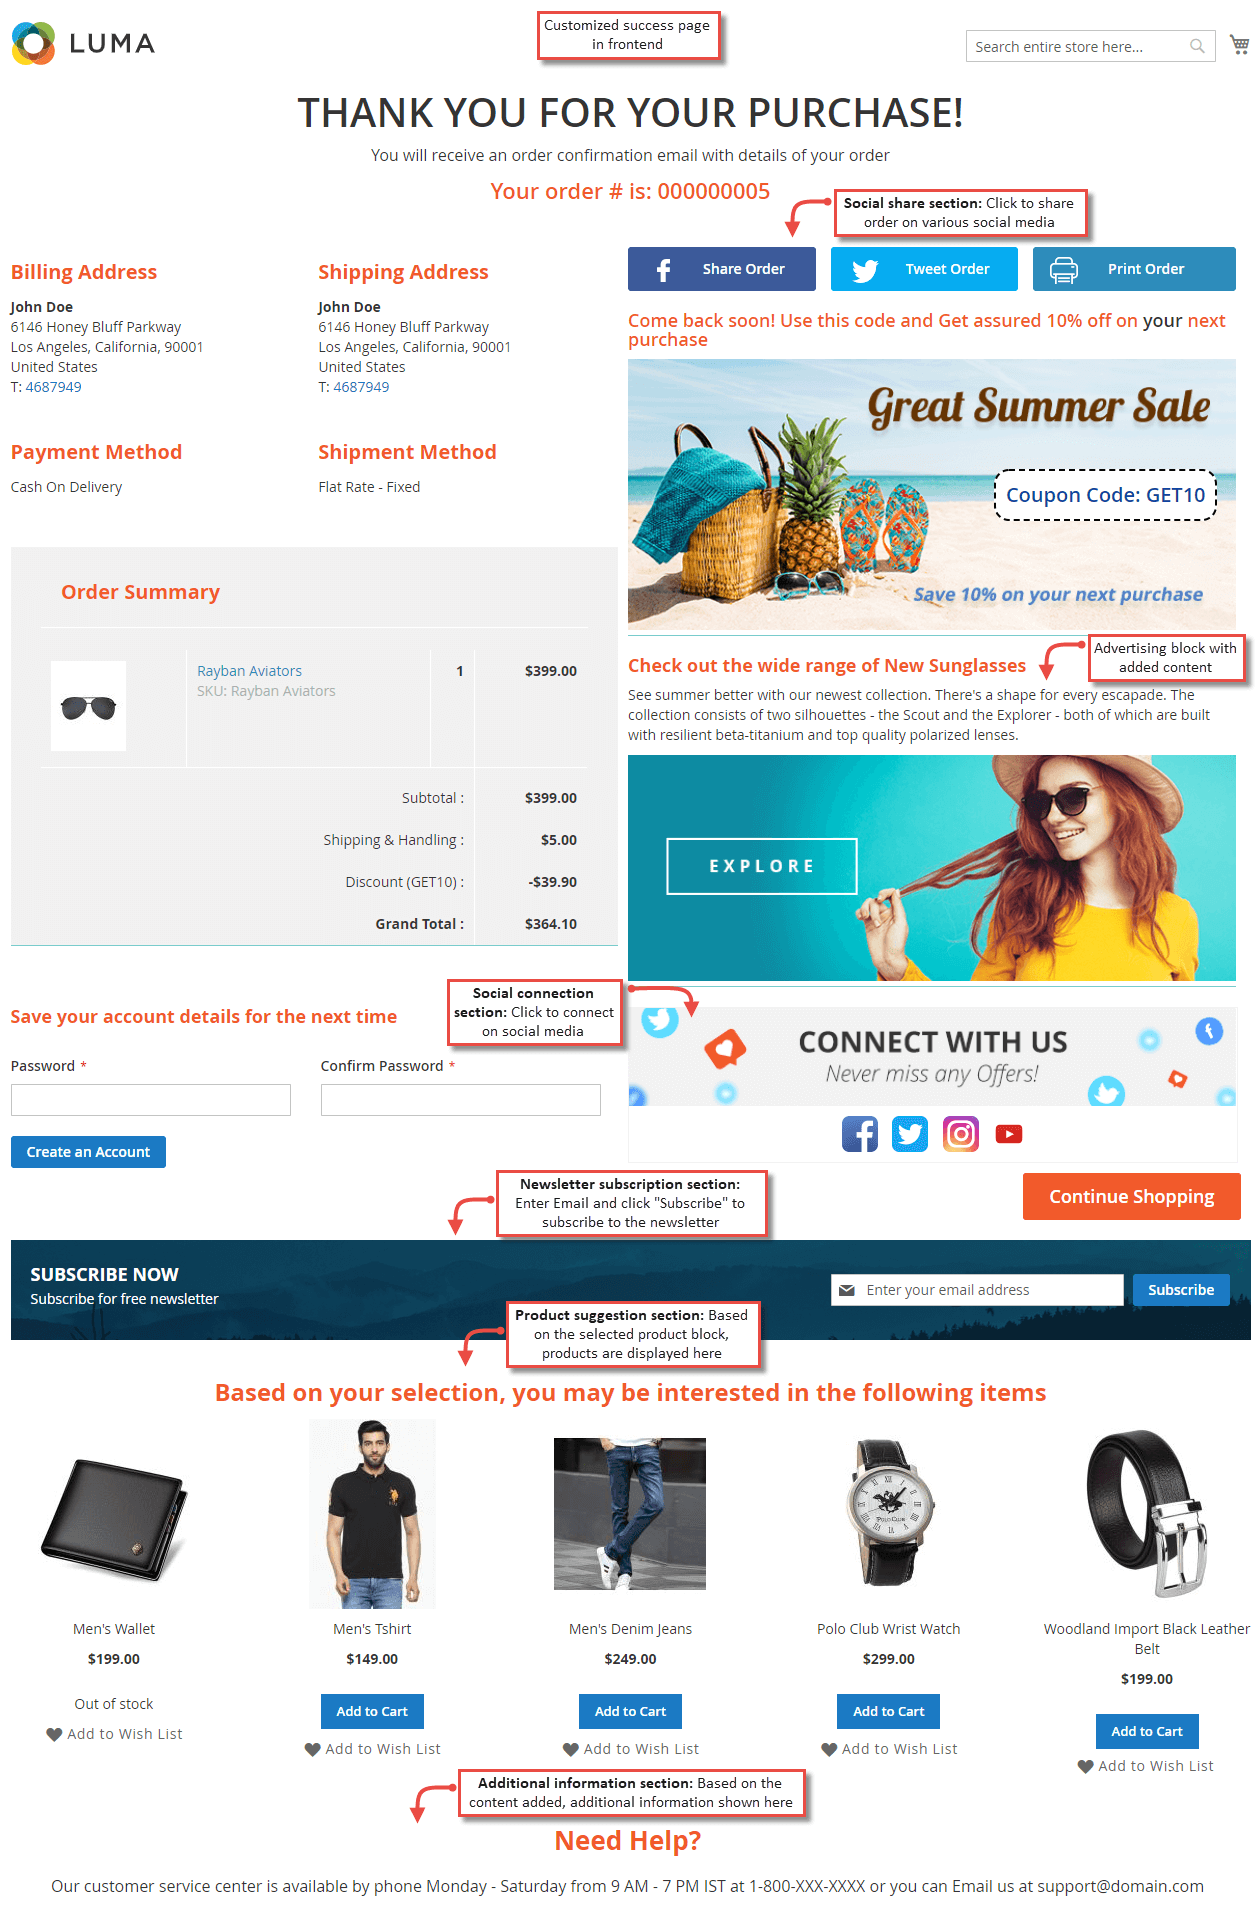
Success Page in Frontend
Once the extension is configured, whenever customers place an order, they can see a customized success page with all the enabled marketing and advertising blocks.
Advanced Order Confirmation Email to Customers
If enabled, the extension sends advanced order confirmation Email to customers after the order is placed. It includes the products from the selected product block.