Custom Order Grid for Magento 2 - User Guide
Extension Installation
For Magento Marketplace Customers
- Create a folder structure in Magento root as app/code/Meetanshi/ExtendedOrderGrid
- Download and extract the zip folder and upload our extension files to the app/code/Meetanshi/ExtendedOrderGrid via FTP.
- Login to your SSH and run below commands step by step:
php bin/magento setup:upgrade
For Magento version 2.0.x to 2.1.x -
php bin/magento setup:static-content:deploy
For Magento version 2.2.x & above -
php bin/magento setup:static-content:deploy --f
php bin/magento cache:flush
php bin/magento synchronize:orders
For Meetanshi Customers
- Extract the zip folder and upload our extension to the root of your Magento 2 directory via FTP.
- Login to your SSH and run below commands step by step:
php bin/magento setup:upgrade
- For Magento version 2.0.x to 2.1.x -
php bin/magento setup:static-content:deploy
- For Magento version 2.2.x & above -
php bin/magento setup:static-content:deploy --f
php bin/magento cache:flush
php bin/magento synchronize:orders
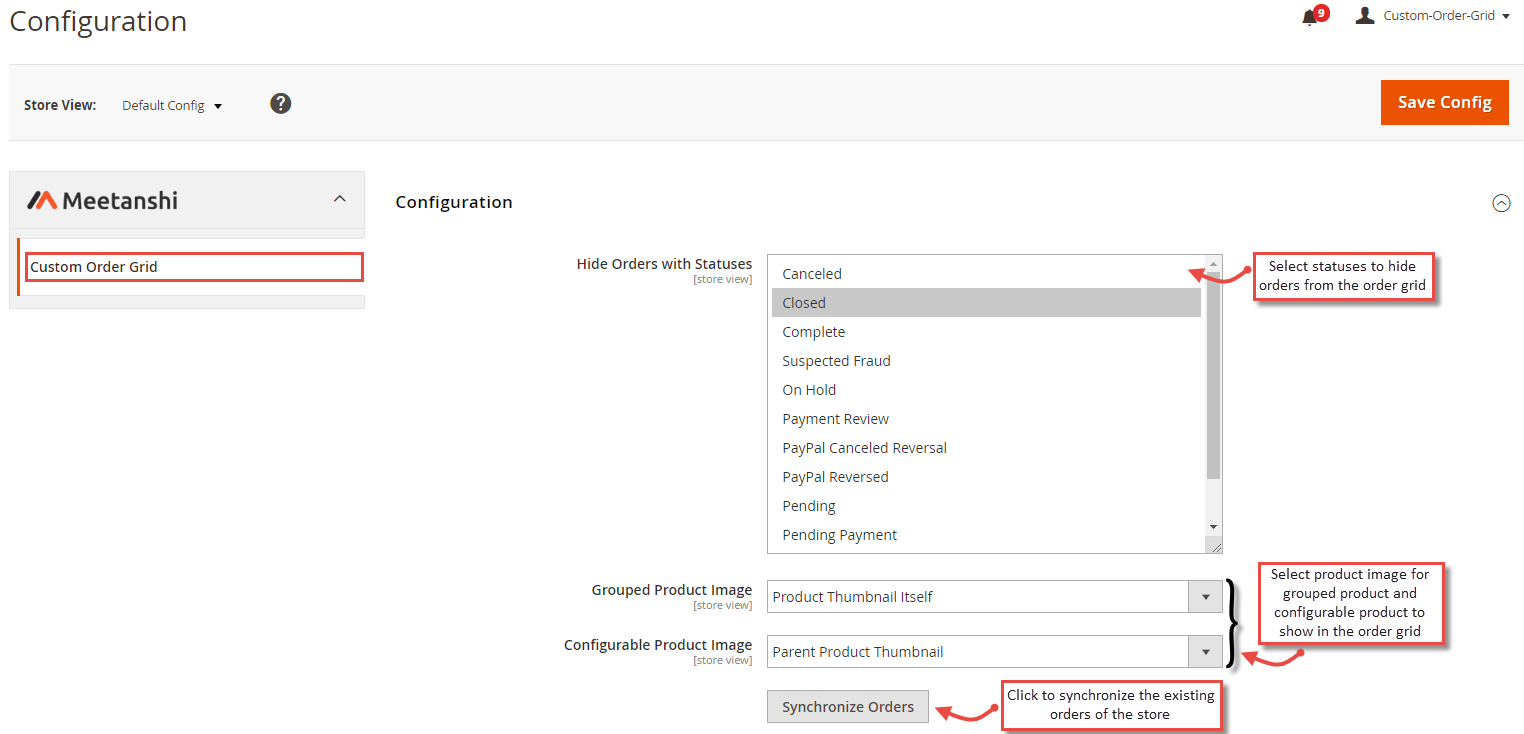
Configuration
For configuring the Custom Order Grid for Magento 2 extension, login to Magento 2, move to Stores > Configuration where you can find various settings to enable the extension.
- Hide Orders with Statuses: Select order statuses of which you want to hide orders from the orders grid.
- Grouped Product Image: Select the image you want to show for the grouped products in the orders grid.
- Configurable Product Image: Select the image you want to show for the configurable products in the orders grid.
- Synchronize Orders: Click the button to synchronize the existing orders of the store.
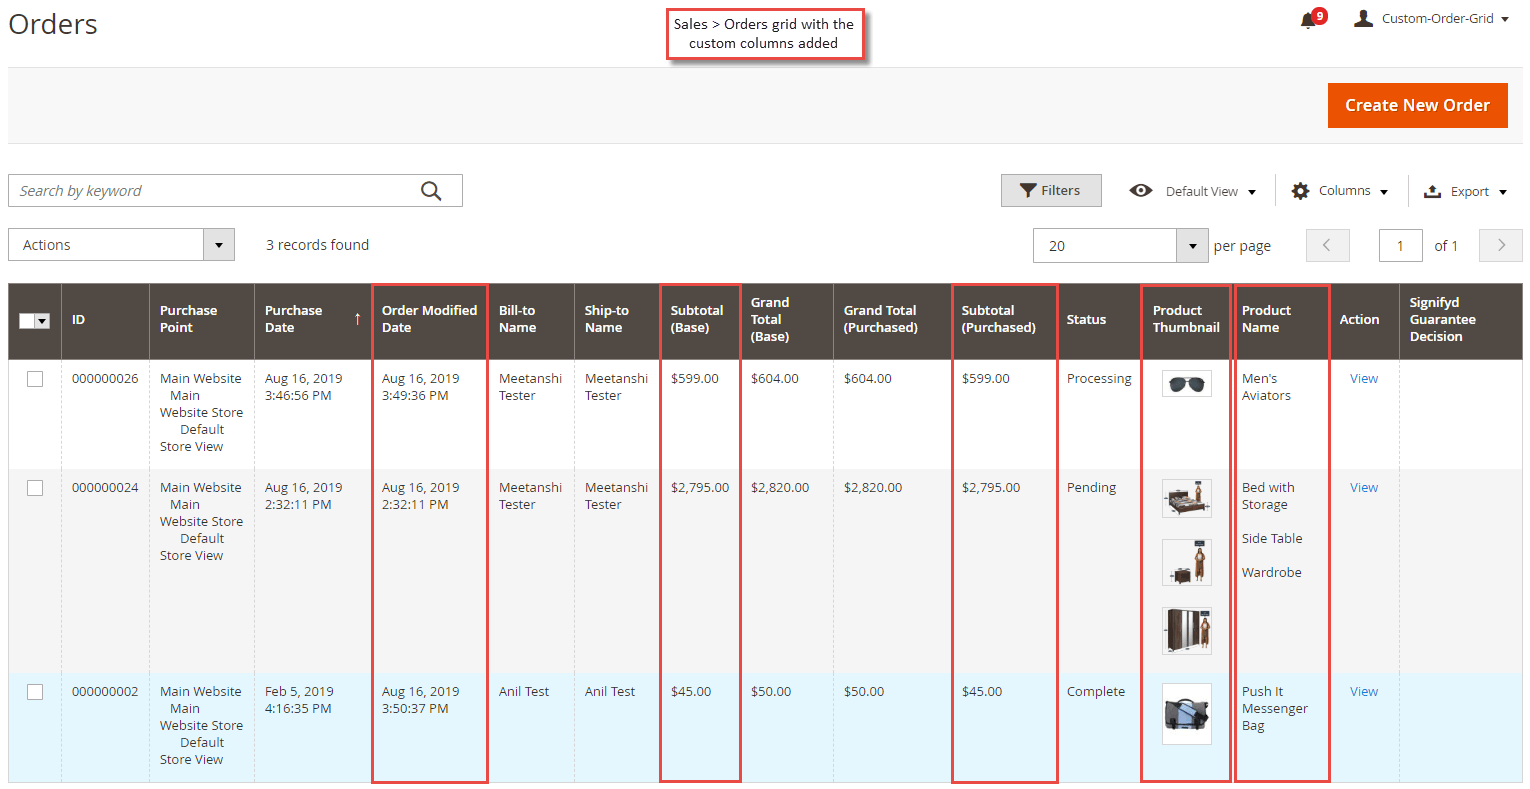
Custom Order Grid in Backend
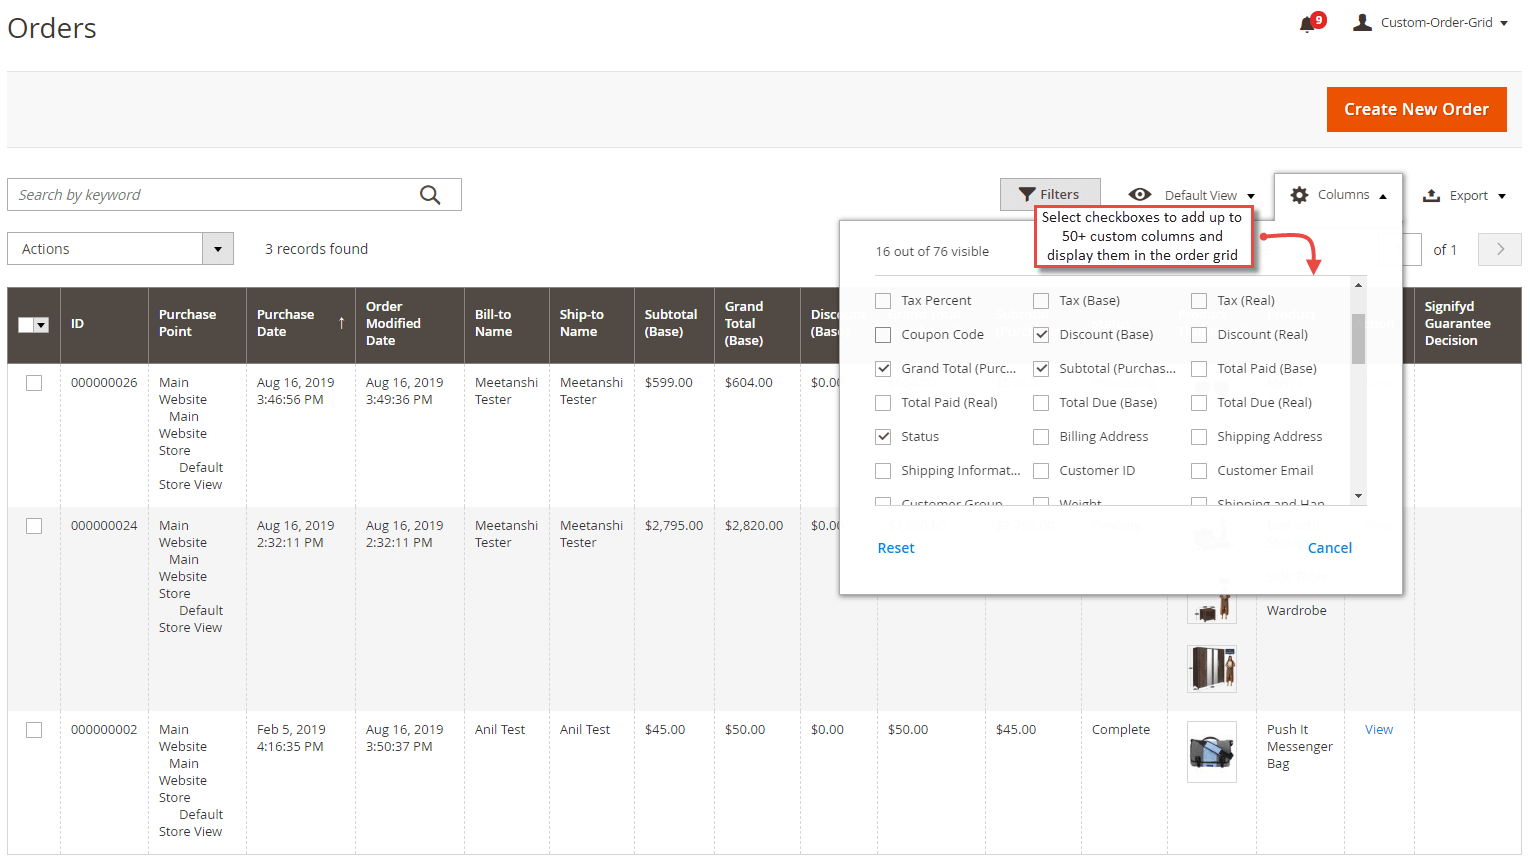
- Add Custom Columns to the Grid
After configuring the extension and synchronizing the orders, go to Sales > Orders grid and select the columns to be added to the grid.
- Order Grid with Custom Columns
Once you select the custom columns, the orders grid gets updated with the custom columns selected by you.