Bambora Payment Gateway for Magento 2 - User Guide
Extension Installation
- Extract the zip folder and upload our extension to the root of your Magento 2 directory via FTP.
- Login to your SSH and run below commands step by step:
php bin/magento setup:upgrade
For Magento version 2.0.x to 2.1.x -
php bin/magento setup:static-content:deploy
For Magento version 2.2.x & above -
php bin/magento setup:static-content:deploy --f
php bin/magento cache:flush
- That's it.
How to Get Bambora API Credentials
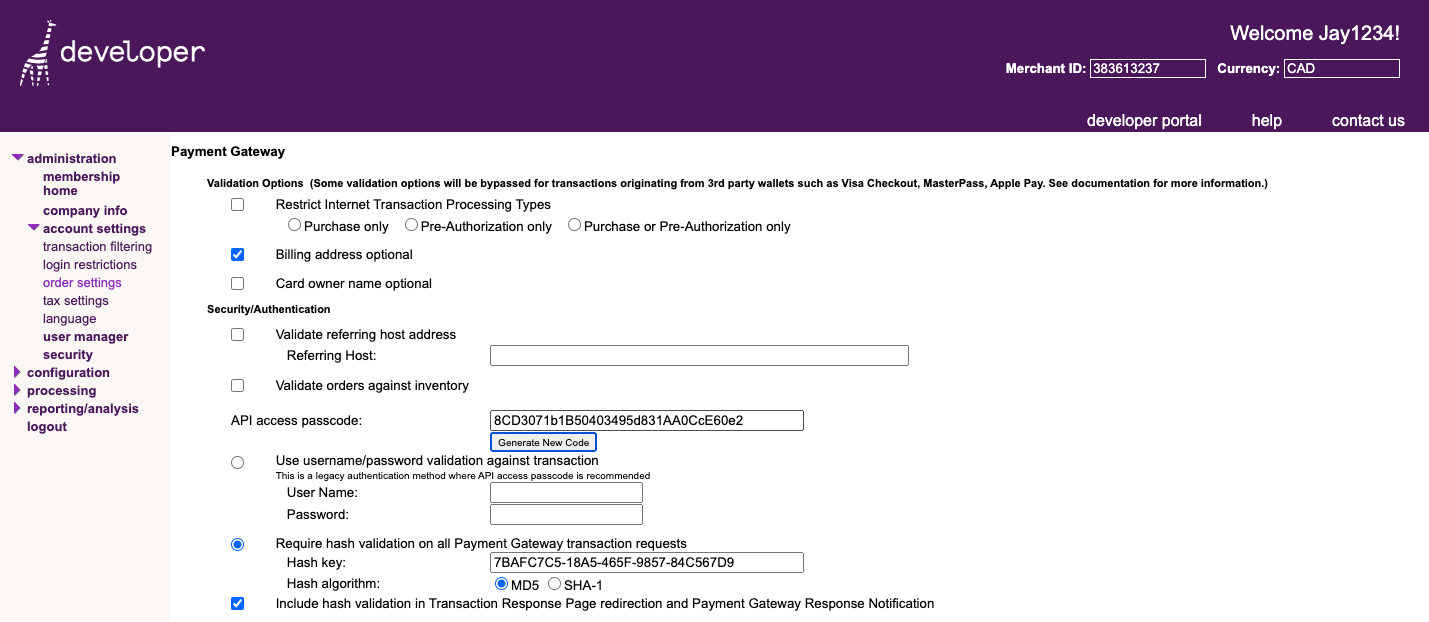
Before configuring Bambora Payment Gateway for Magento 2 the extension, you need to obtain your API keys from the Bambora Merchant account.
- Log in to your Bambora account
- Go to Administration > Account Settings > Order Settings within your Bambora portal
- Under the Payment Gateway section, locate Security/Authentication
- Your Merchant ID is displayed in the top-right corner
- Find the API access passcode field. If a passcode is not present, click Generate New Code
- Click Update at the bottom of the page to save the changes
Configuration
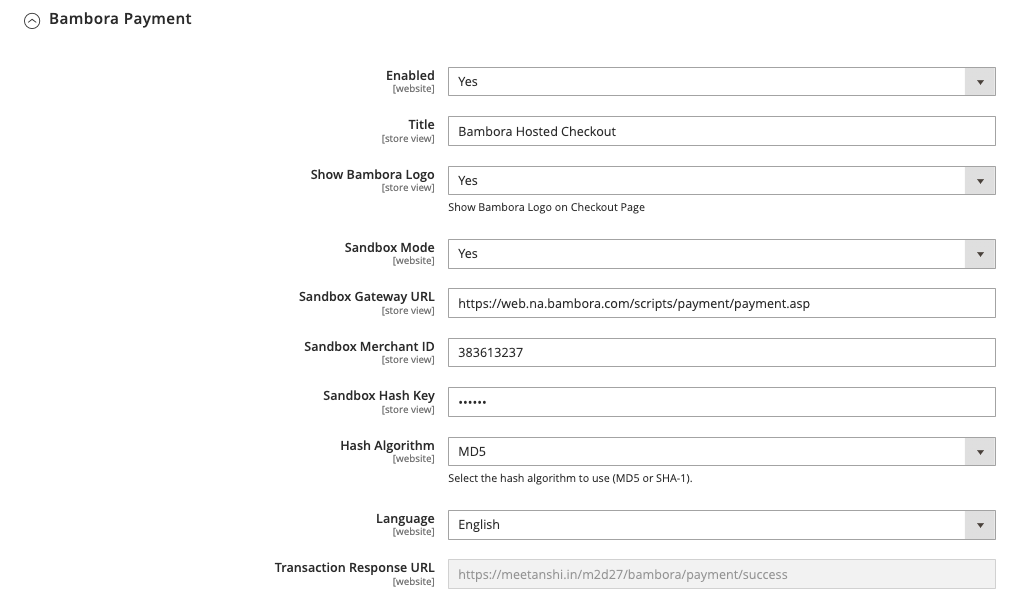
To configure the extension, log in to the Magento 2 Admin panel, and go to Stores > Configuration > Sales > Payment Methods > Bambora Payment.
- Enabled: Set to Yes to enable the Bambora payment method
- Title: Enter the title for the payment method that will be displayed on the checkout page.
- Show Bambora Logo: Set to Yes to display the Bambora logo next to the payment method title on the checkout page
- Mode: Set to Yes to use the extension in a testing environment. Select 'No' for the live environment
- Gateway URL: This URL is pre-filled for the sandbox environment. For production, use the live Gateway URL provided by Bambora.
- Merchant ID: Enter your Bambora Merchant ID, which you can obtain from your Bambora account
- Hash Key: Enter your Bambora Hash Key. This key is used to ensure the security and integrity of the transaction data.
- Hash Algorithm: Select the hash algorithm to be used for secure communication between your store and Bambora. You should choose the algorithm specified in your Bambora account settings (either MD5 or SHA-1)
- Language: You can select the language from here, either English or French
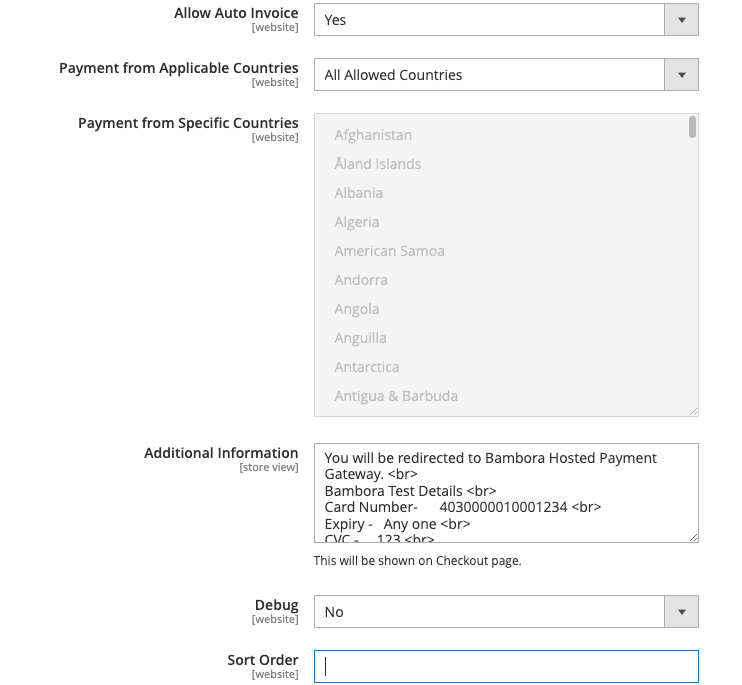
- Allow Auto Invoice: Set to Yes to automatically generate an invoice for successful payments
- Payment from Applicable Countries: Select All Allowed Countries to enable the payment method for all countries configured in your store
- Payment from Specific Countries: If you want to limit the payment method to specific countries, select them from the list provided
- Additional Information: Add any custom text here that you want to display to customers on the checkout page (e.g., payment details, redirection message, or test card info)
- Debug: Set to No for the live environment to disable logging and improve performance.
- Sort Order: Enter a number to determine the position of the Bambora payment method on the checkout page relative to other payment options. A lower number will place it higher on the list
Bambora Payment Flow in Frontend
- In the Magento 2 Review & Payments checkout page, select Bambora Hosted Checkout as the payment method.
- Click the Continue to Payment button.

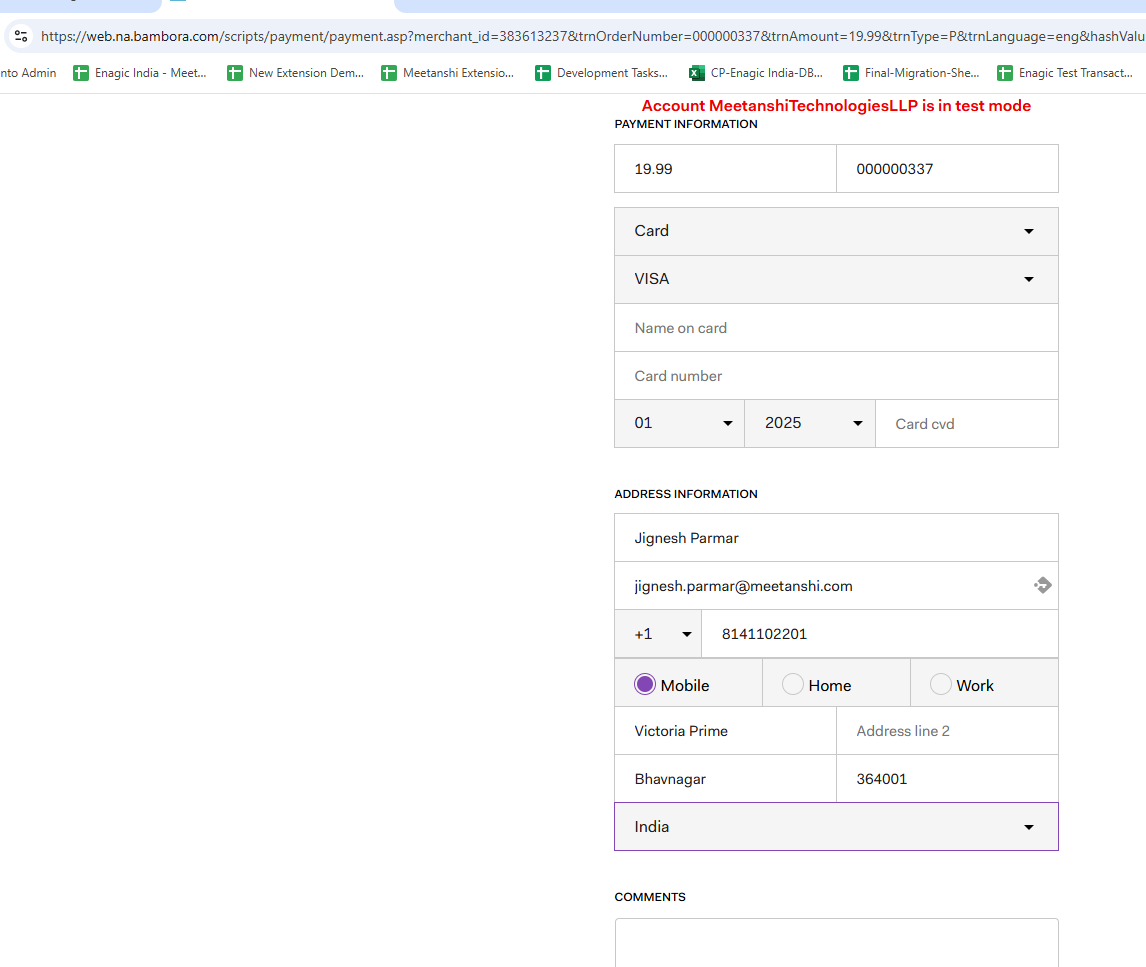
- You are redirected to Bambora's hosted payment page here
- Enter your card details (Card Type, Name on Card, Card Number, Expiry, Card CVD) and address information as prompted
- After the transaction is approved, you will be redirected back to the Magento store, where the order status will be displayed as Processing
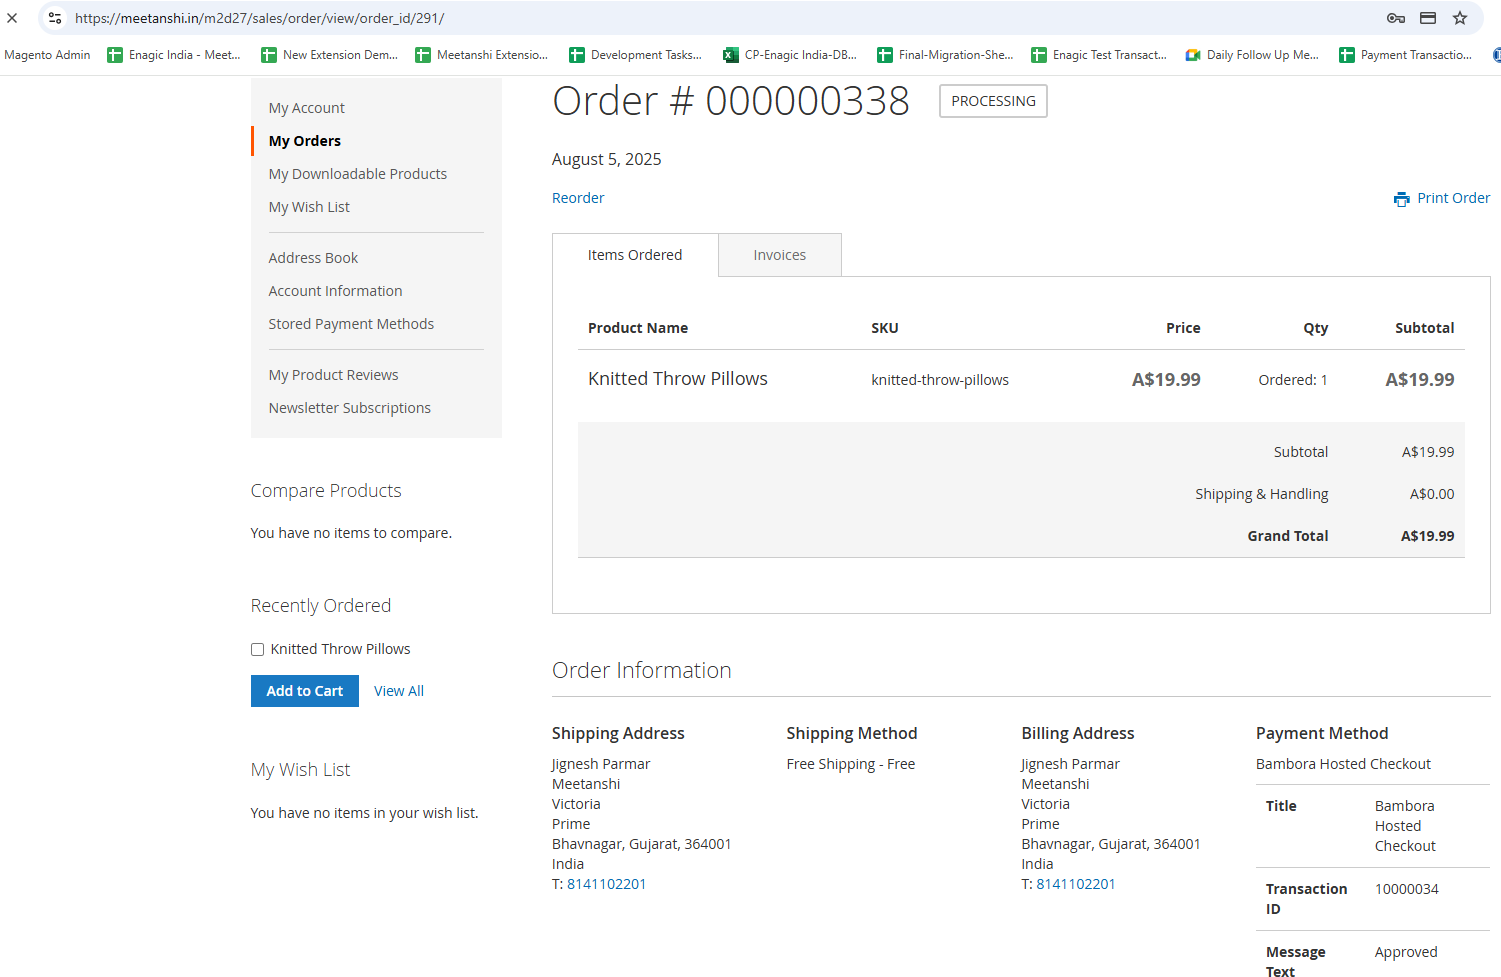
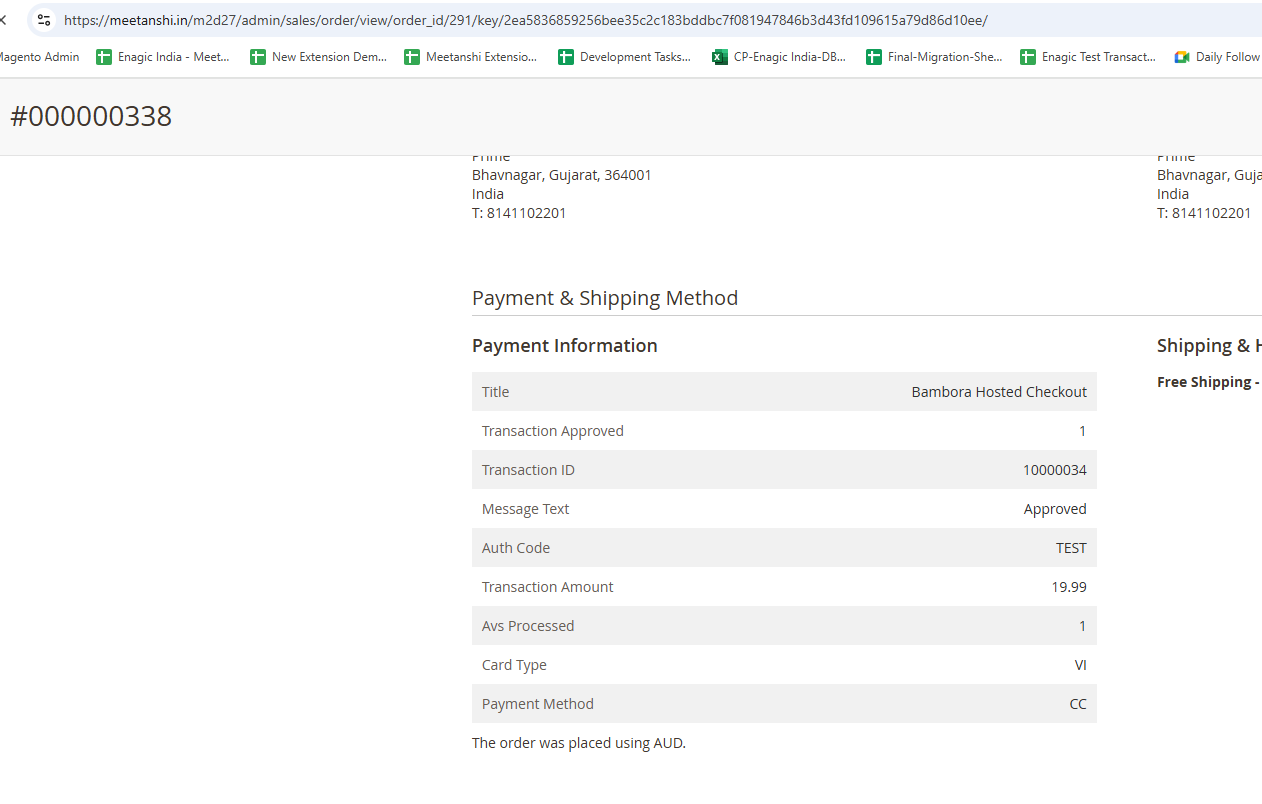
- As the store administrator, you can view the complete order details in the Magento admin panel, including the payment information received from Bambora (Transaction ID, Message Text, Auth Code, etc.).