Smart Categories for Magento 2 - User Guide
Extension Installation
Prerequisites
- Magento 2.3.x – 2.4.x installed and functioning.
- PHP version compatible with your Magento release.
Magento Marketplace Customers Method
- Access your server CLI via SSH and navigate to your Magento root directory.
- Run the Composer command to fetch the extension:
composer require meetanshi/magento-2-smart-categories - Enable the extension module:
php bin/magento module:enable Meetanshi_SmartCategories - Run the upgrade command:
php bin/magento setup:upgrade - Deploy static content based on your Magento version:
- For Magento 2.0.x – 2.1.x:
php bin/magento setup:static-content:deploy - For Magento 2.2.x & above:
php bin/magento setup:static-content:deploy -f
- For Magento 2.0.x – 2.1.x:
- Flush the Magento cache:
php bin/magento cache:flush
Direct ZIP / Meetanshi Customers Method
- Download the extension ZIP file from your Meetanshi account area.
- Extract the archive contents and upload them to your server under
<Magento_Root>/app/code/Meetanshi/SmartCategories/. - Connect to your Magento server via SSH and execute the following commands:
php bin/magento setup:upgrade- For Magento 2.0.x – 2.1.x:
php bin/magento setup:static-content:deploy - For Magento 2.2.x & above:
php bin/magento setup:static-content:deploy -f
php bin/magento cache:flush - For Magento 2.0.x – 2.1.x:
Smart Categories for Magento 2 automates product category management by dynamically assigning products based on custom conditions and product attributes.
Category Rule Settings
Go to Catalog > Categories and select or create a category.
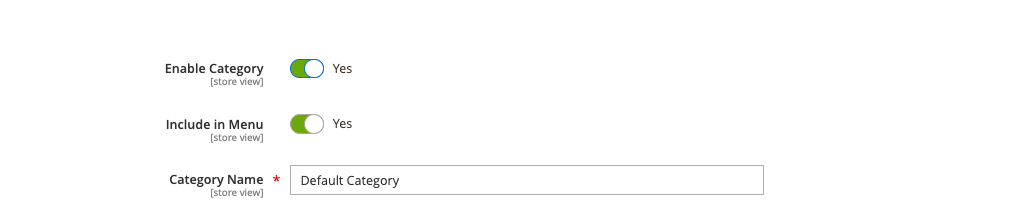
Enable Category: Set to Yes to make the category active.
Include in Menu: Choose Yes to display the category link in the main store navigation bar.
Category Name: Enter the title of the category (e.g., Default Category).
Category Content & CMS Blocks
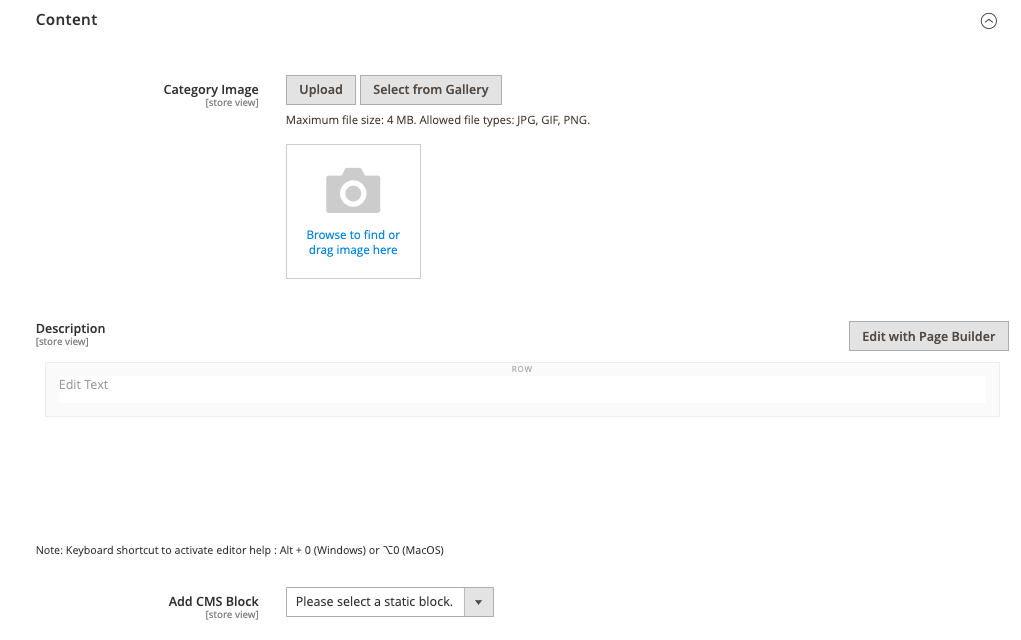
Under the Content tab:
Category Image: Upload a category banner image directly from your computer or select an existing asset from the media gallery (supports JPG, GIF, PNG up to 4 MB).
Description: Enter category text or format content using Page Builder / WYSIWYG editor.
Add CMS Block: Pick an existing static CMS block from the dropdown list to render custom promotional blocks or banners on the category page.
Display Settings
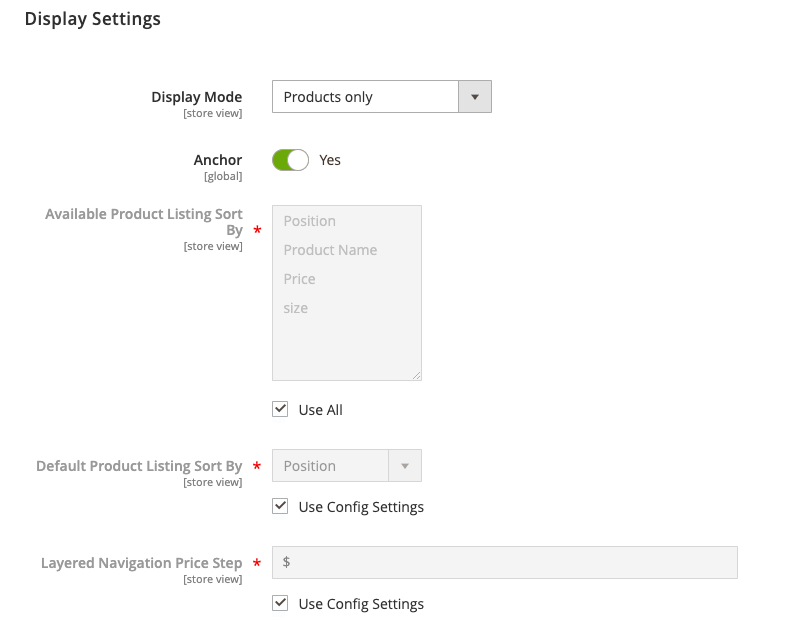
Under the Display Settings tab:
Display Mode: Choose what content displays on the category page (Products only, Static block only, or Both).
Anchor: Set to Yes to enable layered navigation filters (price, attributes) on the category page.
Available Product Listing Sort By: Select sorting options available to storefront users or check Use All.
Default Product Listing Sort By: Define the primary sort order (e.g., Position, Price, or Product Name).
Layered Navigation Price Step: Set the price interval breakdown for layered navigation filters, or check Use Config Settings.
Search Engine Optimization (SEO) & AI Content
Under the Search Engine Optimization tab:
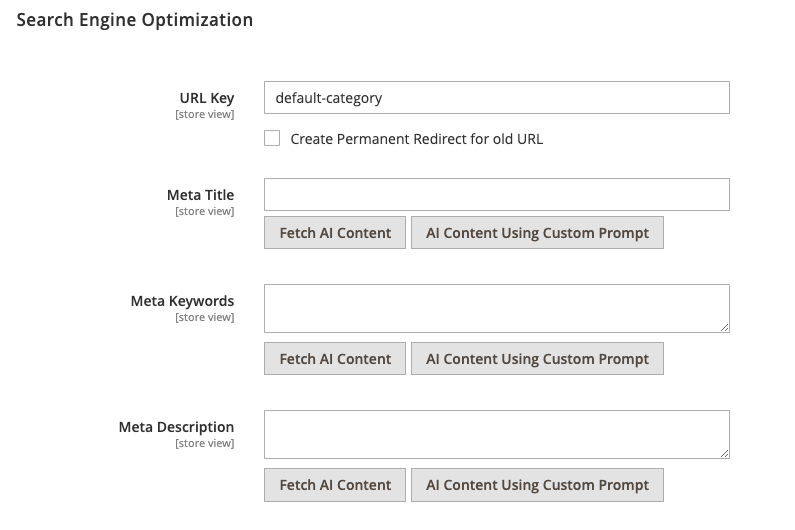
URL Key: Enter the SEO-friendly URL slug for the category. Check Create Permanent Redirect for old URL if changing an existing key.
Meta Title: Add the meta title tag. Click Fetch AI Content or AI Content Using Custom Prompt to automatically generate optimized titles.
Meta Keywords: Enter relevant category keywords or generate them using the AI content buttons.
Meta Description: Add the search snippet description or generate dynamic copy using the AI content tools.
Smart Category Rules Configuration
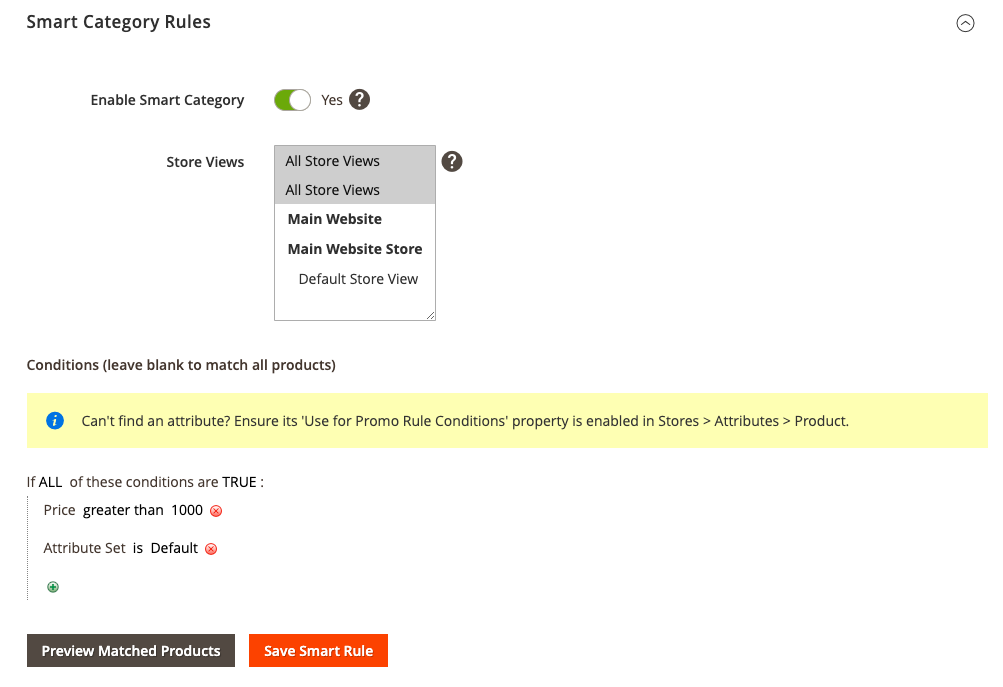
Under the Smart Category Rules tab, you can set dynamic rules that automatically populate the category with matching products.
Enable Smart Category: Toggle to Yes to enable dynamic rule evaluation for this category.
Store Views: Select the store views where the rule criteria apply (All Store Views, Main Website, or specific store views).
Conditions: Build condition trees to match products automatically.
Example: If ALL of these conditions are TRUE: Price greater than 1000, Attribute Set is Default.
Note: If a product attribute does not appear in the conditions dropdown, navigate to Stores > Attributes > Product, open the attribute, and set Use for Promo Rule Conditions to Yes.
Leave conditions blank to match all products in your catalog.
Preview Matched Products: Click to preview all products that match the selected conditions before saving.
Save Smart Rule: Click to save and apply the smart conditions.
Manual Overrides & Activity Log
Directly beneath the smart rules configuration:
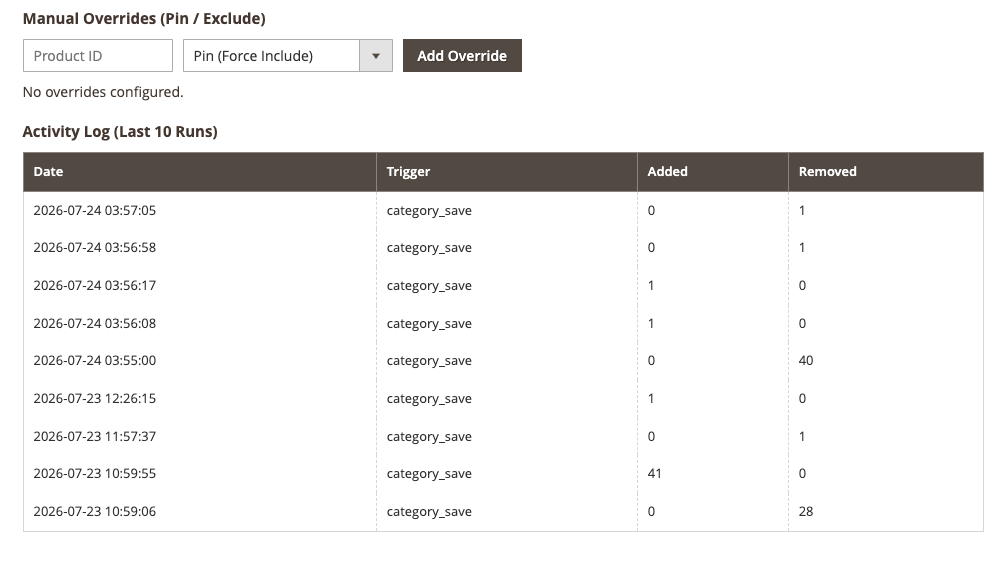
- Manual Overrides (Pin / Exclude) Manually force specific products into the category or keep them out, regardless of the dynamic rule criteria:
Product ID: Enter the numeric ID of the product.
Action Type: Select Pin (Force Include) to keep a product in the category, or choose exclude.
Click Add Override.
- Activity Log (Last 10 Runs) Monitor automatic and manual category updates. The table displays:
Date: Timestamp of the update execution.
Trigger: The event that triggered the sync (e.g., category_save or cron execution).
Added: Number of products added during the execution.
Removed: Number of products unlinked during the execution.
Viewing Products in Category
Under the Products in Category tab:
Inspect the list of assigned products.
View details including Product ID, Name, SKU, Visibility, Status, Price, and Position.
Change product display positions manually by entering values in the Position column.
Design & Schedule Design Updates
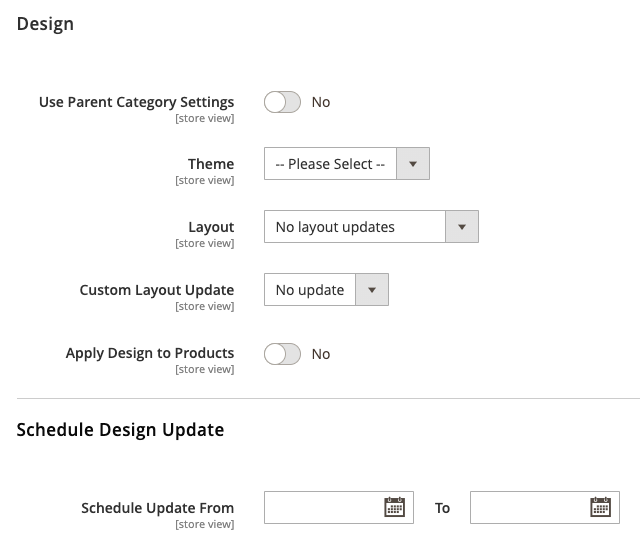
Under the Design and Schedule Design Update tabs:
Use Parent Category Settings: Toggle to Yes to inherit theme and layout configurations from the parent category.
Theme & Layout: Select a custom theme or layout template (e.g., 1-column, 2-columns with left/right bar).
Custom Layout Update: Apply custom XML layout updates if needed.
Apply Design to Products: Choose whether layout configurations cascade down to products within this category.
Schedule Update From / To: Use the calendar date pickers to schedule seasonal theme or layout overrides that automatically activate and revert.