Axis Bank Payment Gateway for Magento 2 - User Guide
Extension Installation
For Magento Marketplace Customers
Find the extension's Composer name and version in its composer.json file.
- Login to your SSH and run:
composer require meetanshi/magento2-axis-bank-payment-gateway
- Enter your authentication keys https://experienceleague.adobe.com/en/docs/commerce-operations/installation-guide/prerequisites/authentication-keys . Your public key is your username; your private key is your password.
- Wait for Composer to finish updating your project dependencies and make sure there aren't any errors.
- To verify that the extension is installed properly, run the command:
php bin/magento module:status Meetanshi_Axis
- By default, the extension is probably disabled. Enable the extension and clear static view files:
php bin/magento module:enable Meetanshi_Axis --clear-static-content
php bin/magento setup:upgrade
- For Magento version 2.0.x to 2.1.x -
php bin/magento setup:static-content:deploy
- For Magento version 2.2.x & above -
php bin/magento setup:static-content:deploy --f
php bin/magento cache:flush
For Meetanshi Customers
- Extract the zip folder and upload our extension to the root of your Magento 2 directory via FTP.
- Login to your SSH and run below commands step by step:
php bin/magento setup:upgrade
- For Magento version 2.0.x to 2.1.x -
php bin/magento setup:static-content:deploy
- For Magento version 2.2.x & above -
php bin/magento setup:static-content:deploy --f
php bin/magento cache:flush
Configuration
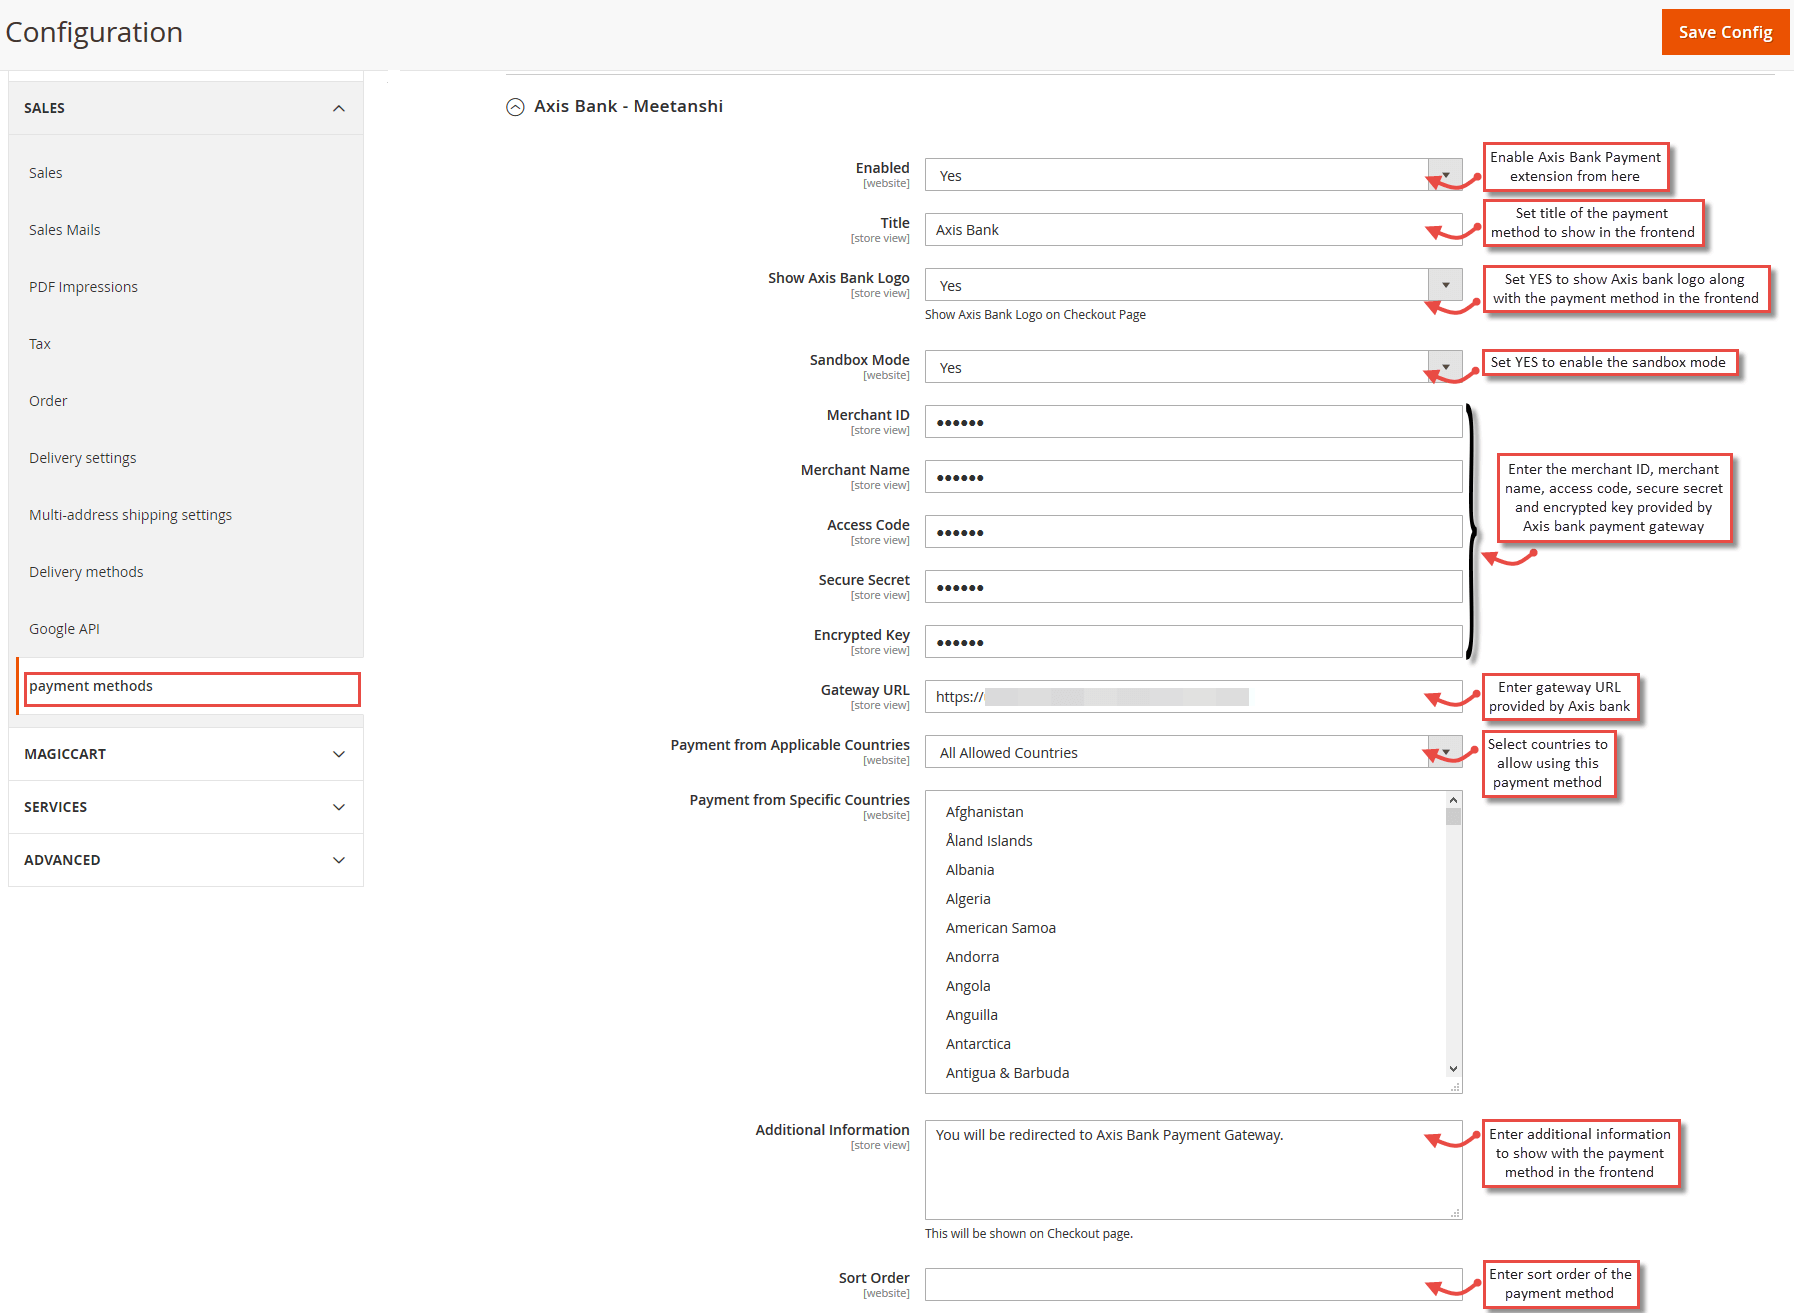
For configuring the Axis Bank Payment Gateway for Magento 2 extension, login to Magento 2, move to Sales > Payments Methods > Axis Bank - Meetanshi where you can find various settings to enable the extension.
- Enabled: Set "YES" to enable the payment method.
- Title: Set the title of the payment method to be displayed in the frontend.
- Show Axis Bank Logo: Set YES to show the Axis bank logo along with the payment method in the frontend.
- Sandbox Mode: Select YES to enable sandbox mode.
- Merchant ID: Enter the merchant ID provided by Axis bank payment gateway.
- Merchant Name: Enter the merchant name provided by Axis bank payment gateway.
- Access Code: Enter the access code provided by Axis bank payment gateway.
- Secure Secret: Enter the secure secret provided by Axis bank payment gateway.
- Encrypted Key: Enter the encrypted key provided by Axis bank payment gateway.
- Gateway URL: Enter the gateway URL provided by Axis bank payment gateway.
- Payment from Applicable Countries: Select countries to allow using this payment method.
- Additional Information: Enter additional information to show along with the payment method in the frontend.
- Sort Order: Enter Sort Order of the payment method display in the frontend.
Note: Prior to configuring the extension, you need to sign up for a FREE merchant account to get the merchant ID, name, access code, secure secret and encrypted key for Axis Bank Payment Gateway integration.
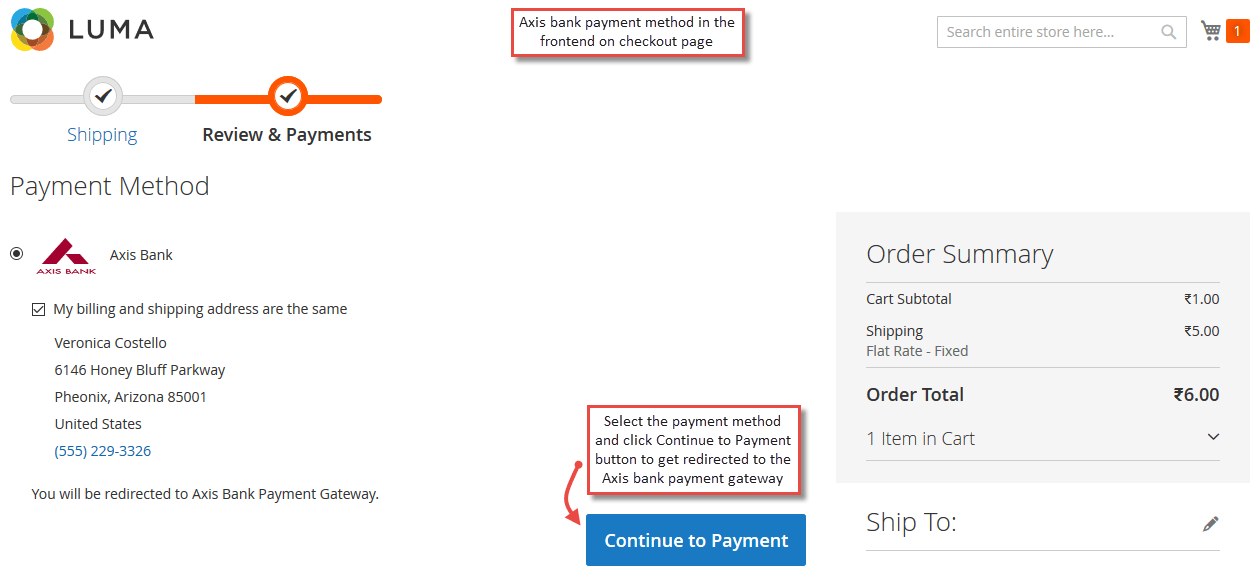
Axis Bank Payment Gateway in Frontend
Once the payment method is configured, Axis Bank Payment Gateway method is shown on the frontend while checking out the products. Just select the payment method and click "Continue to Payment" to get redirected to the hosted payment page to finish the payments.
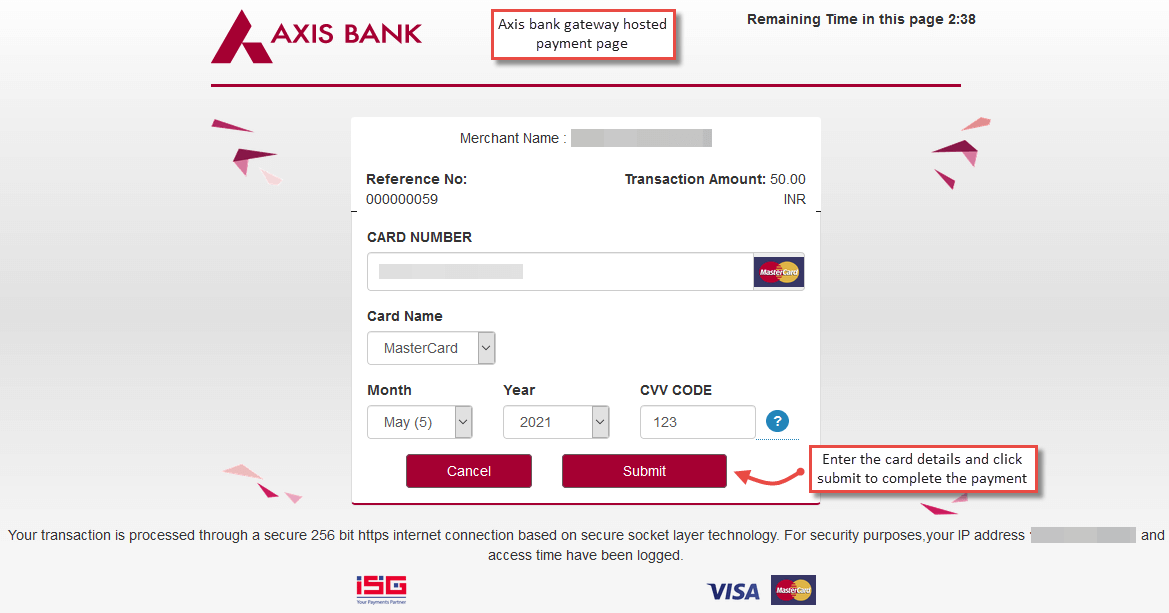
- Redirection to Axis Bank Hosted Payment Page
On click of the "Continue to Payment" button, customers are redirected to the Axis bank hosted payment page to enter the card details, submit and finish payments.
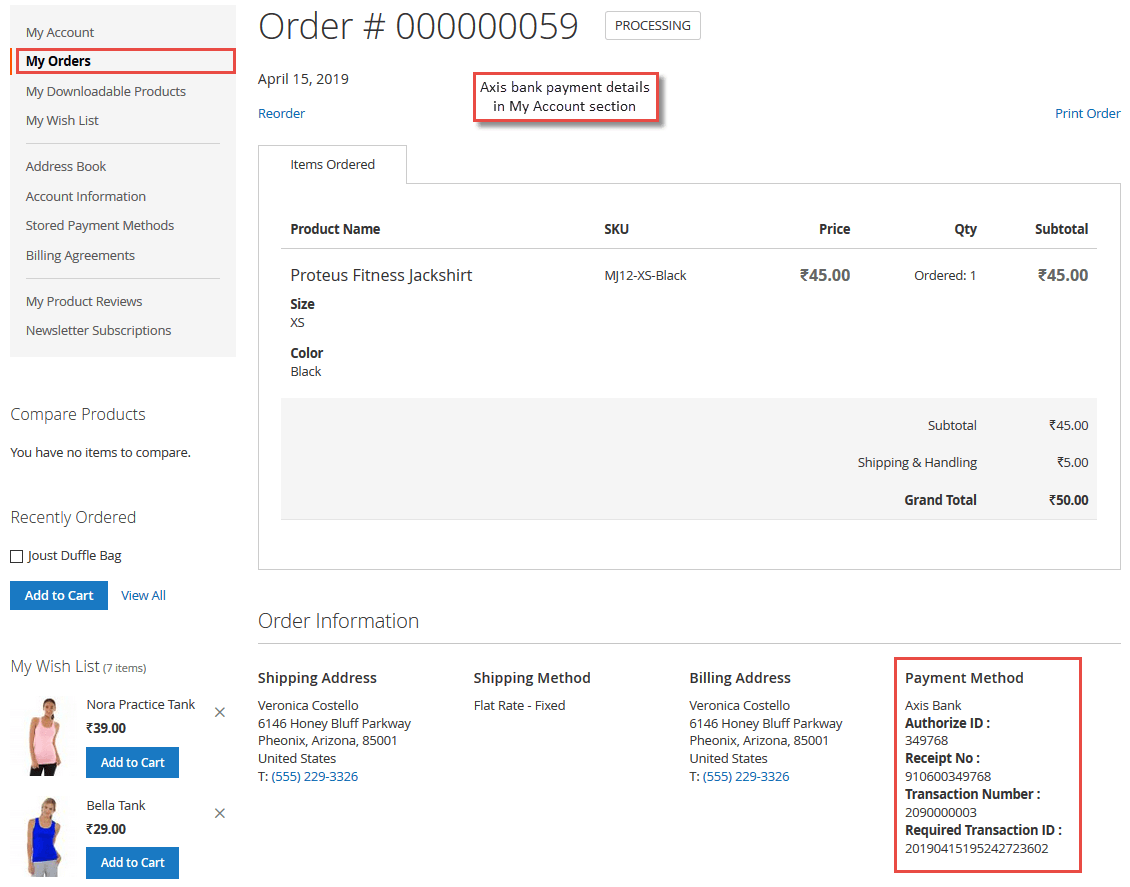
- Axis Bank Payment Details in "My Account" section
Once the order is placed, the Axis Bank Payment details are shown in the Account dashboard, in "My Orders" tab which includes authorize ID, receipt number, transaction number, and transaction ID.
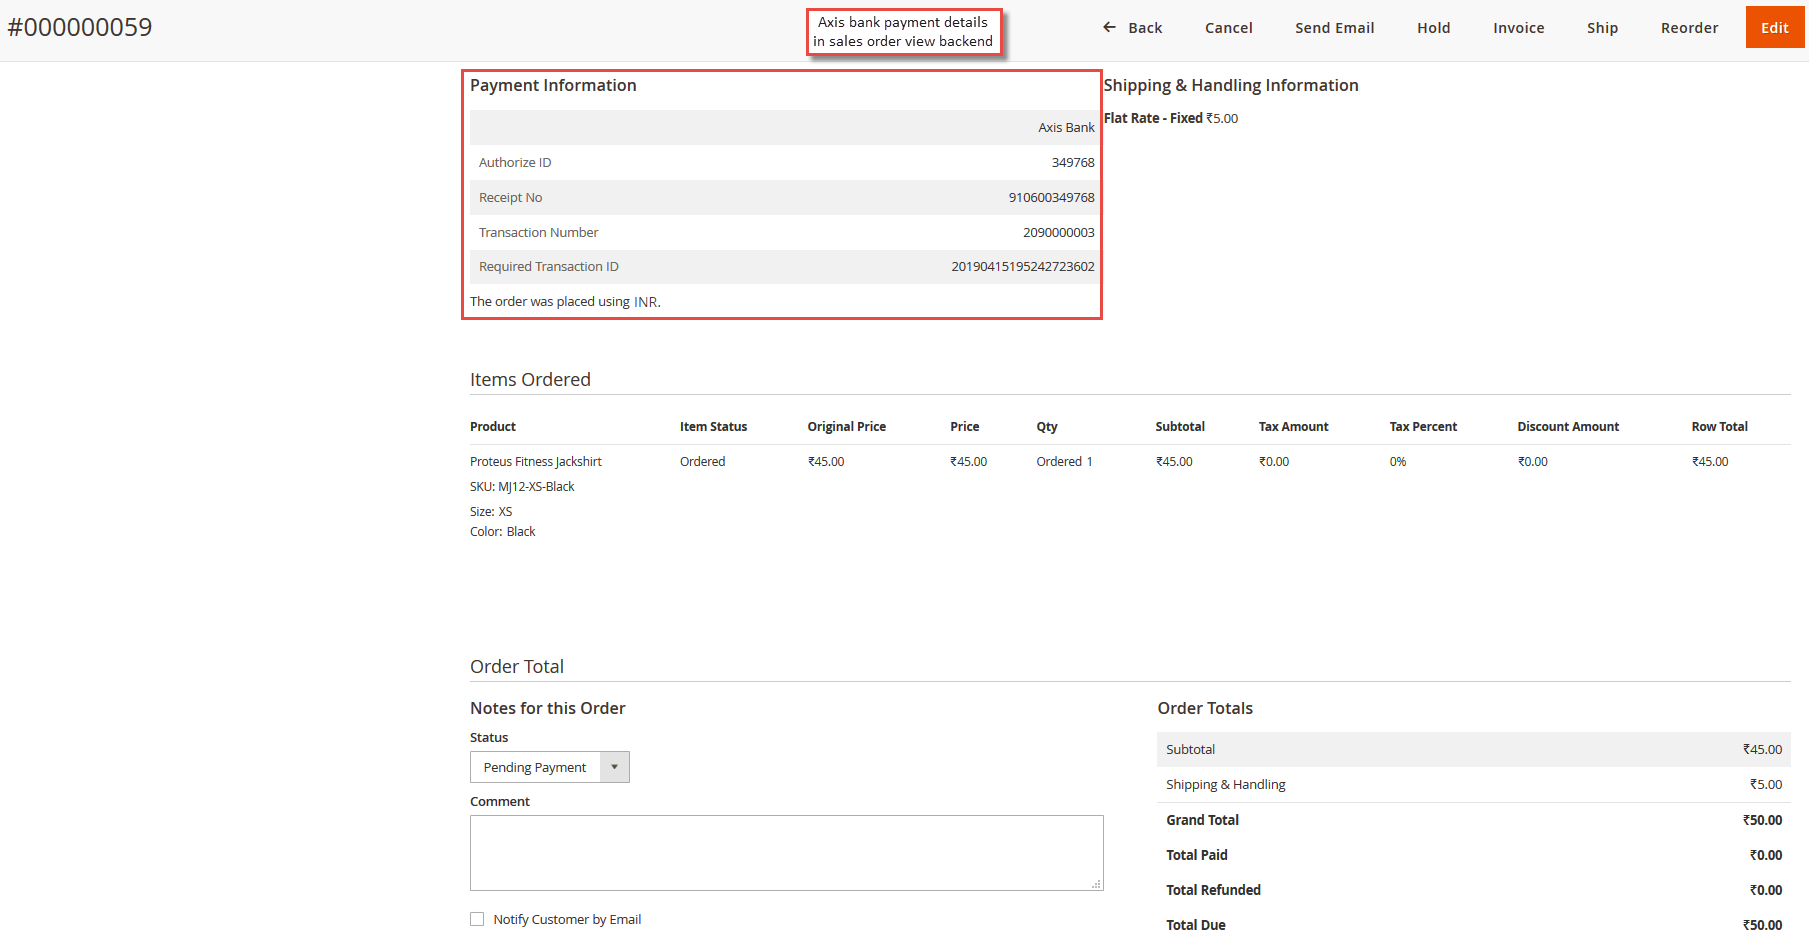
Axis Bank Payment Gateway in Backend
The Order View backend shows the Axis bank payment information to admin. It displays the payment method name, authorize ID, receipt number, transaction number, and transaction ID.