Admin Action Log for Magento 2 - User Guide
Extension Installation
For Magento Marketplace Customers
- Find the Composer name and version of the extension in the extension’s
composer.jsonfile. - Log in to your server via SSH and run:
composer require meetanshi/magento2-admin-action-log
Enter your authentication keys:
https://devdocs.magento.com/guides/v2.3/install-gde/prereq/connect-auth.html- Public key → Username
- Private key → Password
Wait for Composer to finish updating the project dependencies and ensure there are no errors.
Verify that the extension is installed properly:
php bin/magento module:status Meetanshi_AdminActionLog
By default, the extension may be disabled. Enable it using:
php bin/magento module:enable Meetanshi_AdminActionLog --clear-static-content
- Run the setup upgrade:
php bin/magento setup:upgrade
Deploy static content:
- Magento 2.0.x – 2.1.x
php bin/magento setup:static-content:deploy - Magento 2.2.x & above
php bin/magento setup:static-content:deploy -f
- Magento 2.0.x – 2.1.x
Flush the cache:
php bin/magento cache:flush
For Meetanshi Customers
- Extract the ZIP file and upload the extension to the root of your Magento 2 directory via FTP.
- Log in to your server via SSH and run the following commands step by step:
php bin/magento setup:upgrade
Deploy static content:
- Magento 2.0.x – 2.1.x
php bin/magento setup:static-content:deploy - Magento 2.2.x & above
php bin/magento setup:static-content:deploy -f
- Magento 2.0.x – 2.1.x
Flush the cache:
php bin/magento cache:flush
Configuration
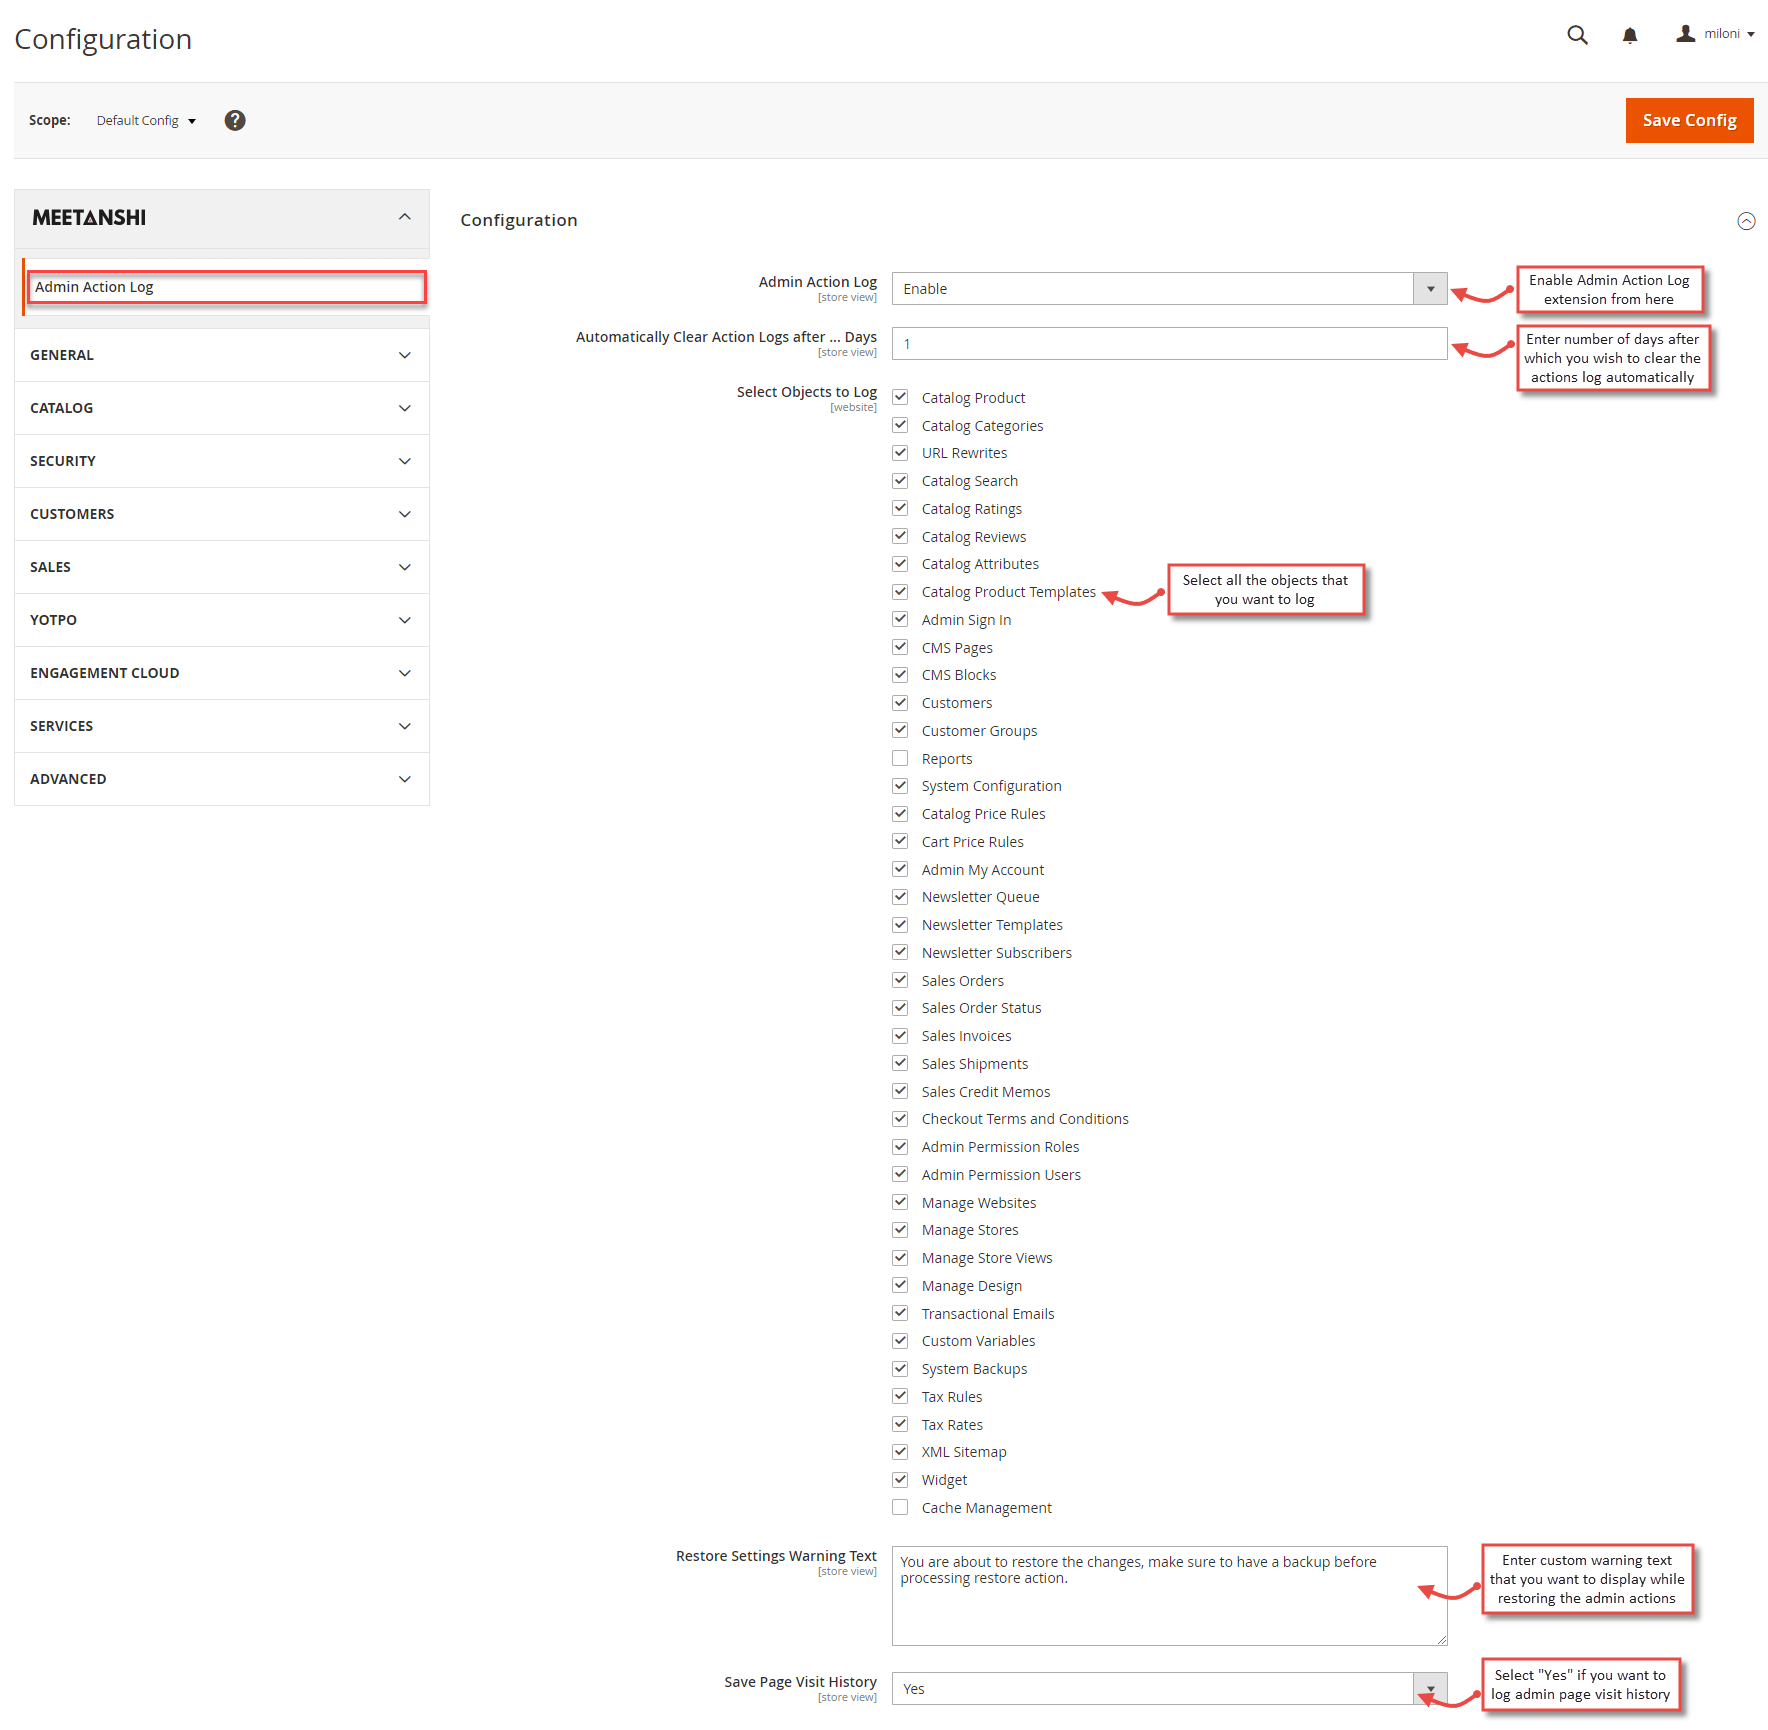
To configure the Admin Action Log for Magento 2 extension, log in to Magento 2, move to Admin Action Log Configuration where you can find various settings to configure the extension.
- Admin Action Log: Enable or disable the Admin Action Log extension.
- Automatically Clear Action Logs after .... Days: Enter number of days after which you wish the extension to automatically clear the action logs.
- Select Objects to Log: Select all the objects for which you want to log actions.
- Restore Settings Warning Text: Enter custom message that you want to display to the admin while restoring the admin actions.
- Save Page Visit History: Set YES to enable page visit history log for various admin users.
Email Notification Settings
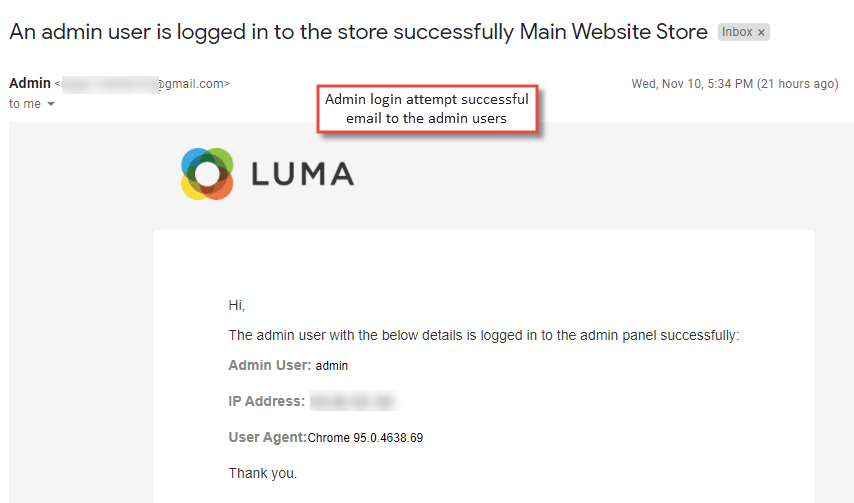
The extension also allows the admin users to get notified about the login attempts via email. Configure various settings to send email notifications on successful or failed login attempts.
- Email Sender: Select the email sender from the drop-down menu to send emails to the main admin on successful logins.
- Send Email Copy To: Select the admin users whom you want to send email notifications on successful or failed admin login attempts.
- Login Success Email Template: Select template to send email notification for successful login attempts by the admin users.
- Login Failure Email Template: Select template to send email notification for failed login attempts by the admin users.

- Login Success Email to Admin
- Login Failure Email to Admin

Admin Action Logs in Backend
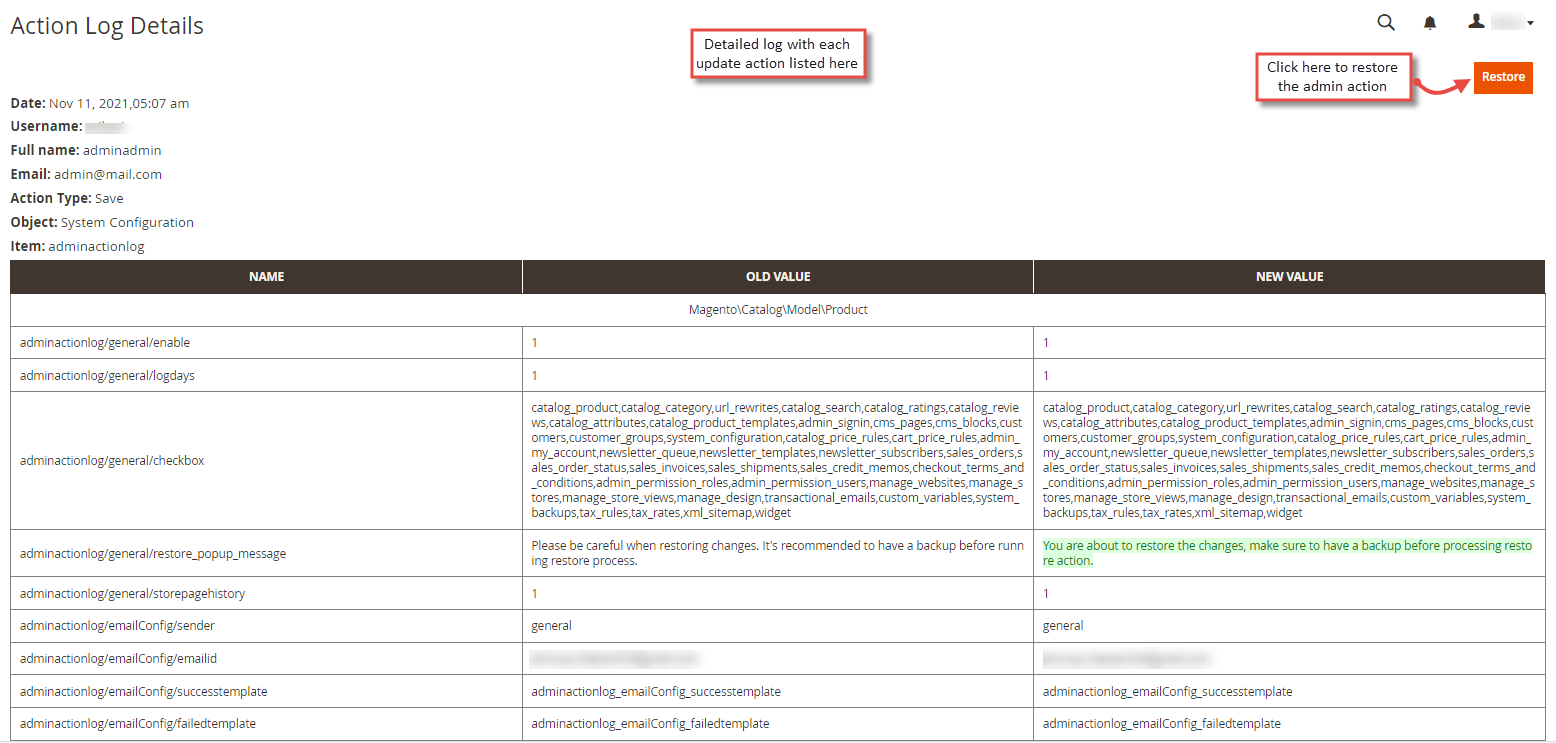
All the activities of various admin users get stored at Admin Action Log grid in the backend with the details like date of action performed, user name of the admin, IP address, action performed, object for which the action is performed, specific object, action type and store views. The admin can also export the actions log in CSV or XML format.
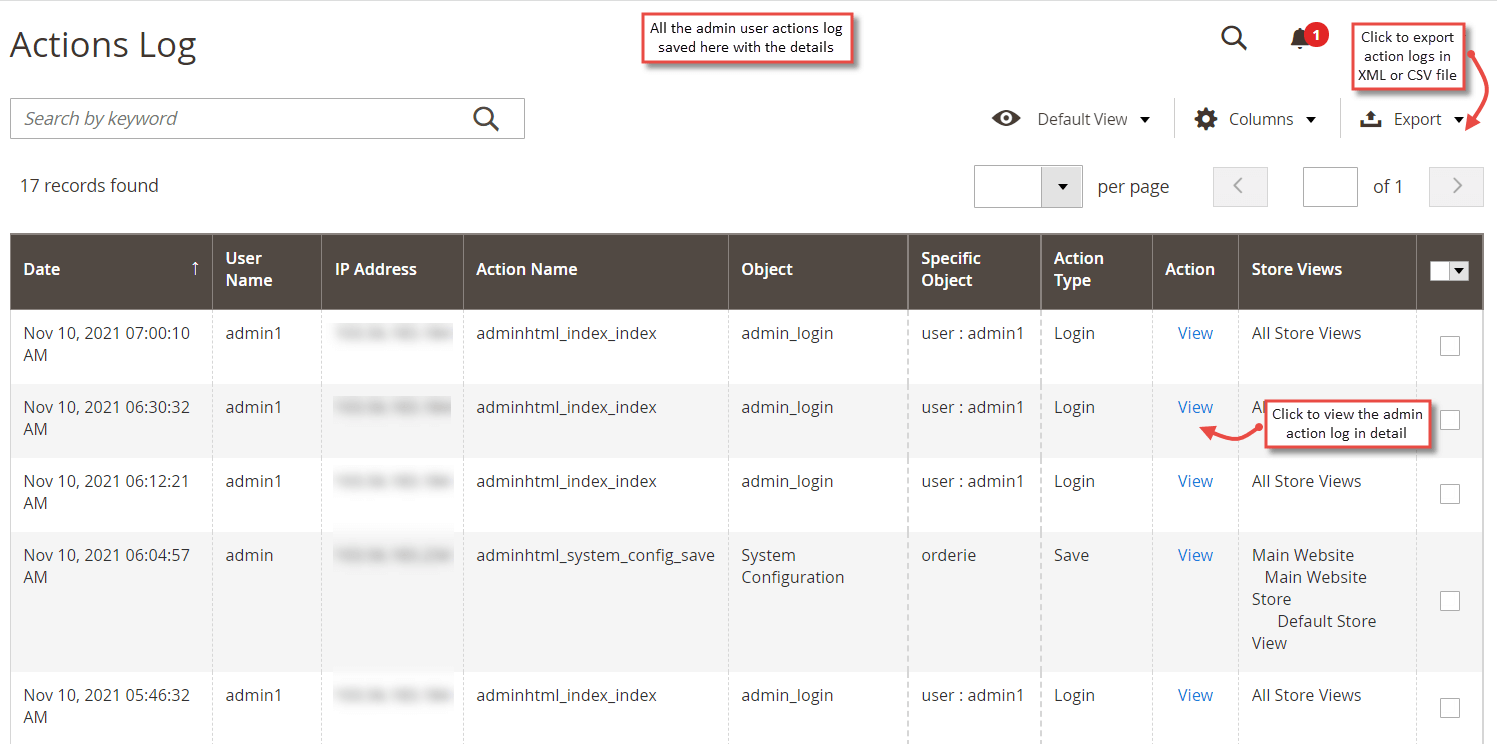
- Restore Admin Actions On click of " View " action from the Actions log grid, detailed action details are shown with the old and new values. The admin can click " Restore " button to restore the recent changes done by the admin user.
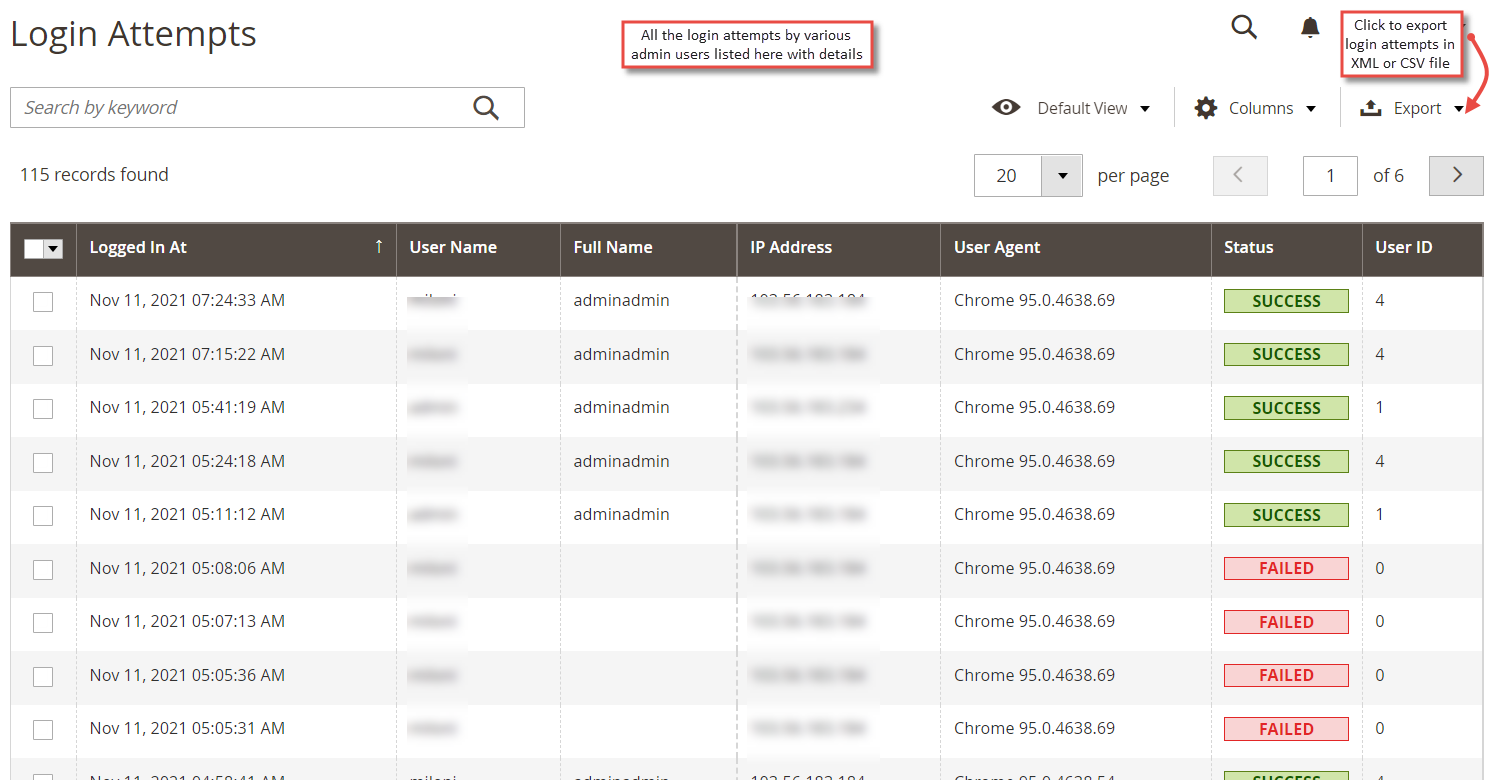
Login Attempts
Move to Admin Action Log > Login Attempts grid in the backend to get complete details of login attempts by the admin users. The grid stores the details like date and time of login, user name, full name, IP address, user agent, status and user ID. The admin can also export the login attempt logs in CSV or XML file.
Page Visit History
Using Admin Action Log extension, the admin can also keep track of admin users' page visit history. Move to Admin Action Log > Page Visit History where you can see page visit history details such as user name, full name, IP address, session start date and time, session end date and time.
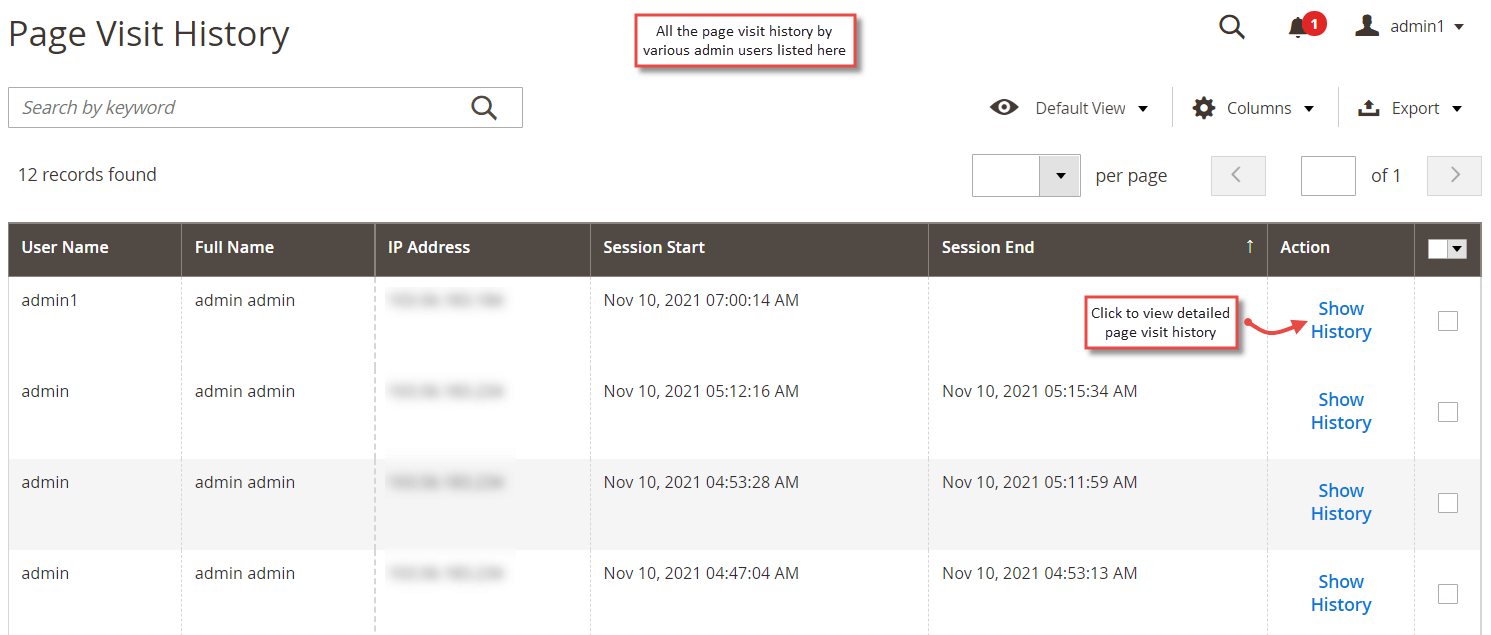
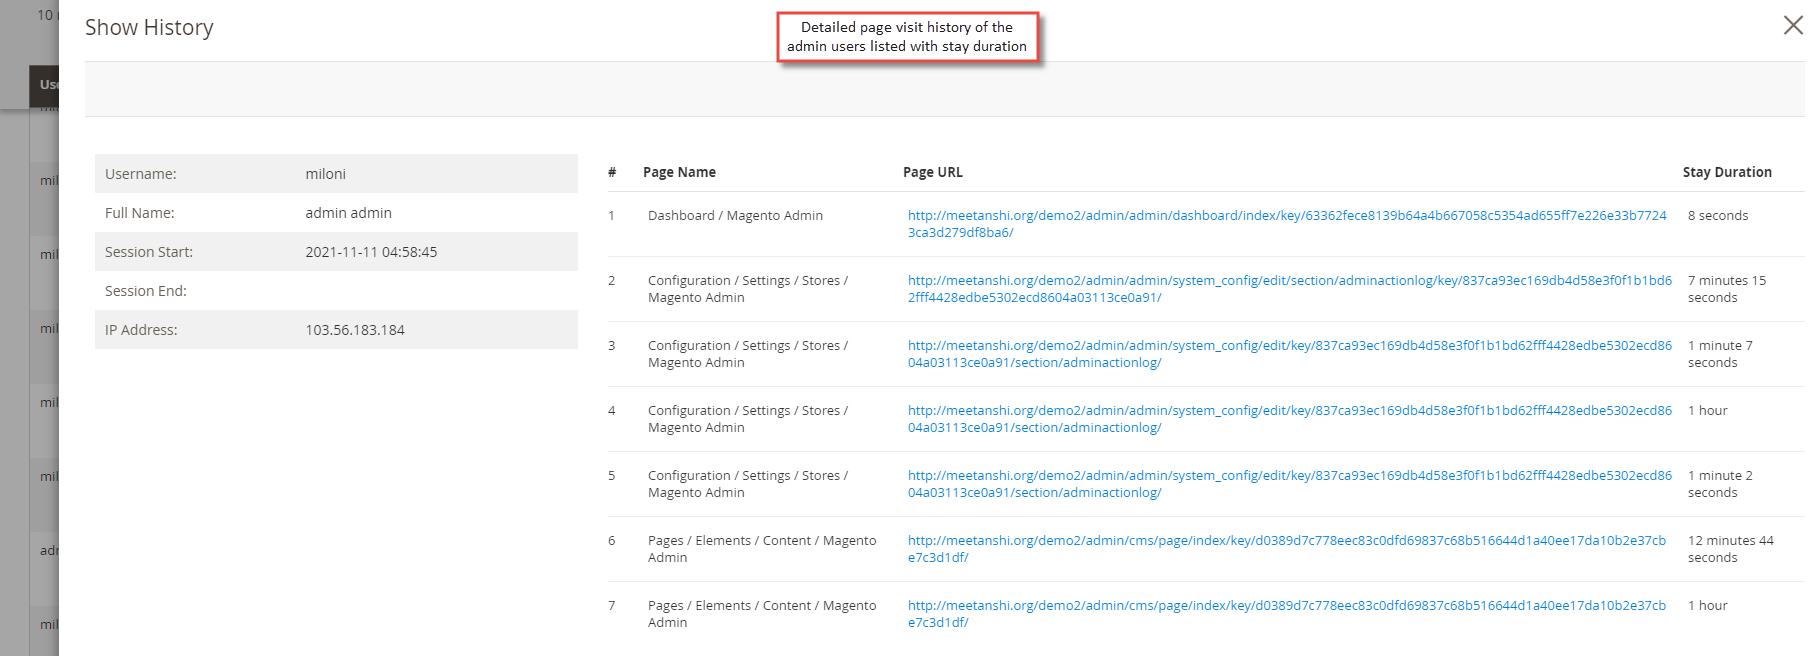
- Click "Show History" button from the page visit history grid to view details like page name, page URL and stay duration of the admin user on the particular page.
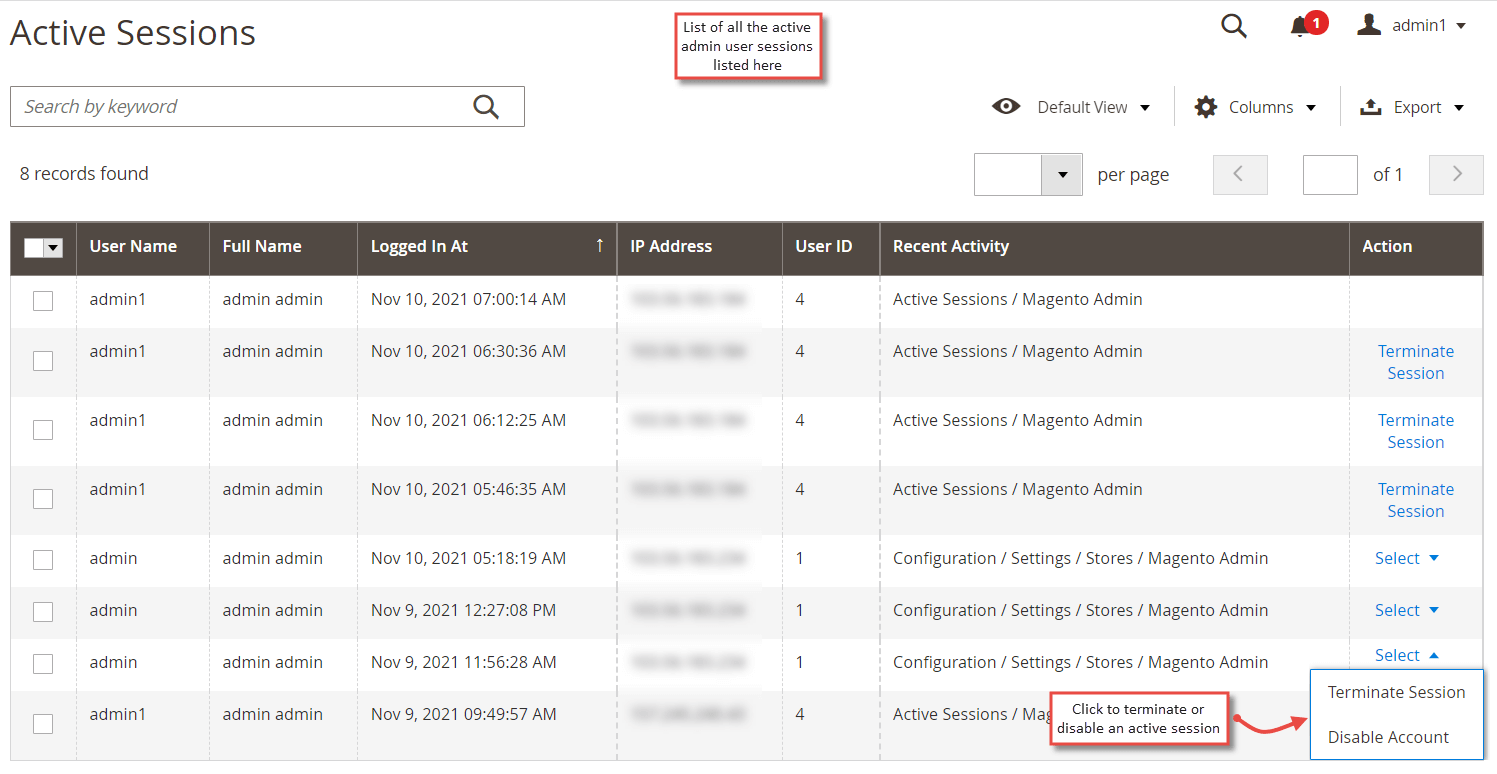
Active Admin Sessions
Move toAdmin Action Log > Active Sessions to view currently active admin. The grid provides complete details of the active admin sessions such as user name, full name, date and time of login, IP address, user ID, and recent activity performed.
Admin can choose to terminate an active session or disable account of the admin user by clicking " Terminate Session " and " Disable Account " action respectively.