Google One Tap Sign-in for Magento 2 - User Guide
Extension Installation
For Magento Marketplace Customers
- Create a folder structure in Magento root as app/code/Meetanshi/ OneTap
- Download and extract the zip folder and upload our extension files to the app/code/Meetanshi/ OneTap via FTP.
- Login to your SSH and run below commands step by step:
php bin/magento setup:upgrade
- For Magento version 2.0.x to 2.1.x -
php bin/magento setup:static-content:deploy
- For Magento version 2.2.x & above -
php bin/magento setup:static-content:deploy --f
php bin/magento cache:flush
For Meetanshi Customers
- Extract the zip folder and upload our extension to the root of your Magento 2 directory via FTP.
- Login to your SSH and run below commands step by step:
php bin/magento setup:upgrade
- For Magento version 2.0.x to 2.1.x -
php bin/magento setup:static-content:deploy
- For Magento version 2.2.x & above -
php bin/magento setup:static-content:deploy --f
php bin/magento cache:flush
Configuration
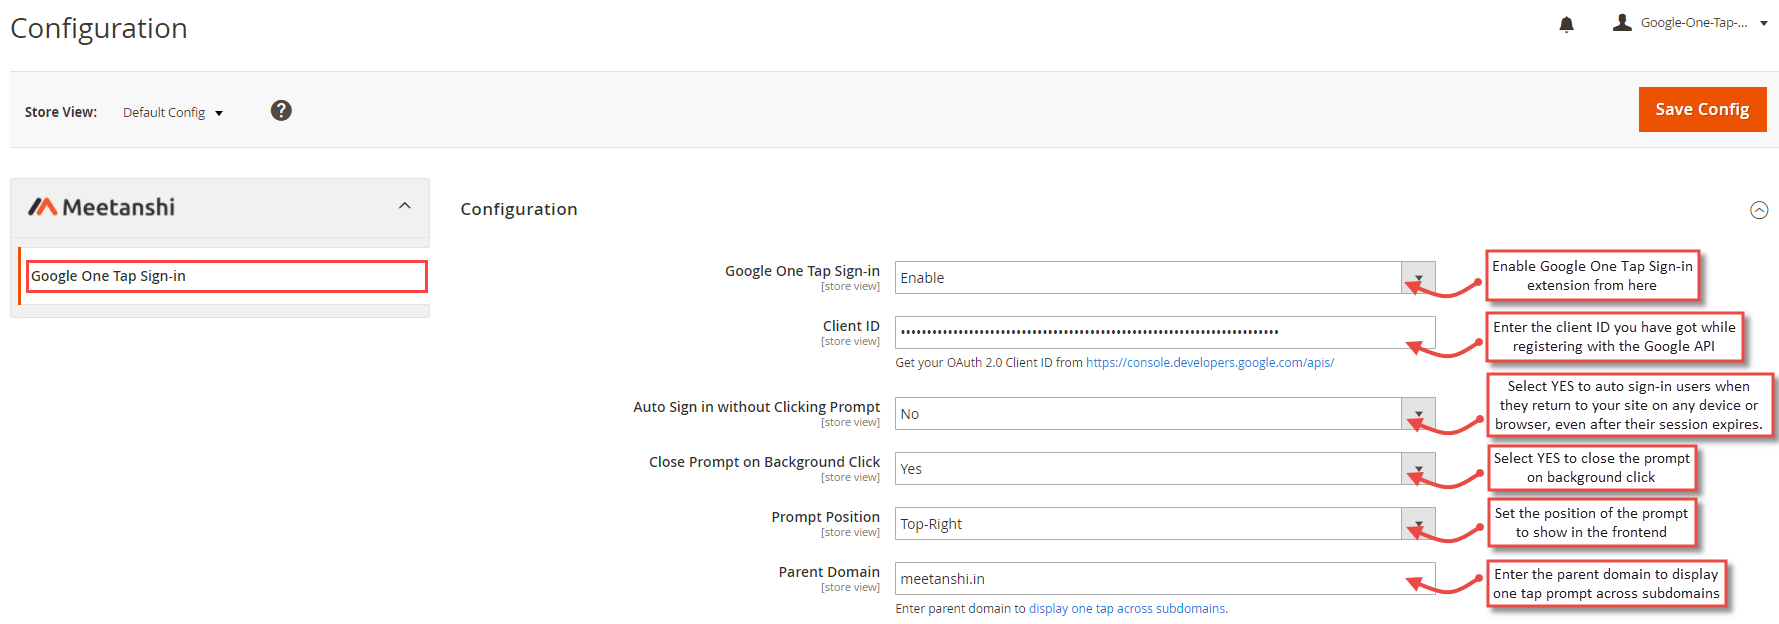
To configure the Google One Tap Sign-in for Magento 2 extension, login to Magento 2 backend, move to Stores > Configuration > Meetanshi > Google One Tap Sign-in where you can find various settings to configure the extension.
Google One Tap Sign-in: Enable or disable the extension from here.
Client ID : Get your client ID from https://console.developers.google.com/apis Follow the steps to get your Google API client ID (https://developers.google.com/identity/gsi/web/guides/get-google-api-clientid) Don't forget to configure OAuth consent screen (https://developers.google.com/identity/gsi/web/guides/get-google-api-clientid#configure_your_oauth_consent_screen) to show privacy policy and terms of service links in Google one tap sign-in prompt.
Auto Sign-in Without Clicking Prompt: Select YES to auto sign-in users when they return to your site even after their session expires.
Close Prompt on Background Click: Select YES to close the Google one tap prompt on background click.
Prompt Position: Set one of the preferred Google one tap prompt positions.
Note: As mentioned in https://developers.google.com/identity/gsi/web/guides/change-position
data-prompt_parent_id attribute is ignored on mobile web browsers and thus, the position you set above will not affect the prompt position in the mobile devices.
- Parent Domain: Enter parent domain to display one tap across subdomains .
Google One Tap Sign-in Prompt in Frontend
Once you have configured the extension successfully, if the user is logged in to the Google account in a browser, he/she can see Google One Tap Sign-in prompt on the Magento 2 Sign-in page in the set position. The Google one tap sign-in prompt contains a link to privacy policy and terms of service if added during configuration of the OAuth consent screen while getting the client ID . Also, it contains a button to continue sign-up or sign-in with the preferred Google account.
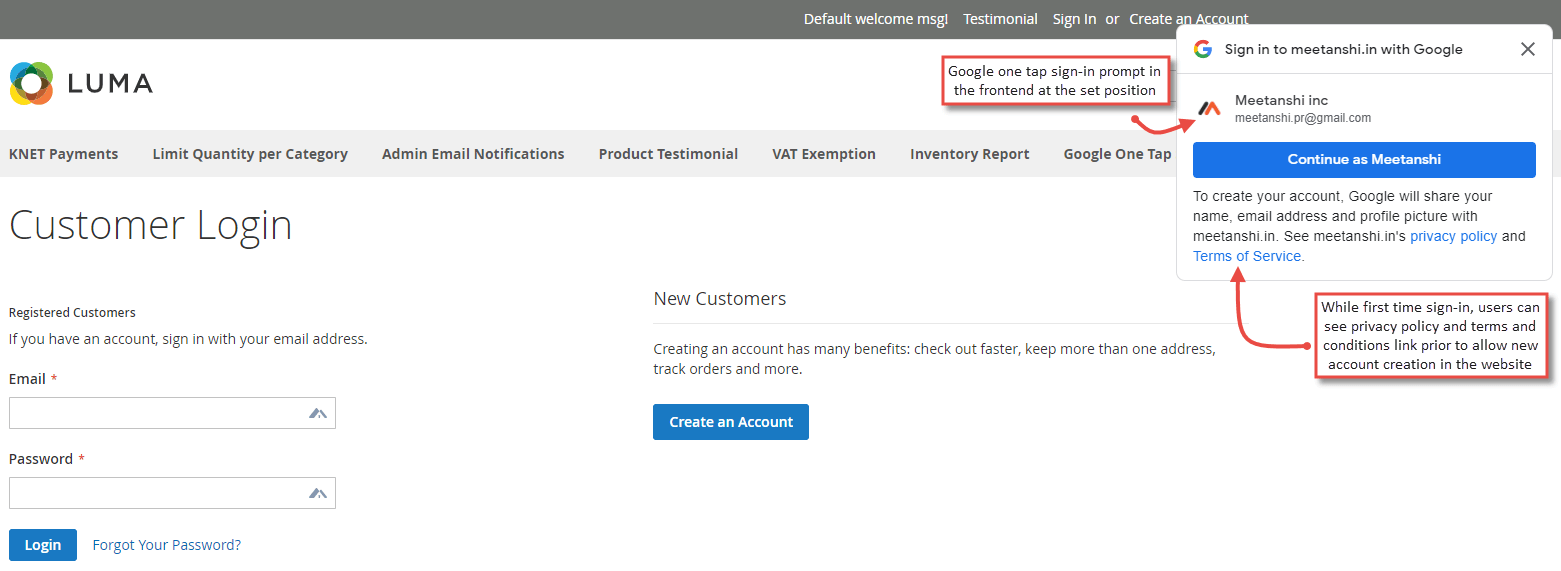
- Google One Tap Login Successful
Immediately after the user selects a Google account to sign-up or login, if the user is new, he will be logged in and redirected to the My Account page and a new customer account is auto created in the Magento 2 backend. If the customer is a returning one, he'll be auto logged in on clicking prompt.

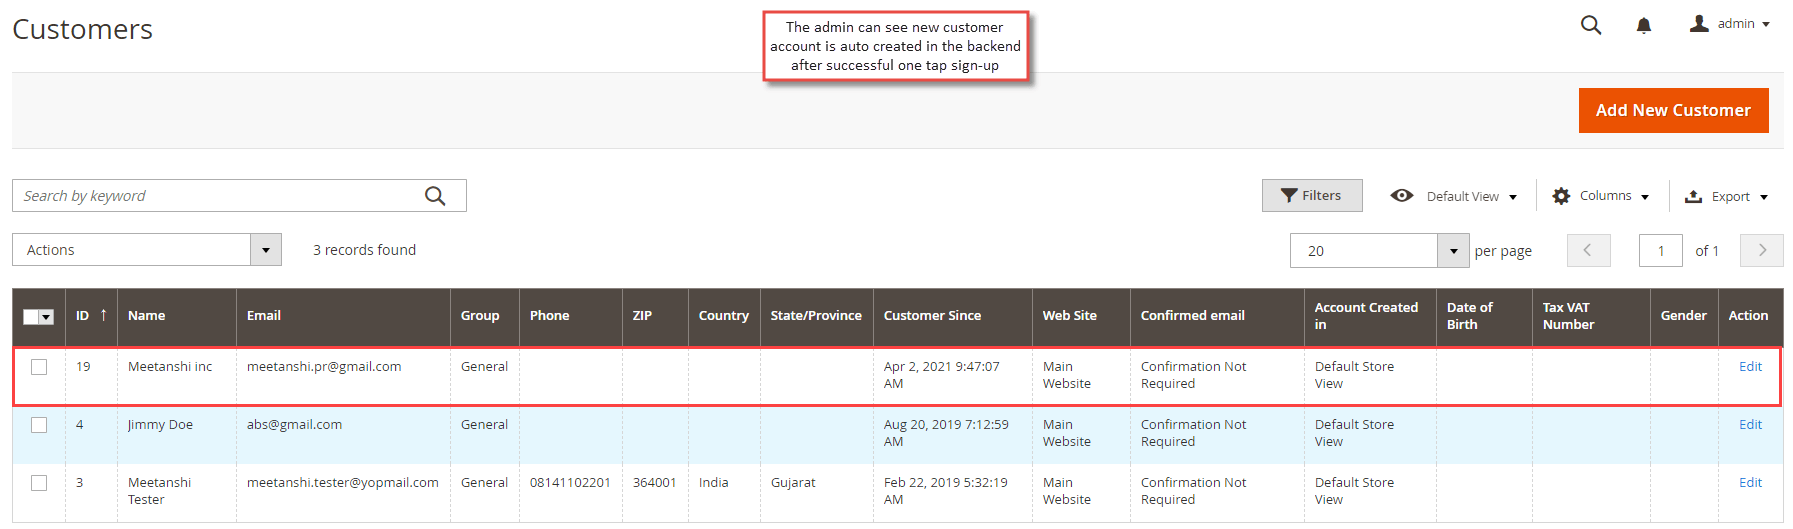
Customer Account Auto Creation in Backend
If the user is new while using the Google one tap sign-in prompt, the customer account is auto created in the Magento 2 admin panel. The admin can see a new customer created under Customers > All Customers grid.