Google Customer Reviews for Magento 2 - User Guide
Extension Installation
Prerequisites
- Magento 2.3.x – 2.4.x installed and functioning.
- Active Google Merchant Center Account & Merchant ID.
Magento Marketplace Customers Method
- Access your server CLI via SSH and navigate to your Magento root directory.
- Run the Composer command to fetch the extension:
composer require meetanshi/magento-2-google-customer-reviews - Enable the extension module:
php bin/magento module:enable Meetanshi_GoogleReviews - Run the upgrade command:
php bin/magento setup:upgrade - Deploy static content based on your Magento version:
- For Magento 2.0.x – 2.1.x:
php bin/magento setup:static-content:deploy - For Magento 2.2.x & above:
php bin/magento setup:static-content:deploy -f
- For Magento 2.0.x – 2.1.x:
- Flush the Magento cache:
php bin/magento cache:flush
Direct ZIP / Meetanshi Customers Method
- Download the extension ZIP file from your Meetanshi account area.
- Extract the archive contents and upload them to your server under
<Magento_Root>/app/code/Meetanshi/GoogleReviews/. - Connect to your Magento server via SSH and execute the following commands:
php bin/magento setup:upgrade- For Magento 2.0.x – 2.1.x:
php bin/magento setup:static-content:deploy - For Magento 2.2.x & above:
php bin/magento setup:static-content:deploy -f
php bin/magento cache:flush - For Magento 2.0.x – 2.1.x:
Google Customer Reviews for Magento 2 collects seller ratings and displays Google Customer Reviews badges on your storefront to build customer trust and improve Google Search & Shopping ad performance.
How to Obtain Google Merchant ID & Enable Google Customer Reviews
To integrate Google Customer Reviews, locate your Google Merchant ID and enable the program in Google Merchant Center:
- Sign in to your Google Merchant Center account.
- Look at the top right header area (next to your account name) to find your Merchant Center ID (a multi-digit number).
- Click the gear icon (Tools & Settings) and select Growth > Manage Programs (or Settings > Program setup).
- Find Google Customer Reviews card and click Enable (or Get Started).
- Read and accept the Google Customer Reviews Agreement.
- Enter your copied Google Merchant ID into the Google Merchant ID field under Stores > Configuration > Meetanshi > Google Customer Reviews in Magento Admin.
General Configuration
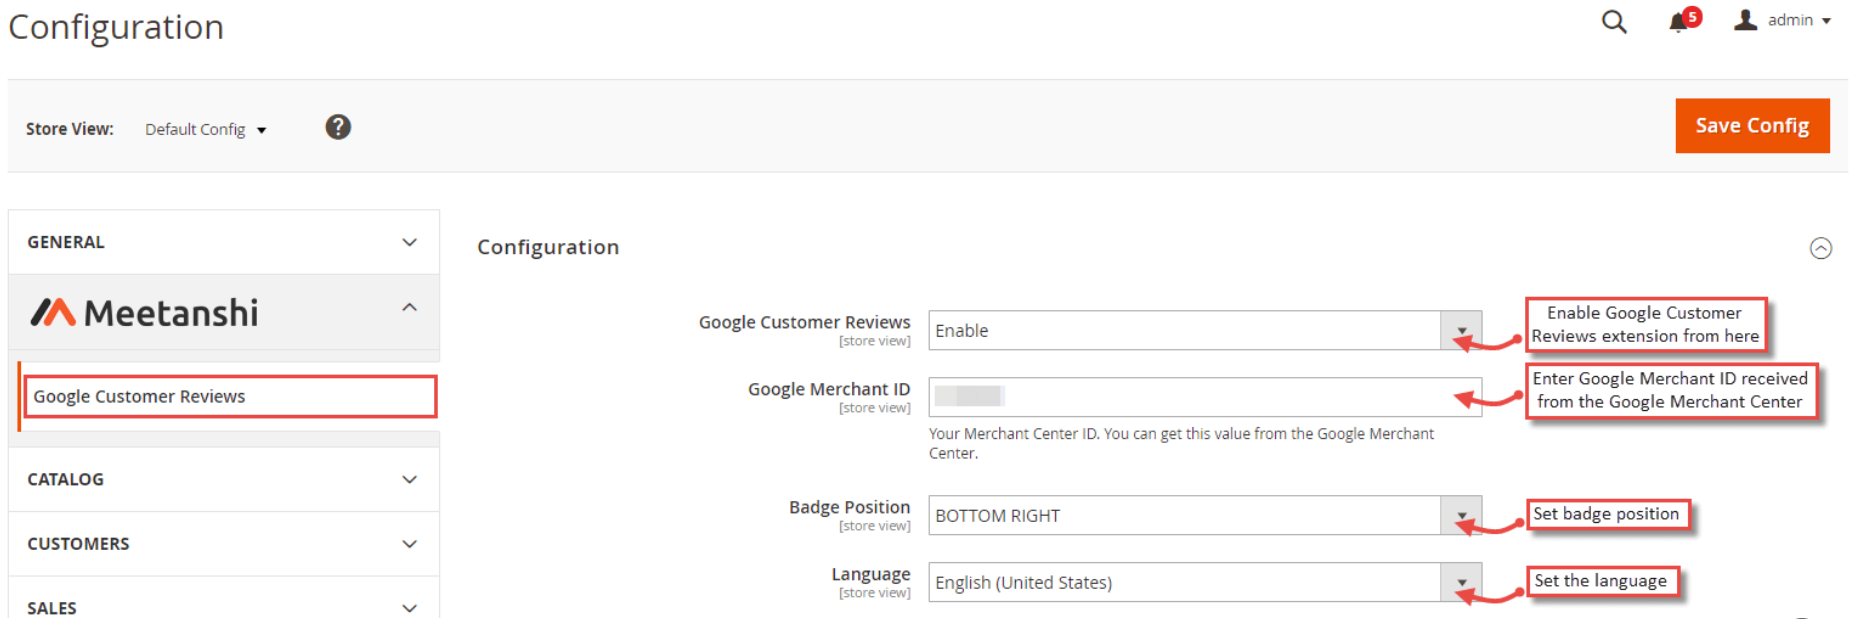
Navigate to Stores > Configuration > Meetanshi > Google Customer Reviews to connect your Google Merchant account.
- Google Customer Reviews: Select Enable to turn on Google Customer Reviews integration.
- Google Merchant ID: Enter your unique Google Merchant Center Account ID.
- Badge Position: Select where the Google Customer Reviews badge displays on your site (Bottom Right, Bottom Left, or User Defined).
- Language: Select badge and survey display language.
Survey Settings
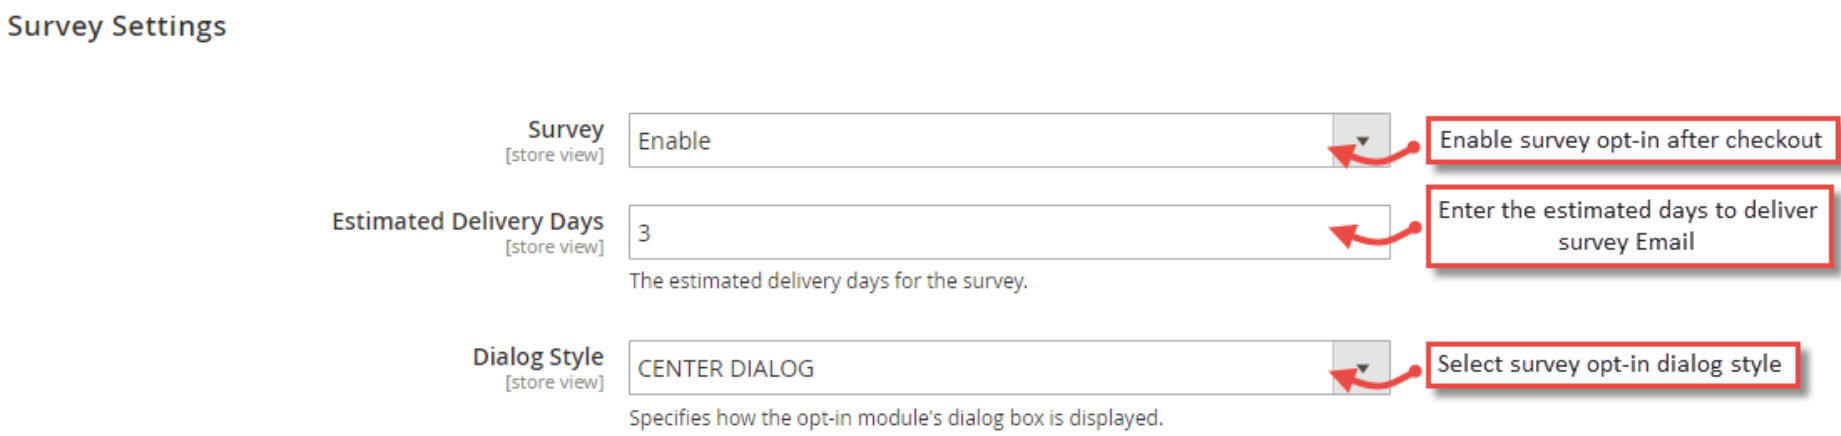
Configure post-checkout survey opt-in popup settings.
- Survey: Select Enable to display Google Customer Reviews survey opt-in modal on checkout success page.
- Estimated Delivery Days: Enter estimated delivery duration (in days) to calculate when Google should send review emails.
- Dialog Style: Choose modal popup position (Center Dialog, Bottom Right Dialog, Bottom Left Dialog, Top Right Dialog, Top Left Dialog).
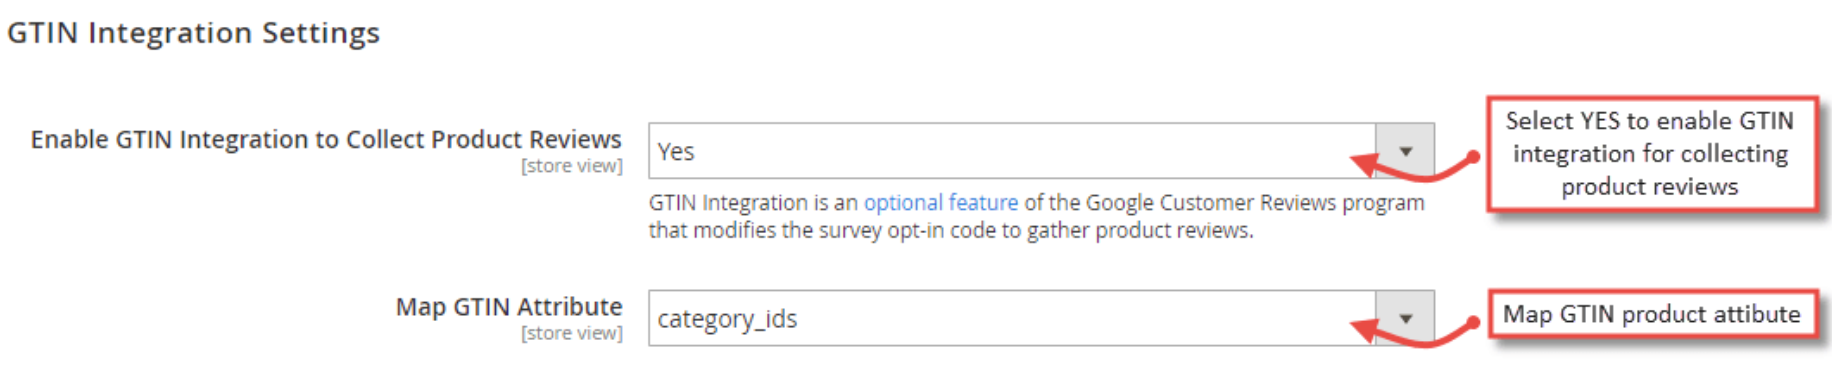
GTIN Integration Settings
- Add Products GTIN: Select Yes to include product GTIN parameters in the Google survey payload.
- Map Attribute as GTIN: Select catalog product attribute containing GTIN/EAN values (e.g. SKU, GTIN, UPC).
Frontend Badge & Survey Experience
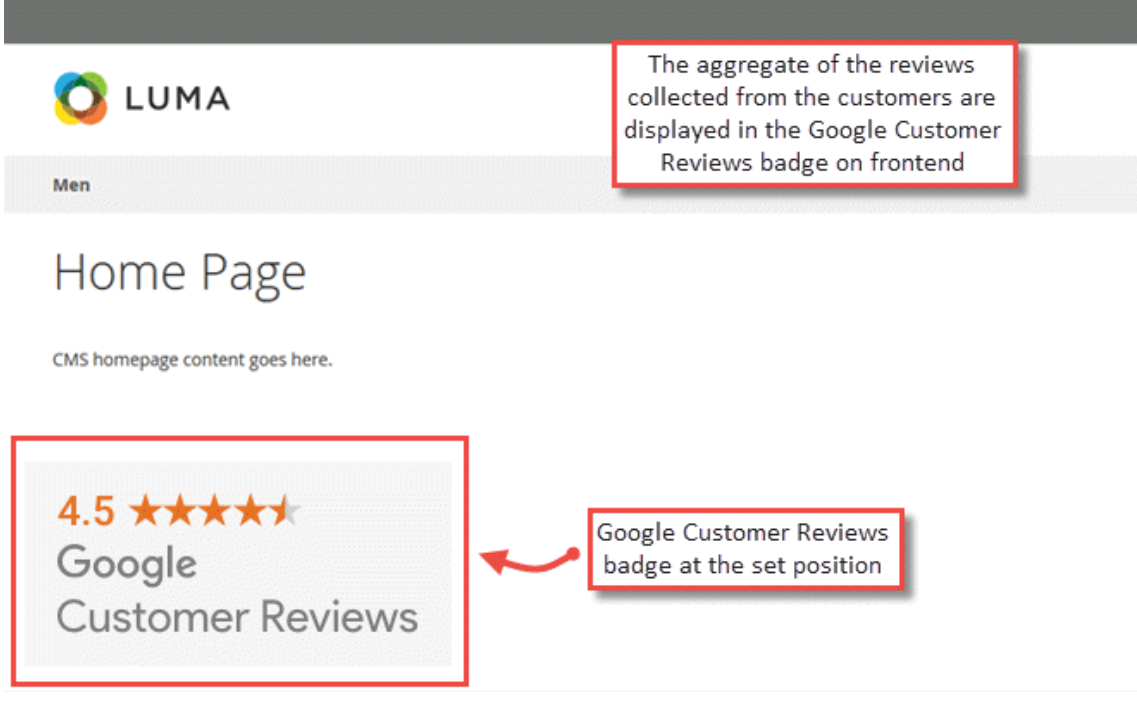
- Customers see the Google Customer Reviews rating badge rendered at the chosen position across your store.
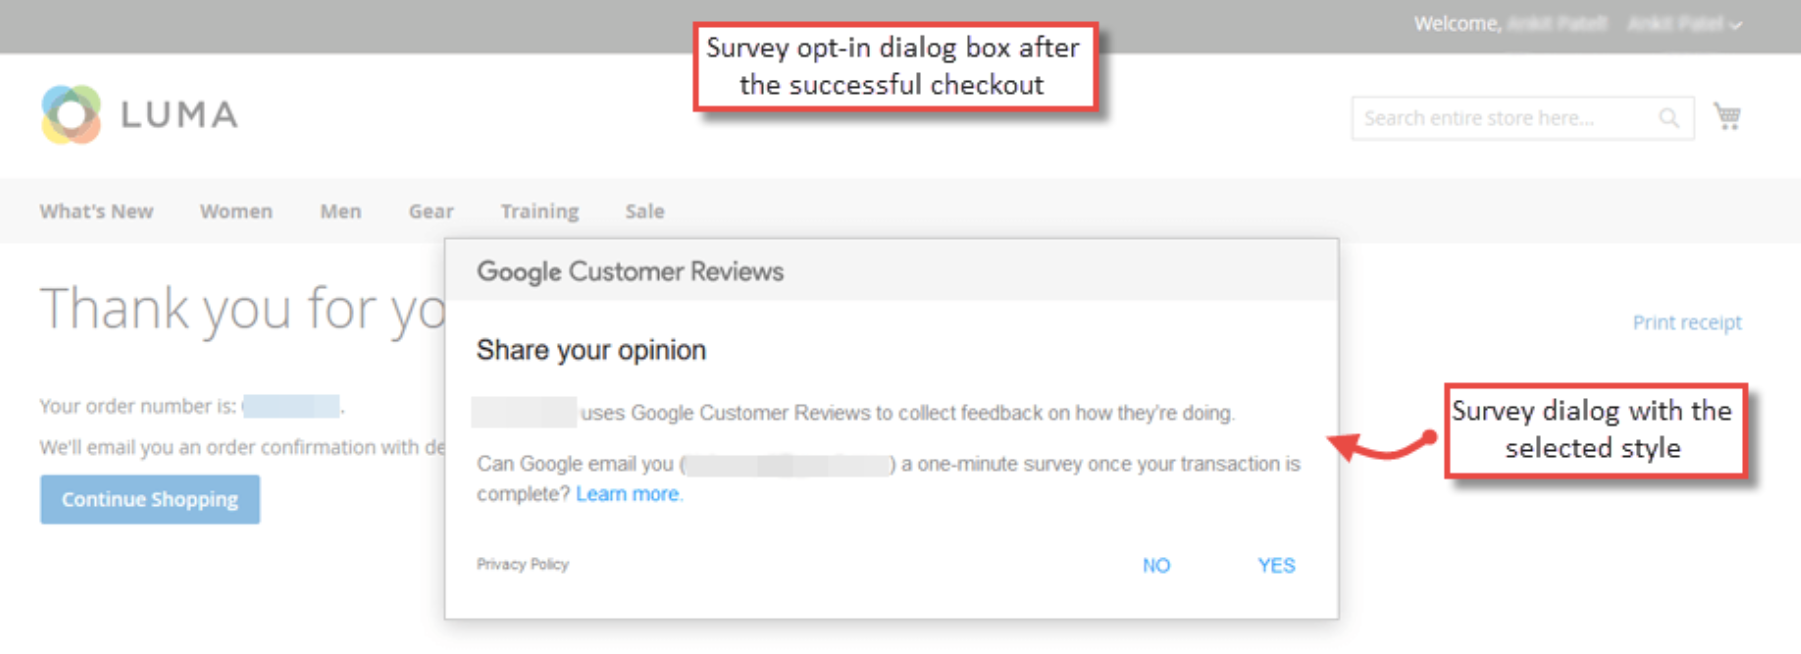
- After completing a purchase, the Google Review Opt-in modal pops up on the order success page asking the customer if they wish to opt in to rate their purchase experience.