AI Chatbot for Magento 2 - User Guide
Extension Installation
Prerequisites:
- Ensure Python 3 is installed on your server.
Installation Steps:
- Extract the zip folder.
- Upload the extension files and the
pythondirectory to the root of your Magento 2 installation via FTP.
Login to your SSH and run the standard deployment commands:
php bin/magento setup:upgrade
php bin/magento setup:static-content:deploy -f
php bin/magento cache:flush
Configuration & Setup:
Magento Admin:
- Go to System > Extensions > Integrations. If any Integrations already exist, edit them. Otherwise, create a new integration with access to Catalog > Products API. Copy the Access Token.
- Go to Stores > Configuration > Services > OAuth. Set "Allow OAuth Access Tokens to be used as standalone Bearer tokens" to Yes.
File Configuration:
- Open
python/.env. Add your Store URL, the Access Token, and Google API Key. - Open
chat_search.php. Update$pythonExecif your Python path is different from/usr/bin/python3.
- Open
Python Execution:
The Python environment powers the AI Chatbot’s advanced features, including product vector generation, semantic search, and AI-powered response matching. Before generating embeddings or running vector indexing, ensure Python 3 and all required libraries are properly installed on your server.
Navigate to AI Chatbot > AI Chatbot Tools to manage environment dependencies and vector generation directly from the Magento Admin.
Environment Status & Library Installation
Check Status: Click to verify if Python 3 and the required libraries are installed on your server.
Install Python Libraries: Click to automatically run
pip install -r python/requirements.txtif any components are missing.
Generate Vector Index
Click Generate Vector Index to fetch products via Magento API, generate Gemini embeddings, and build the FAISS vector database.
Alternative: CLI Execution via SSH (For Large Catalogs)
- Run the command:
pip install -r python/requirements.txt
- Run the command:
python3 python/m2-to-vector.py
[Note: Here python3 is the working command]
That's it.
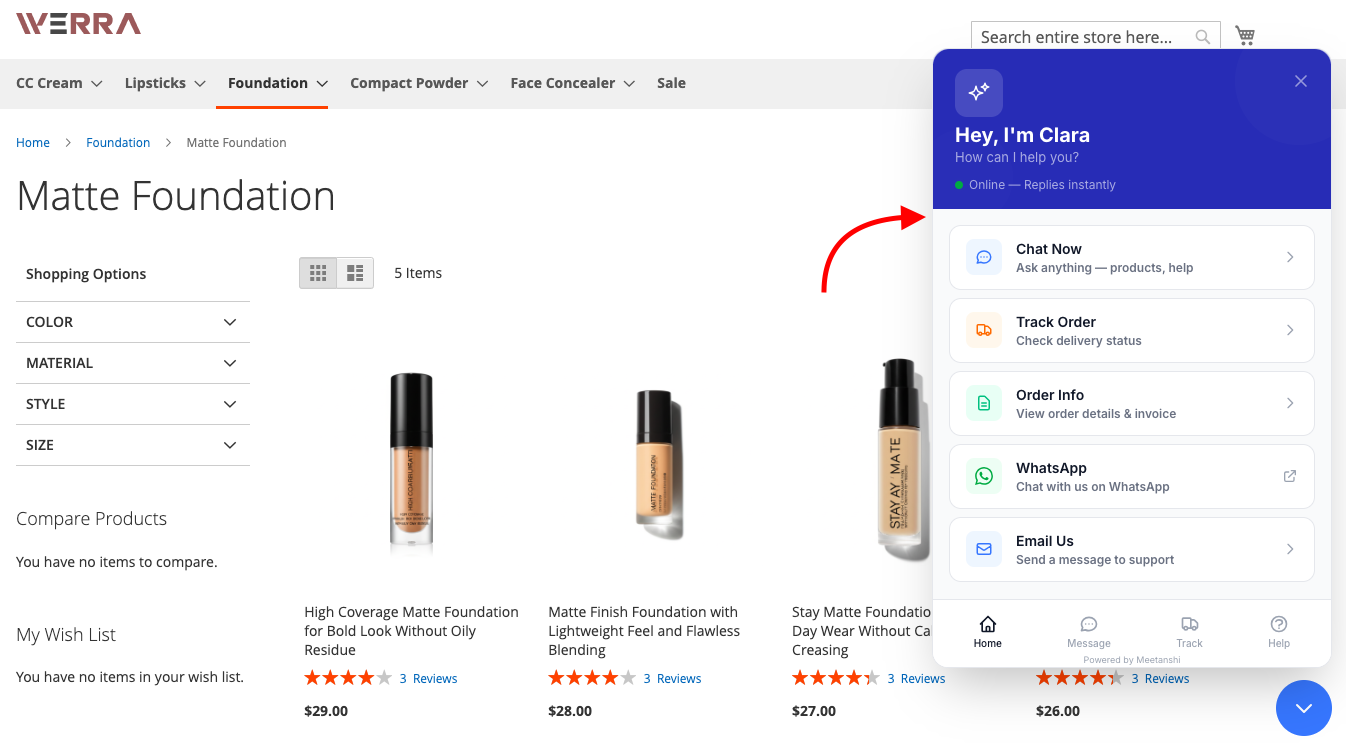
Get started with our AI Chatbot extension for Magento 2. Enjoy the flexibility to place the chatbot on any page (as seen below) and completely customize the design to fit your store's style.
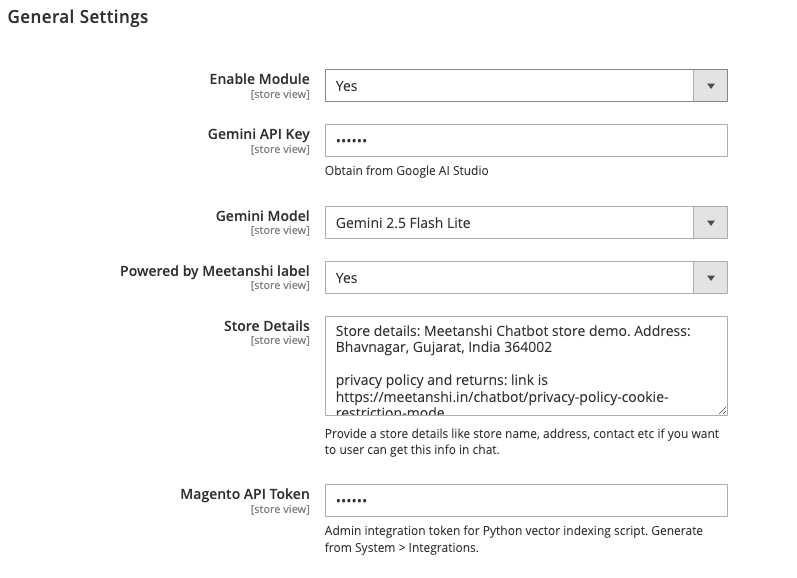
General Settings
Configure the core connection parameters between Magento and the Gemini API.
- Enable Module: Select Yes to activate the chatbot on the frontend.
- Gemini API Key: Enter your secret API key obtained from Google AI Studio.
- Gemini Model: Choose the model version from the dropdown (e.g., Gemini 2.5 Flash Lite).
- Powered by Meetanshi label: Set to Yes to show the developer attribution at the bottom of the chat widget.
- Store Details: Provide your company name, physical address, contact details, and links to your privacy or return policies. The chatbot reads this text to answer general store queries.
- Magento API Token: Input your admin integration token generated under System > Integrations. This token authorizes the automated Python vector indexing script.
AI Chatbot Settings
Configure the personality, capabilities, and contact options for your bot.
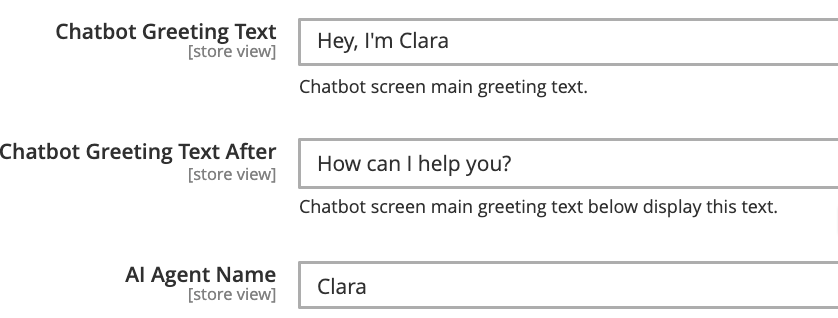
Identity & Greetings
- Chatbot Greeting Text: Add the chatbot’s greeting message.
- Chatbot Greeting Text After: Add the sub-text below the greeting message.
- AI Agent Name: Give your bot a name.
Functionality & Contact
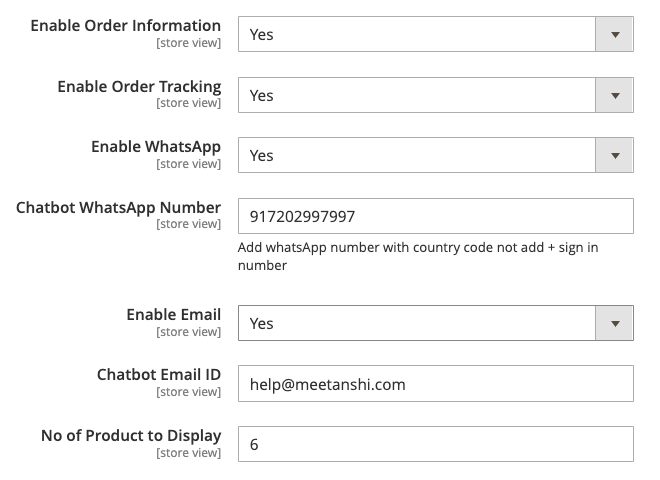
- Enable Order Information: Select Yes for customers to get their specific order details.
- Enable Order Tracking: Select Yes to let the bot provide shipment tracking updates.
- Enable WhatsApp: Select Yes to show a WhatsApp button and enter the contact number.
- Enable Email: Select Yes to show an email button and enter the supported email address.
- No of Products to Display: Define how many product recommendations the AI should show in a single response.
Chatbot Theme Color Customization
Personalize the appearance of the chat widget to match your store branding. The backend includes a real-time live preview panel showing exactly how your choices will appear to users.
- Color Preset: Select from pre-configured color schemes like Default (Dark/Blue), Ocean Blue, Emerald Green, Royal Purple, Crimson Red, Sunset Orange, or Slate Gray to auto-fill the color values.
- Primary Color: Sets the header background and main toggle button color.
- Accent Color: Sets the color for clickable buttons, send icons, suggestion pills, and active navigation tabs
- Accent Hover Color: Defines the color state when a user hovers over interactive accent elements
Custom CSS: Paste advanced CSS style overrides directly into the text area to customize specific design elements

Product Vector Indexing Settings
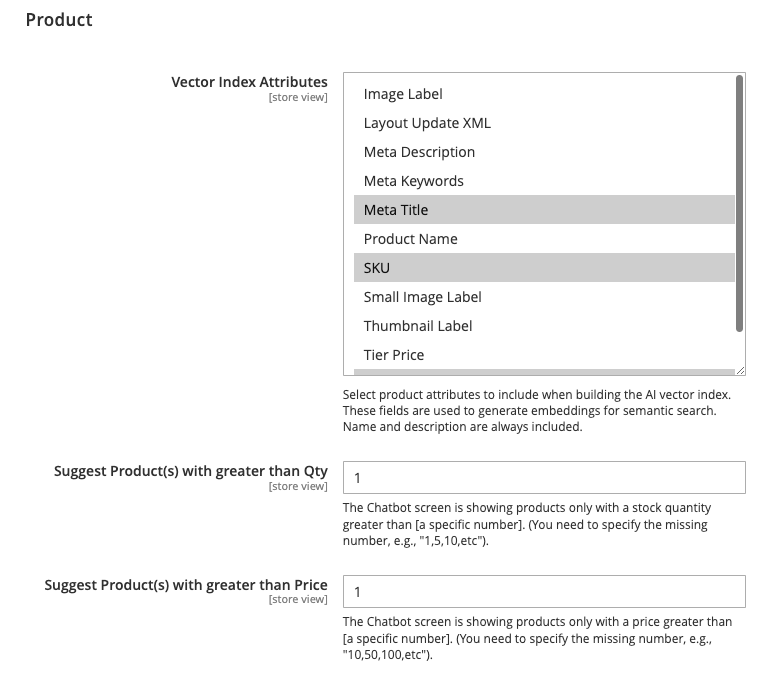
Control how product data is analyzed and filtered for semantic AI recommendations.
- Vector Index Attributes: Highlight and select the specific Magento catalog attributes (like SKU, Meta Title, Meta Description, Meta Keywords) that should be included when building the AI vector index embeddings. Note: Product Name and Description are processed automatically.
- Suggest Product(s) with greater than Qty: Set a minimum inventory threshold. The chatbot will only recommend products that have stock numbers higher than this integer (e.g., 1).
- Suggest Product(s) with greater than Price: Define a minimum price floor. The chatbot will exclude items priced lower than this value from its search recommendations.
Then, save the config and flush the Magento Cache to ensure changes reflect on the frontend immediately.
Now, your chatbot is ready to answer FAQs and share product recommendations 24/7.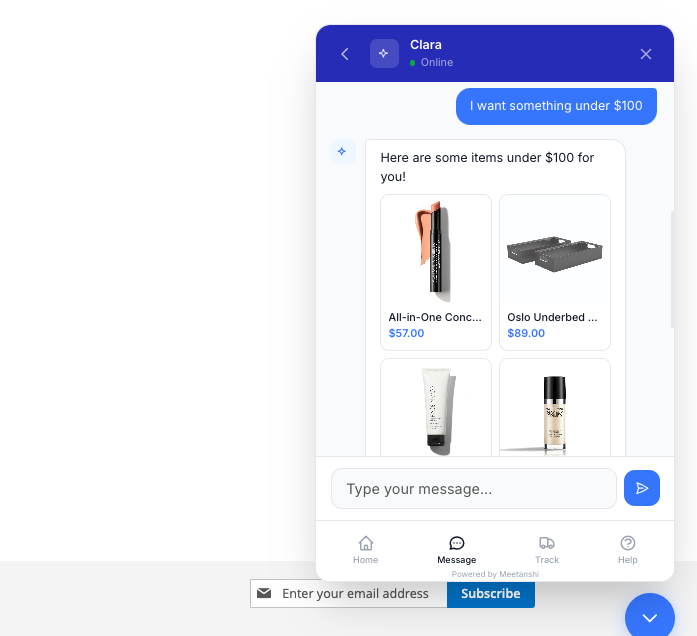
Managing Help Center Articles
Provide structured, accordion-style FAQ resources within the chatbot interface for instant customer self-service.
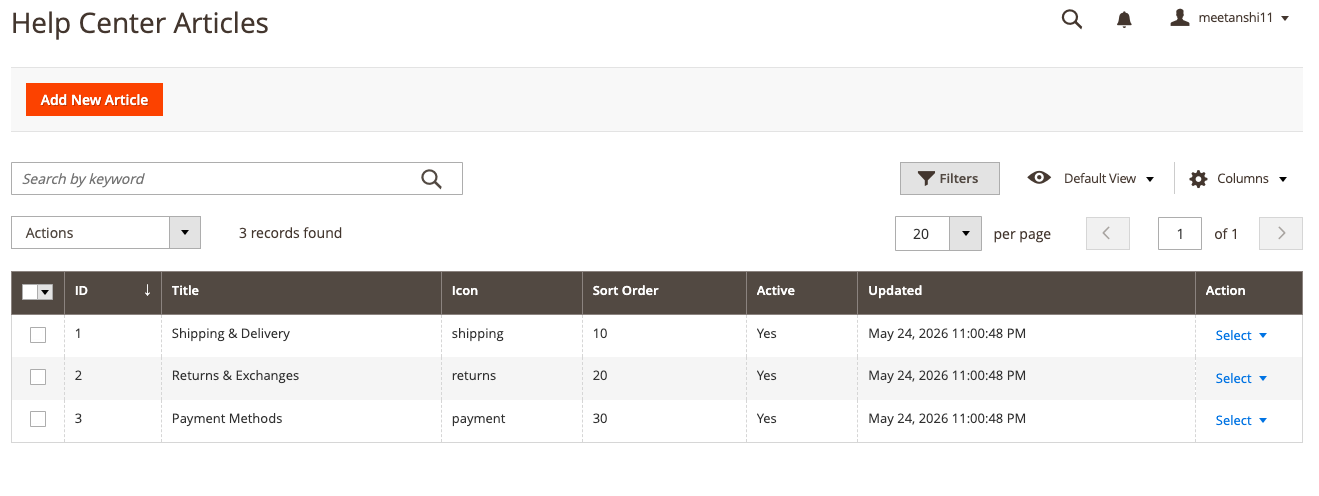
Backend Overview
Go to AI Chatbot > Help Center Articles to view your existing documentation grid. Click Add New Article to create a new record. You can manage fields such as the Title, Icon type, and Sort Order position.
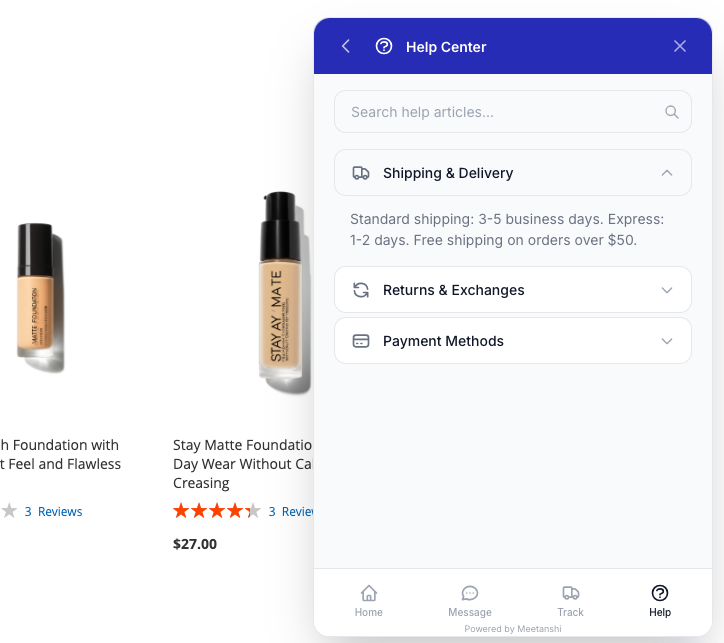
Frontend Widget View
When a user clicks the Help tab at the bottom of the frontend chat drawer, they see a searchable list of categorized topics. Clicking a heading expands an accordion to display the formatted response details instantly.
Configuring Quick Suggestions
Quick Suggestions allow you to place prompt shortcut pills right above the text input bar, guiding users toward frequent inquiries.
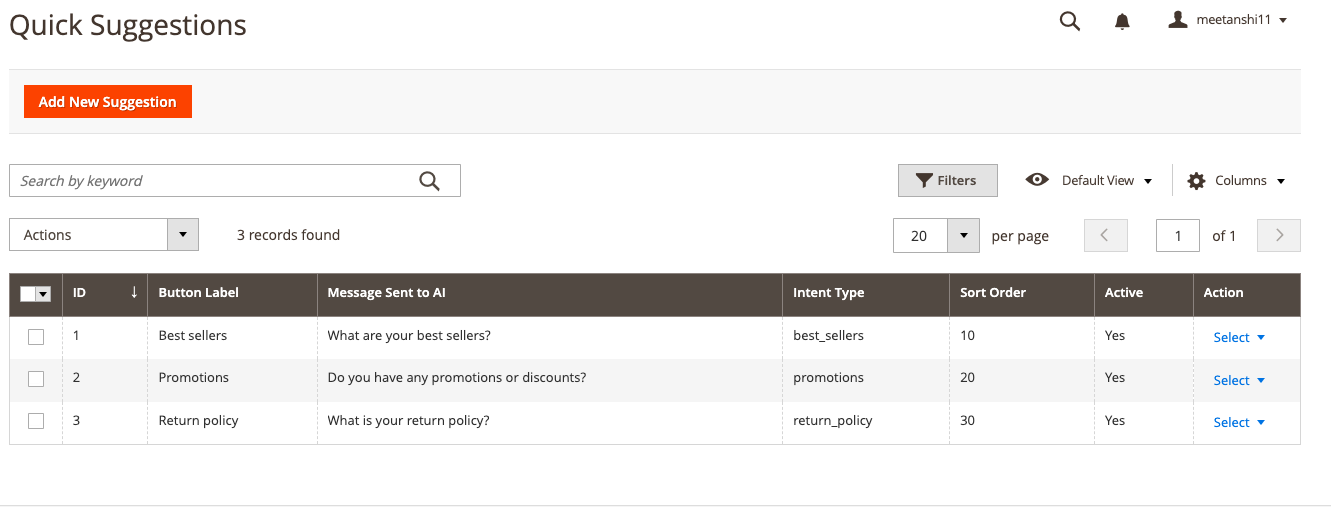
Backend Overview
Navigate to AI Chatbot > Quick Suggestions to manage interactive buttons.
- Button Label: The visible text displayed inside the button pill on the store layout.
- Message Sent to AI: The hidden prompt context is triggered and sent directly to the Gemini LLM when a visitor clicks the pill.
- Intent Type: Internal classification tags used for event tracking.
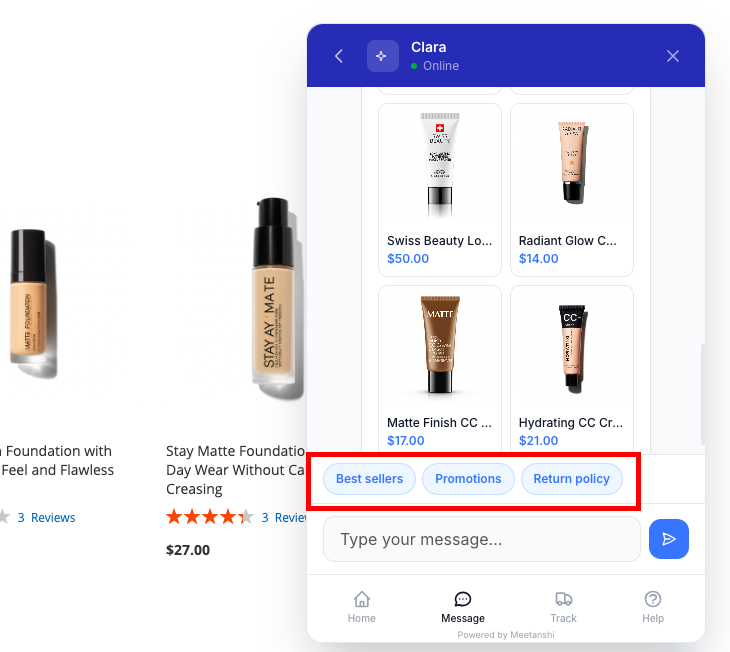
Frontend Widget View
These shortcut options appear horizontally directly above the conversation entry window. This allows customers to tap options like Best sellers, Promotions, or Return policy instead of typing long sentences out by hand.
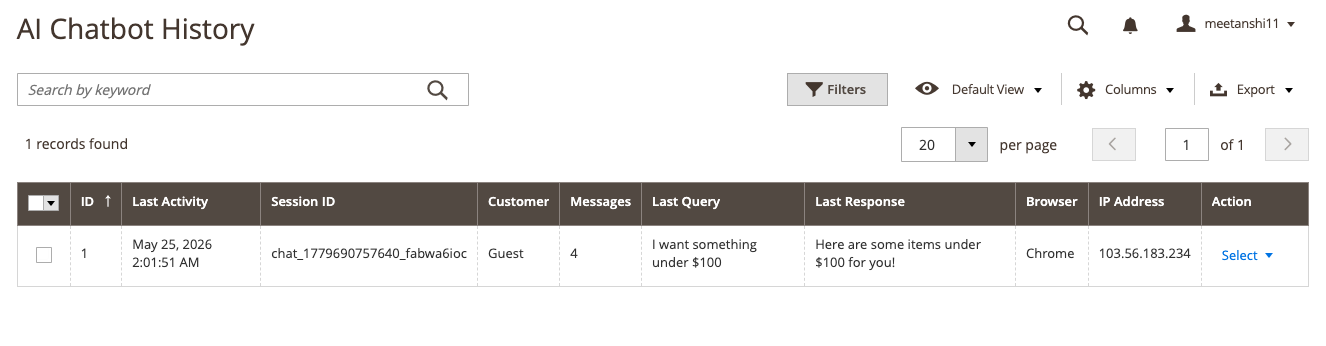
Monitoring Conversations (AI Chatbot History)
Track user behavior and analyze AI response accuracy directly inside Magento via AI Chatbot > History.
The comprehensive session monitoring log tracks:
- Session ID & Last Activity: Identifies individual user journeys along with execution timestamps.
- Customer Status & Message Volume: Differentiates logged-in accounts from guest sessions and counts active transaction exchanges.
- Last Query & Response Text: Displays exact input phrasing alongside the precise text answers returned by the Gemini integration.
- Metadata & Diagnostics: Records client browser footprints and connection IP addresses for security logging and optimization.