AI Virtual Try-On for Magento 2 - User Guide
AI Virtual Try-On for Magento 2 lets shoppers see how a product looks on them by uploading a photo or using their camera, with the try-on image generated through Google Gemini. This guide covers installation, the Gemini API key setup, every admin setting, button and popup styling, per-product activation, and the storefront experience.
Extension Installation
For Magento Marketplace customers
Find the Composer name and version of the extension in its
composer.jsonfile.Log in to your server via SSH and run:
composer require meetanshi/module-virtual-try-onNEEDS INPUT: confirm the exact Composer package name.
Enter your Magento authentication keys when prompted (public key = username, private key = password).
Verify the module is recognized:
php bin/magento module:status Meetanshi_VirtualTryOnNEEDS INPUT: confirm the exact module handle.
Enable the module and run setup:
php bin/magento module:enable Meetanshi_VirtualTryOn
php bin/magento setup:upgrade
For Meetanshi customers
Extract the ZIP file and upload the extension to the root of your Magento 2 directory via FTP.
Log in to your server via SSH and run:
php bin/magento setup:upgrade
Deploy static content and flush cache (both methods)
php bin/magento setup:static-content:deploy -f
php bin/magento cache:flush
How to Get Your Google Gemini API Key?
The extension uses Google Gemini to generate the try-on image, so you need a Gemini API key before it will work.
- Go to Google AI Studio at https://aistudio.google.com/.
- Sign in with your Google account.
- Open the Get API key section and click Create API key.
- Copy the generated key.
- Keep the key private. You will paste it into the extension configuration in the next section.
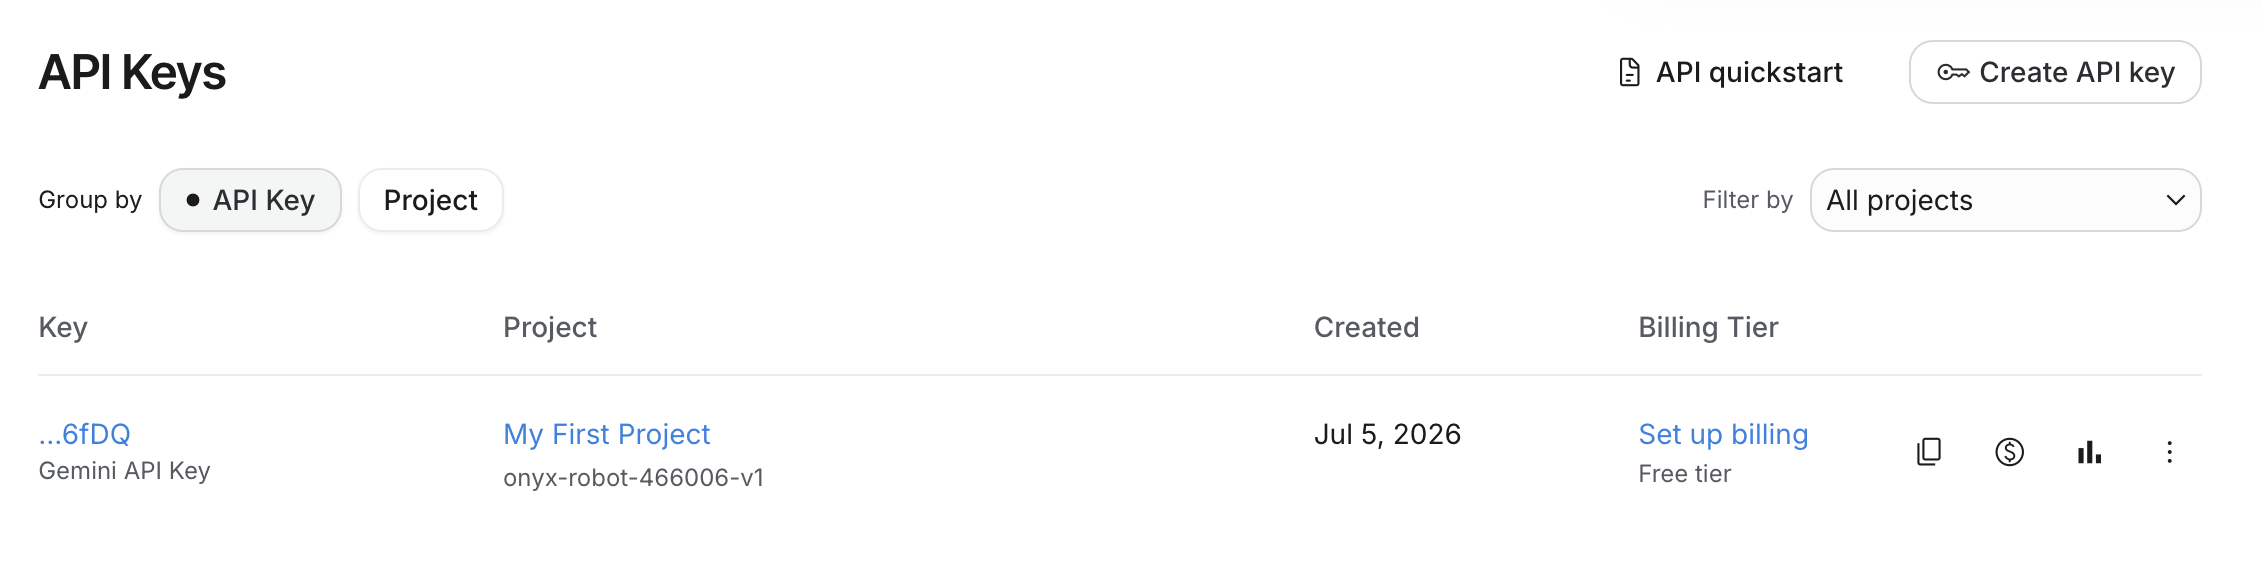
Note: Gemini API usage is billed by Google based on your Google Cloud plan. Review Google's current Gemini API pricing and quotas before going live.
Extension Configuration
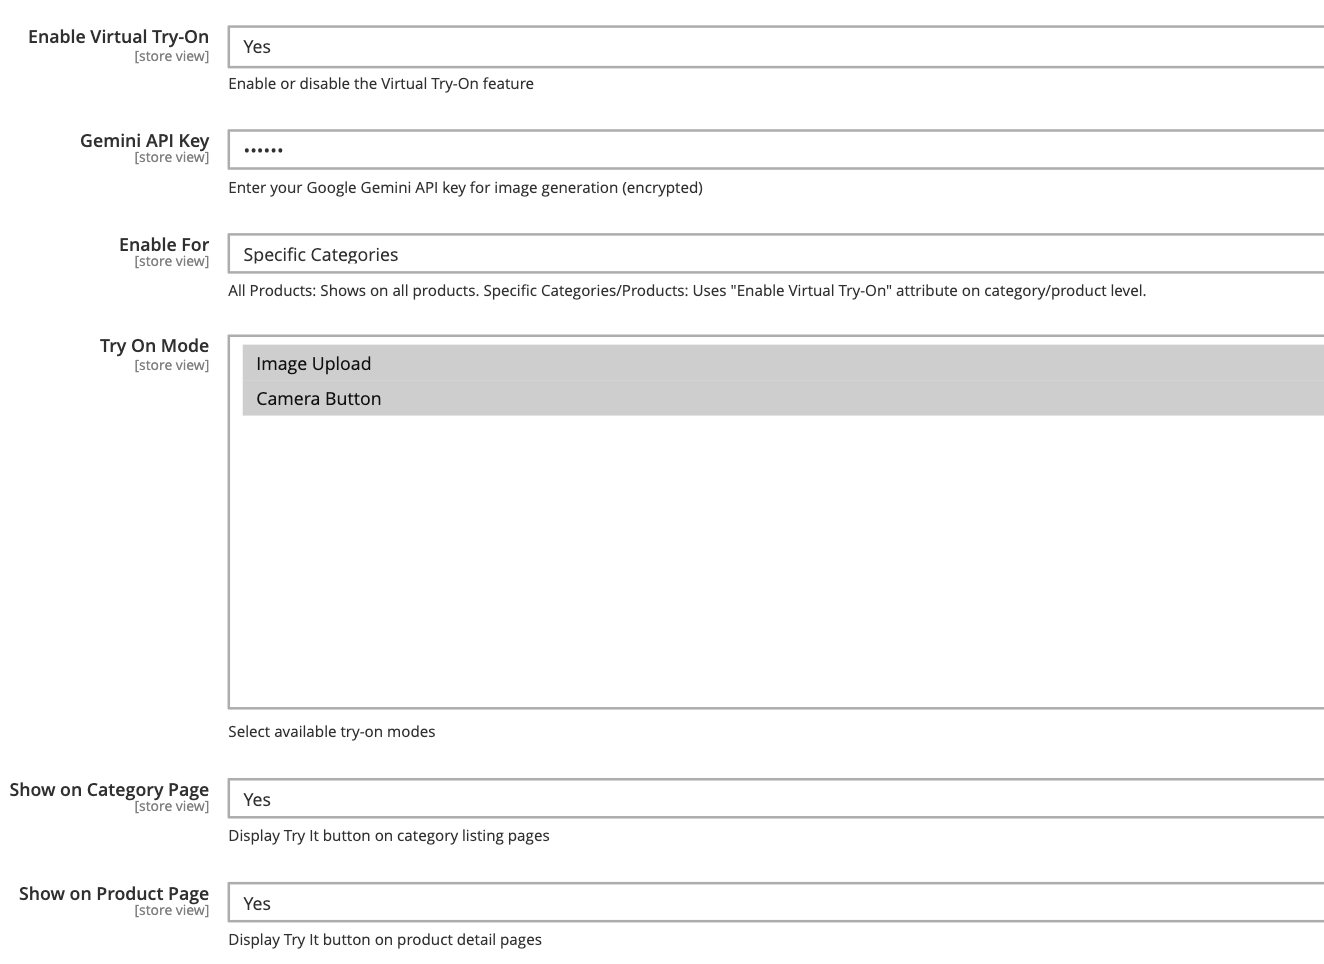
Log in to the Magento 2 admin panel and go to Stores > Configuration > Meetanshi > Virtual Try-On.
| Field | Description |
|---|---|
| Enable Virtual Try-On | Set to Yes to activate the feature on your storefront. |
| Gemini API Key | Paste the Google Gemini API key from the previous section. It is used for encrypted image generation and processing. |
| Enable For | Choose where the feature applies. All Products shows it across the catalog. Specific Categories/Products limits it to items where the try-on attribute is toggled on at the category or product level. |
| Try On Mode | Select the input methods available to shoppers. Image Upload lets users upload a photo from their device. Camera Button lets users take a live photo with their device camera. You can enable one or both. |
| Show on Category Page | Set to Yes to display the "Try It" button on product listing pages. |
| Show on Product Page | Set to Yes to display the "Try It" button on individual product pages. |
Click Save Config after changing these settings.
Configuration: Try On Button Styling
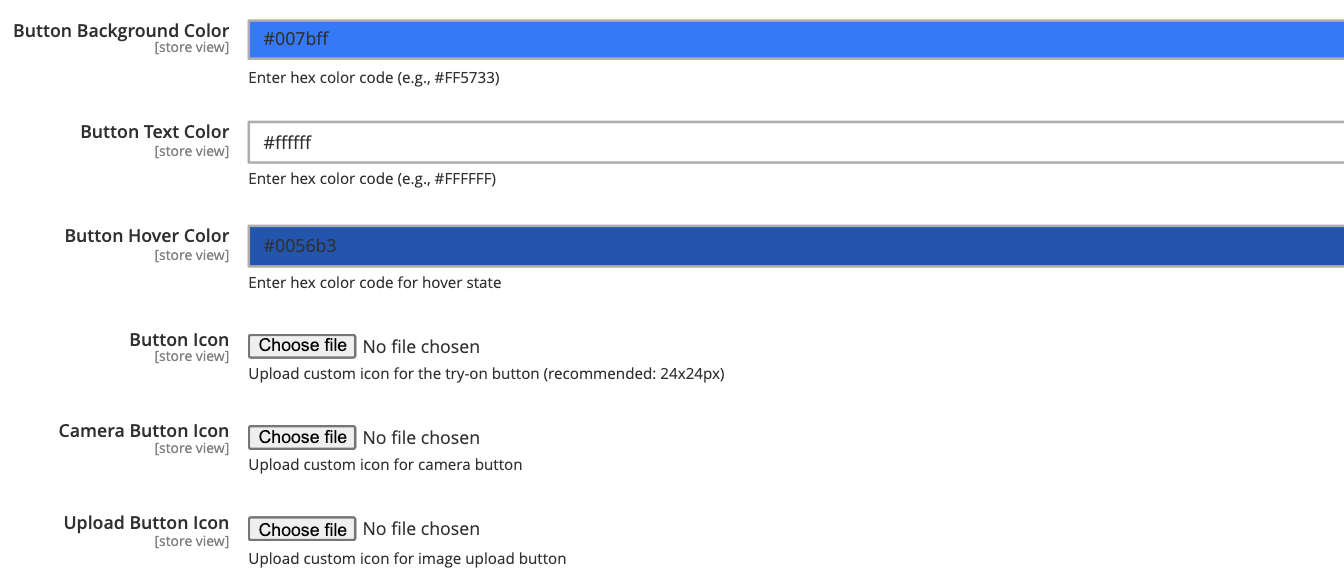
Match the try-on buttons to your brand from the same configuration screen.
| Field | Description |
|---|---|
| Button Background Color | The primary color of the try-on button, set with a hex code. |
| Button Text Color | The color of the text inside the button. |
| Button Hover Color | The background color shown when a shopper hovers over the button. |
| Button Icon | A custom icon for the main "Try On" button. |
| Camera Button Icon | A specific icon for the live camera trigger. |
| Upload Button Icon | A specific icon for the image upload trigger. |
Configuration: Popup Window Styling
When a shopper clicks "Try On," a modal window opens. Use these fields to style it.
| Field | Description |
|---|---|
| Popup Background Color | The main background color of the modal window. |
| Popup Header Background Color | The color of the top bar or header area of the popup. |
| Popup Header Text Color | The color of the title text in the header. |
| Popup Border Color | The hex code for the outer border of the popup. |
| Popup Overlay Color | The color of the dimming effect behind the popup. |
| Close Button Color | The color of the close (X) icon in the corner of the popup. |
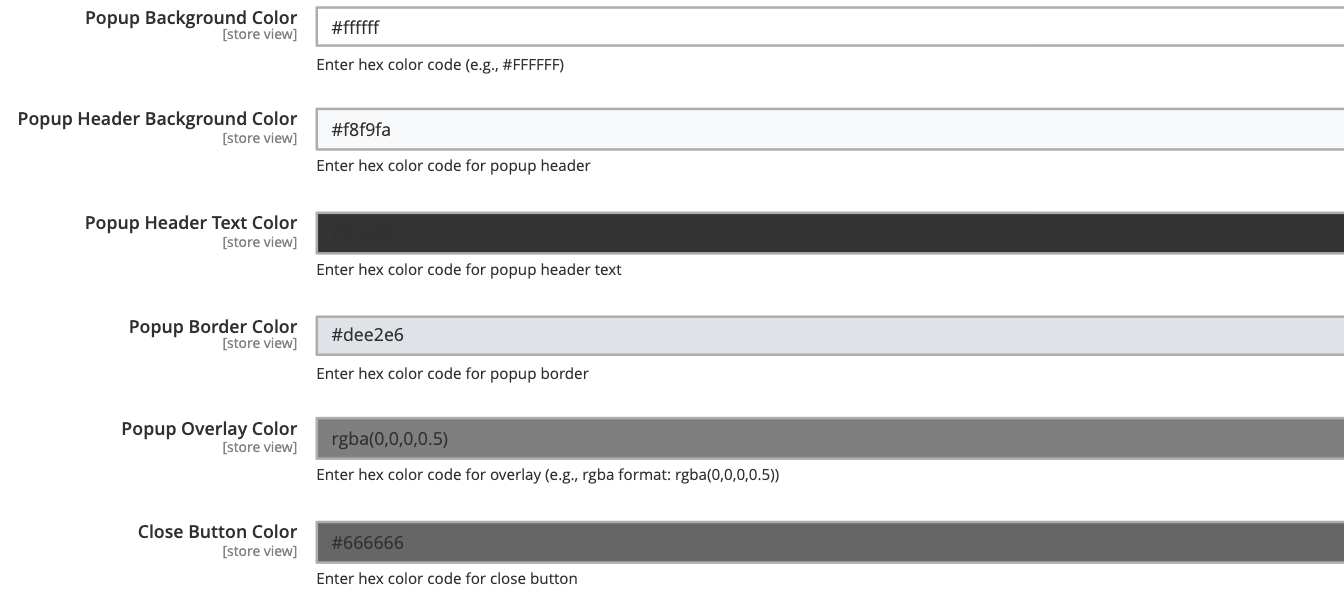
Activate Try-On for Specific Products
Use this when Enable For is set to Specific Categories/Products. If it is set to All Products, you can skip this section.
- Go to Catalog > Products and open the product you want in Edit mode.
- Scroll to the AI Virtual Try-On section.
- Toggle the setting to Yes.
- Click Save at the top of the page.
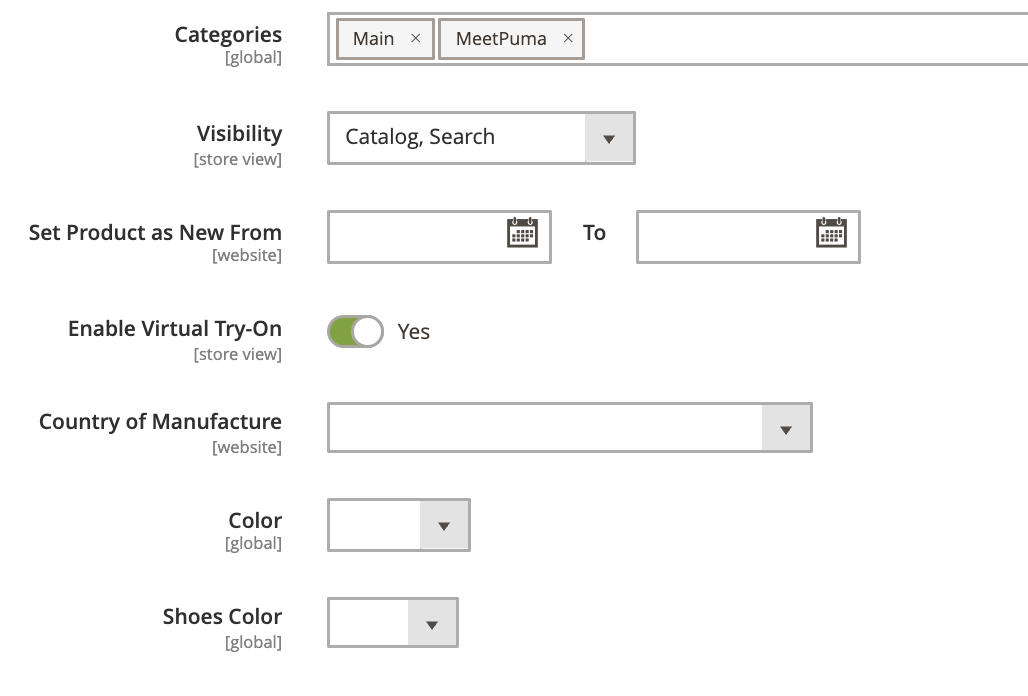
Repeat for each product, or set the attribute at the category level to apply it to a group of products.
Storefront Experience
This is what shoppers see once the feature is enabled.
The Try It button appears on the product page (and on category pages if enabled).
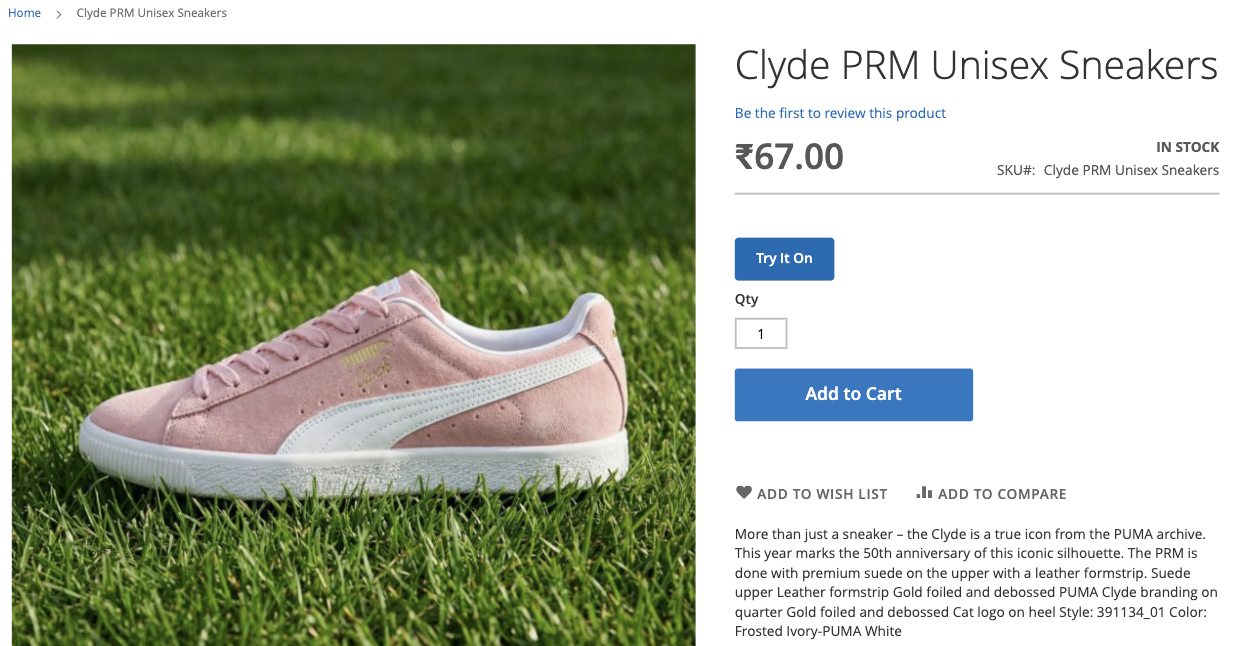
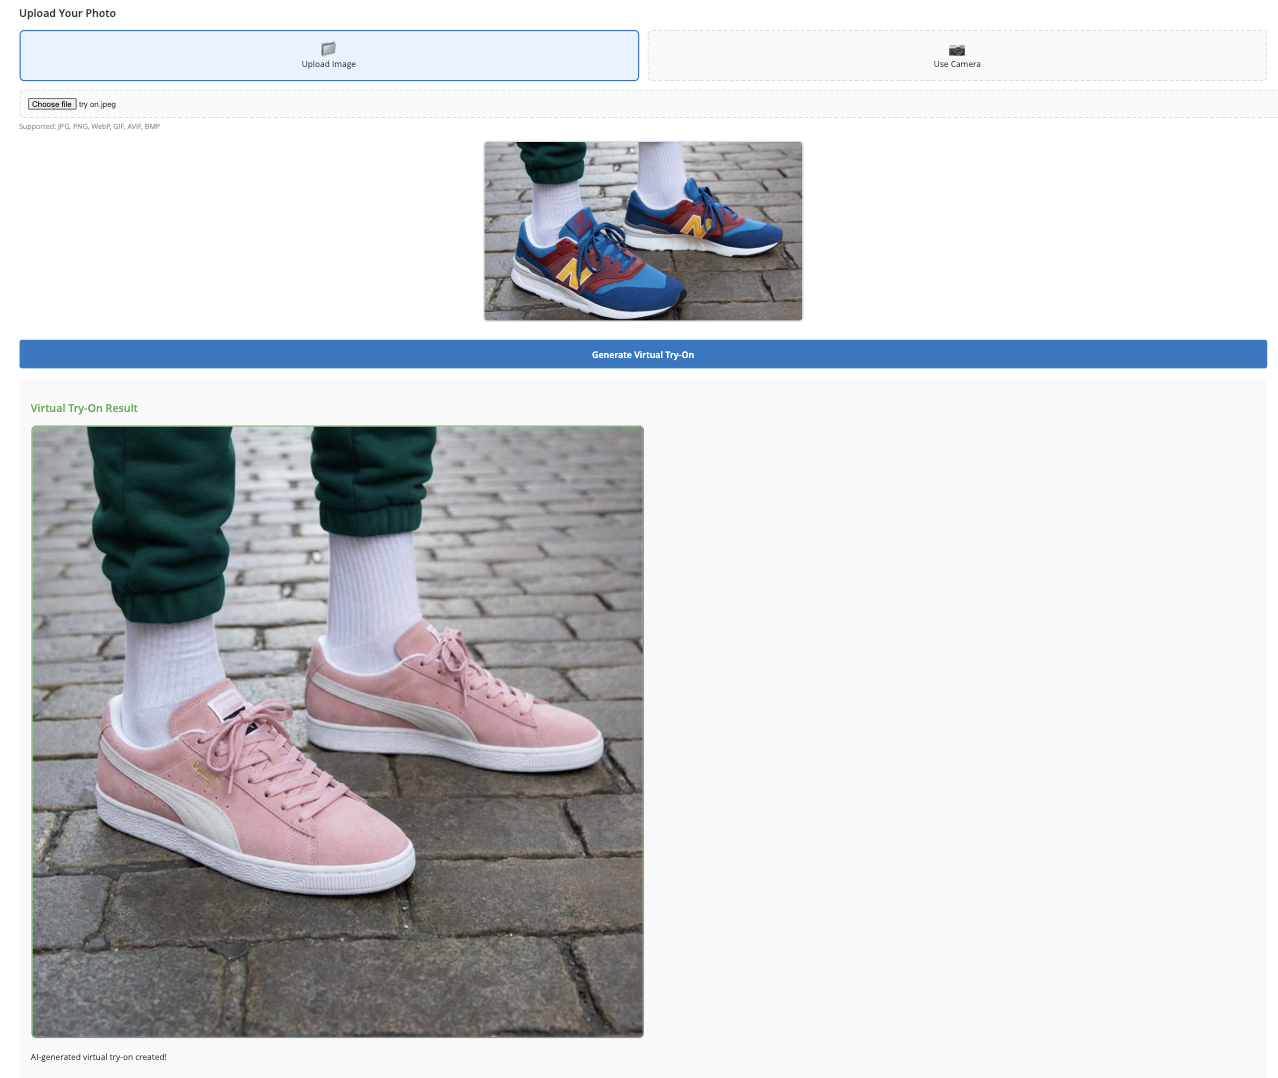
When the shopper clicks it, the popup opens with the options you enabled: Upload Image or Use Camera.
After the shopper uploads or captures a photo, Gemini generates the try-on image and displays the result in the popup.