Agentic Commerce for Magento 2 - User Guide
Make your Magento 2 / Adobe Commerce store discoverable, readable, and transactable by AI shopping agents. The extension implements four open standards - UCP, Generic MCP, WebMCP, and OpenAI ACP - over a unified catalog service, ensuring every agent sees storefront-correct data (price, currency, tax display, stock, and visibility).
Extension Installation
For Magento Marketplace Customers
Find the Composer name and version of the extension in the extension's composer.json file.
Login to your SSH and run:
composer require meetanshi/module-agentic-commerce --ignore-platform-reqs
composer require stripe/stripe-php --ignore-platform-reqs
Enter your authentication keys. Your public key is your username; your private key is your password.
Wait for Composer to finish updating your project dependencies and make sure there aren't any errors.
To verify that the extension installed properly, run the command:
php bin/magento module:status Meetanshi_AgenticCommerce --ignore-platform-reqs
By default, the extension is probably disabled.
Enable the extension and clear static view files:
php bin/magento module:enable Meetanshi_AgenticCommerce --clear-static-content
php bin/magento setup:upgrade
For Magento version 2.0.x to 2.1.x -
php bin/magento setup:static-content:deploy
For Magento version 2.2.x & above -
php bin/magento setup:static-content:deploy -f
php bin/magento cache:flush
For Meetanshi Customers
Login to your SSH and run:
composer require meetanshi/module-agentic-commerce
Wait for Composer to finish updating your project dependencies and make sure there aren't any errors.
Enable the extension and run setup:
bin/magento module:enable Meetanshi_AgenticCommerce
bin/magento setup:upgrade
bin/magento setup:di:compile
bin/magento cache:flush
Extension Configuration
To configure Magento 2 Agentic Commerce extension, log into the Magento 2 admin panel and navigate to Stores > Configuration > Meetanshi > Agentic Commerce.
General
- Enable Agentic Commerce: Master switch. Set to
Yesto enable all agent surfaces globally. When set toNo, all agent endpoints return a404 Not Foundregardless of individual surface settings. - Debug Logging: Set to
Yesto write detailed request/response logs tovar/log/meetanshi_agentic.log. All secrets and tokens are automatically masked in the log output.
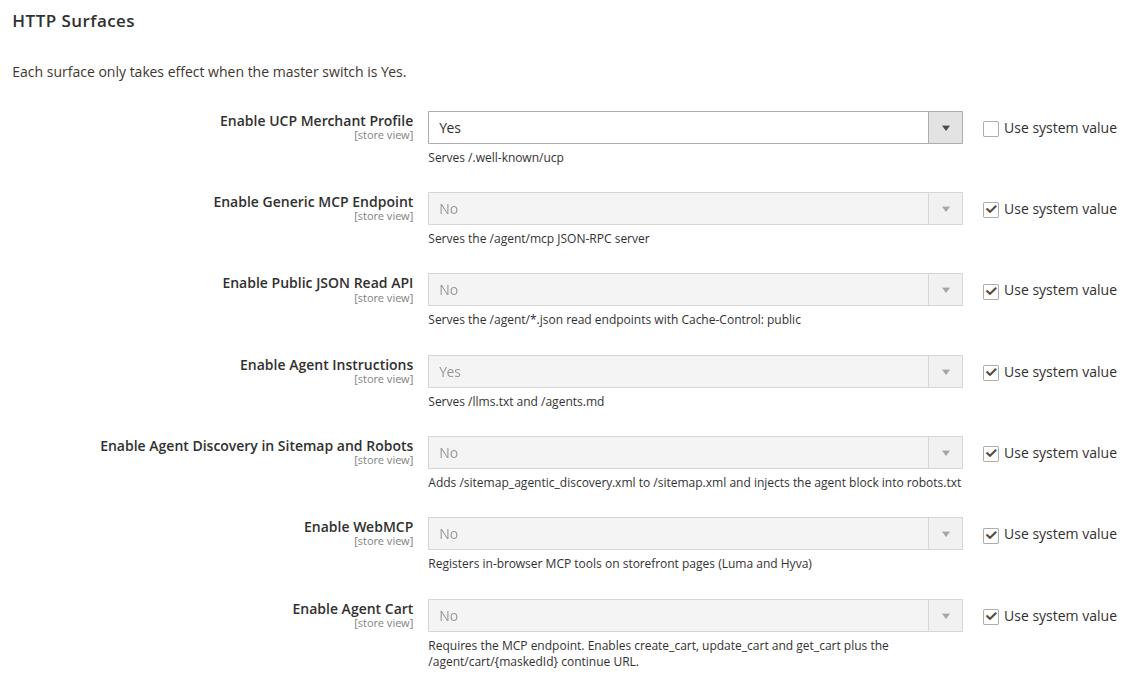
HTTP Surfaces
- Enable UCP Merchant Profile: Set to
Yesto serve the UCP merchant profile at/.well-known/ucp. This allows AI agents to discover your store's capabilities and endpoints automatically. - Enable Generic MCP Endpoint: Set to
Yesto serve the Model Context Protocol JSON-RPC endpoint at/agent/mcp. Chat-based assistants (like Claude Desktop or Claude Code) use this to browse your catalog and build carts. - Enable Public JSON Read API: Set to
Yesto serve catalog read endpoints under/agent/*.json. Provides search, product detail, and category listing in a simple JSON format. - Enable Agent Instructions: Set to
Yesto serve/llms.txtand/agents.mddiscovery documents. These files help AI agents understand your store's category structure, featured products, and policies. - Enable Agent Discovery in Sitemap and Robots: Set to
Yesto inject/sitemap_agentic_discovery.xmlinto your sitemap and add relevant blocks to/robots.txt, making your store discoverable by AI agent crawlers. - Enable WebMCP: Set to
Yesto inject in-browser MCP tools on storefront pages. Supports both Hyvä 1.3+ (vanilla JS) and Luma (RequireJS) themes with automatic detection. - Enable Agent Cart: Set to
Yesto activate MCP cart tools and the/agent/cart/{maskedId}handoff URL. This allows agents to build carts and hand them off to shoppers for checkout.
Agent Cart
- Continue URL Landing Page: Select where the shopper lands when they open the
continue_urlfrom an agent-built cart. Options:- Cart - The shopper is taken to the shopping cart page to review items before proceeding.
- Checkout - The shopper is taken directly to the checkout page to complete their purchase.
- Agent Quote Lifetime (hours): Enter the number of hours an inactive agent-built quote remains valid before being automatically cleaned up. Valid range: 1 to 720 hours. Expired quotes return a 404 when accessed via the
continue_url.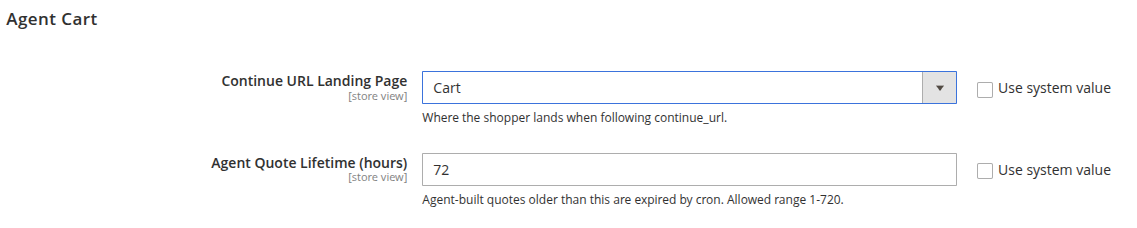
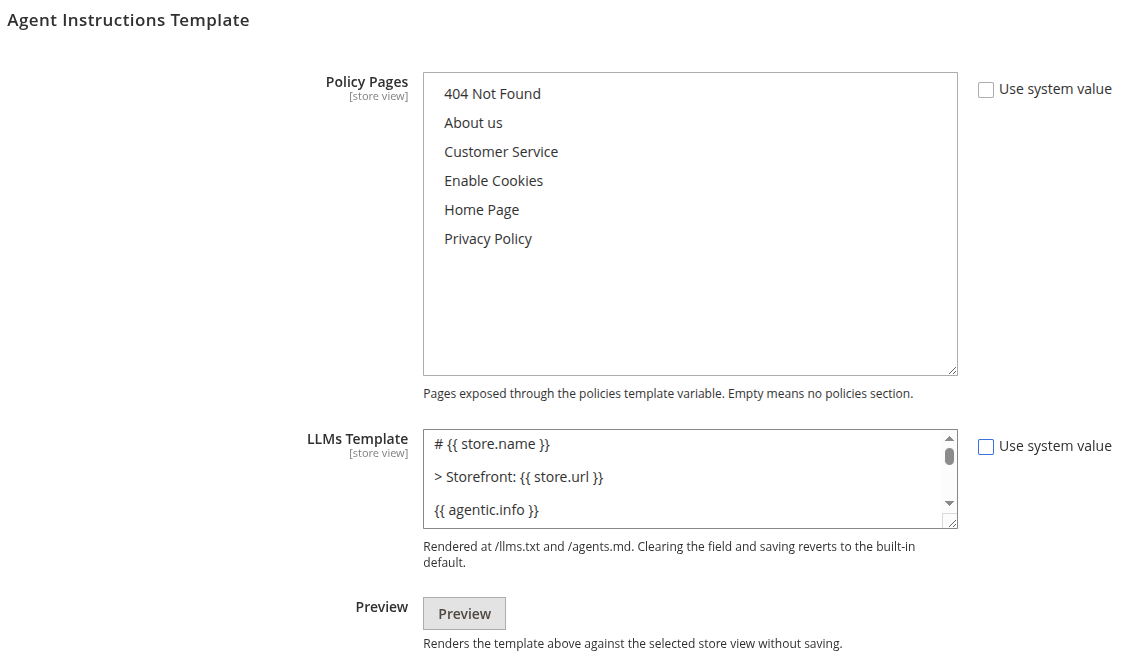
Agent Instructions Template
- Policy Pages: Select the CMS pages to expose as variables inside
/llms.txtand/agents.mdtemplates. These pages typically include return policies, shipping information, and terms of service that agents can relay to shoppers. - LLMs Template: Enter the Markdown text template containing Liquid-style variables. This template defines the content of your
/llms.txtfile and controls what information AI agents see about your store, including category structure, featured products, and policy content.
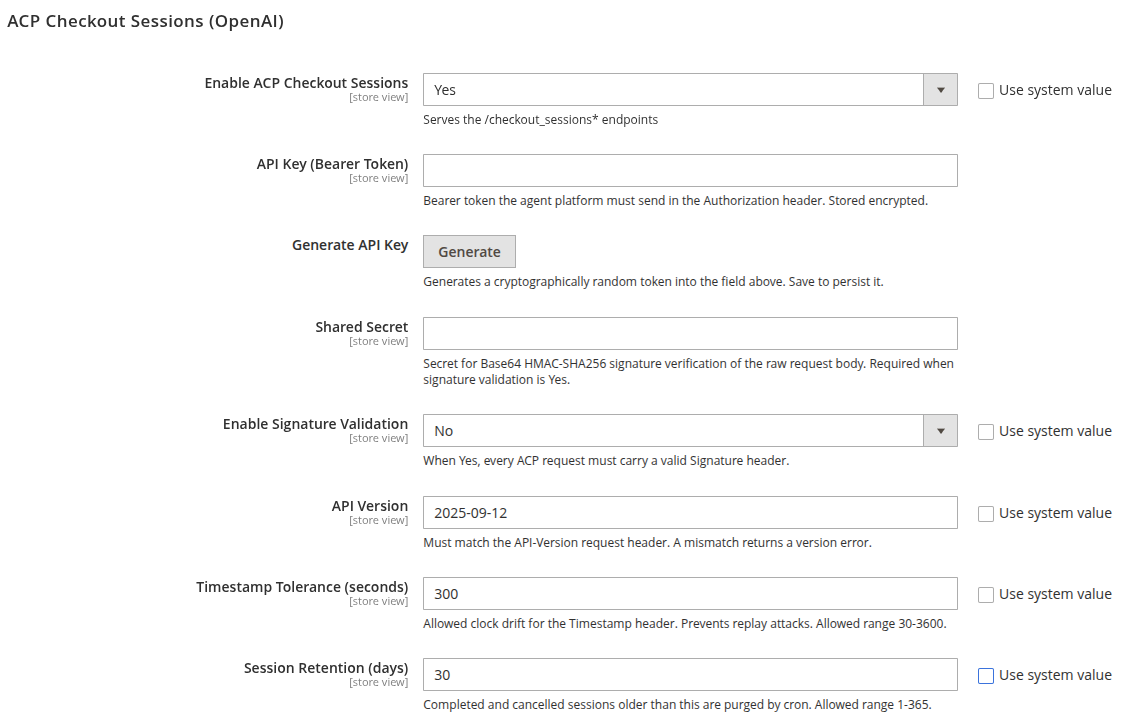
ACP Checkout Sessions (OpenAI)
- Enable ACP Checkout Sessions: Set to
Yesto serve checkout session endpoints at/checkout_sessions*. Required for OpenAI ACP integration. - API Key (Bearer Token): Enter the authorization secret that the agent platform must send in the
Authorization: Bearerheader. This value is stored encrypted and never logged in the clear. - Shared Secret: Enter the shared secret used for HMAC-SHA256 request signature validation. Both your store and the agent platform must use the same secret. Stored encrypted.
- Enable Signature Validation: Set to
Yesto require the agent platform to send a validSignatureheader on every ACP request. The signature is computed asBase64(HMAC-SHA256(raw request body, shared secret)). - API Version: Enter the API version validation string. Requests with a mismatched
API-Versionheader are rejected. - Timestamp Tolerance (seconds): Set the maximum allowed clock drift between the client and server in seconds (valid range: 30 to 3600). Requests with a
Timestampheader beyond this tolerance are rejected to block replay attacks. - Session Retention (days): Enter the number of days to retain completed and cancelled ACP sessions before they are purged by the cleanup cron job.
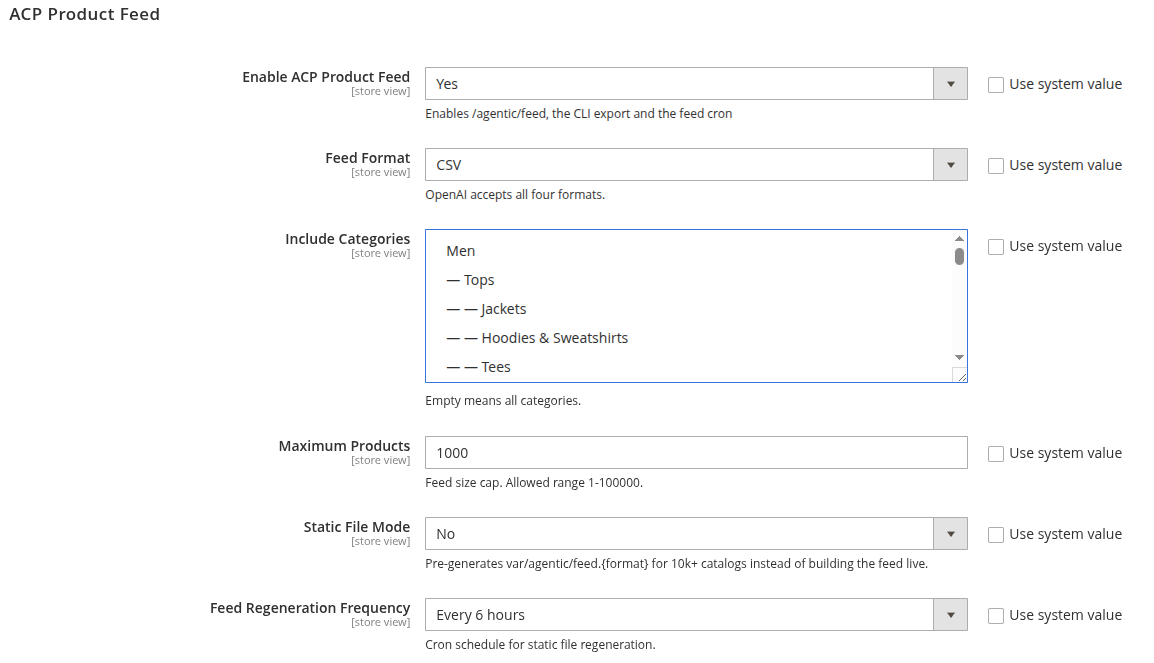
ACP Product Feed
- Enable ACP Product Feed: Set to
Yesto enable the product feed at/agentic/feed. Agent platforms (like OpenAI/ChatGPT) ingest this feed to index your catalog. - Feed Format: Select the export format for the product feed. Options:
csv,tsv,json, orxml. - Include Categories: Optionally restrict the feed to specific categories. If left empty, all visible products are included.
- Maximum Products: Set a cap on the number of products exported in the feed (valid range: 1 to 100,000).
- Static File Mode: Set to
Yesto generate static feed files invar/agentic/via cron rather than calculating feeds on demand. Recommended for catalogs with more than 10,000 products to avoid performance impact on live requests. - Feed Regeneration Frequency: Set the cron schedule for static feed file generation. Only applicable when Static File Mode is enabled.
Webhooks
- Enable Webhooks: Set to
Yesto fireorder.createdandorder.updatedwebhook events. Webhooks are triggered only for agent-originated orders (ACP orders and continue_url orders). - Endpoint URL: Enter the secure HTTPS URL where webhook payloads will be delivered. The configuration rejects
http://URLs - only HTTPS is allowed. - Signing Secret: Enter the HMAC SHA-256 signing secret used to sign outgoing webhook payloads. The signature is attached as the
X-Agentic-Signatureheader. Stored encrypted.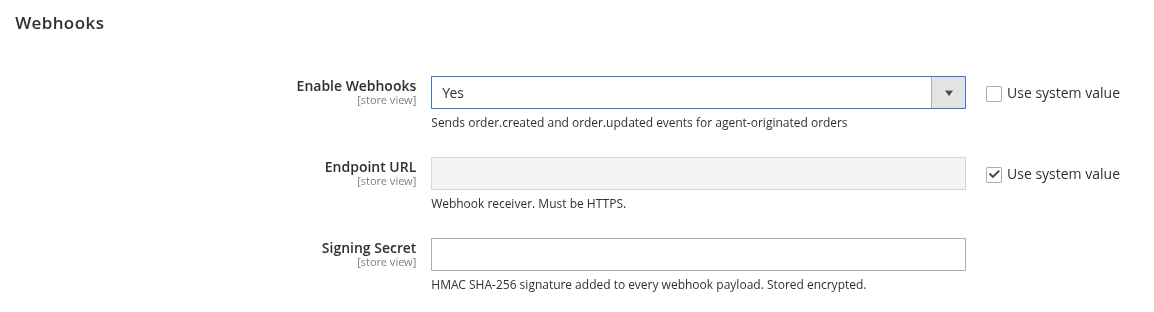
Delegated Payments (Stripe)
- Enable Stripe Delegated Payment: Set to
Yesto allow ACP checkout sessions to charge customers via Stripe's delegated payment flow. - Stripe Secret Key: Enter your Stripe secret key (
sk_live_...for production orsk_test_...for testing). This value is stored encrypted and never exposed in logs. - Stripe Test Mode: Set to
Yesto force all transactions through Stripe's test endpoint. Use this during development and integration testing.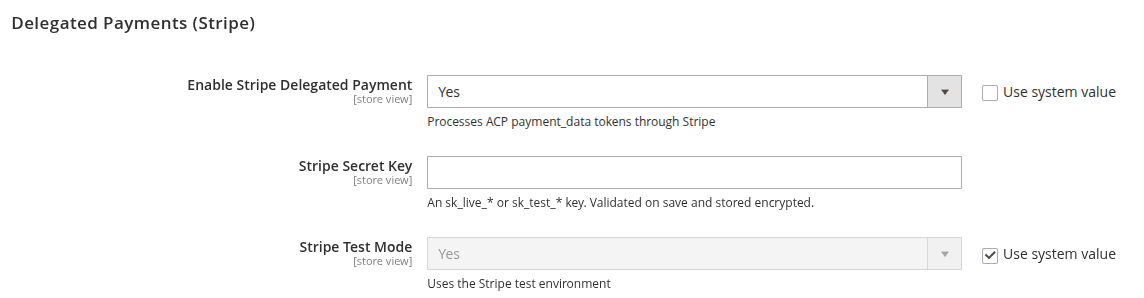
Agent Activity (Telemetry)
- Record Agent Activity: Set to
Yesto record agent queries, search terms, cart creations, and order attributions. This data powers the Agent Activity dashboard under Sales. - Retain Activity For (days): Enter the number of days to retain telemetry records before they are automatically pruned by the daily cleanup cron job.

Product Attributes for Agents
The extension adds three store-view-scoped product attributes under the Agentic Commerce attribute group. These are available when editing any product in the admin catalog (Catalog > Products > Edit).
- Include in Agent Instructions: Set to
Yesto include this product in theproducts.featuredarray inside/llms.txtand/agents.mdtemplates. A maximum of 50 products can be featured. Use this to highlight key products that agents should proactively recommend. - Enable in Agent Search: Set to
Yes(default) to allow this product to appear in agent search results, category lookups, and direct endpoint views. Set toNoto hide the product from all agent surfaces while keeping it visible to regular shoppers. - Enable Agentic Checkout: Set to
Yes(default) to allow agents to add this product to carts and ACP checkout sessions. Set toNoto prevent agent-initiated purchases of this product while still allowing it to appear in search results and collections.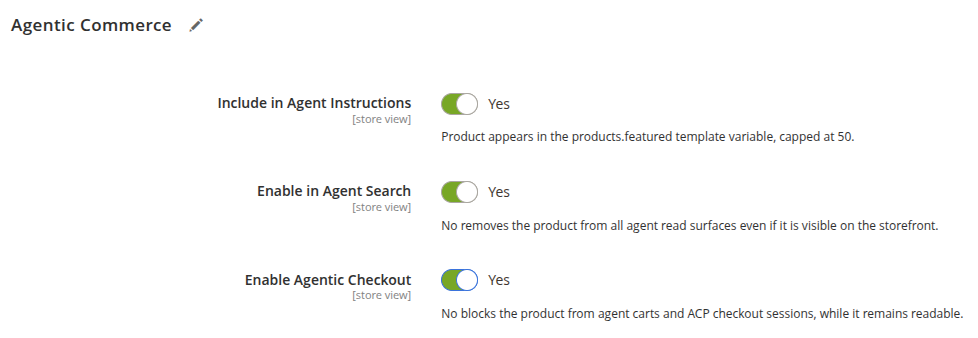
Managing Agent Activity
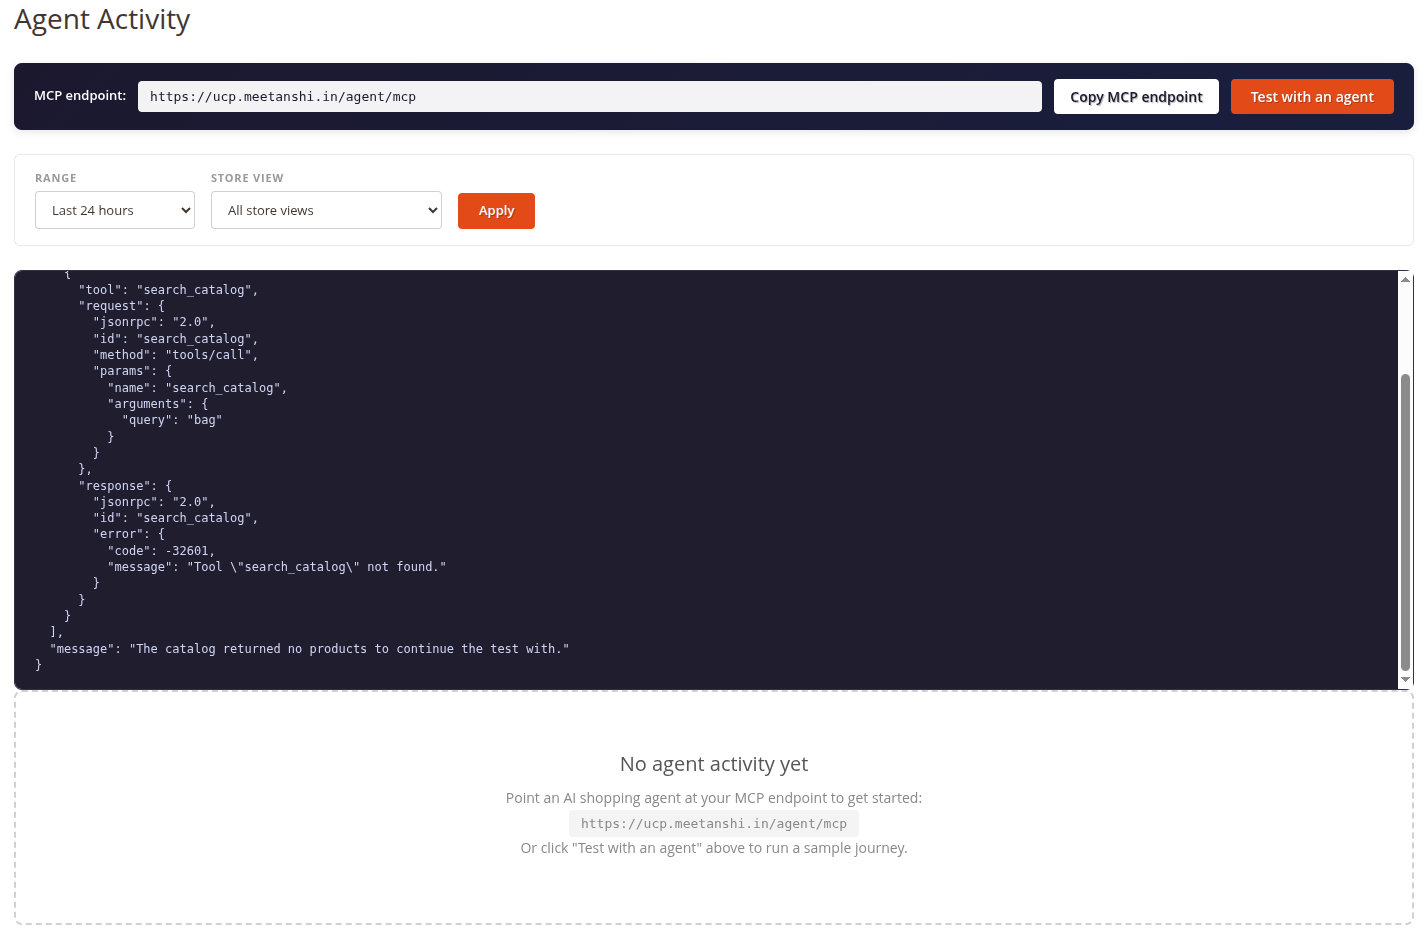
Navigate to Sales > Agentic Commerce > Agent Activity to monitor how AI agents interact with your store.
Agent Activity Dashboard
The Agent Activity dashboard provides a real-time overview of agent interactions with your store, including:
- MCP Endpoint URL: Copy the MCP endpoint URL to configure in your agent platform (e.g., Claude Desktop). The endpoint is your store's base URL +
/agent/mcp. - Funnel Visualization: See the progression from agent queries → product views → cart creations → completed orders.
- Top Queries: View the most frequently searched terms by agents, with unmet-demand highlighting for queries that returned zero results. Use this to identify catalog gaps or search optimization opportunities.
- Attributed Revenue: Track the total revenue generated through agent-originated orders.
- Surface Breakdown: See which agent surfaces (MCP, ACP, JSON API, WebMCP, UCP) are receiving the most traffic.
Test With an Agent
Click the Test with an agent button to run a built-in test that simulates a deterministic agent session:
- Performs a
search_catalogquery - Fetches a
get_productdetail - Creates a cart with
create_cart
The test results are displayed immediately and are excluded from your metrics. Use this to verify your MCP endpoint is working correctly before connecting a real agent.
Managing Webhooks
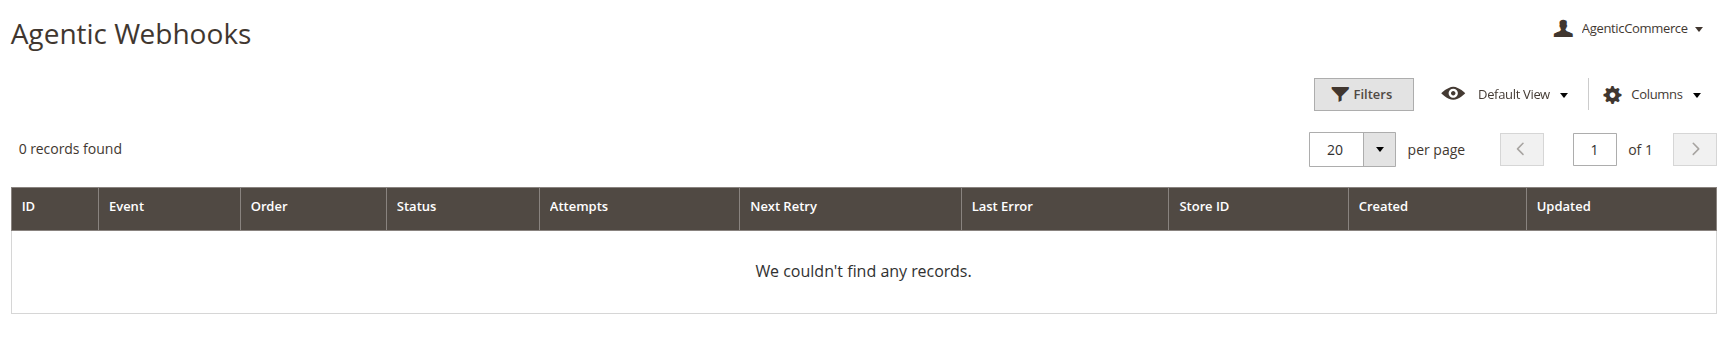
Navigate to Sales > Agentic Commerce > Agentic Webhooks to view and manage outbound webhook deliveries.
Webhook Queue Grid
The webhook grid displays the following columns:
- ID: The unique webhook queue entry identifier.
- Event Type: The event that triggered the webhook (
order.createdororder.updated). - Order ID: The Magento order entity ID (linked to order view).
- Order Increment ID: The order increment identifier displayed in admin grids.
- Store: The store view in which the order was placed.
- Status: The current delivery status:
- Pending - Awaiting delivery or retry.
- Sent - Successfully delivered.
- Failed - All 5 delivery attempts exhausted.
- Attempts: Number of delivery attempts made (capped at 5).
- Last Error: The masked error message from the most recent failed delivery attempt.
- Next Retry At: The scheduled timestamp for the next delivery retry (uses exponential backoff).
- Created At: When the webhook event was first enqueued.