CBK T-Pay for Magento 2 - User Guide
Extension Installation
For Magento Marketplace Customers
- Find the Composer name and version of the extension in the extension’s
composer.jsonfile. - Log in to your server via SSH and run:
composer require meetanshi/magento2-cbk-payments
Enter your authentication keys:
https://devdocs.magento.com/guides/v2.3/install-gde/prereq/connect-auth.html- Public key → Username
- Private key → Password
Wait for Composer to finish updating the project dependencies and ensure there are no errors.
Verify that the extension is installed properly:
php bin/magento module:status Meetanshi_Cbk
By default, the extension may be disabled. Enable it using:
php bin/magento module:enable Meetanshi_Cbk --clear-static-content
- Run the setup upgrade:
php bin/magento setup:upgrade
Deploy static content:
- Magento 2.0.x – 2.1.x
php bin/magento setup:static-content:deploy - Magento 2.2.x & above
php bin/magento setup:static-content:deploy -f
- Magento 2.0.x – 2.1.x
Flush the cache:
php bin/magento cache:flush
For Meetanshi Customers
- Extract the zip folder and upload our extension to the root of your Magento 2 directory via FTP.
- Login to your SSH and run below commands step by step:
php bin/magento setup:upgrade
For Magento version 2.0.x to 2.1.x -
php bin/magento setup:static-content:deploy
For Magento version 2.2.x & above -
php bin/magento setup:static-content:deploy --f
php bin/magento cache:flush
Configuration
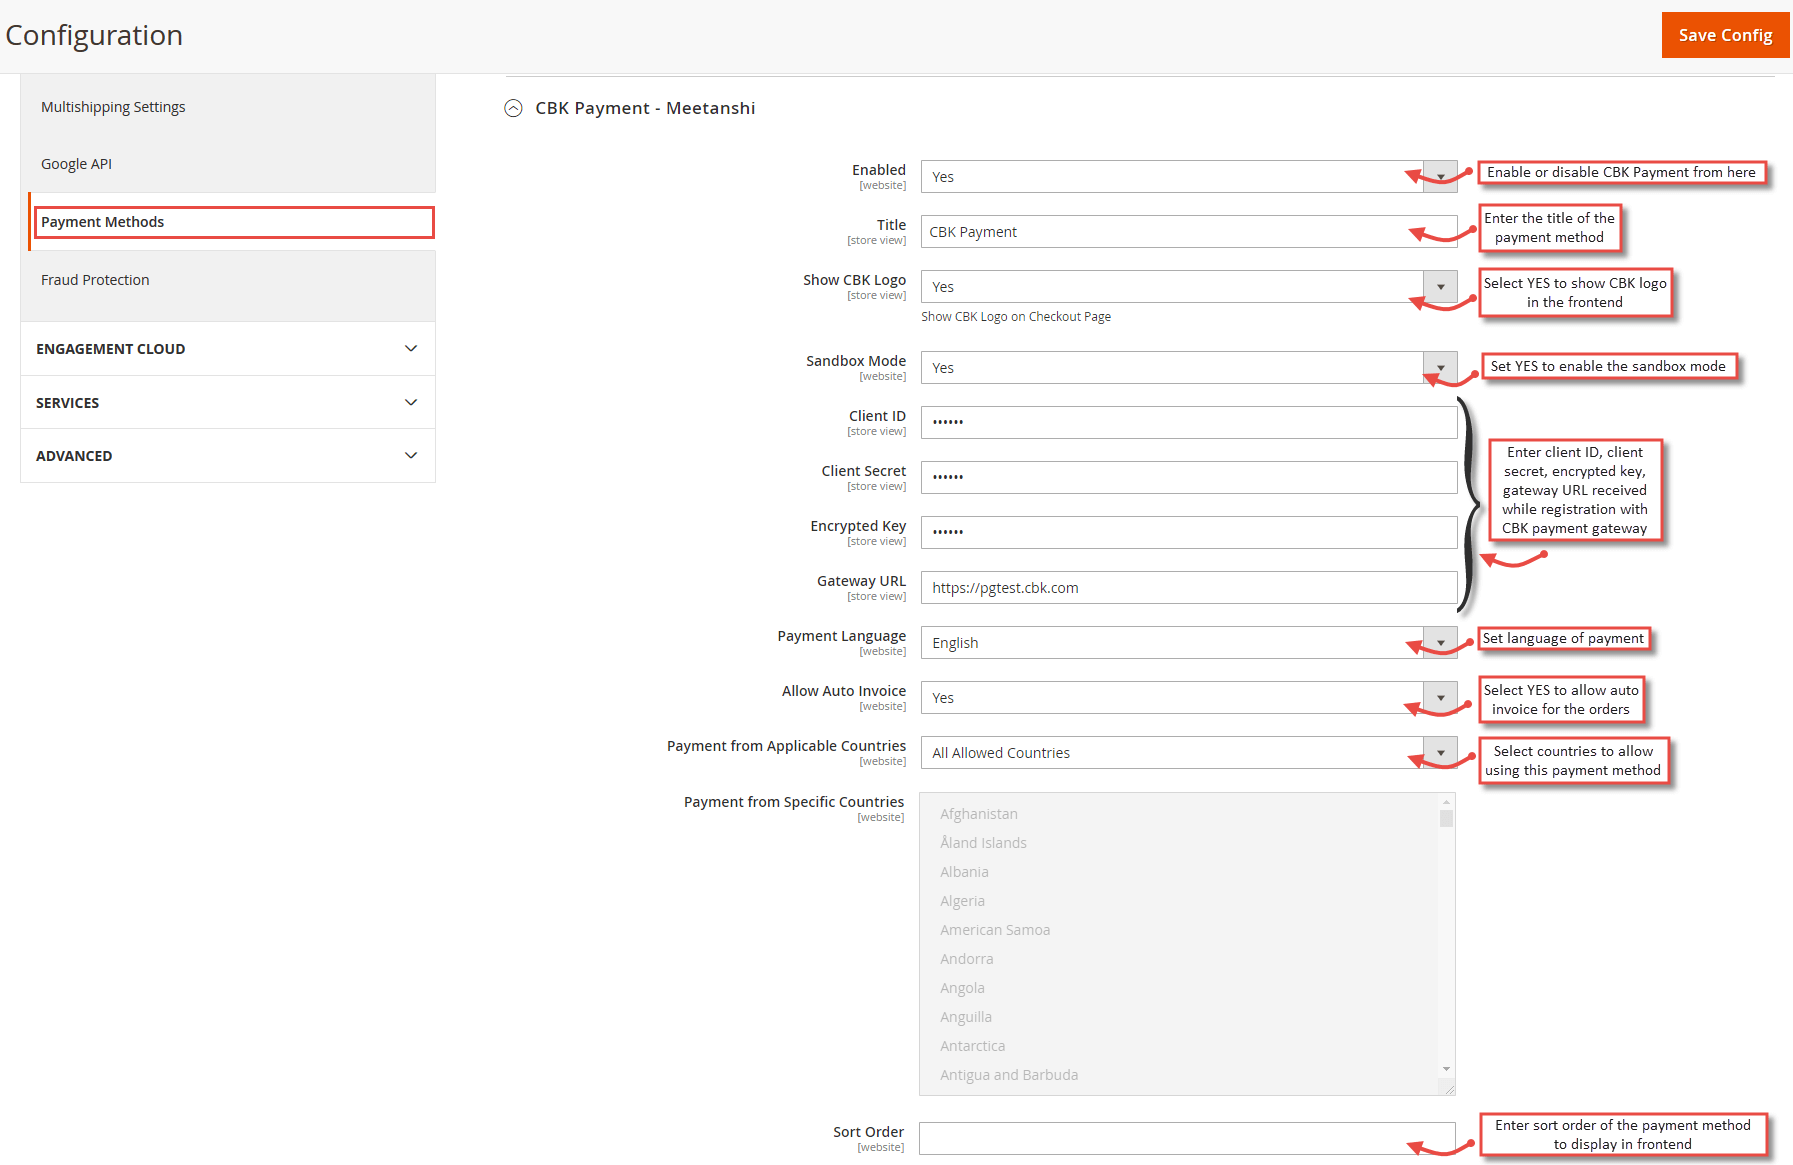
For configuring the CBK T-Pay for Magento 2 extension, login to Magento 2, move to Sales > Payments Methods > CBK Payment -- Meetanshi where you can find various settings to enable the extension.
Enabled: Set "YES" to enable the payment method.
Title: Set the title for the payment method to be displayed in the frontend.
Show CBK Logo: Select YES to show CBK logo on the checkout page in the frontend.
Sandbox Mode: Select YES to enable the sandbox mode for testing purpose.
Client ID: Enter the client ID provided by CBK gateway during registration.
Client Secret: Enter the client secret provided by CBK gateway during registration.
Encrypted Key: Enter the encrypted key provided by CBK gateway during registration
Gateway URL: Enter the gateway URL provided by CBK gateway during registration.
Payment Language: Set language of the payment.
Allow Auto Invoice: Select YES to allow generating auto invoice for the orders paid using CBK payment.
Payment From Applicable Countries: Select countries to allow using this payment method.
Sort Order: Enter Sort Order of the payment method display in frontend.
CBK Payment Method in Frontend
Once the extension is configured, customers add the products to cart and select CBK Payment option from the checkout page.
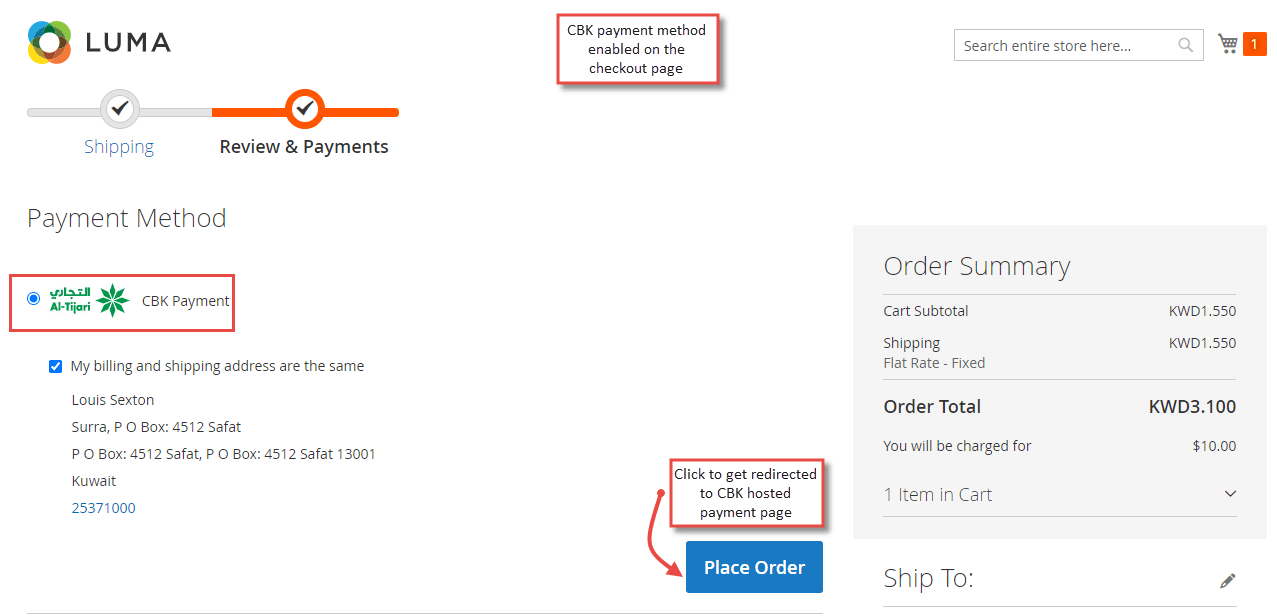
- Redirection to Hosted Payment Page
On click of "Place Order" button from the checkout page, customers get redirected to the CBK hosted payment page. Using CBK payment, customers are allowed to pay either using KNET or using CBK T-Pay QR code payment method. Customers has to select one of the payment options to continue payment for the order.

CBK KNET Payment Method Selection
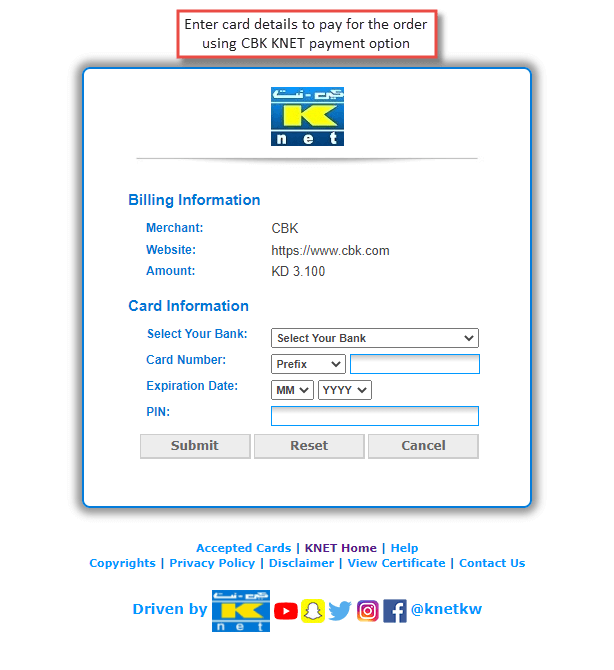
On selection of KNET payment method option from the hosted payment page, customers are redirected to KNET hosted payment page to add the card details and complete the payment.
- Add Card Details Customers are required to enter card details on KNET hosted payment page to proceed the payment.
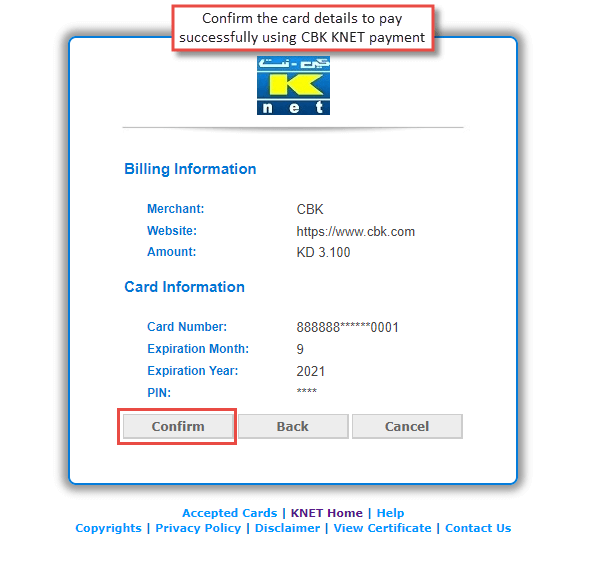
- Confirm Card Details
Once customers enter the card details, they are required to confirm before proceeding to the payment.
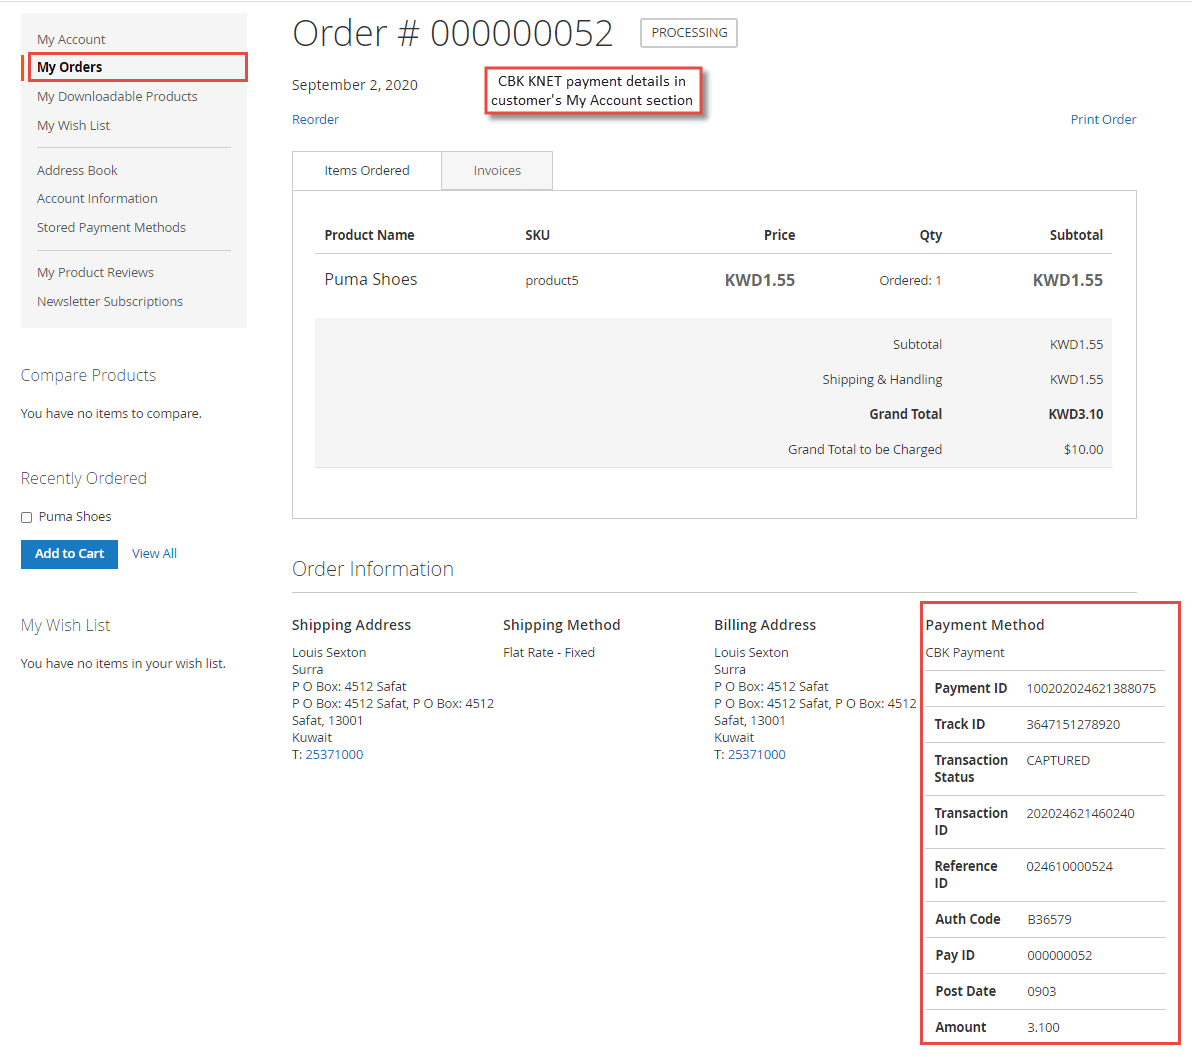
- KNET Payment Details in Customer's My Account Section
Once the payment is successful and order is placed, customers can see KNET payment details in their My Account section which includes payment ID, track ID, transaction status, transaction ID, reference ID, auth code, pay ID, post date and amount.
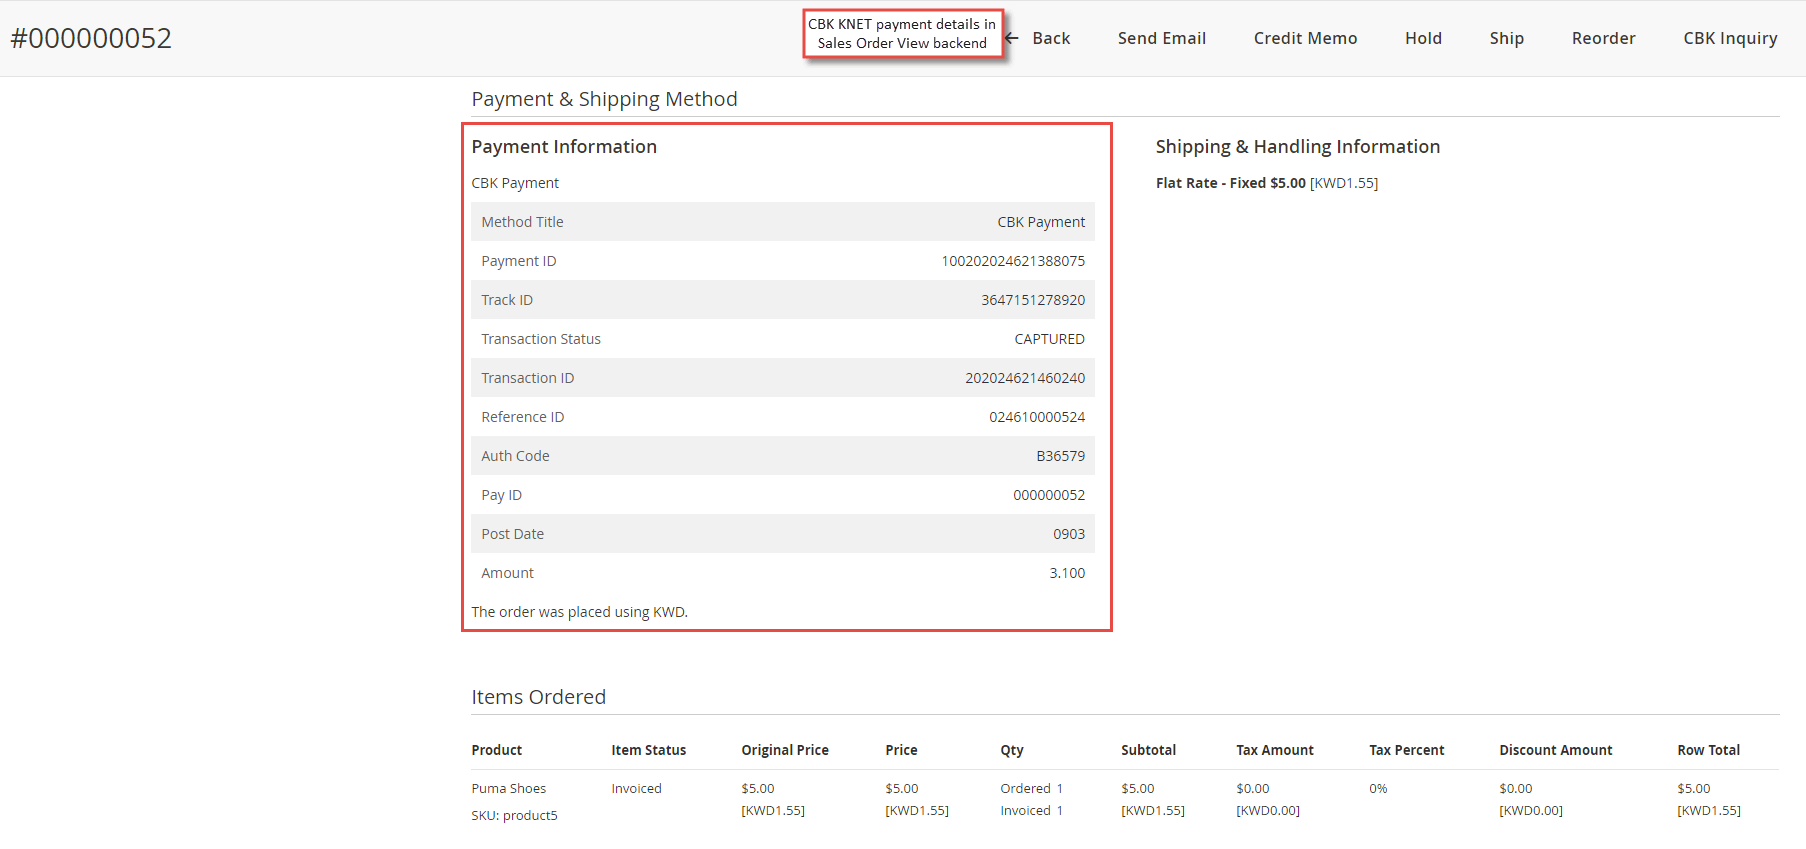
- KNET Payment Details in Sales Order View Backend
Apart from the customers, the admin can also see KNET payment details in Sales > Orders > Order View in the backend. The KNET payment details include method title, payment ID, track ID, transaction status, transaction ID, reference ID, auth code, pay ID, post date and amount
CBK T-Pay Method Selection
On selection of CBK T-Pay method option from the hosted payment page, customers are redirected to CBK T-pay service page to scan the QR code using CBK mobile app and complete the payment.
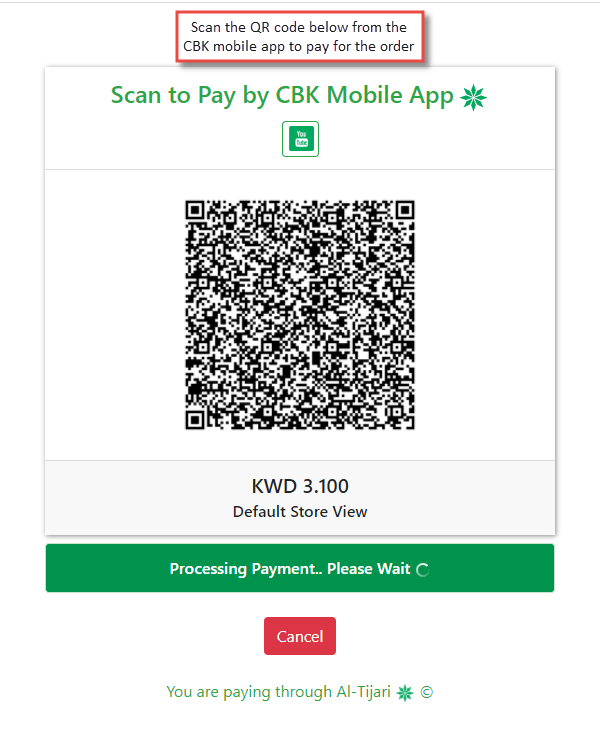
- Scan QR Code to Pay
On CBK T-pay service page, customers are asked to scan the QR code using CBK mobile app . Once they scan the code and complete the payment from the mobile app, the order gets paid successfully.
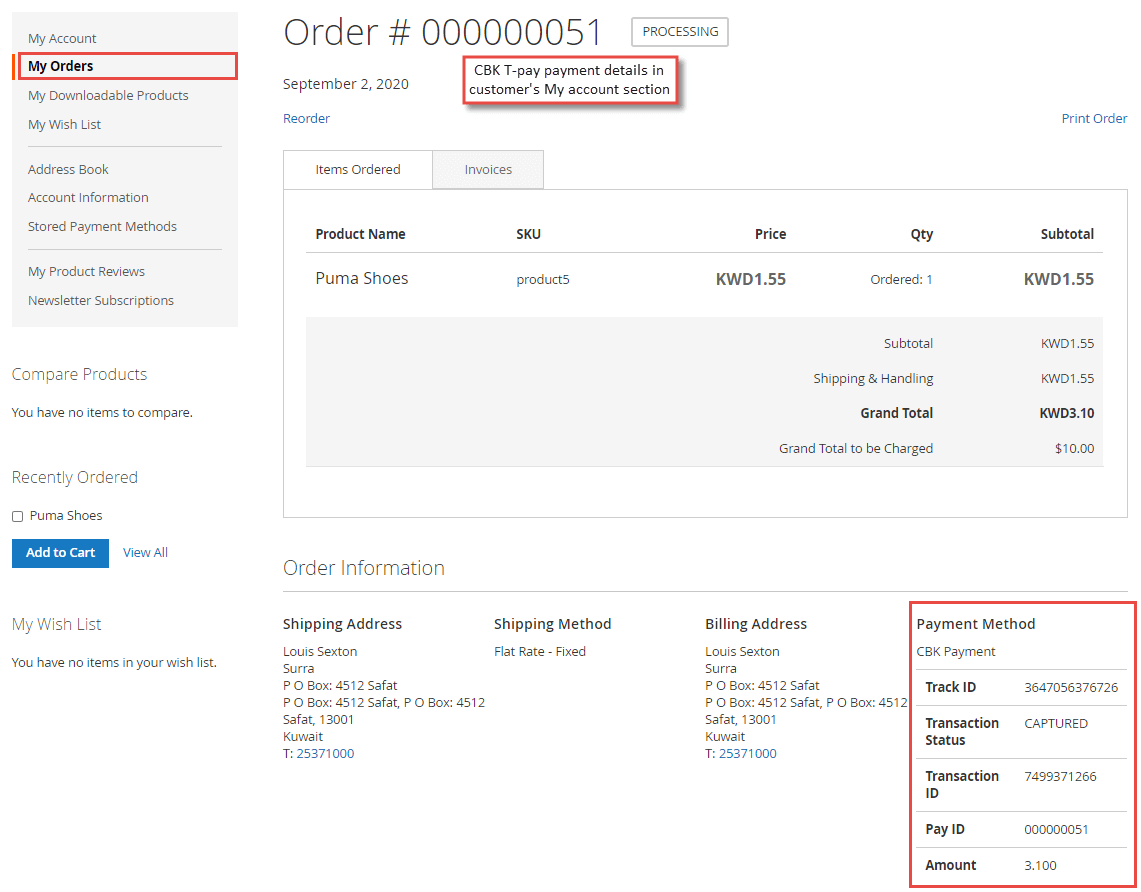
- CBK T-Pay in "My Account" section
Once the payment is successful, the payment method details are shown in the Account dashboard, in " My Orders " tab which includes track ID, transaction status, transaction ID, pay ID and amount.
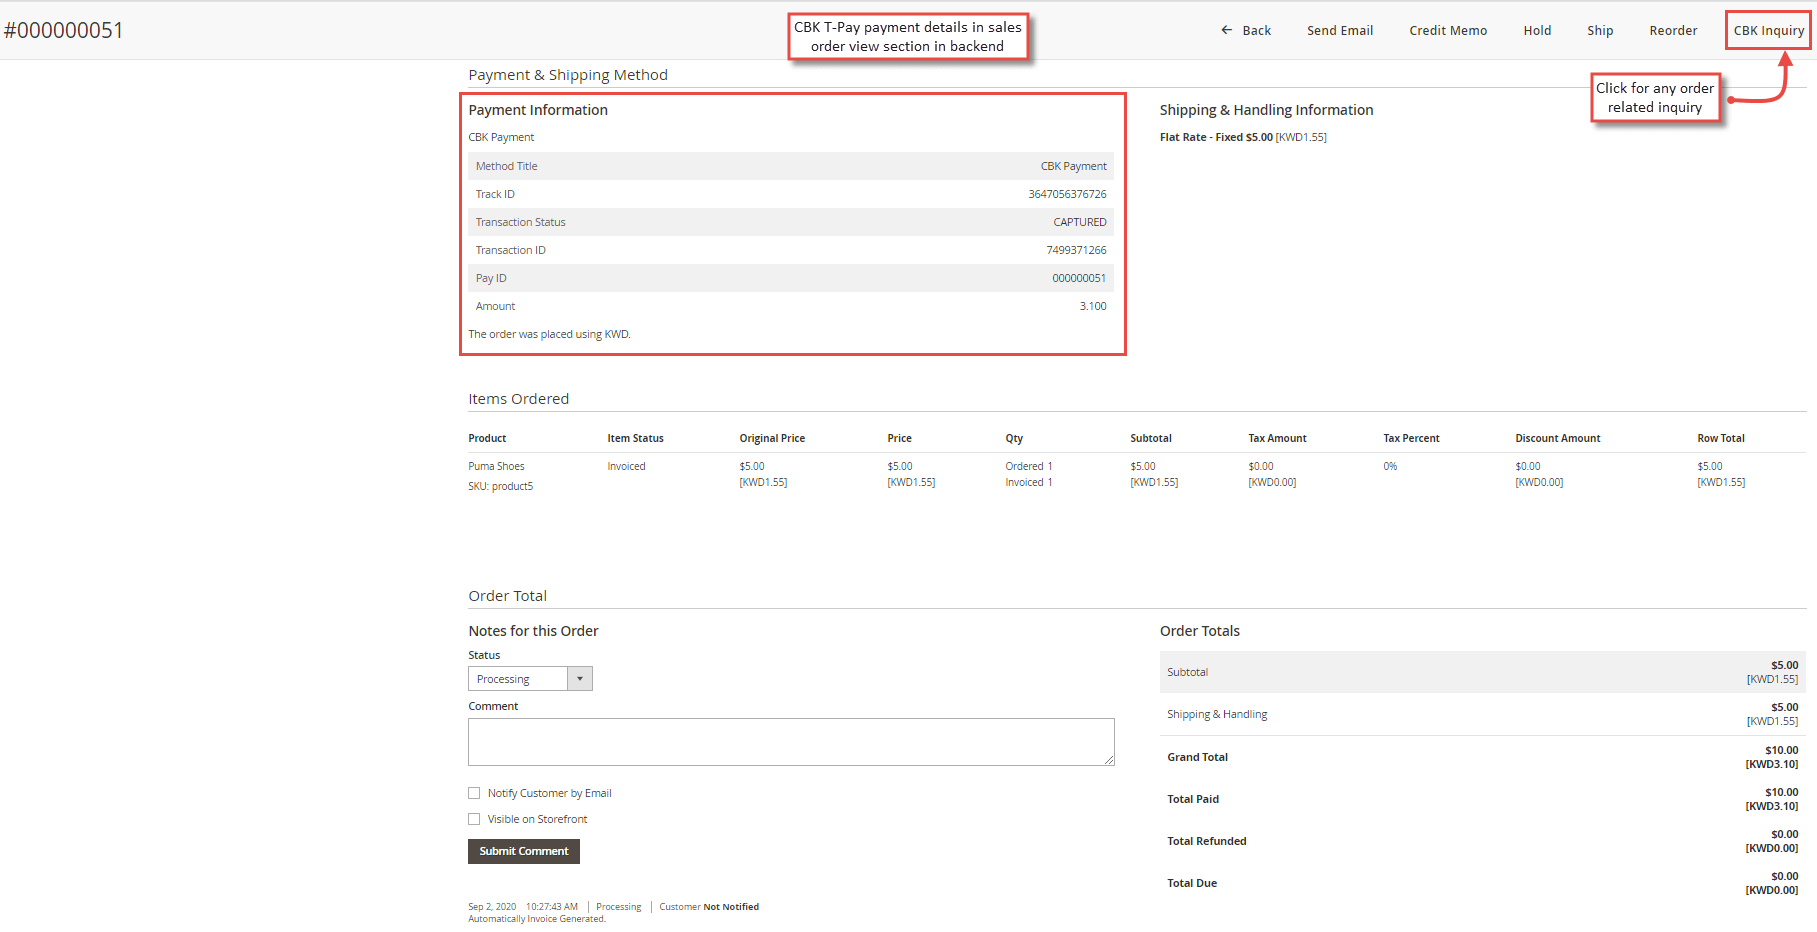
- CBK T-Pay Payment Details in Sales Order View Backend
Apart from the frontend, the admin can see CBK T-pay payment details in sales order view section from the backend. It displays the payment method name, method title, track ID, transaction status, transaction ID, pay ID and amount.