Magento 2 Order by SKU - User Guide
Extension Installation
For Magento Marketplace Customers
- Find the Composer package name and version in the extension's
composer.jsonfile. - Log in to your server via SSH, navigate to your Magento 2 root directory, and run:
composer require meetanshi/magento-2-order-by-sku
- Enter your Magento Marketplace authentication keys. Use your public key as the username and your private key as the password.
- Wait for Composer to complete the installation and ensure no errors occur.
- Verify the extension's installation status by running:
php bin/magento module:status Meetanshi_QuickOrder
- If the extension is disabled, enable it and run the Magento upgrade command:
php bin/magento module:enable Meetanshi_QuickOrder --clear-static-content
php bin/magento setup:upgrade
- Deploy static content and clear the cache:
php bin/magento setup:static-content:deploy -f
php bin/magento cache:flush
For Meetanshi Customers
- Extract the downloaded ZIP file and upload the extension files to the root directory of your Magento 2 installation via FTP or SFTP.
- Log in to your server via SSH, navigate to your Magento 2 root directory, and run the following commands step by step:
php bin/magento setup:upgrade
php bin/magento setup:static-content:deploy -f
php bin/magento cache:flush
- Verify that the extension is enabled and working correctly:
php bin/magento module:status Meetanshi_QuickOrder
Configuration
To configure the Order by SKU (Quick Order) extension, log in to the Magento 2 admin panel and go to: Stores > Configuration > Meetanshi > Quick Order.
General Settings
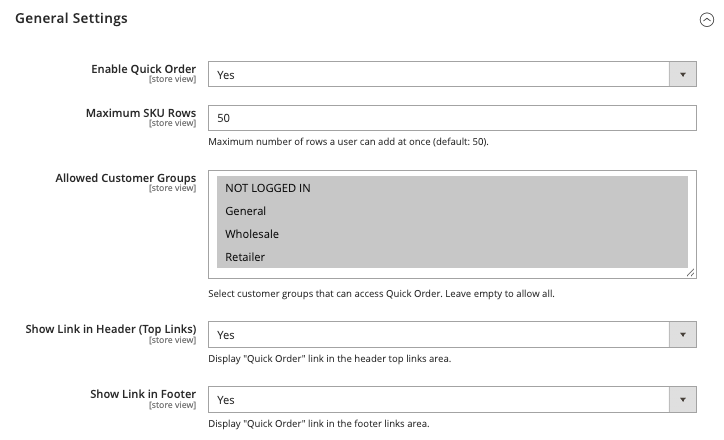
- Enable Quick Order: Select Yes to activate the Quick Order feature so customers can start ordering products using their SKUs, or No to disable it.
- Maximum SKU Rows: Enter a whole number greater than zero (for example, 50). This caps how many products a customer can enter in a single session. If left blank or invalid, the extension falls back to a default of 50.
- Allowed Customer Groups: Select one or more customer groups (for example, Wholesale, Retailer) that should be able to use Quick Order. Leave the field empty to allow all customer groups access.
- Show Link in Header (Top Links): Select Yes to display the Quick Order link in the header so customers can reach it easily from any page, or No to hide it.
- Show Link in Footer: Select Yes to display the Quick Order link in the footer, or No to hide it.
Request for Quote
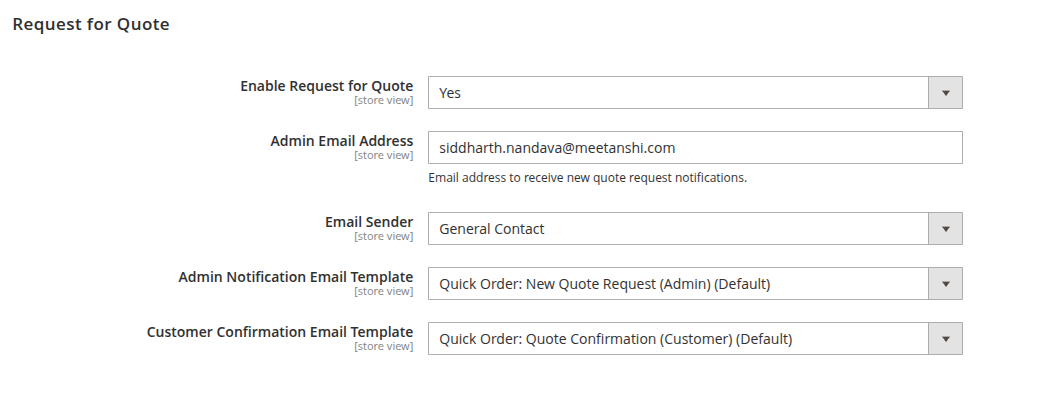
- Enable Request for Quote: Select Yes to let customers submit quote requests, or No to disable the RFQ functionality.
- Admin Email Address: Enter a valid email address (for example, [email protected]) that your team monitors for incoming quote requests.
- Email Sender: Select a sender identity from the list (for example, General Contact, Sales Representative, Customer Support). These identities are configured under Stores > Configuration > General > Store Email Addresses.
- Admin Notification Email Template: Choose the template you want to use. Leave it on the default template, or select a custom template you created under Marketing > Email Templates.
- Customer Confirmation Email Template: Choose the template you want to use. Leave it on the default template, or select a custom template you created under Marketing > Email Templates.
After configuring the settings, click Save Config and clear the cache if prompted.
Using Quick Order (Frontend)
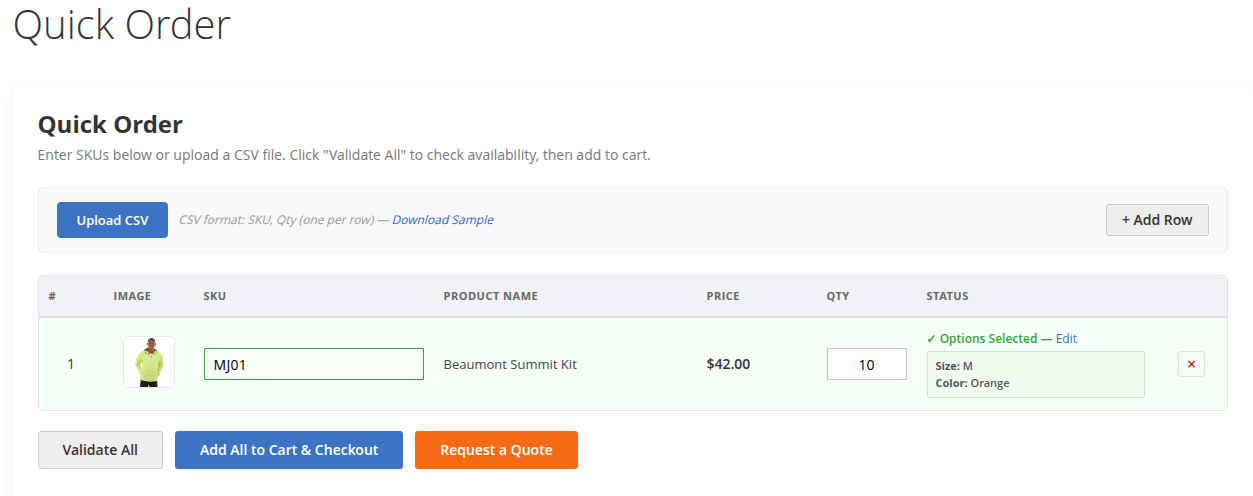
Once enabled, customers who belong to an allowed customer group can access the Quick Order page through the header or footer link. On the Quick Order page, customers can:
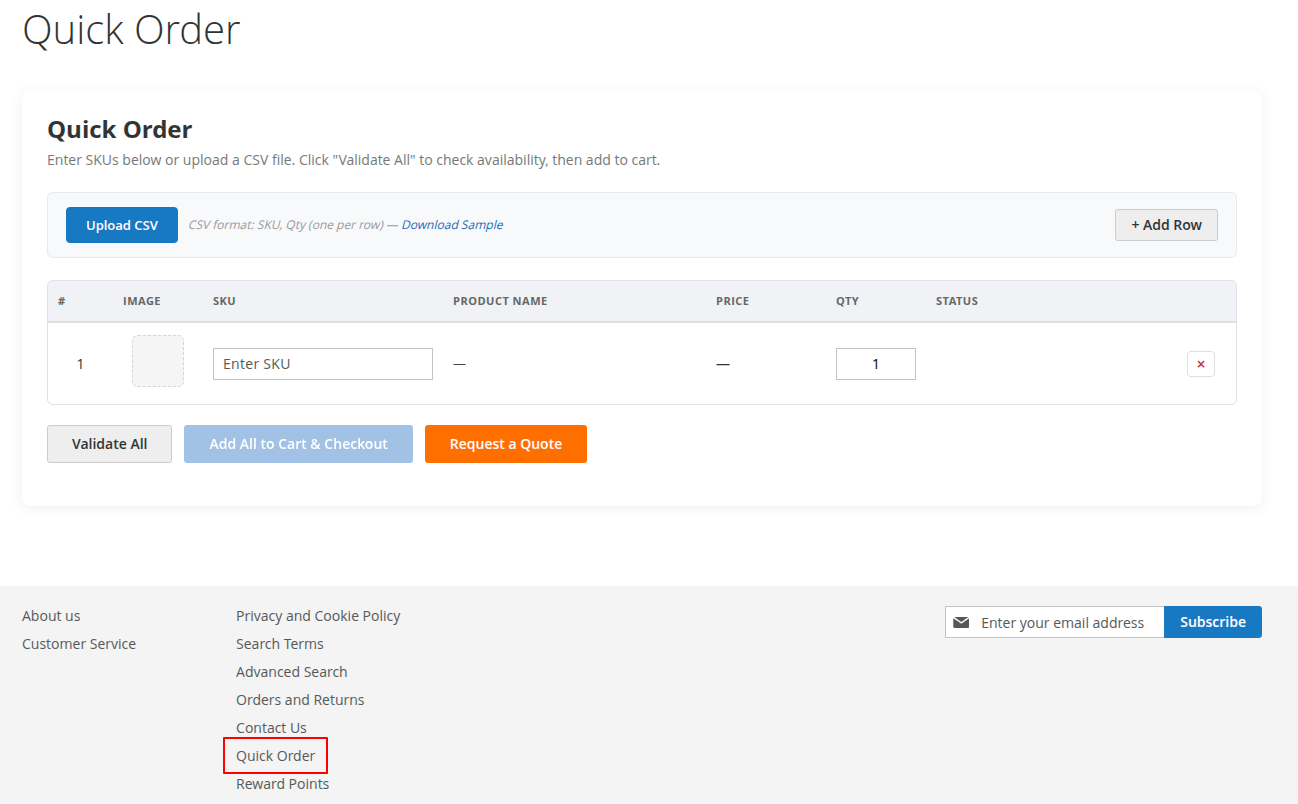
- Enter SKUs manually - type a product SKU and quantity into each row. Auto-suggest helps find the correct product as they type, and inventory validation confirms availability.
- Add more rows - add additional SKU rows up to the Maximum SKU Rows limit set in the configuration.
- Upload a CSV file - bulk import a list of SKUs and quantities from a CSV file instead of typing each row.
- Add to Cart - add all validated products to the shopping cart in one step and proceed to checkout.
- Submit a Quote (if enabled) - submit the SKU list as a Request for Quote. The admin is notified at the configured email address, and the customer receives a confirmation email.
Managing Quote Requests (Backend)
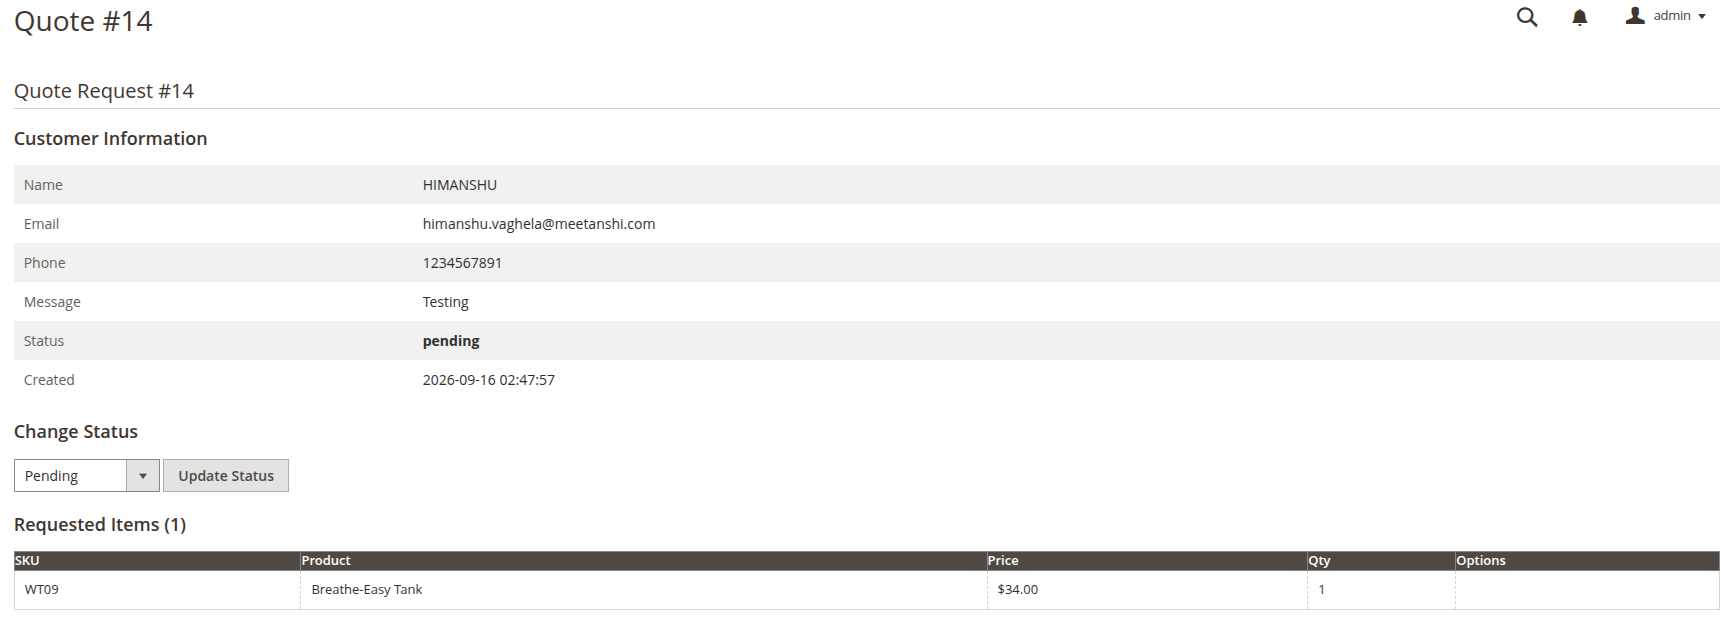
When Request for Quote is enabled, submitted quotes are managed from the admin panel under Sales > Quick Order > Quotes.
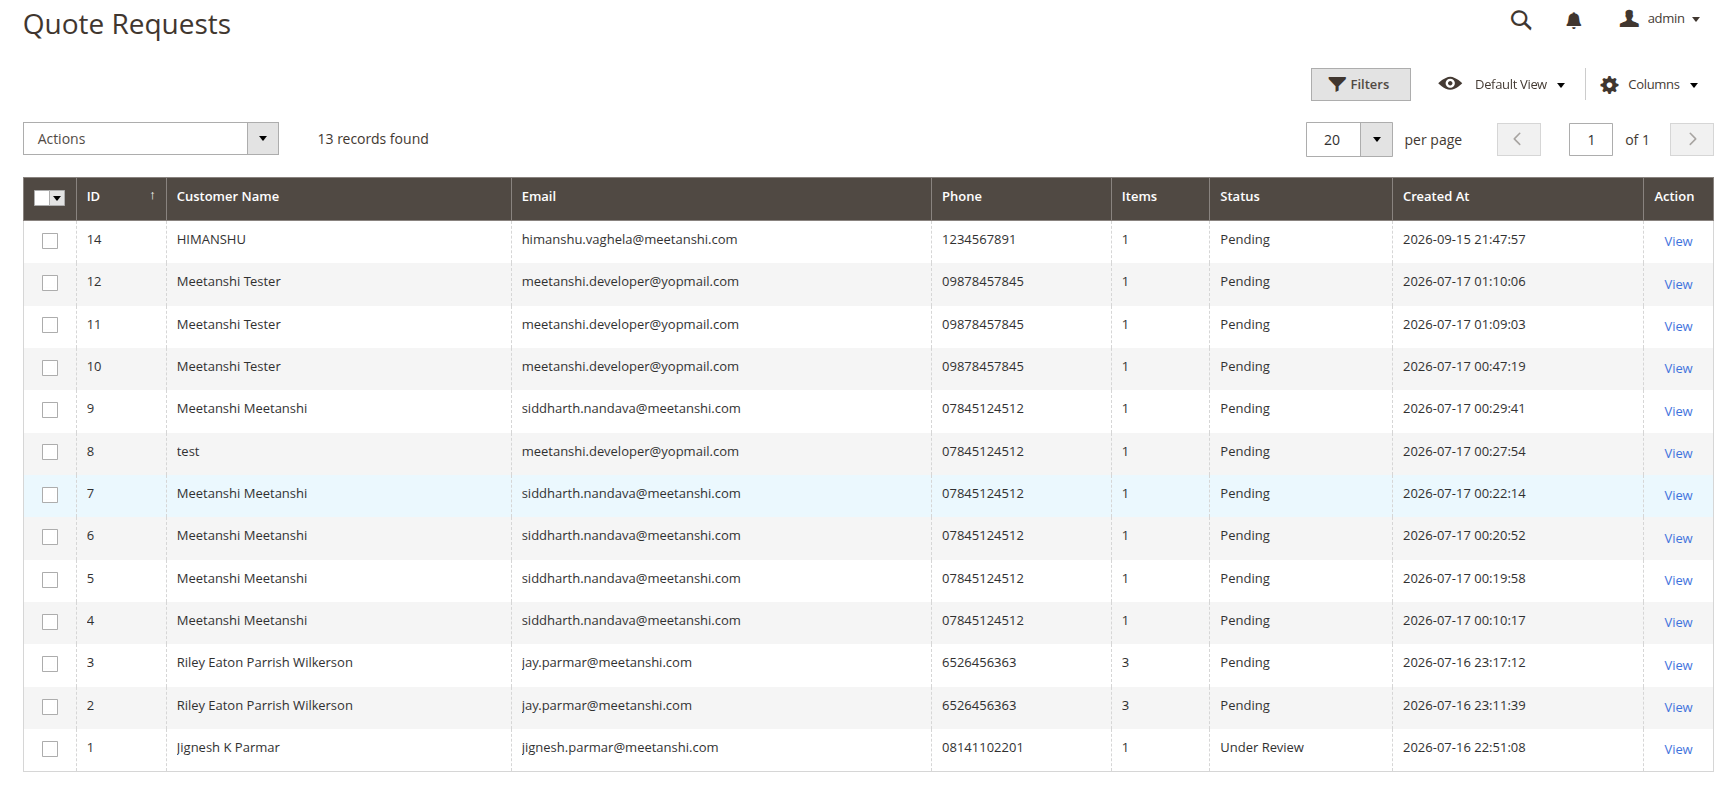
- View quotes - see a grid of all submitted quote requests with customer details and requested items.
- Open a quote - click a quote to view its full item list, SKUs, and quantities.
- Change status - update a quote's status to reflect its progress:
- Pending - the quote has been submitted and is awaiting review.
- Under Review - your team is currently evaluating the request.
- Quoted - a price/quote has been provided to the customer.
- Closed - the quote request is complete or no longer active.
- Mass delete - select multiple quotes and remove them in a single action.