Meetanshi Schema & SEO AI - User Guide
Boost your store's search visibility and performance with Meetanshi Schema & SEO AI, an automation tool designed to generate rich JSON-LD structured data effortlessly.
It simplifies complex technical SEO, helping top search engines and AI models accurately index your products, blogs, and core business details for maximum storefront exposure.
Dashboard Overview
When you first open the app, the Setup Guide dashboard provides a bird's-eye view of your configuration status.
- Setup Progress: Follow the interactive 3-step checklist to ensure you’ve enabled the theme extension, completed your shop details, and configured your page-specific schemas.
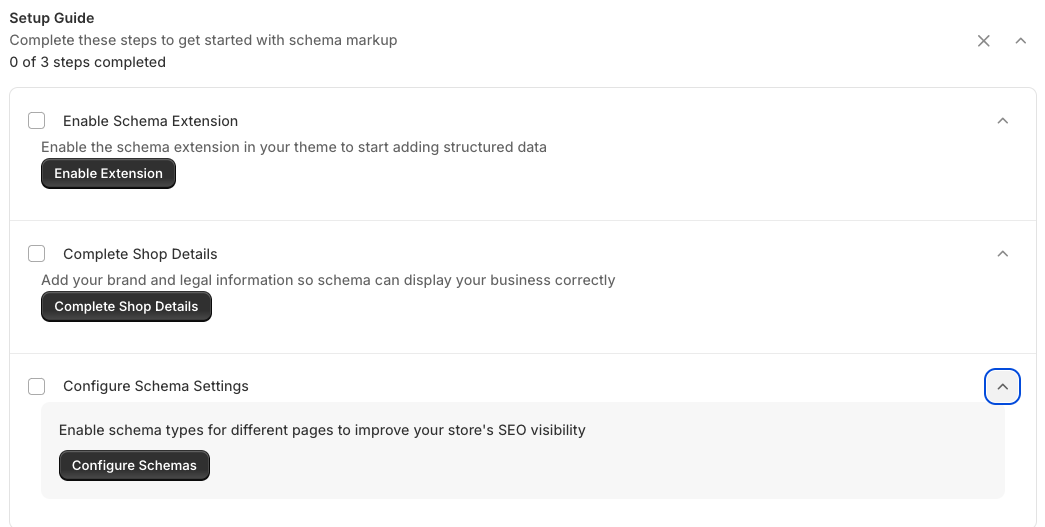
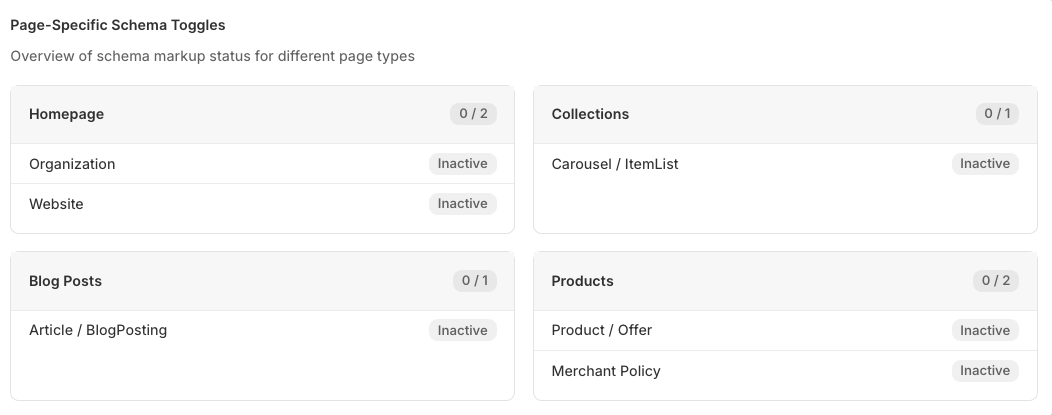
- Page-Specific Schema Toggles: Monitor your overall store health and see exactly which schema markup statuses are Inactive or active for different page types like Homepage, Collections, Blog Posts, and Products.
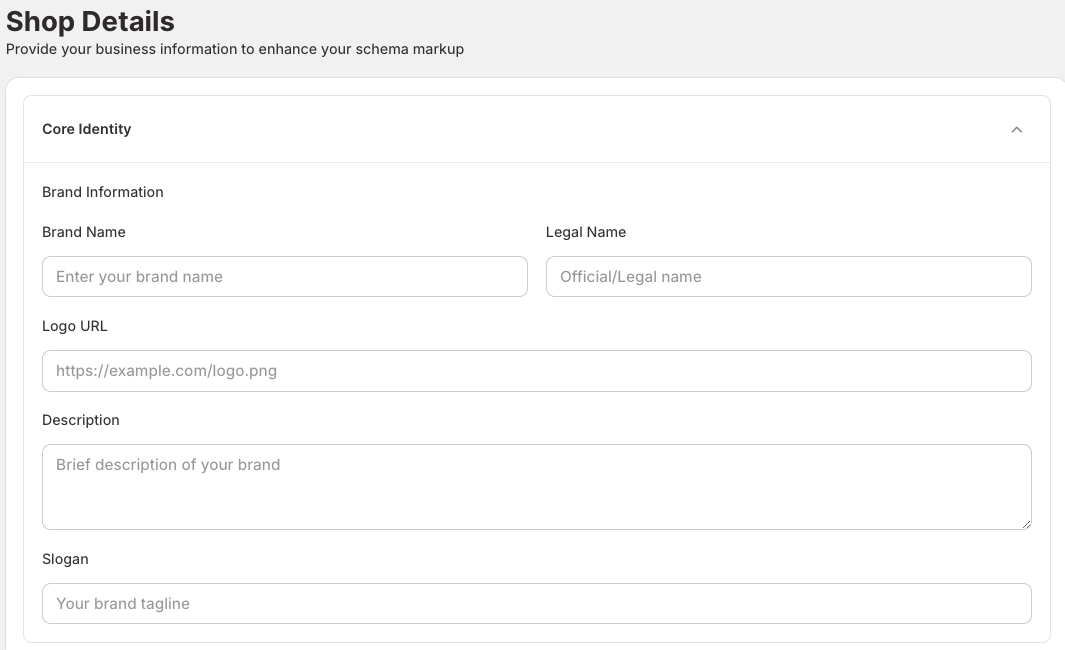
Configuring Your Shop Details
Before launching your schema, you must define your business and entity identity details. Navigate to Shop Details to provide your core brand and legal information so search engines can display your business correctly in Google's Knowledge Panel.
1. Core Identity & Brand Information
Fill in your basic brand elements to establish online authority:
- Brand Name & Legal Name: Enter your customer-facing brand name and official registered business name.
- Logo URL: Provide a direct link to your official store logo.
- Description & Slogan: Add a brief description of your brand along with your official tagline.
2. Social Media Profiles & Support Contacts
Help search engines connect your storefront to your wider digital presence and support channels:
- Social Media Links: Click + Add more, select your desired platform from the dropdown menu, and paste your profile URL.
- Contact & Support: Provide dedicated phone numbers for Customer Service, Sales, and Technical Support. Input your Support Email, define your Area Served (e.g., Worldwide, USA), and add your Customer Service Page URL.

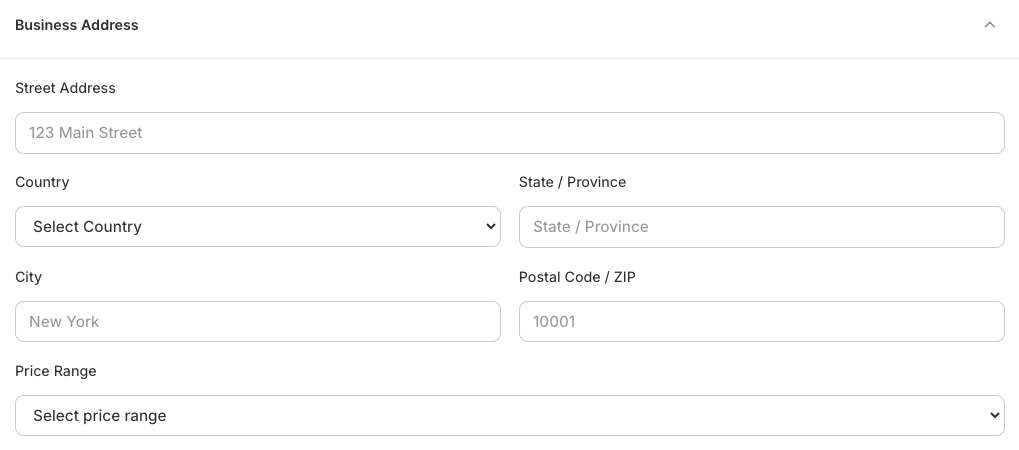
3. Business Address & Price Range
Ensure local search accuracy by logging your location data:
- Street Address: Input your physical office or headquarters address.
- Location Fields: Select your Country, State/Province, City, and Postal Code / ZIP.
- Price Range: Select your store's relative pricing tier from the dropdown menu to guide search engines.
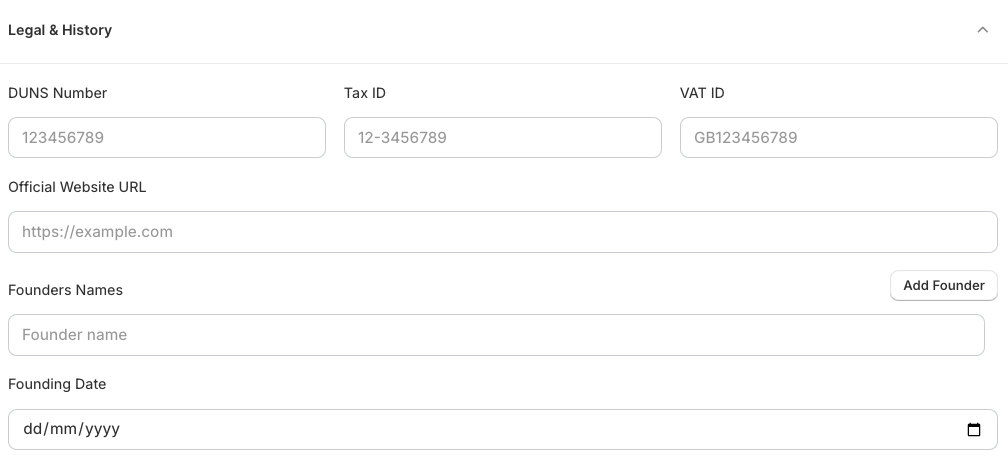
4. Legal & History
Establish business credibility by filling out verification metrics:
- Registration Identifiers: Enter your business DUNS Number, Tax ID, and VAT ID if applicable.
- Official Website URL: Add your primary canonical store domain.
- Founders & Dates: Click Add Founder to input founder names, and select your company's official founding date.
Setting Up Global Policies
Providing structured policy data allows search engines to feature rich shipping and return details directly in search snippets.
1. Shipping Policies
Configure how delivery terms are shared with search engines:
- Country / Region: Select the applicable region (e.g., Global / Rest of World).
- Shipping Cost & Currency: Enter your baseline shipping rates (set to 0 for free shipping) and select your currency.
- Delivery Times: Input your minimum/maximum Handling Time and Transit Time in days. Toggle the "Use Business Days" checkbox if weekends should be excluded from calculations.
- Cut-off Time (Optional): Define your daily order cut-off times and corresponding time zones for same-day processing accuracy.

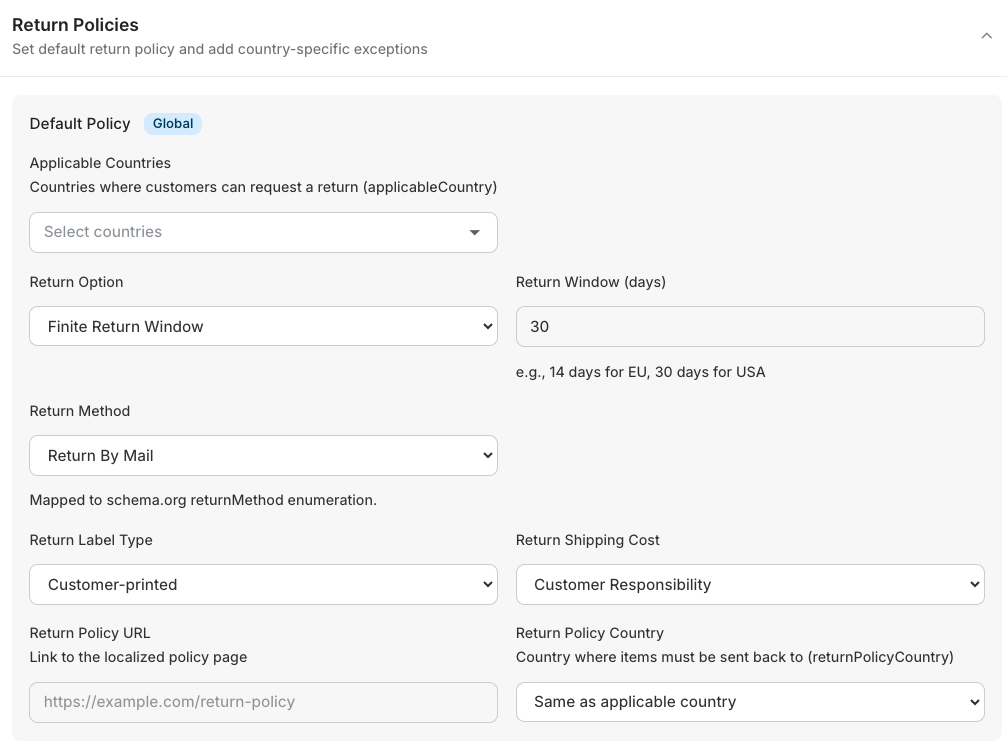
2. Return Policies
Automate how search engines interpret your returns system:
- Applicable Countries: Select the target countries where this specific return policy applies.
- Return Window & Options: Choose your return parameters (e.g., Finite Return Window) and input the return window duration in days (e.g., 30 days).
- Methods & Costs: Map your return method (e.g., Return By Mail), select the Return Label Type (e.g., Customer-printed), and specify who handles the return shipping cost.
- Policy URLs: Provide the exact link to your localized return policy page.
Activating Schema Markup on Your Storefront
1. Enable the Storefront Master Toggle
To begin deployment, go to the top of your schema configurations and switch the master toggle for Show schema markup on storefront to “On”. When turned off, no structured data will be injected into your store.
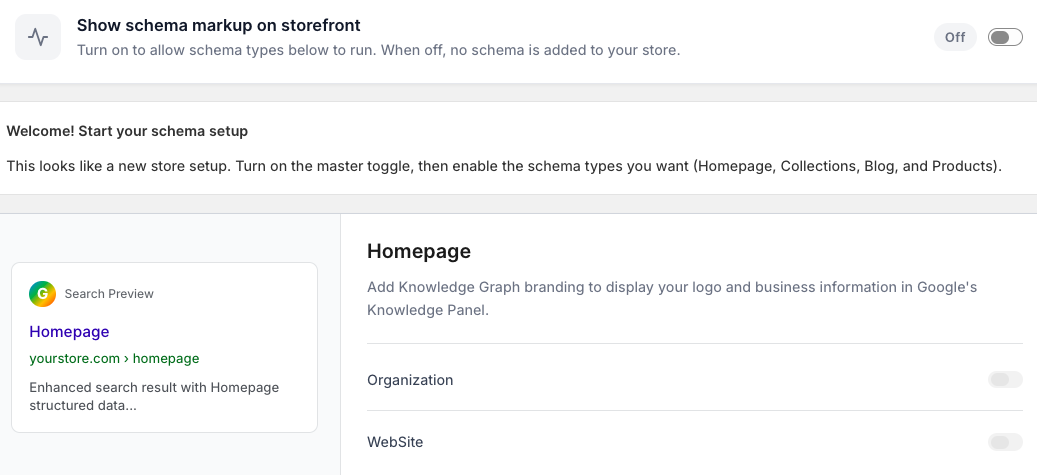
2. Configuration & Page Toggles
Once the master toggle is active, navigate through the individual tabs to turn on specific schemas for different sections of your store. Use the Search Preview panel on the left to visualize how your store will ideally look as an enhanced rich snippet in search results.
- Homepage Schema: Turn on the toggles for Organization and Website to deploy your Knowledge Graph branding and site search parameters.
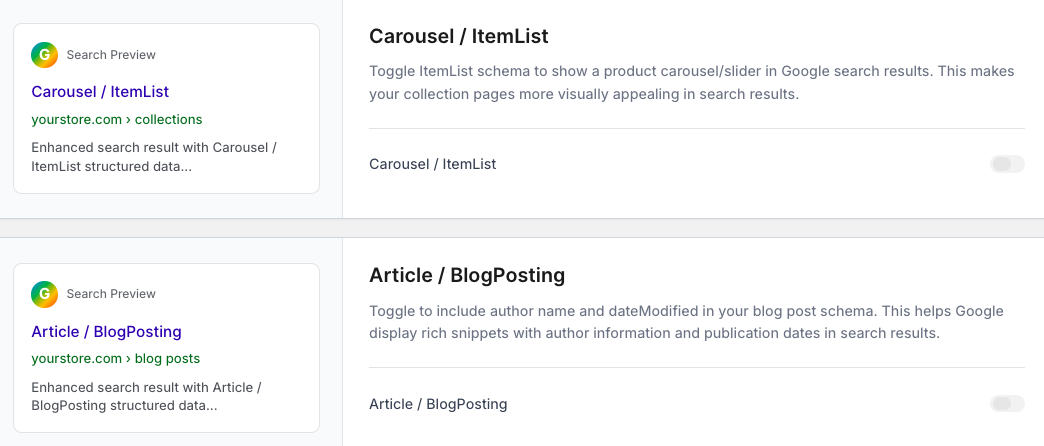
- Carousel / ItemList Schema: Turn on the toggle to display an interactive product carousel/slider on your collection pages to increase visual appeal.
- Article / BlogPosting Schema: Turn on the toggle to include metadata like author name and article modification dates to gain rich blog snippets.
- Product / Offer Schema: Turn on the individual page toggles to link your active product listings, pricing data, and global merchant policies directly to search indexes.
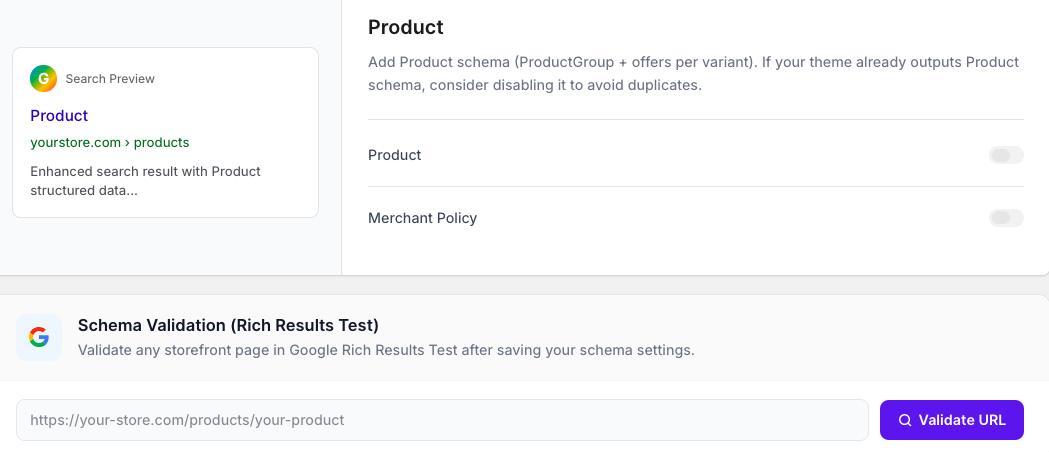
3. Product Schema Toggles & Schema Validation
The final step in your storefront configuration ensures your products are indexed correctly and your live structured data is perfectly optimized.
- Product & Merchant Policy Toggles: Go to the Product tab and turn on the toggles for Product (adds ProductGroup and variant offers) and Merchant Policy.
⚠️ Note: If your active Shopify theme already outputs its own product schema, consider disabling it to avoid duplicate data errors in search engine reports.
- Schema Validation (Rich Results Test): Once you have saved all your schema settings, scroll down to the built-in validation bar. Paste a live storefront URL (e.g., a specific product page link) into the text field and click Validate URL. This connects directly to Google's Rich Results Test to verify that your structural data is valid, error-free, and fully eligible for enhanced search snippets.
Need Help?
If you need support, contact us directly through the app dashboard.