MIT Cart & Order Limits for Shopify - User Guide
Important: First, Enable the App
In case you missed it, here’s how you can do it:
- In your Shopify store, go to Online store > Themes > Customize
- On the left menu bar, click the last icon (which is for app embeds)
- In the list of app embeds, find and enable the Cart Limit app
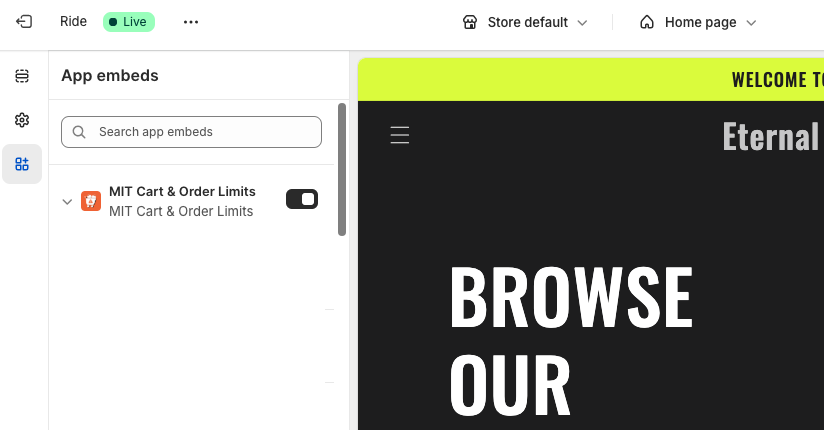
Once done, save the settings.
Dashboard Overview
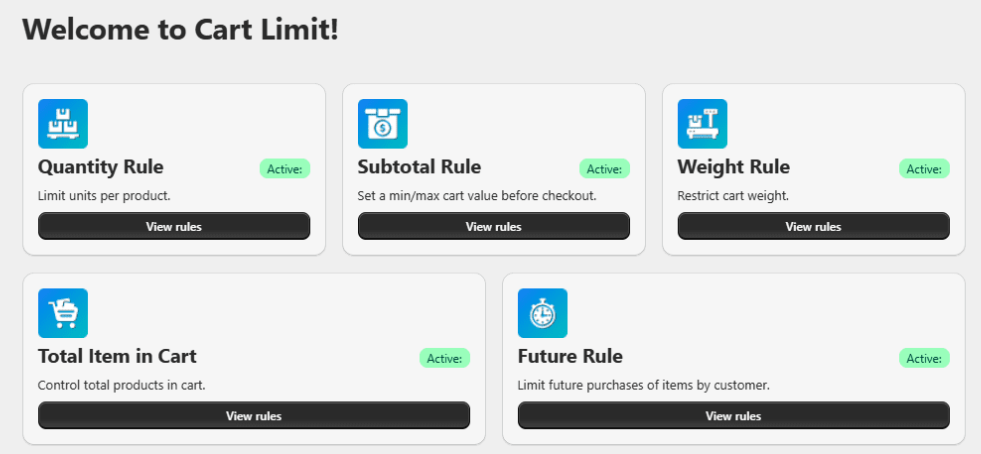
Once installed, you'll land on the Cart Limit Dashboard. This dashboard provides quick access to all available rule types and shows how many are active. The available rules are:
Quantity Rule - It limits the number of units a customer can purchase per product. Helps manage stock and control of bulk orders.
Example: Limit a customer to purchase a maximum of 5 units of any one product.
Subtotal Rule - It sets a minimum or maximum cart value before checkout. Ideal for enforcing order value thresholds.
Example: Orders must be between $50 and $500.
Weight Rule - Restrict the total weight of specific product in the cart. Useful for shipping and handling limitations.
Example: The customer can only buy maximum of 5 kg of certain product.
Total Items in Cart - Control how many products can be added to the cart. Great for bundle offers or curated boxes.
Example: A Cart can contain a maximum of 5 total quantities.
Future Rule - Control the number of times a customer can purchase a product in the future based on conditions.
Example: One customer can purchase a product only once a month.
Quantity Rules
This type of rule lets you control the number of units a customer can purchase per order. It’s especially helpful for stock control, bulk purchase restrictions, or promotional limits.
In the listing, you can find the list of active rules, along with their specifications like minimum, maximum, and multiplier of allowed quantity.
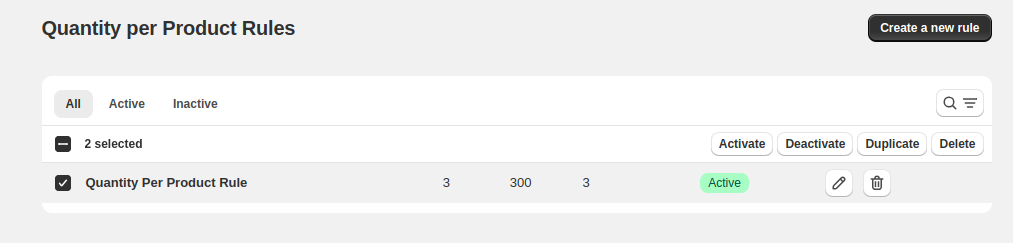
How to Create a Quantity Rule in Cart in Shopify?
To create one, go to Quantity per Product Rules and click Create a new rule. You’ll get an interface where you can set the limits and define conditions when to apply the rule.
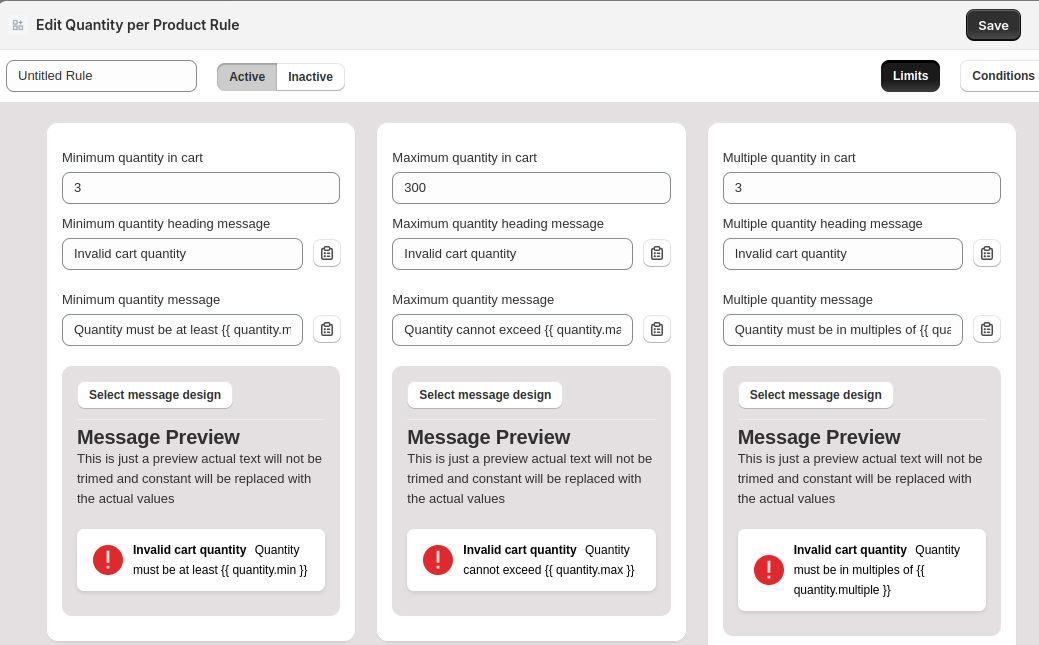
Step 1: Define Limits
Set a title for the rule and define the following for quantity limits:
- Minimum quantity in cart - The minimum product quantity allowed
- Maximum quantity in cart - The maximum product quantity allowed
- Multiple quantity in cart - The product quantity should be in multiple of this number
For each limit, add a custom message to display when the customer does not meet the requirement (e.g., "Quantity must be at least 1" for minimum quantity). It also supports various dynamic variables to display errors like the current quantity, minimum quantity, etc.
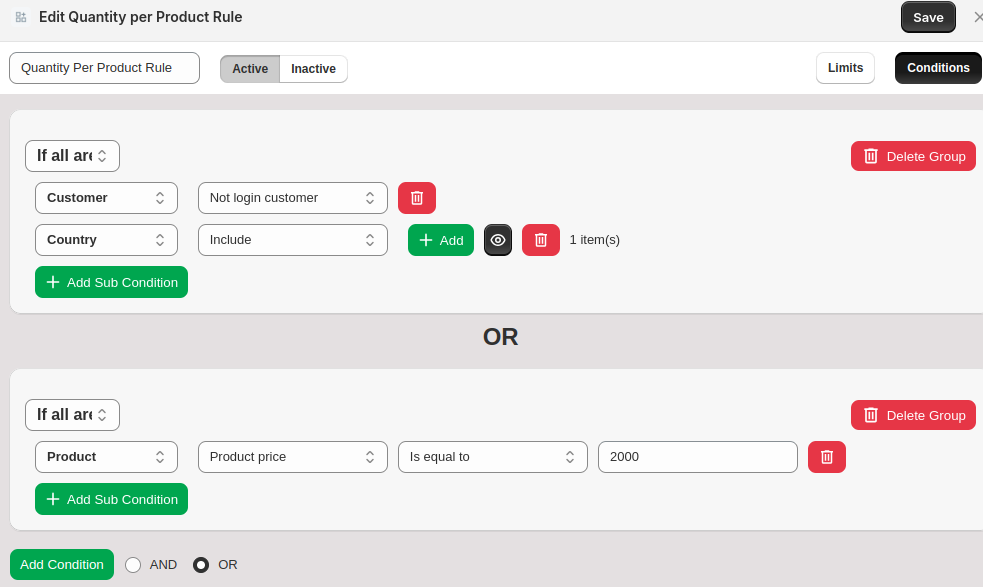
Step 2: Define conditions
You can choose when to apply this rule by setting flexible logic. The interface allows you to set multiple conditions and sub-conditions with AND/OR logic.
- Click the Add Condition button to create a condition
- You can choose any attribute and logical operator to match
- For multiple conditions, select between AND/OR to control the logic flow
Once the conditions are set, click Save on the top right.
The rule will be applied to both product pages and cart pages. It will restrict the customers from proceeding to the cart/checkout unless the set limits are satisfied.
For example, here’s what the warning messages look like on the checkout:
Minimum quantity limit:

Maximum quantity limit:

Multiple quantity limit:

Subtotal Rule
The Subtotal Rule restricts cart actions based on the total cart value (subtotal). This is especially useful when you want to allow checkout or apply conditions only if the cart subtotal falls within a specific range or structure.
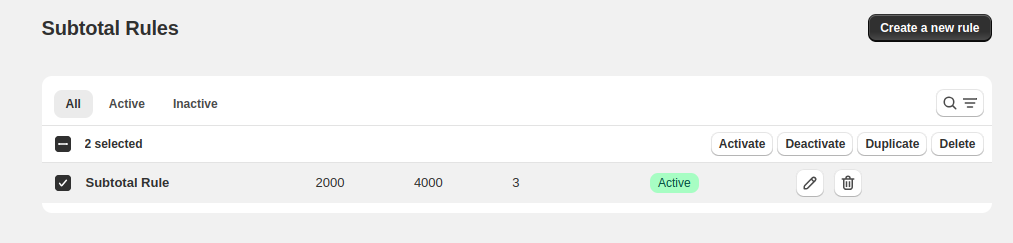
How to Create a Cart Subtotal Rule in Shopify?
To create one, go to Subtotal Rules and click Create a new rule. You’ll get an interface where you can set the subtotal limits and define conditions when to apply the rule.
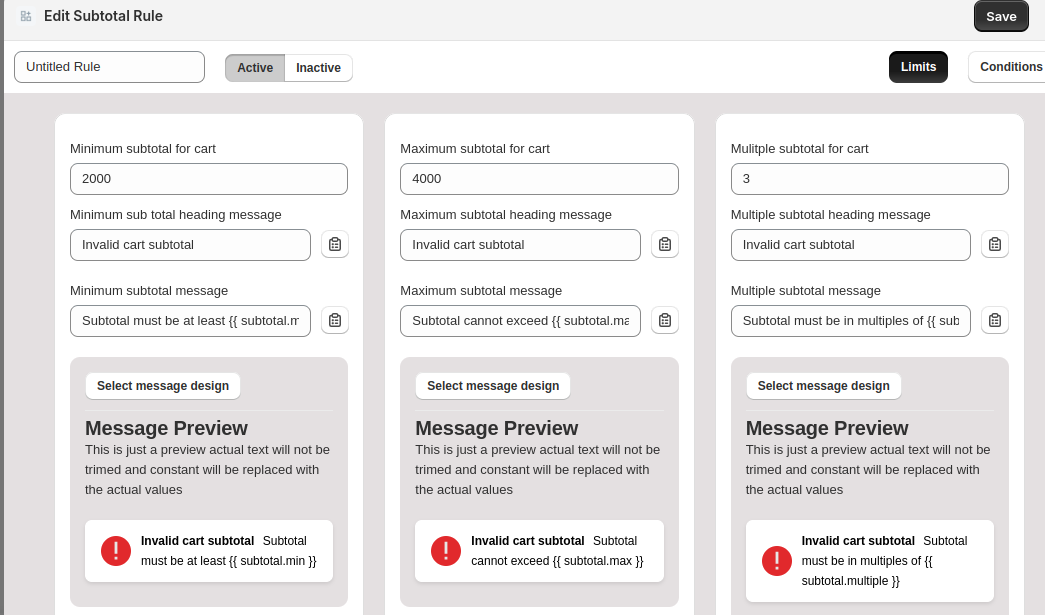
Step 1: Define Limits
Set a title for the rule and define the following for subtotal limits:
- Minimum Subtotal for Cart - The minimum subtotal for the cart allowed for checkout
- Maximum Subtotal for Cart - The maximum subtotal for the cart allowed for checkout
- Multiple Subtotal for Cart - The subtotal for the cart allowed for checkout should be in multiple of this number
For each limit, you can set a custom warning header and message to display when the cart does not satisfy it. Here, you can use dynamic variables in message texts like minimum cart subtotal, current cart subtotal, etc.
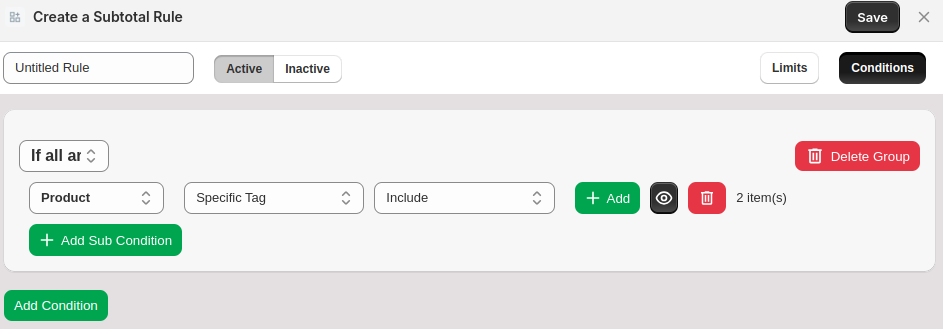
Step 2: Define conditions
Choose when to apply the cart subtotal rule by setting flexible logic. You can set multiple conditions and sub-conditions with AND/OR logic.
- Click the Add Condition button to create a condition
- You can choose any attribute and logical operator to match
- For multiple conditions, select between AND/OR to control the logic flow
Once the conditions are set, click Save on the top right.
The rule will be applied to cart pages, restricting the customers from proceeding to checkout unless the set limits are satisfied.
Examples of messages:
Minimum subtotal message:
Maximum subtotal message:

Multiple subtotal message:

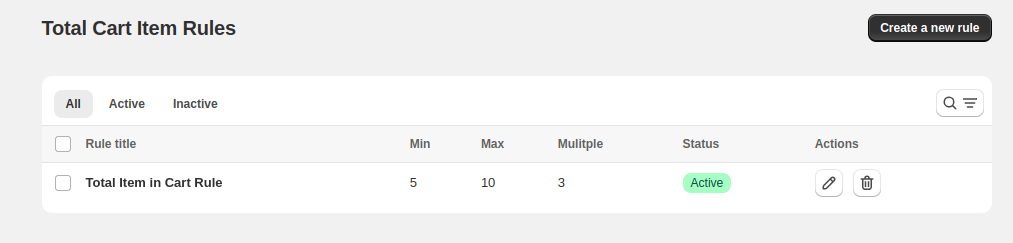
Total Rule
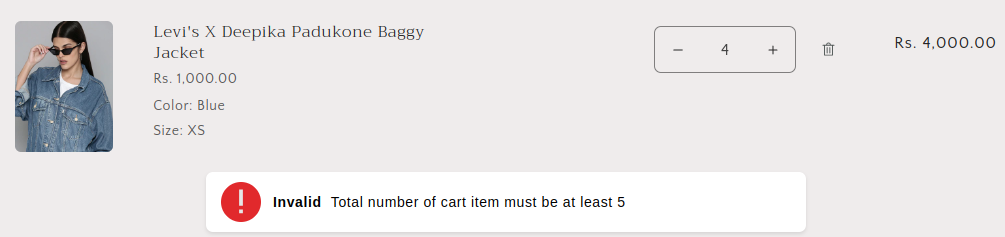
The Total Item in Cart Rule restricts cart actions based on the total number of items in the cart. You can define minimum, maximum, or specific multiples of item quantities to be allowed in the cart. View Existing Rules or Click Create a New Rule.
How to Create a Total Item in a Cart Rule in Shopify?
To create one, go to Total Rules and click Create a new rule. You’ll get an interface where you can set the total limits and define conditions when to apply the rule.
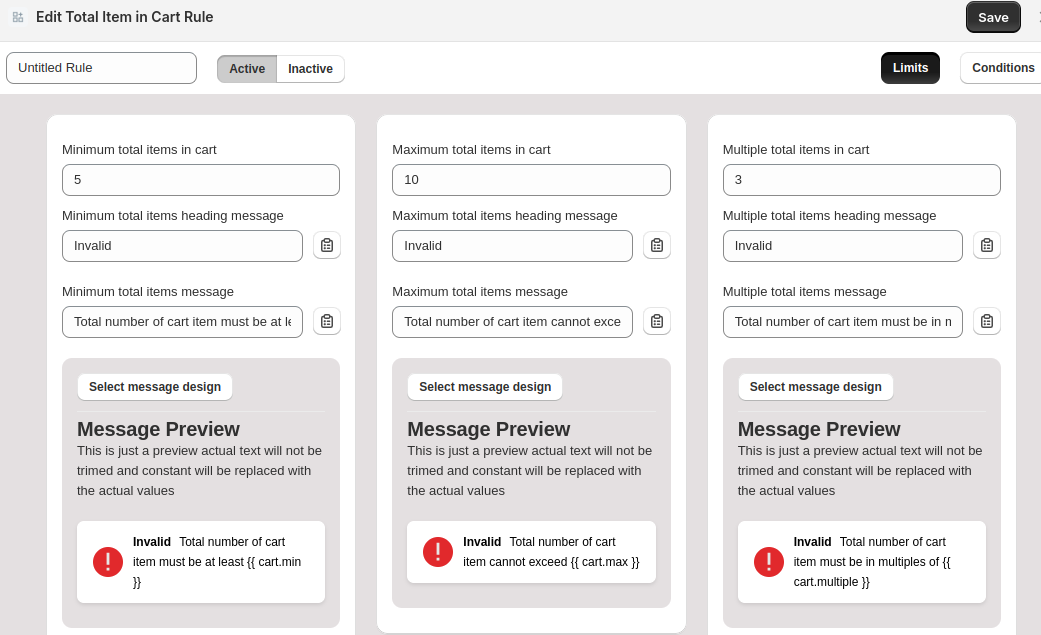
Step 1: Define Limits
Set a title for the rule and define the following for total limits:
- Minimum Total for Cart - The minimum total for the cart allowed for checkout
- Maximum Total for Cart - The maximum total for the cart allowed for checkout
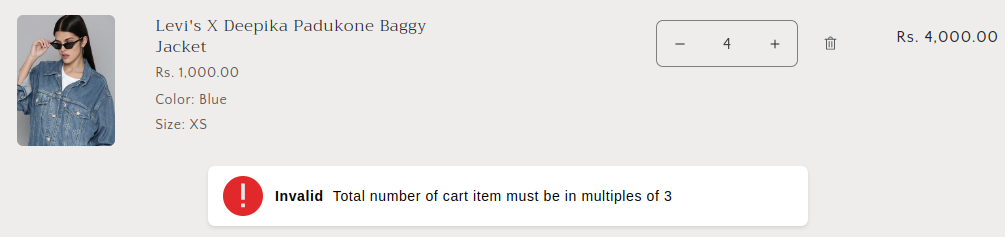
- Multiple Total for Cart - The total for the cart allowed for checkout should be in multiple of this number
For each limit, you can set a custom warning header and message to display when the cart does not satisfy it. Here, you can use dynamic variables in message texts like minimum cart total, current cart total, etc.
Step 2: Define conditions
Choose when to apply the cart total rule by setting flexible logic. You can set multiple conditions and sub-conditions with AND/OR logic.
- Click the Add Condition button to create a condition
- You can choose any attribute and logical operator to match
- For multiple conditions, select between AND/OR to control the logic flow
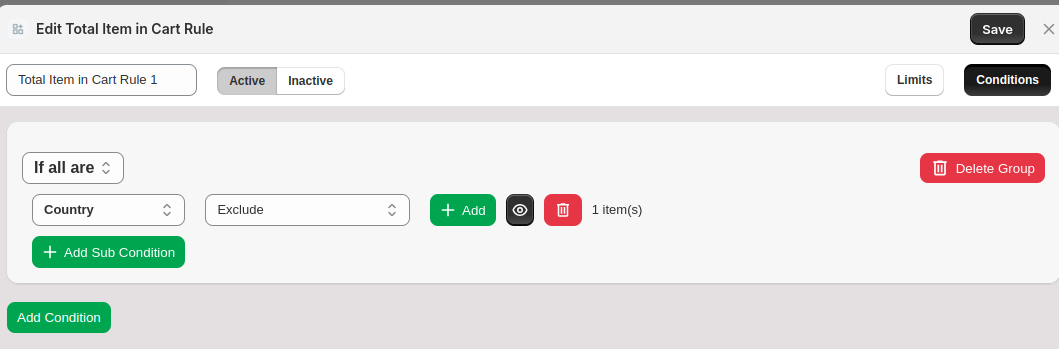
Once the conditions are set, click Save on the top right.
The rule will be applied to cart pages, restricting the customers from proceeding to checkout unless the set limits are satisfied.
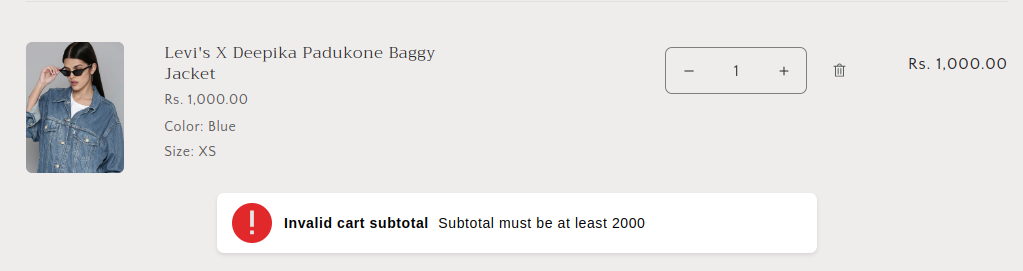
Examples of messages:
Minimum total message:
Maximum total message:

Multiple total message:
Weight Rule
The Weight per Product Rule allows you to restrict cart behavior based on the total weight of items. You can set minimum, maximum, or multiple weight rules to enforce order size limits.
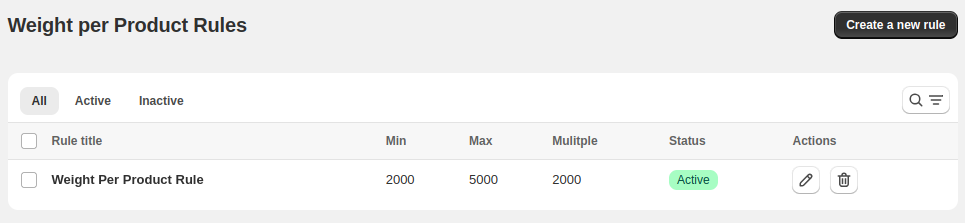
How to Create Weight Per Product Rule in Shopify?
To create one, go to Weight Rules and click Create a new rule. You’ll get an interface where you can set the weight limits and define conditions when to apply the rule.
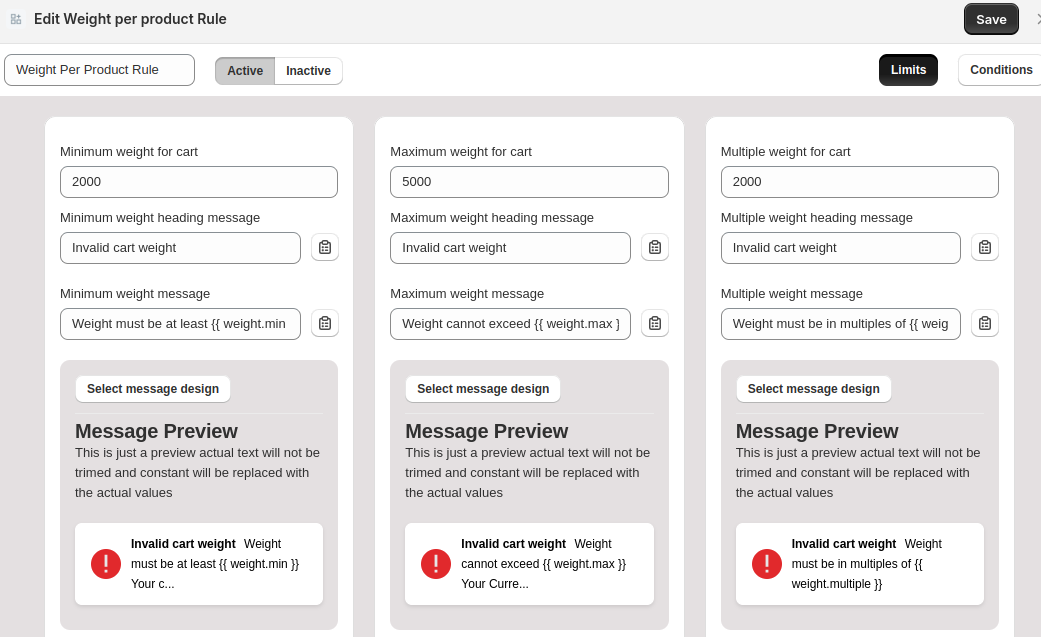
Step 1: Define Limits
Set a title for the rule and define the following for weight limits:
- Minimum Weight for Cart - The minimum weight for the cart allowed for checkout
- Maximum Weight for Cart - The maximum weight for the cart allowed for checkout
- Multiple Weight for Cart - The weight for the cart allowed for checkout should be in multiple of this number
For each limit, you can set a custom warning header and message to display when the cart does not satisfy it. Here, you can use dynamic variables in message texts like minimum cart weight, current cart weight, etc.
Step 2: Define conditions
Choose when to apply the weight per product rule by setting flexible logic. You can set multiple conditions and sub-conditions with AND/OR logic.
- Click the Add Condition button to create a condition
- You can choose any attribute and logical operator to match
- For multiple conditions, select between AND/OR to control the logic flow
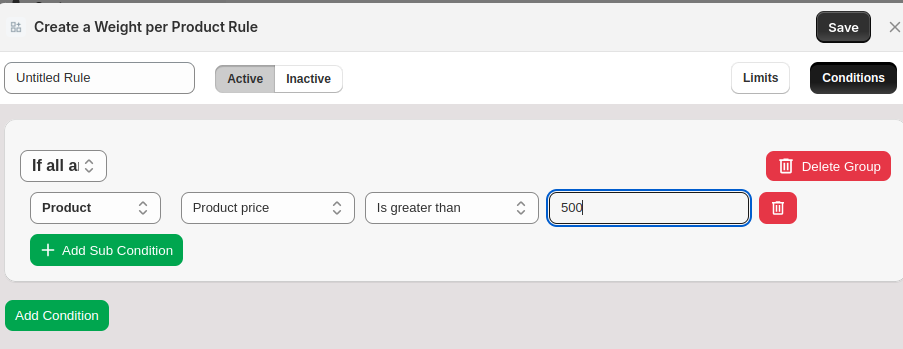
Once the conditions are set, click Save on the top right.
The rule will be applied to cart pages, restricting the customers from proceeding to checkout unless the set limits are satisfied.
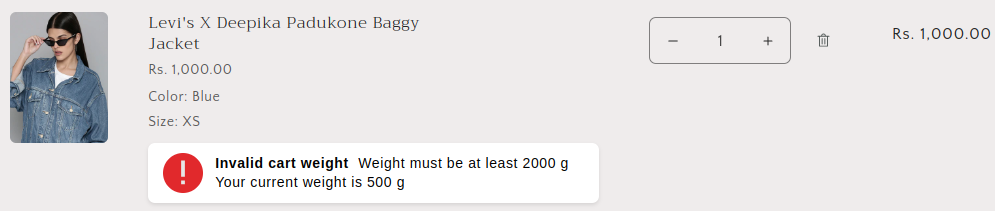
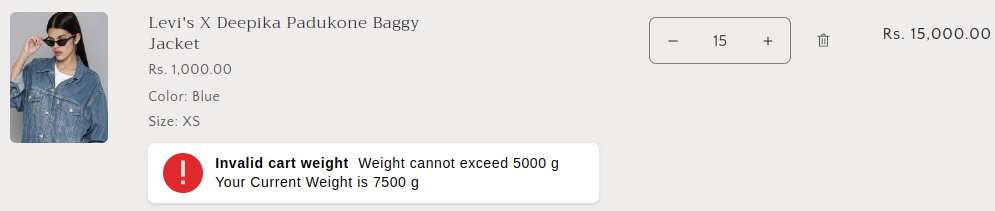
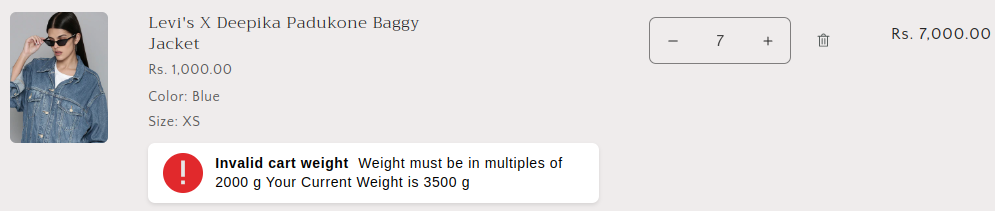
Examples of messages:
Minimum weight message:
Maximum weight message:
Multiple weight message:
Future Rule
This section allows you to restrict customer orders based on time-related conditions. You can limit purchases using lifetime order counts, waiting periods between orders, or specific calendar dates. Let’s start setting the Future Rule.

How to Create Future Rules in Shopify?
To create one, go to Future Rules and click Create a new rule. You’ll get an interface where you can set the future limits and define conditions when to apply the rule.
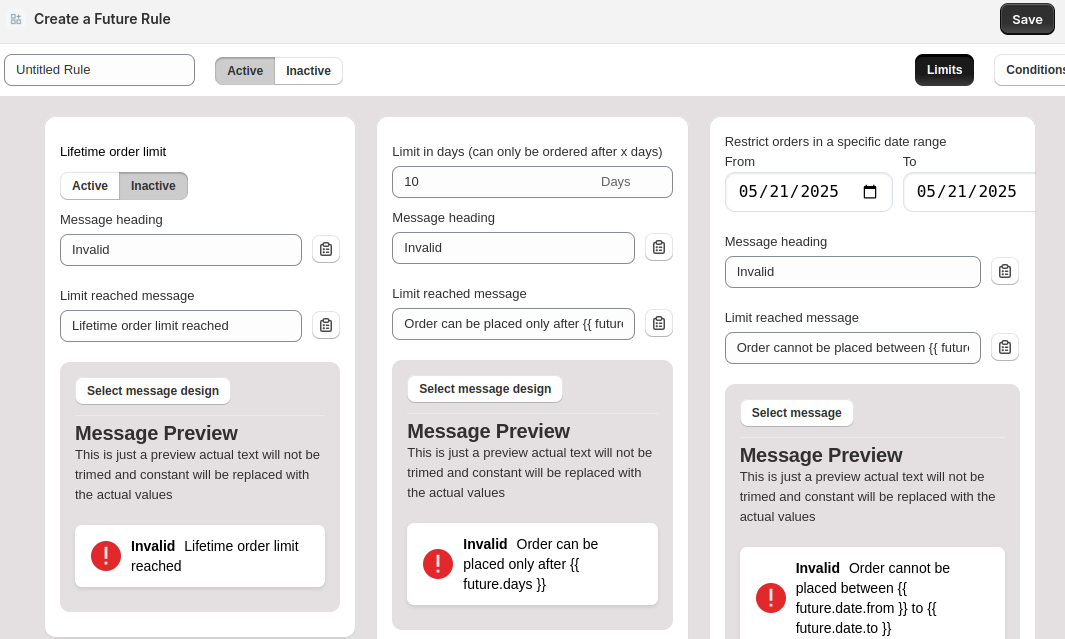
Step 1: Define Limits
Set a title for the rule and define the following for future limits:
- Lifetime Order Limit - No limit on placing new orders.
- Limit in Days - New orders can only be placed after a specific number of days.
- Restrict Orders for Specific Date Range - Restricting placing new orders between specific date ranges.
For each limit, you can set a custom warning header and message to display when the cart does not satisfy it. Here, you can use dynamic variables in message texts like lifetime order limit reached, order can be placed after x days, etc.
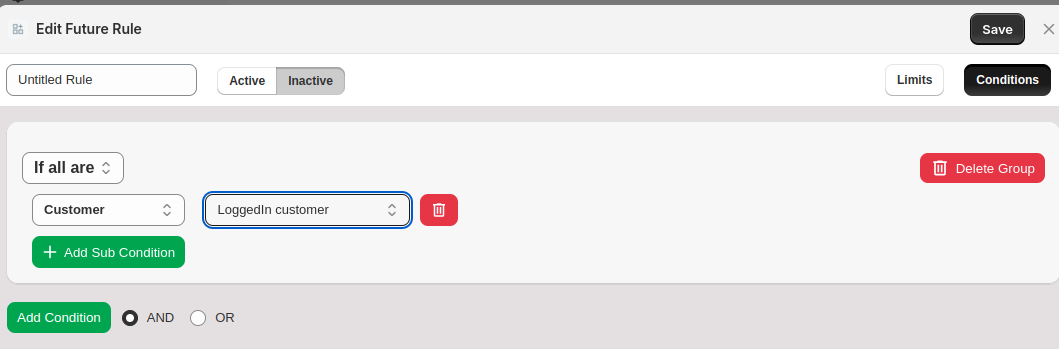
Step 2: Define conditions
Choose when to apply the future rule by setting flexible logic. You can set multiple conditions and sub-conditions with AND/OR logic.
- Click the Add Condition button to create a condition
- You can choose any attribute and logical operator to match
- For multiple conditions, select between AND/OR to control the logic flow
Once the conditions are set, click Save on the top right.
The rule will be applied to cart pages, restricting the customers from proceeding to checkout unless the set limits are satisfied.
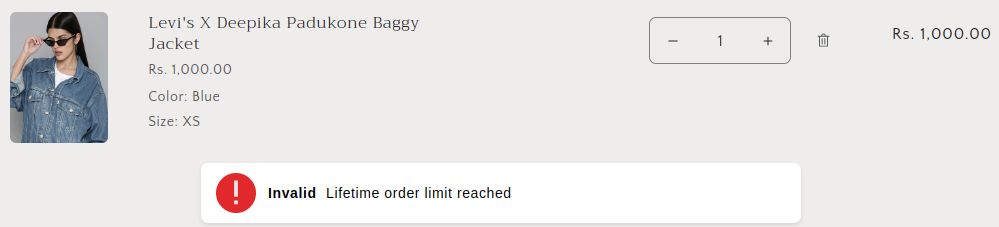
Examples of messages:
Lifetime Order Limit:
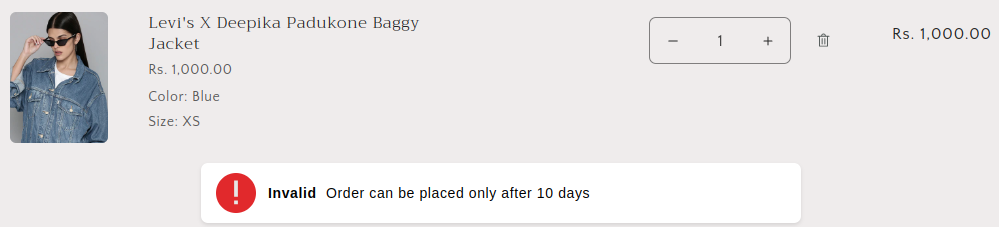
Order After X Days Limit:
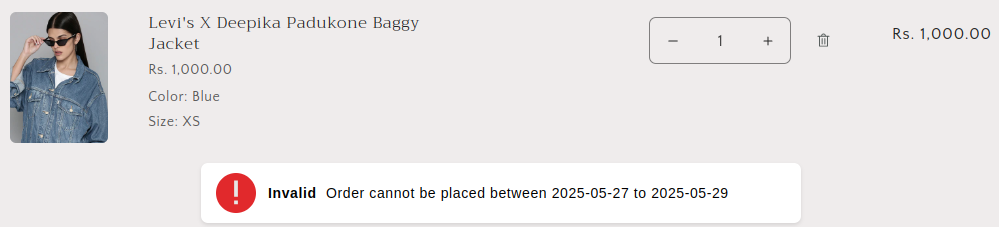
Restrict Orders in a Specific Date Range:
Branding - Message Customization
You can personalize the messaging and appearance of your cart limit warnings:
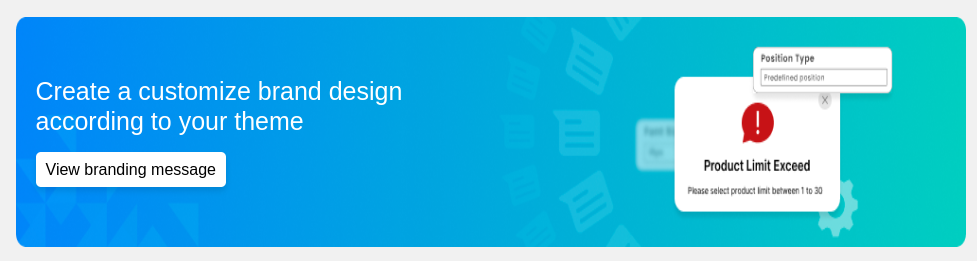
- Click “View branding message” in the customization section.
- Customize the error/warning texts (e.g., “Product Limit Exceed”).
- Match your theme with colors and position preferences.
Branding Message Setup
The Branding Message section allows you to customize alert messages displayed to customers. This helps maintain a consistent visual identity while delivering important information. You can use it either from the main dashboard by clicking View Branding Message.
Or else click Branding in the sidebar menu on left under the Cart Limit App.
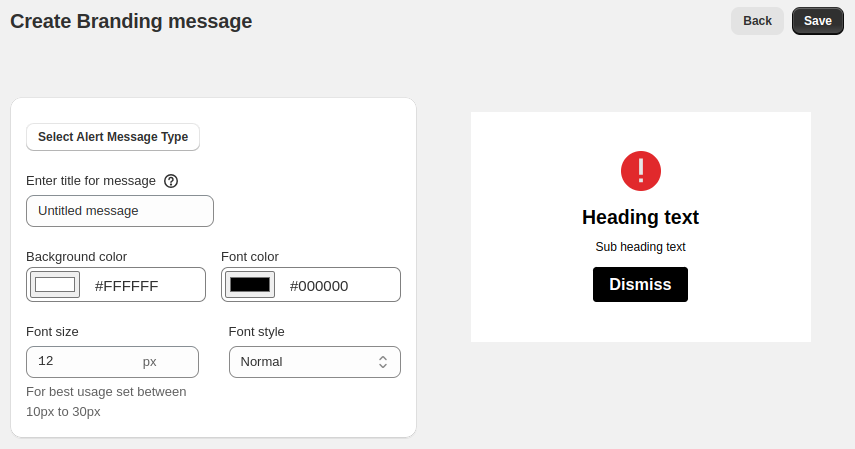
How to Configure:
- Select Alert Message Type Click the “Select Alert Message Type” button to choose the type of alert you wish to create (e.g., modal with icon, modal without icon, alert with icon, etc).
- Enter Title for Message Add a clear and concise title in the "Enter title for message" field. This will appear as the heading text in the alert.
- Customize Appearance
Customize the appearance of the alert message that will be shown to customers when they will be adding items to cart that will not be appropriate.
- Choose a background color using the color picker or by entering a hex code.
- Select the color of the text using the picker or by entering a hex code.
- Enter a value in pixels. Recommended range: 10px to 30px for best visibility.
- Use the dropdown to select from available styles such as Normal, Italic, etc.
Preview Your Message On the right side, you’ll see a real-time preview of your alert message. This preview updates as you modify the styling or content.
Final Alert Message The preview contains:
- An alert icon based on the selected message type.
- A heading (set via the title field).
- A subheading (likely auto-generated or customizable separately).
- A Dismiss button for user interaction.