MIT AI Chatbot & Sales Bot for Shopify - User Guide
Seamlessly integrate an AI chatbot and sales bot into your Shopify store to manage conversations, recommend products, show order tracking details, and capture sales leads.
The app provides 24/7 assistance in your store without any interruptions, engaging with old customers and new shoppers—all without editing your theme file.
How to Add an AI Chatbot & Sales Bot to Shopify?
Here are the three simple ways to integrate an AI chatbot & sales bot for your Shopify store.
Important
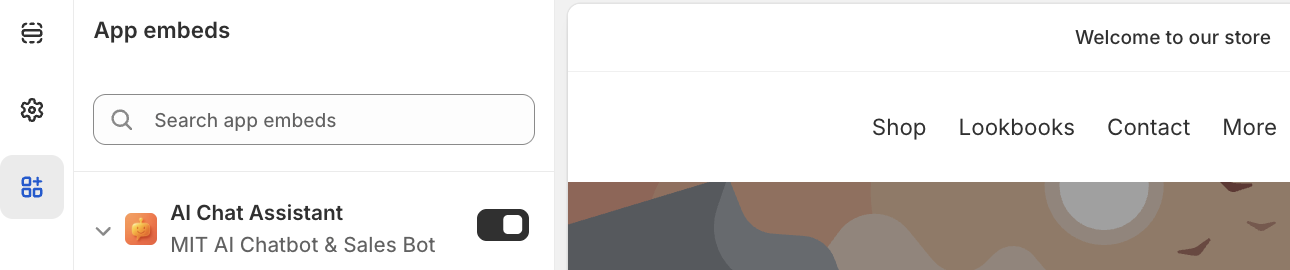
Enable App Embed
Firstly, head to the MIT AI Chatbot & Sales Bot dashboard and navigate to Enable App Embed. Then, activate the toggle from your app embed list. This step is essential for your app to start working in your store.
Step 1: Get Started with Basic Settings
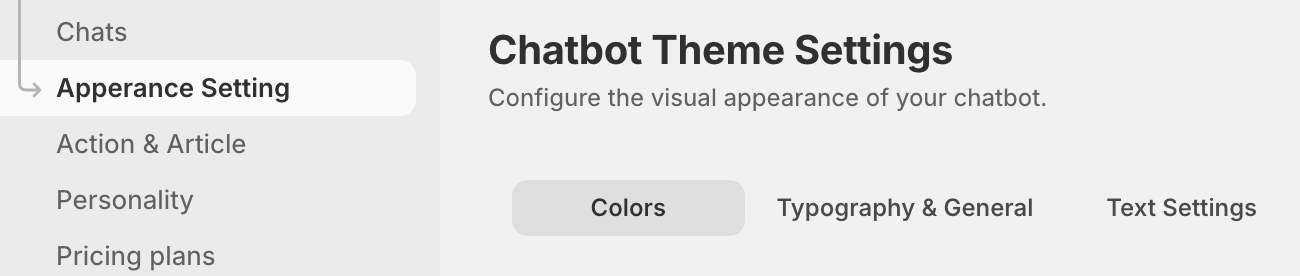
Go to the Appearance Setting from the app dashboard to give the bot your desired look. Here, you will see three important tabs:
- Colors
- Typography & General
- Text Settings
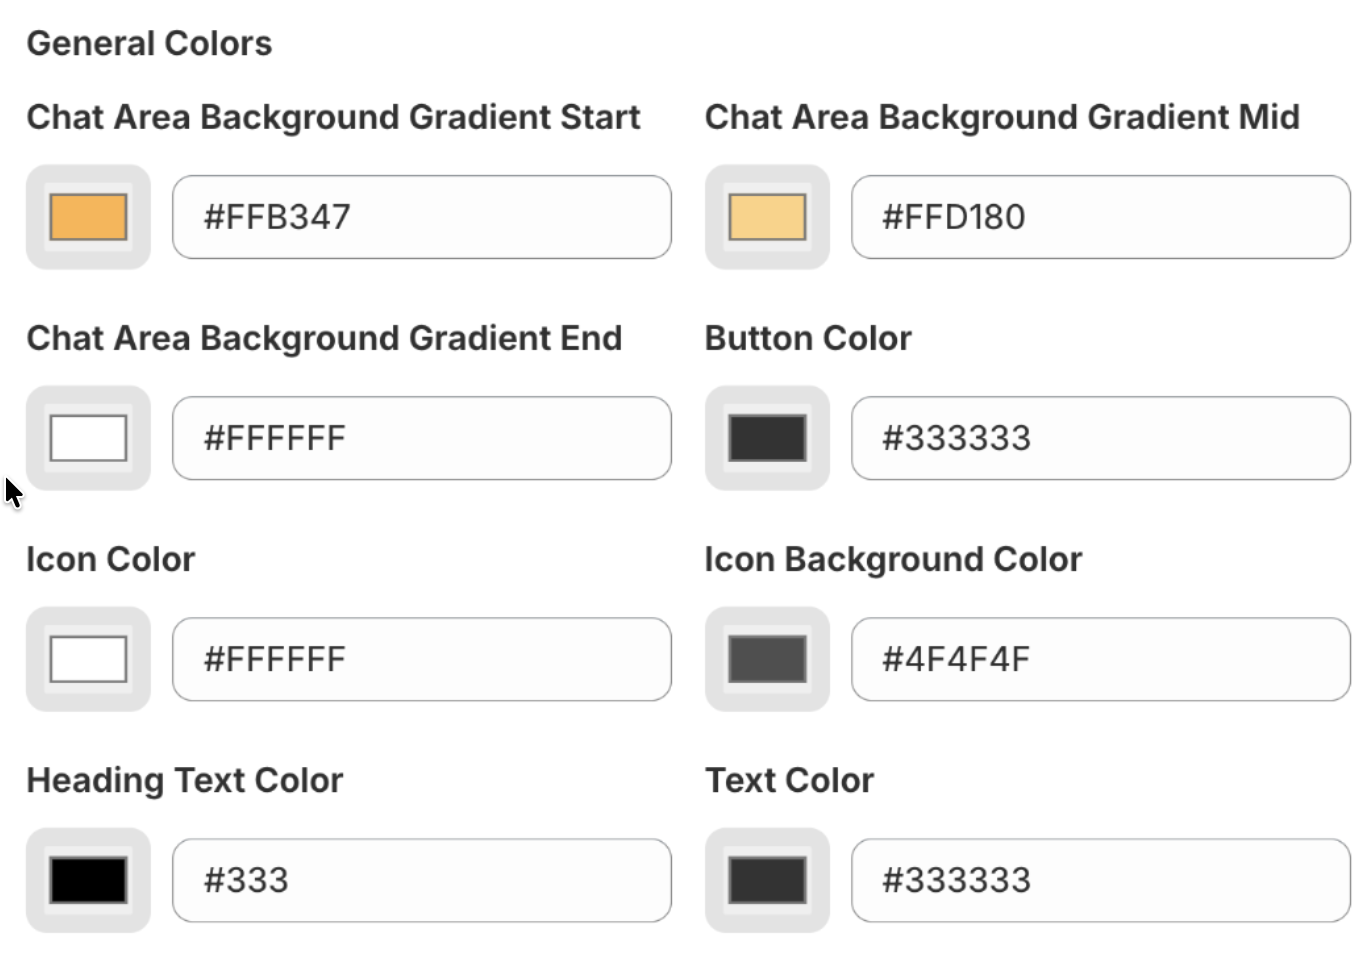
Colors
Customize every visual aspect of your chatbot using this tab. Here is a breakdown of each setting:
- Chat Area Background Gradient Start / Mid / End: These three settings create a smooth background for the main chat window.
- Button Color: Sets the background color for the main action buttons.
- Icon Color: Controls the color of the icons inside the action buttons.
- Icon Background Color: Sets the background color for the chatbot's launcher icon.
- Heading Text Color: Changes the color of the main greeting text.
- Text Color: Sets the color for all other standard text, like the greeting subheading and section titles.
- Button Text Color: Controls the color of the text inside the action buttons.
- Search Bar Color: Sets the background color for the search bar at the bottom of the bot.
- Toggle Button Icon Color: Set the main toggle color when displayed on your website
As you adjust these settings, you can use the live preview on the right to see exactly how the chatbot will appear to your customers.
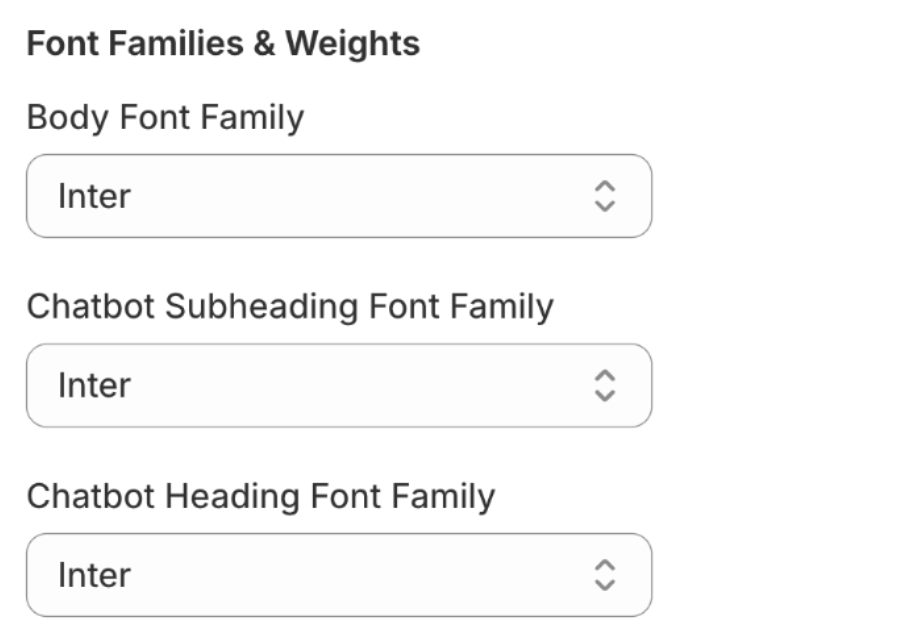
Typography & General
Here, you control the fonts used within your chatbot.
- Body Font Family: Select the font for the text.
- Chatbot Subheading Font Family: Select the font for subheadings in your chatbot.
- Chatbot Heading Font Family: This controls the font for the main greeting text.
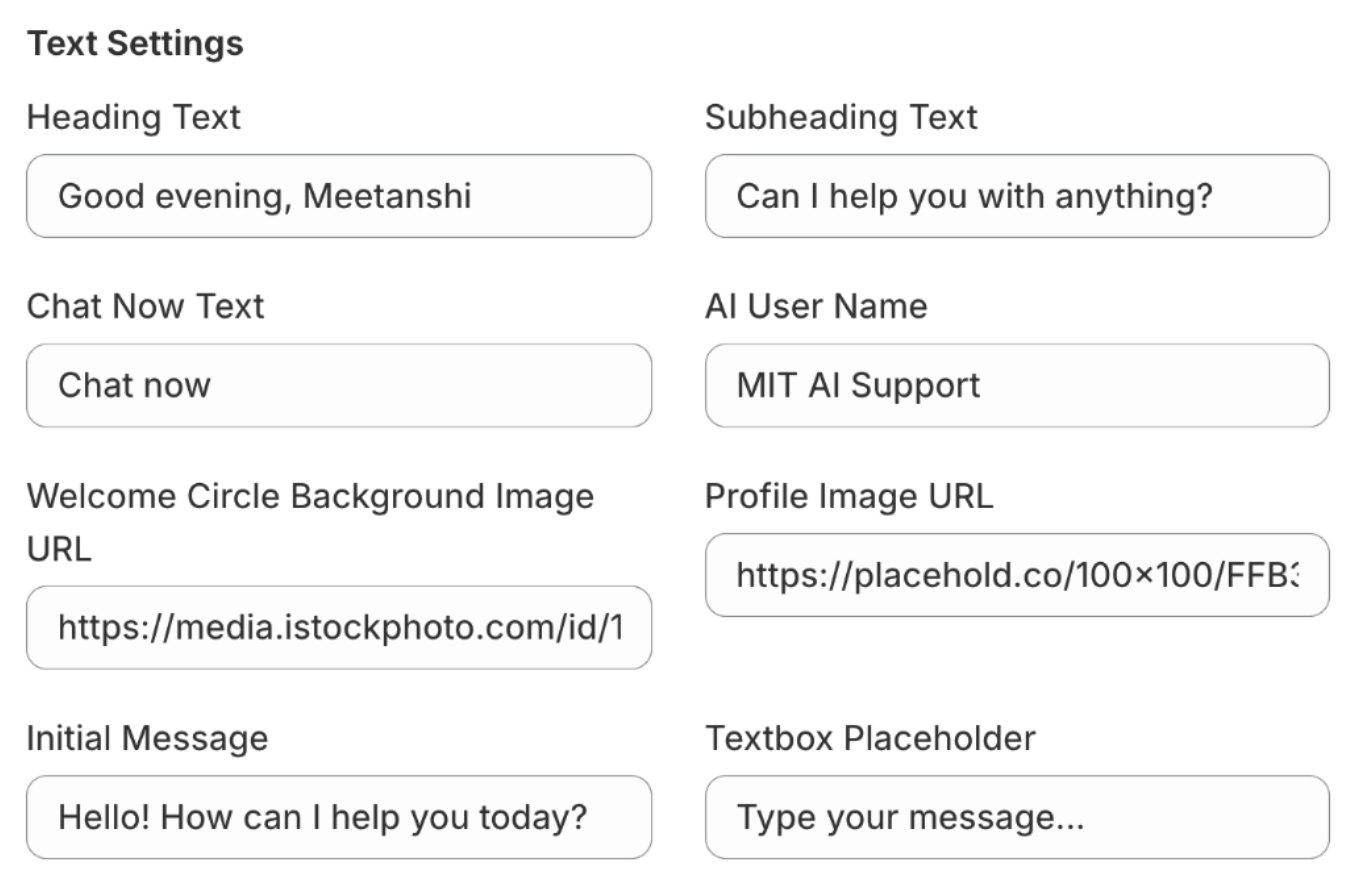
Text Settings
Add specific text and content that appears in your chatbot, from greetings to button labels.
- Heading Text: Add the main greeting at the top of the chatbot.
- Subheading Text: The text directly below the main heading.
- Chat Now Text: The text that appears on the chatbot's launcher button before it's opened.
- AI User Name: The display name for the bot during a conversation.
- Welcome Circle Background Image URL: URL for the image shown in the top header circle.
- Profile Image URL: URL for the bot's avatar, which appears next to its messages during a conversation.
- Initial Message: The first message the bot automatically sends to the user when they open the chat.
- Textbox Placeholder: The placeholder text shown in the message input field during a conversation.
- Search Box Placeholder: The placeholder text for the search bar on the chatbot's home screen.
Step 2: Configure Actions & Articles
Here set up the bot's core functions using the Actions and Articles tabs.
Actions
Add the main buttons that appear on the chatbot's home screen, giving your customers quick links to common tasks.
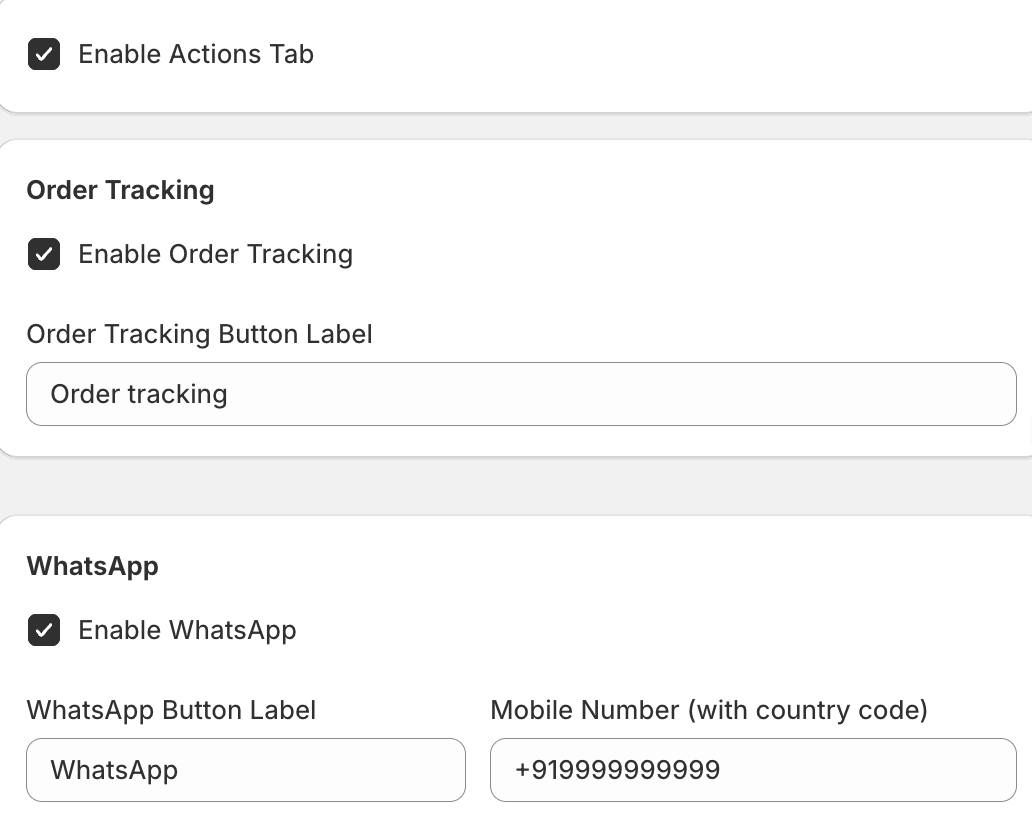
- Enable Actions Tab: Check this box to view other button settings.
- Order Tracking:
- Enable Order Tracking: Check the "Order tracking" button.
- Order Tracking Button Label: The text that appears on the button
- WhatsApp:
- Enable WhatsApp: Check the "WhatsApp" button.
- WhatsApp Button Label: The text for the button.
- Mobile Number (with country code): Add the phone number that customers will be directed to when they click on it.
- Email:
- Enable Email: Check to show the "Email" button.
- Email Button Label: The text for the button.
- Email Address: The support email address that will be opened in the customer's default mail app.
- Support:
- Enable Support: Check to show the "Support" button.
- Support Button Label: The text for the button.
- Support URL: The web address (URL) for your contact or help page.
Articles
Here, you answer commonly asked questions without the need of the customer starting the conversation.
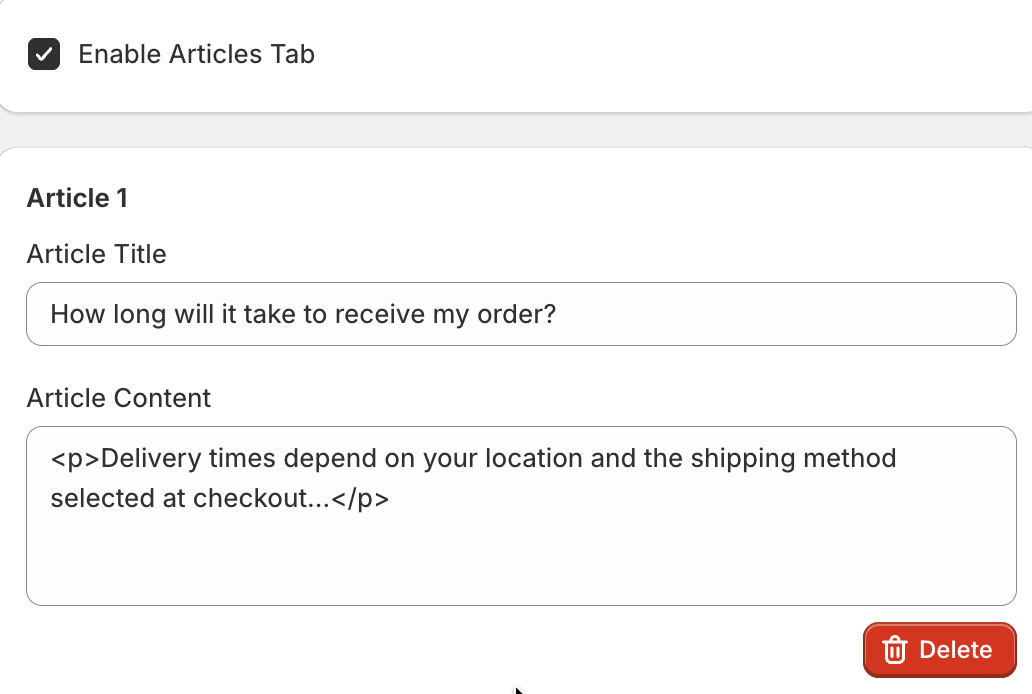
- Enable Articles Tab: Check this box to get access to the settings under this tab.
- Adding an Article:
- Click the + Add Article button to create a new entry.
- Article Title: The question or topic of the article
- Article Content: The answer to the question.
- Delete: Click the "Delete" button to remove an article.
Step 3: Configure Chatbot Behavior & Personality
The last step is to define the bot's personality, tone, and the core information it uses to answer questions.
General Settings
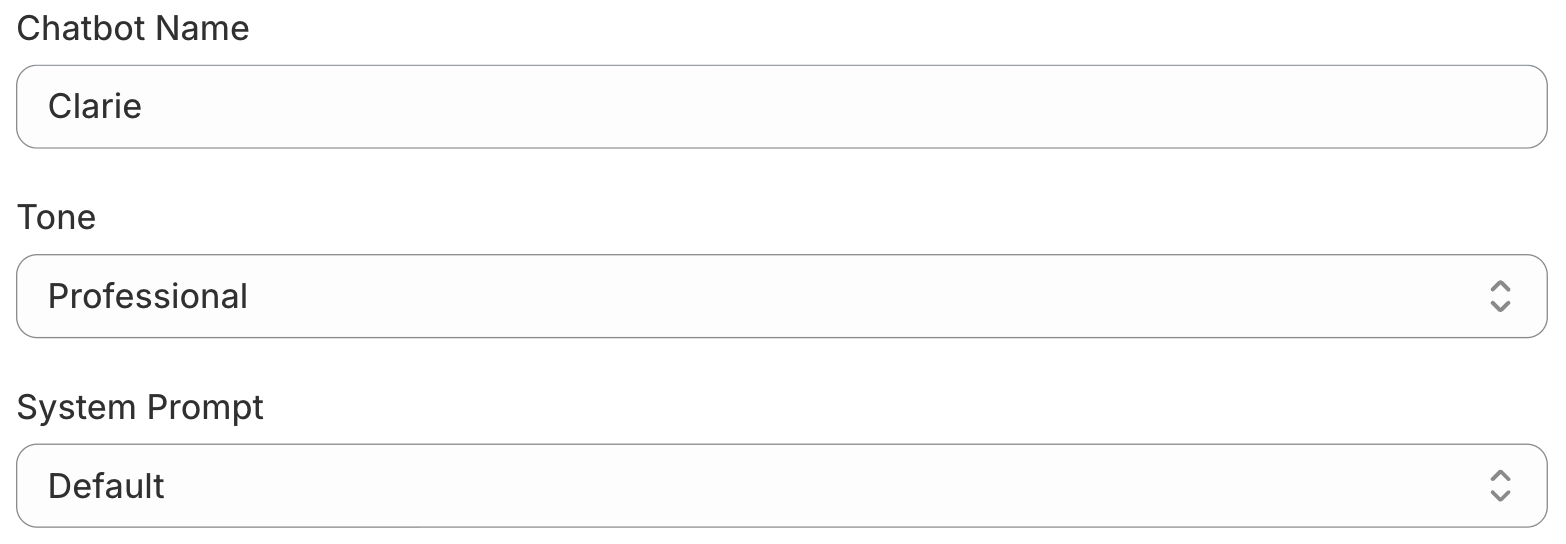
This tab controls the bot's fundamental identity.
- Chatbot Name: The name your bot will use when interacting with customers
- Tone: Select the bot's communication style from the dropdown to match your brand's voice.
- System Prompt: Select default or custom create the prompt to define the role and behaviour of the bot.
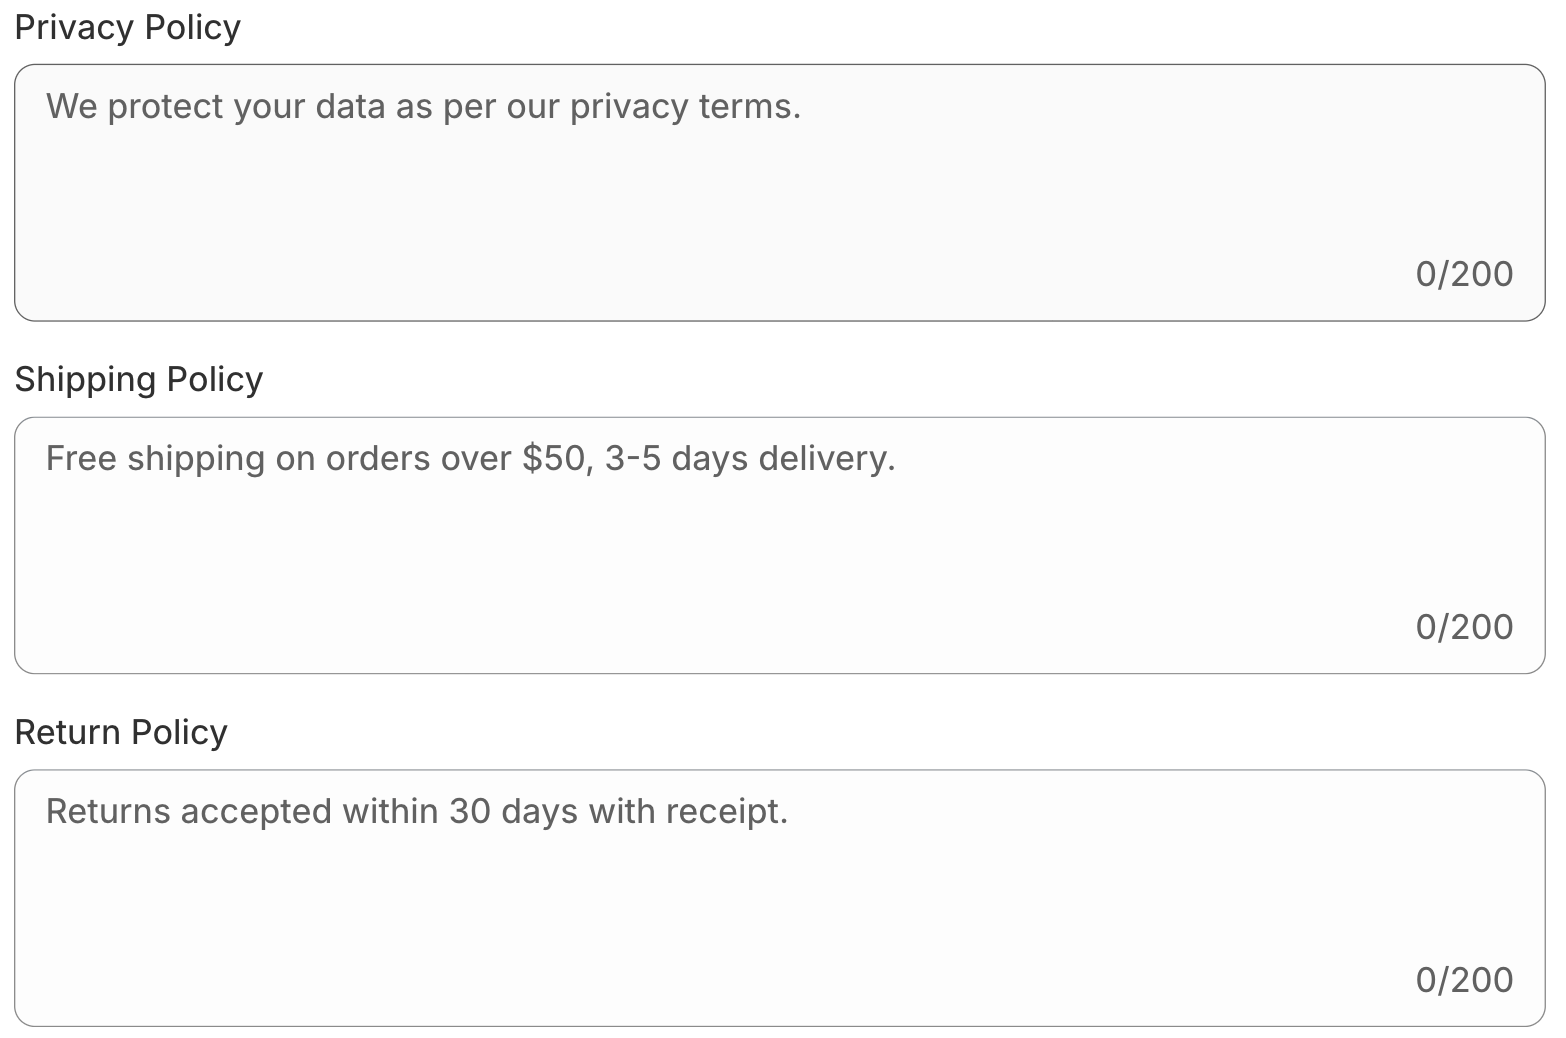
Policies
Add specific answers to common questions about the privacy, shipping, and return policies. Your answer can go up to 200 words.
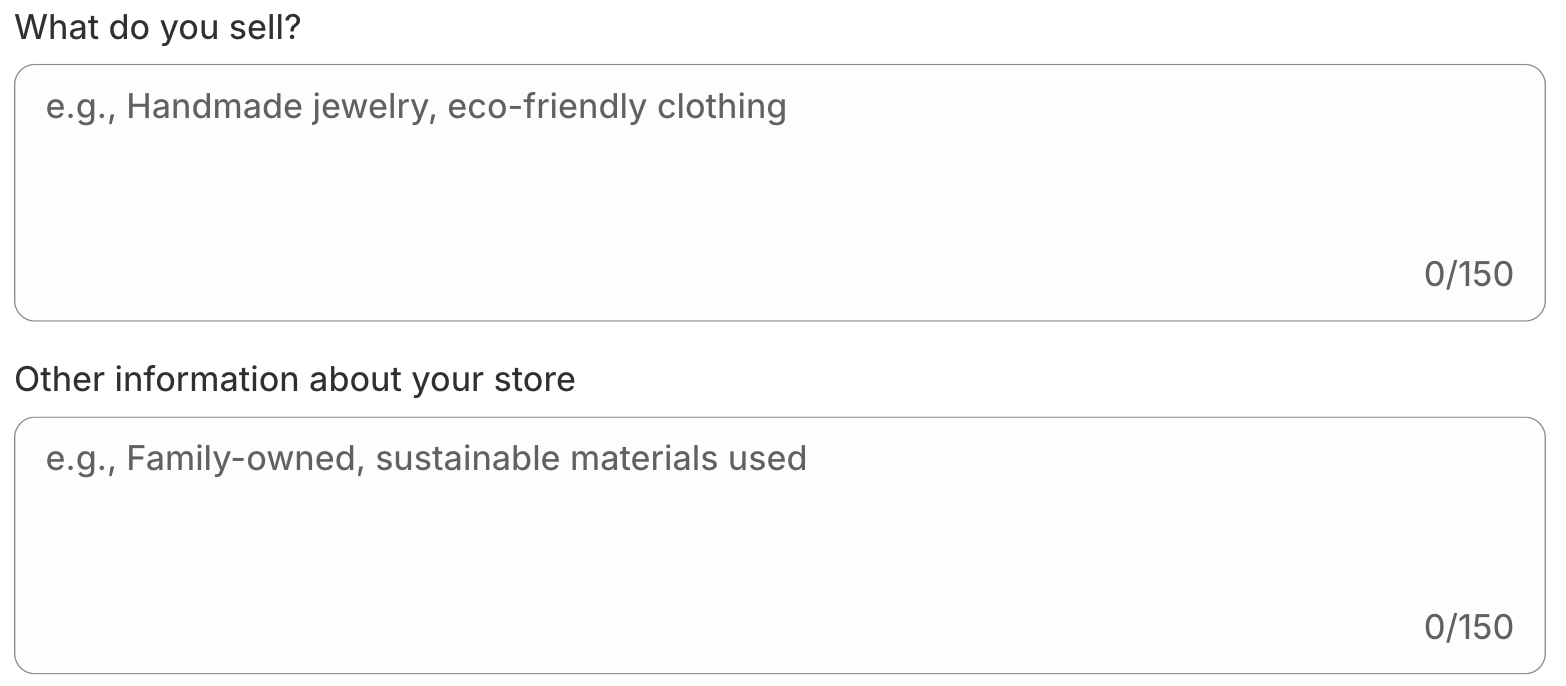
Other Information
This tab feed helps the bot to get more relevant and helpful responses about your products and business.
- What do you sell?: Briefly describe your main products.
- Other information about your store: Add any other unique details the bot should know.
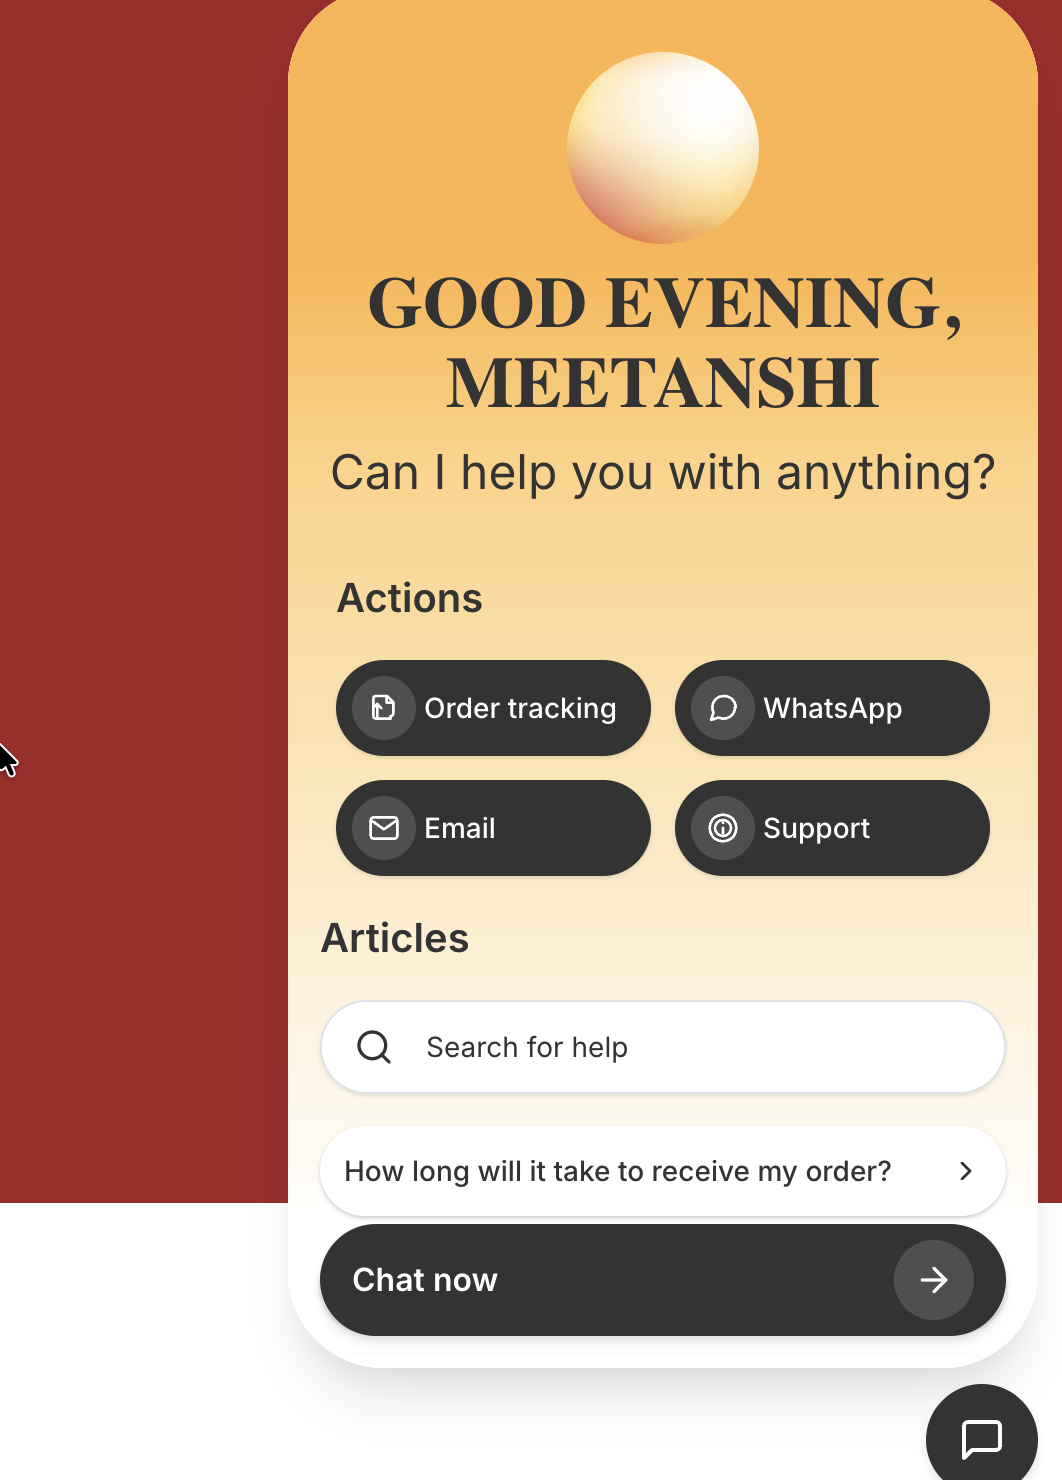
Chatbot in the Frontend
This is how the chatbot will appear in the frontend.
Analyze Every Bot Conversation
Head to the Chat List from the app dashboard to get a log of every conversation your chatbot has with customers. Use the Refresh button at the top right to see the most recent conversations.
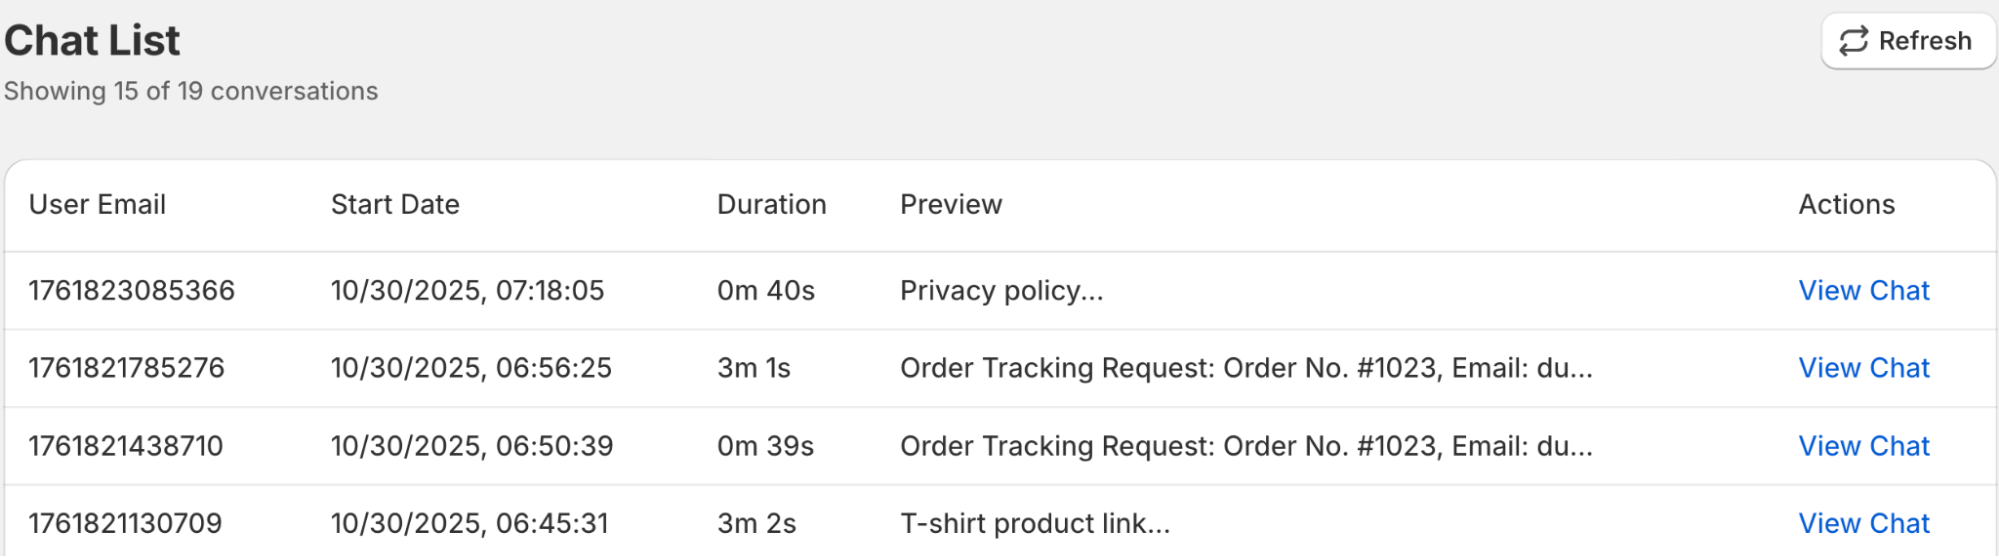
When you click on View Chat, it opens the full conversation between the customer and the bot.
