Switching from one e-commerce platform to another feels really daunting. However, when you get a step-by-step process that guides you throughout your migration, it becomes a lot easier. This is why today we have come up with our Magento to Shopify Migration Checklist.
By the end, you’ll have a clear blueprint on how to migrate from Magento to Shopify.
But before we start, let’s understand the specific data you can migrate from Magento to Shopify.
What Data Can You Migrate From Magento to Shopify?
Here’s a list of the data you can migrate from Magento to Shopify:
Products
- Name: This includes the exact name of the product as listed on Magento
- SKU: Stock Keeping Unit, a unique identifier for each product
- Full Description: Detailed information about the product
- Status: Whether the product is in stock, out of stock, or archived
- Manufacturer: The brand or company that produces the item
- Price Details: This includes the standard price, special offers, and related data
- URL & SEO Details: The product’s unique URL, along with its meta title and meta description for search engine optimization
- Additional Details: Product images, tags associated with the product, and its weight
Product Categories
- Name & Description: The name of the category and a brief description
- Status: Current status of the category (active, inactive)
- Images: Visual representation of the category
- SEO Details: Meta descriptions and titles of the categories
Manufacturers
- Name: List of all brands or manufacturers in the store
Customers
- Basic Details: This includes the first name, lastƒ name, and email of the customers
- Newsletter Subscription: Information on whether the customer has subscribed to your newsletter
- Addresses: Both billing and shipping addresses of the customer
Orders
- Date & Status: The date when the order was placed and its current status (e.g., pending, completed)
- Product Information: Detailed breakdown of products in the order, including name, SKU, price, quantity, any discounts applied, etc.
- Addresses: Comprehensive details about where the order is to be delivered, which include company address, country, state, zip code, telephone, and recipient name
- Customer Details: Names and emails of customers placing the order, along with their billing addresses
Coupons
- Code Details: The unique coupon codes
- Validity: Details about when the coupon starts and ends
Reviews
- Ratings: The ratings given by customers for the products
- User Details: Names of users who left the review.
- Review Timestamp: The date and time when the review was created
- Titles: The titles or headings of the reviews
Migration Checklist Part 1: Prepare For The Migration
1. Back Up Magento 2 Store
Before we dive into the actual Magento 2 to Shopify migration process, it’s crucial to have a backup in place. Backing up your Magento 2 store ensures that even if something goes wrong during Magento to Shopify data migration, you still have a copy of all your data intact.
Here are the steps to take a backup in Magento 2::
Log in to your Magento admin panel and navigate to System > Backups.
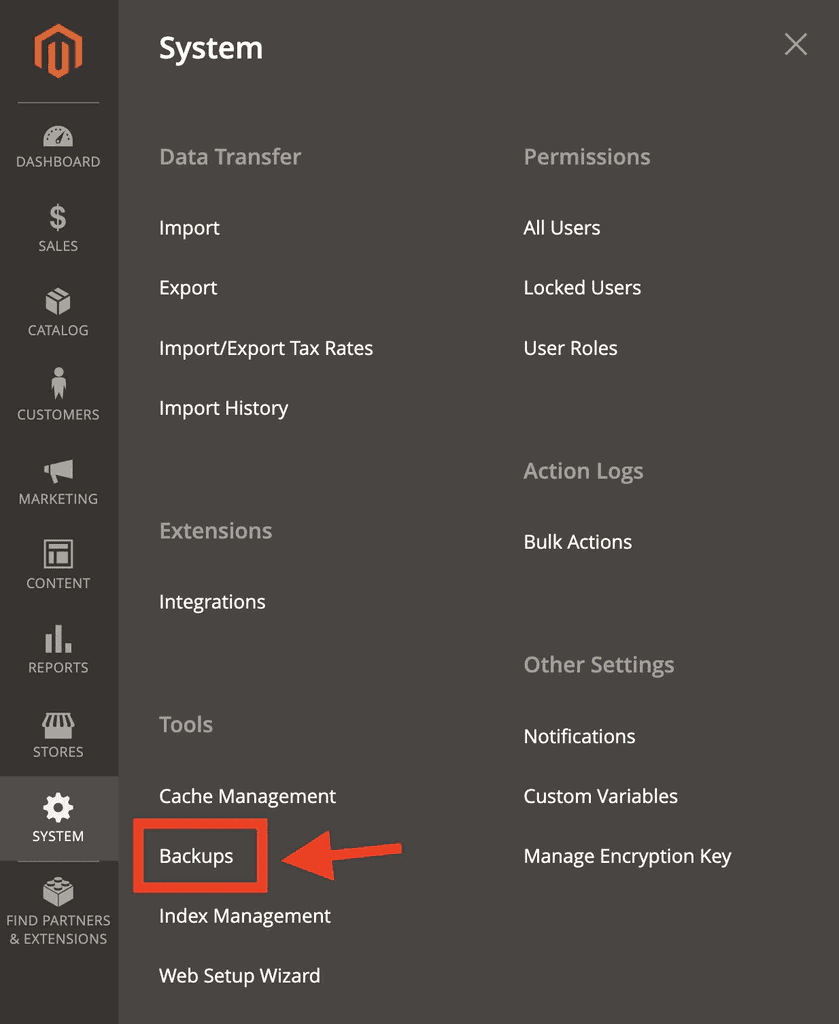
There are three types of backups in Magento 2: System Backup, Database and Media Backup, and Database Backup.
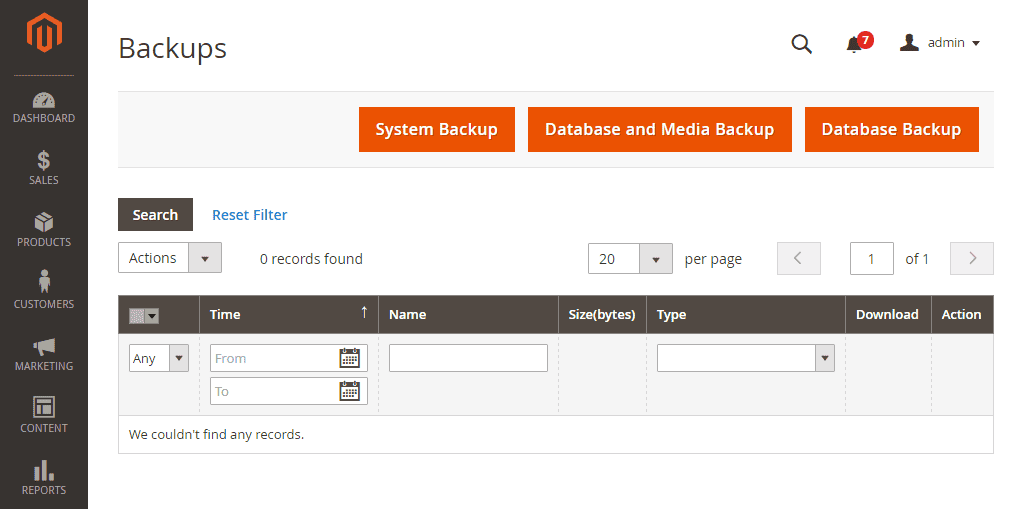
Click “System Backup” to create a complete backup, including the file system and the database.
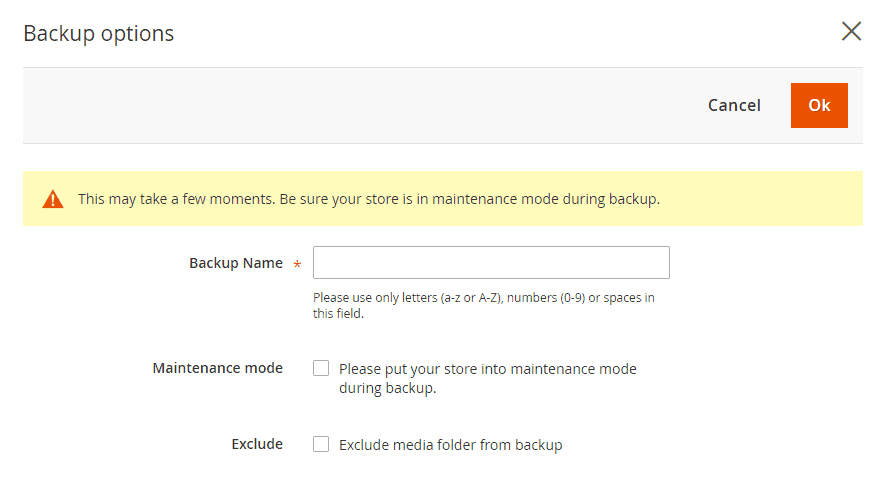
Name the backup as per your convenience and click “OK.”
Expert Tip: Always store your backup in at least two separate locations–perhaps a cloud storage solution and an external hard drive, just in case.
2. Create a Shopify Account & Set Up Your Store
Once your Magento store is safely backed up, it’s time to create a Shopify account and set up your store.
Here’s how to do that:
Go to Shopify and click the “Start free trial” button.

Enter your email address and set a password to create a Shopify account.
You’ll also need to set a unique store name.
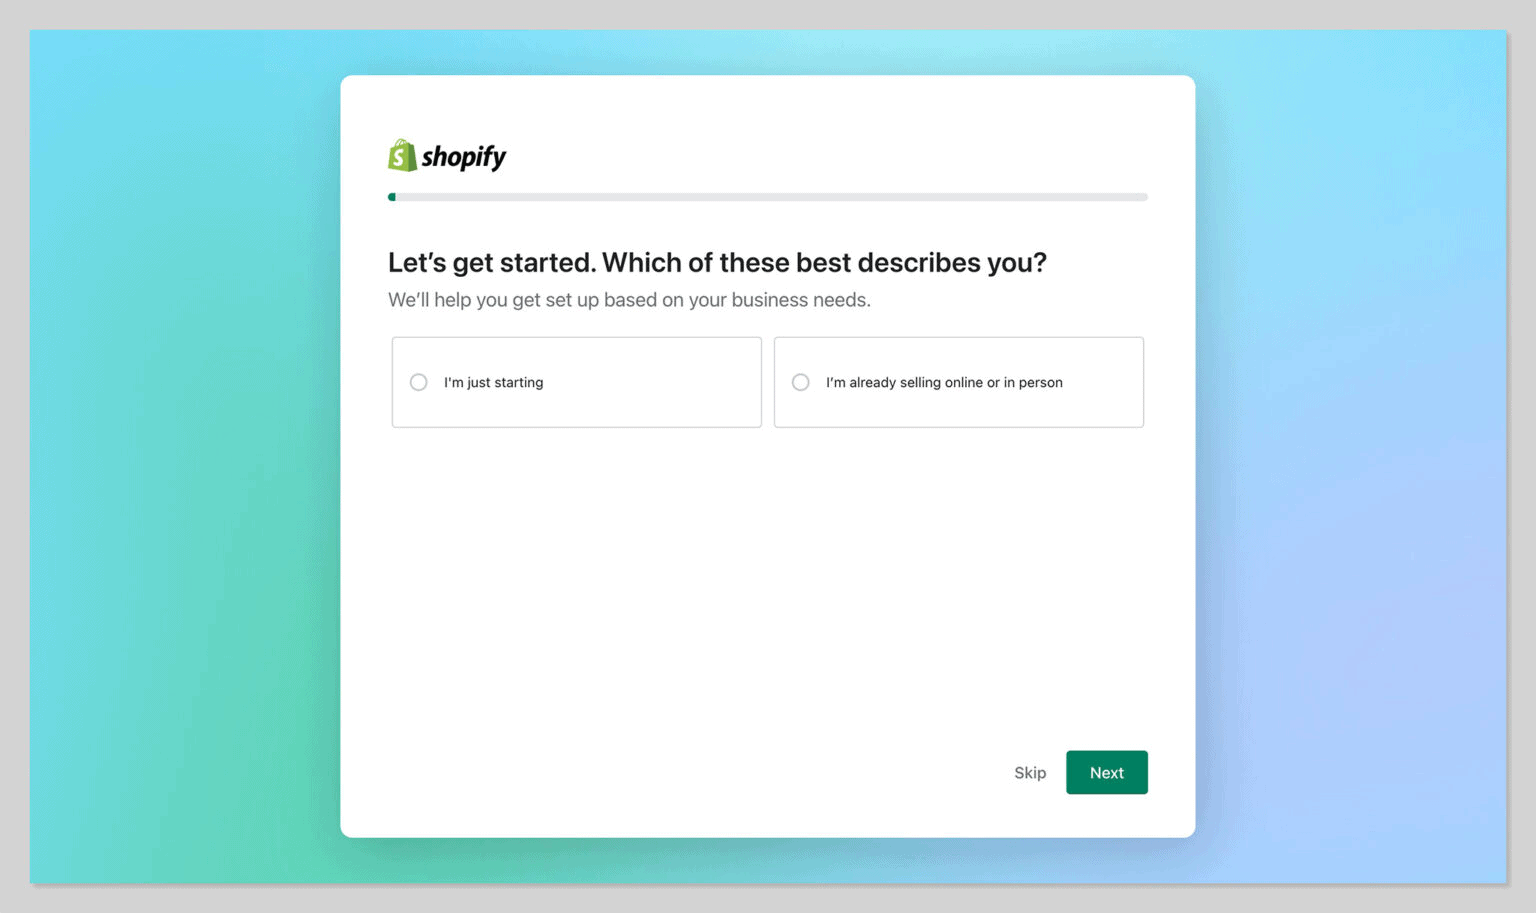
Click “Next” and select the options that describe your business. You can also skip these optional steps.
Now, provide some basic business information, including your physical address and phone number. It is necessary for setting up payments and taxes.
Finally, click “Enter my store.”

Now, with your account active, it’s setup time.
Choose A Theme & Design
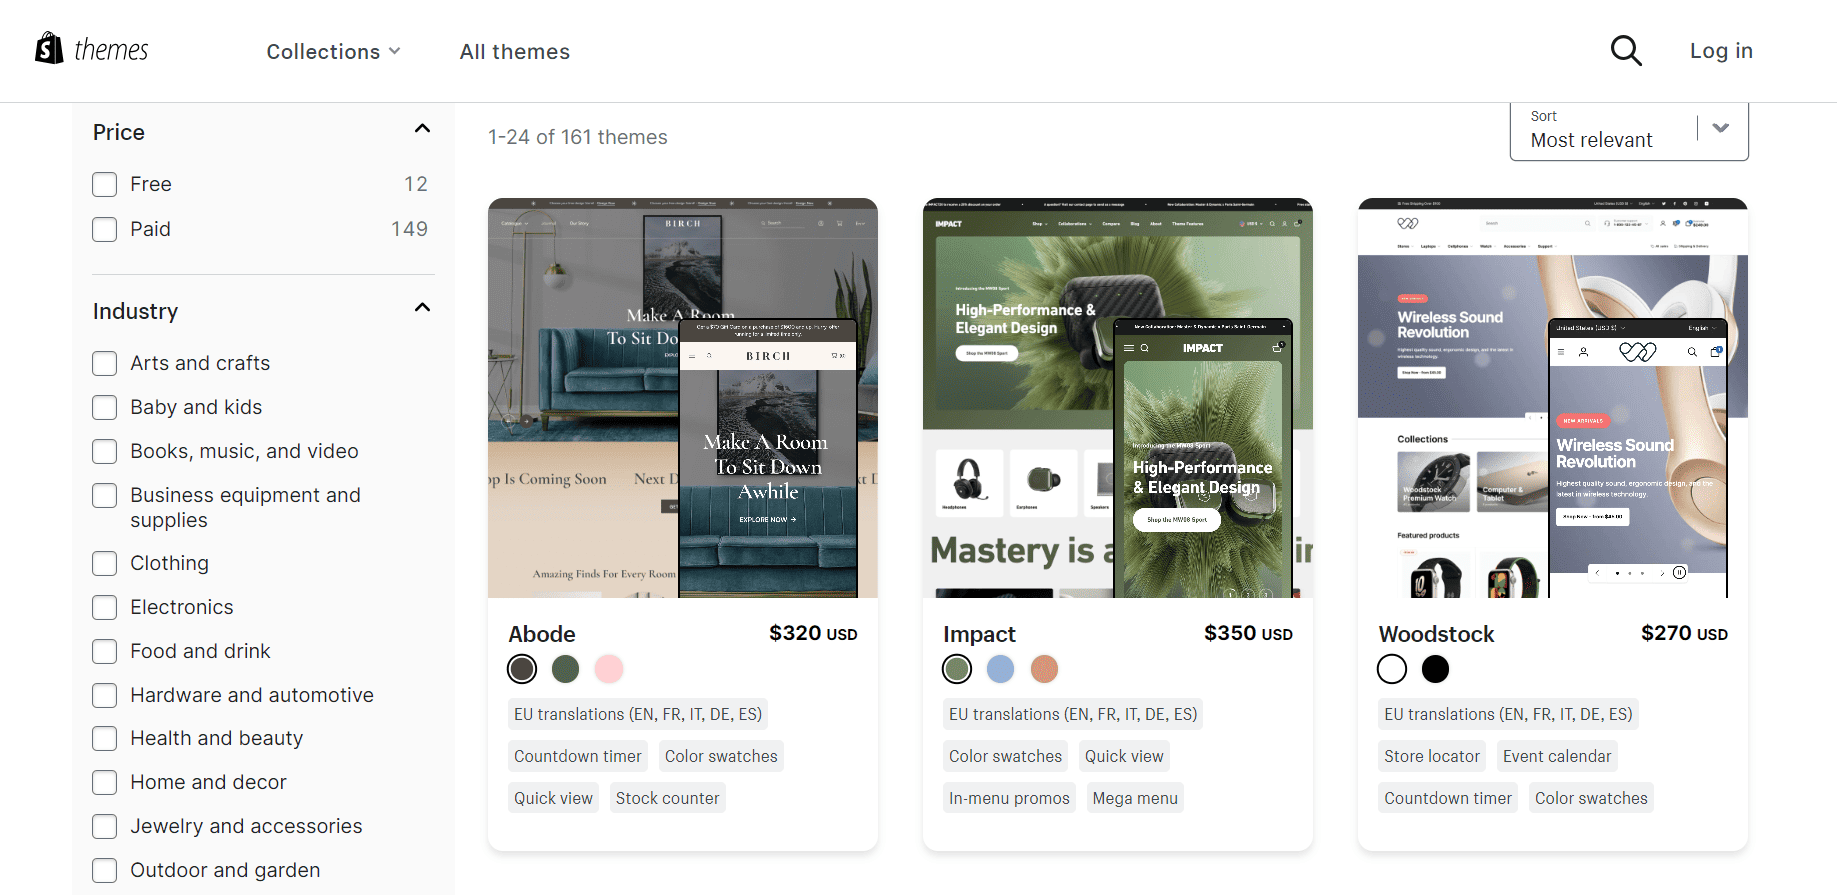
Browse the Shopify theme store and select one that aligns with your brand. Customize it to your liking.
Set Up Payments & Shipping
In the Shopify dashboard, go to “Settings” and then “Payments.” Choose a payment gateway (like Shopify Payments, PayPal, or others) and follow the setup instructions.
Likewise, configure the shipping settings in the store.
With these steps completed, your Shopify store is now ready to receive the data from your Magento platform.
3. Install Required Apps & Integrations
Now, it’s time to install some essential Shopify apps to fill the functionality gaps.
Here are the steps to do that:
Go to Shopify app store or search for an app directly in the admin search bar.

Find the required app and click “Install” on the app’s details page to get it.
If the app is paid, you’ll need to complete the payment to start using the app.
Once installed, you can find the app in your admin dashboard (or through the search bar) and start using it.
Note: It’s easy to get carried away with all the flashy tools available on Shopify. But remember, each app can affect your store’s speed and performance. So, only install apps that you truly need.
Check out our library of Best Shopify Apps
Migration Checklist Part 2: Data Migration
4. Export Data from Magento 2
For transferring your website data into your Shopify store, it’s crucial to export it properly from your old Magento store. Here’s how to do that:
Go to Magento admin, and navigate to System > Data Transfer > Export.
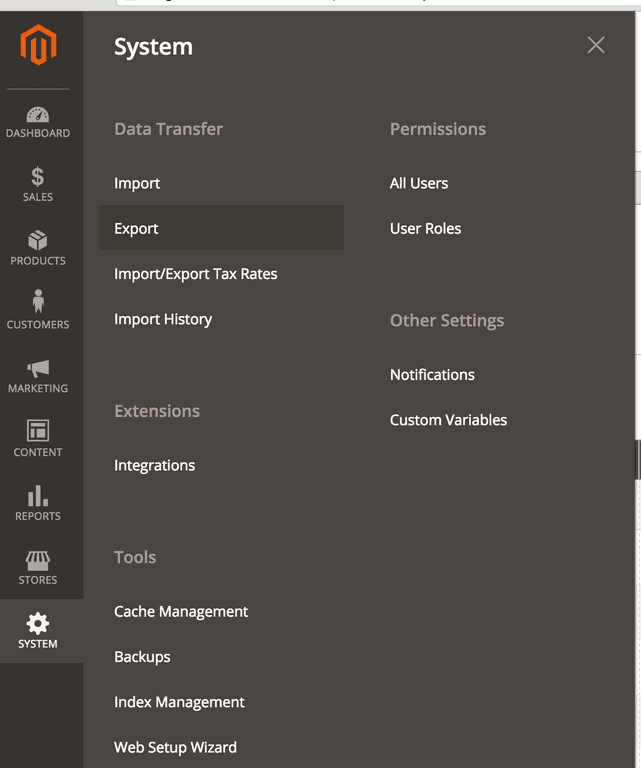
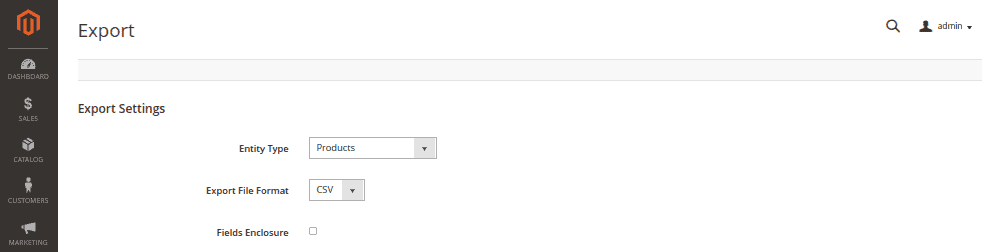
In the Export Settings, choose the entities you want to export, like Products, Customers, etc.
Keep the export file format .csv.
Select the applicable entity attributes to export data.
Here, you can apply filters to export only specific data from the store.
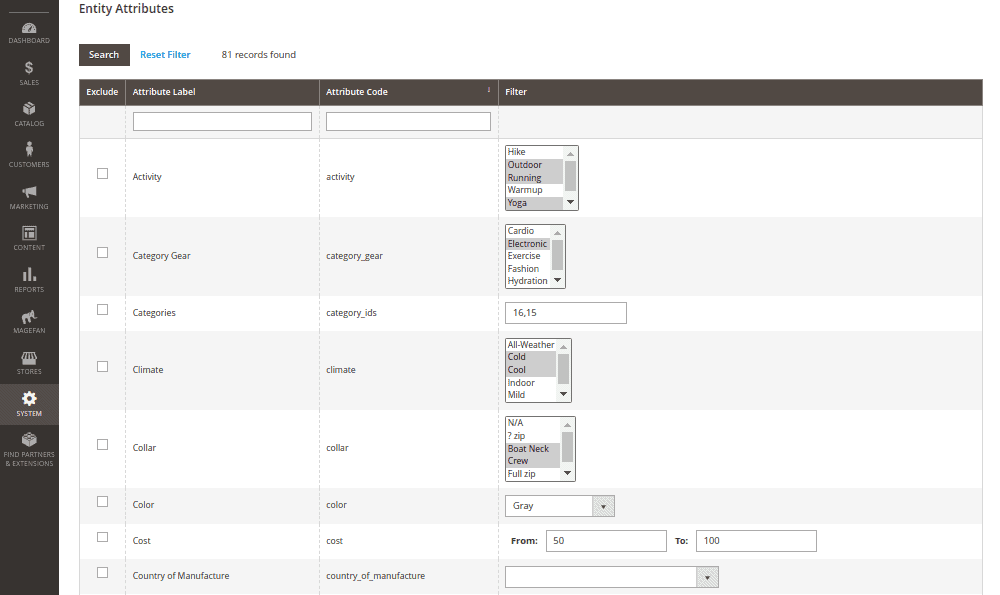
Click “Continue.”
Depending on the size of your store, the export might take a while.
Feels like it’s too much?
Take help from e-commerce experts for a smooth migration.
5. Import Data into Shopify
Now, its time to import the exported data into Shopify.
Shopify supports importing the data in bulk from .csv files. But you need to modify the files first as per the required format. You can do it by editing the .csv files in spreadsheet tools like Microsoft Excel or Google Sheets. The sample .csv files are available on the official Shopify site.
Once you’ve modified the files, you can simply import them into Shopify.
And if that’s a bit technical for you, there are a few Shopify apps that can help.
You can use a third-party app to move data from Magento 2 to Shopify. You can find them on the official app store.
Or there is no much data to transfer, you can try a manual approach, i.e. adding products, categories, and pages manually.
6. Manually Create CMS Pages
CMS pages are the essential pages of your website, such as ‘About Us‘, ‘Contact’, and ‘FAQs’. To manually create CMS pages:
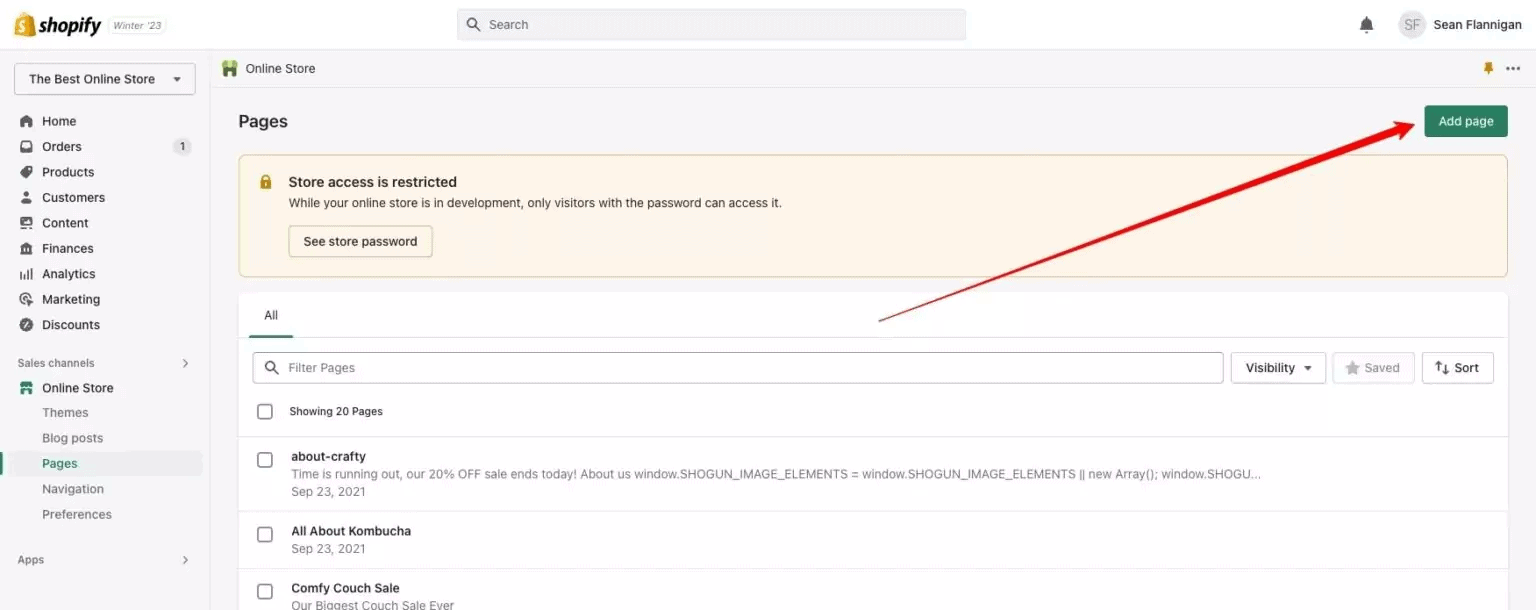
In your Shopify admin, go to ‘Online Store‘ > ‘Pages.’
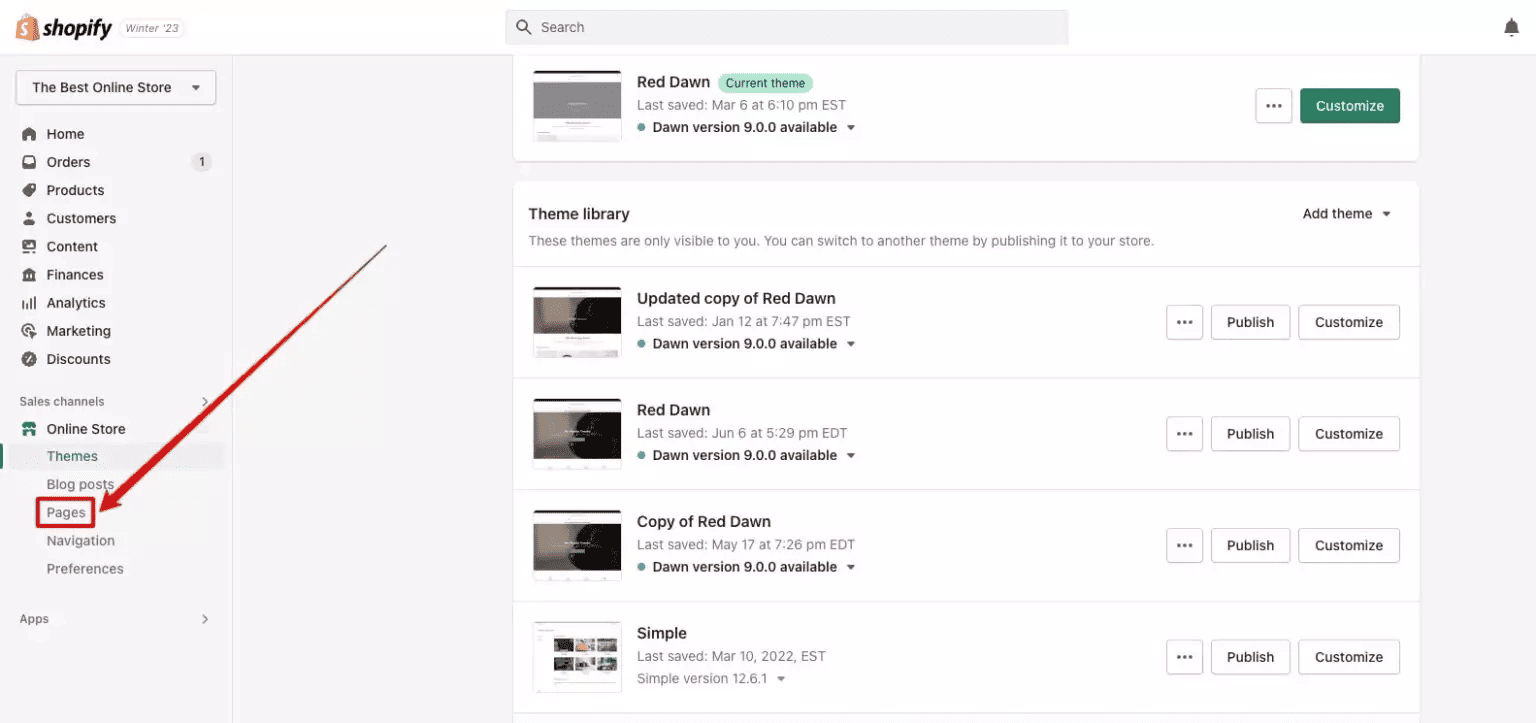
Click ‘Add Page.‘
Enter page details, such as:
- Title: Enter the name of the page.
- Content: Here’s where the text, images, or videos you had on your Magento CMS pages will appear.
- Search engine listing preview: Enter the SEO title and meta description for the page.
Keep the visibility option Visible to make it accessible to anyone.
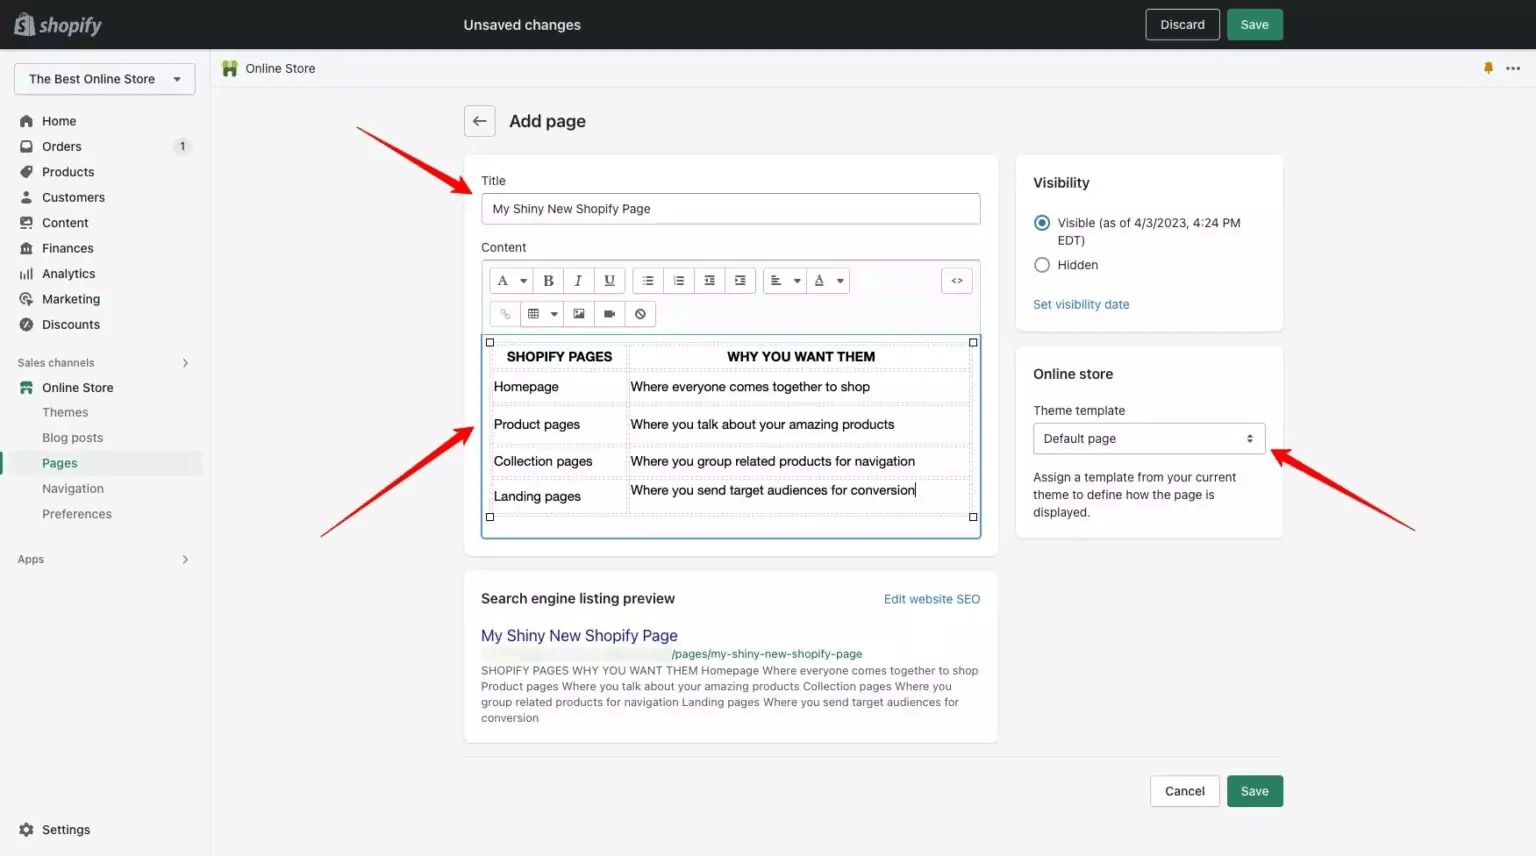
Finally click ‘Save.’
Create all the required CMS pages in the same way.
7. Create URL Redirect Map
When migrating from Magento to Shopify, the structure of your URLs will likely change.
For instance, your customers might have bookmarked certain pages of your Magento store. But without a proper redirect, they’ll end up on a ‘404 Page Not Found‘ when they use that bookmark post Magento 2 to Shopify migration.
And, for search engines, if old URLs lead to dead ends, it can harm your SEO rankings. Thus, it’s important to ensure every old URL points to its correct new destination. Here are the steps for that:
- Start by listing down all the URLs from your Magento store. You can use tools like Screaming Frog or simply export them from Magento.
- As you set up products, categories, or content on Shopify, note down their new URLs.
- Create a simple two-column table. Place the old Magento URL in one column and its corresponding new Shopify URL in the next.
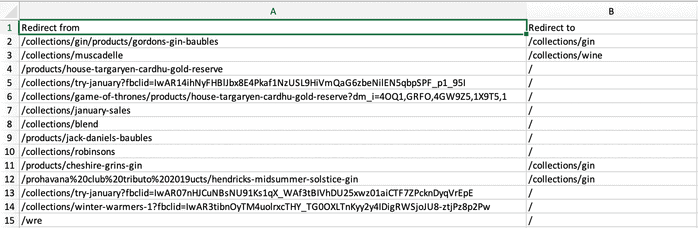
You can use Shopify’s in-built feature to set up redirects. To redirect URLs from Magento to Shopify to work smoothly, you will first need to map the old URLs to the new ones and then implement bulk redirects in Shopify using a CSV file.
Here’s how to do it:
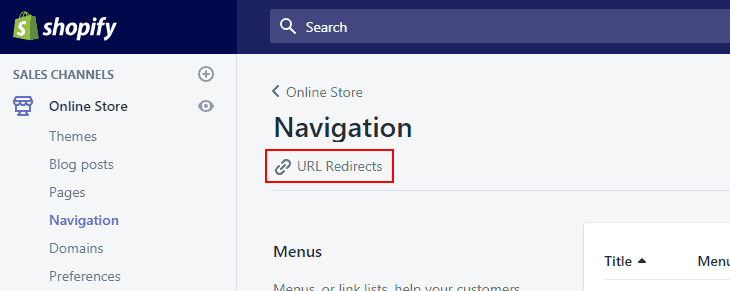
In the Shopify admin, go to Online Store > Navigation.
Click on “URL Redirects.”
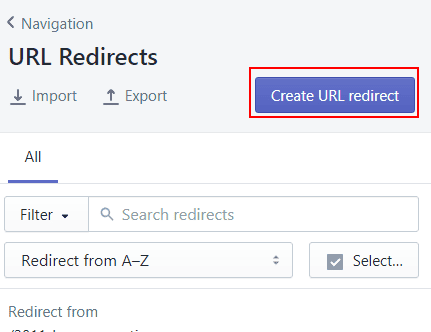
Click “Create URL Redirect.”
Input your old Magento URL in the ‘Redirect from‘ box and the new Shopify URL in the ‘Redirect to‘ box.
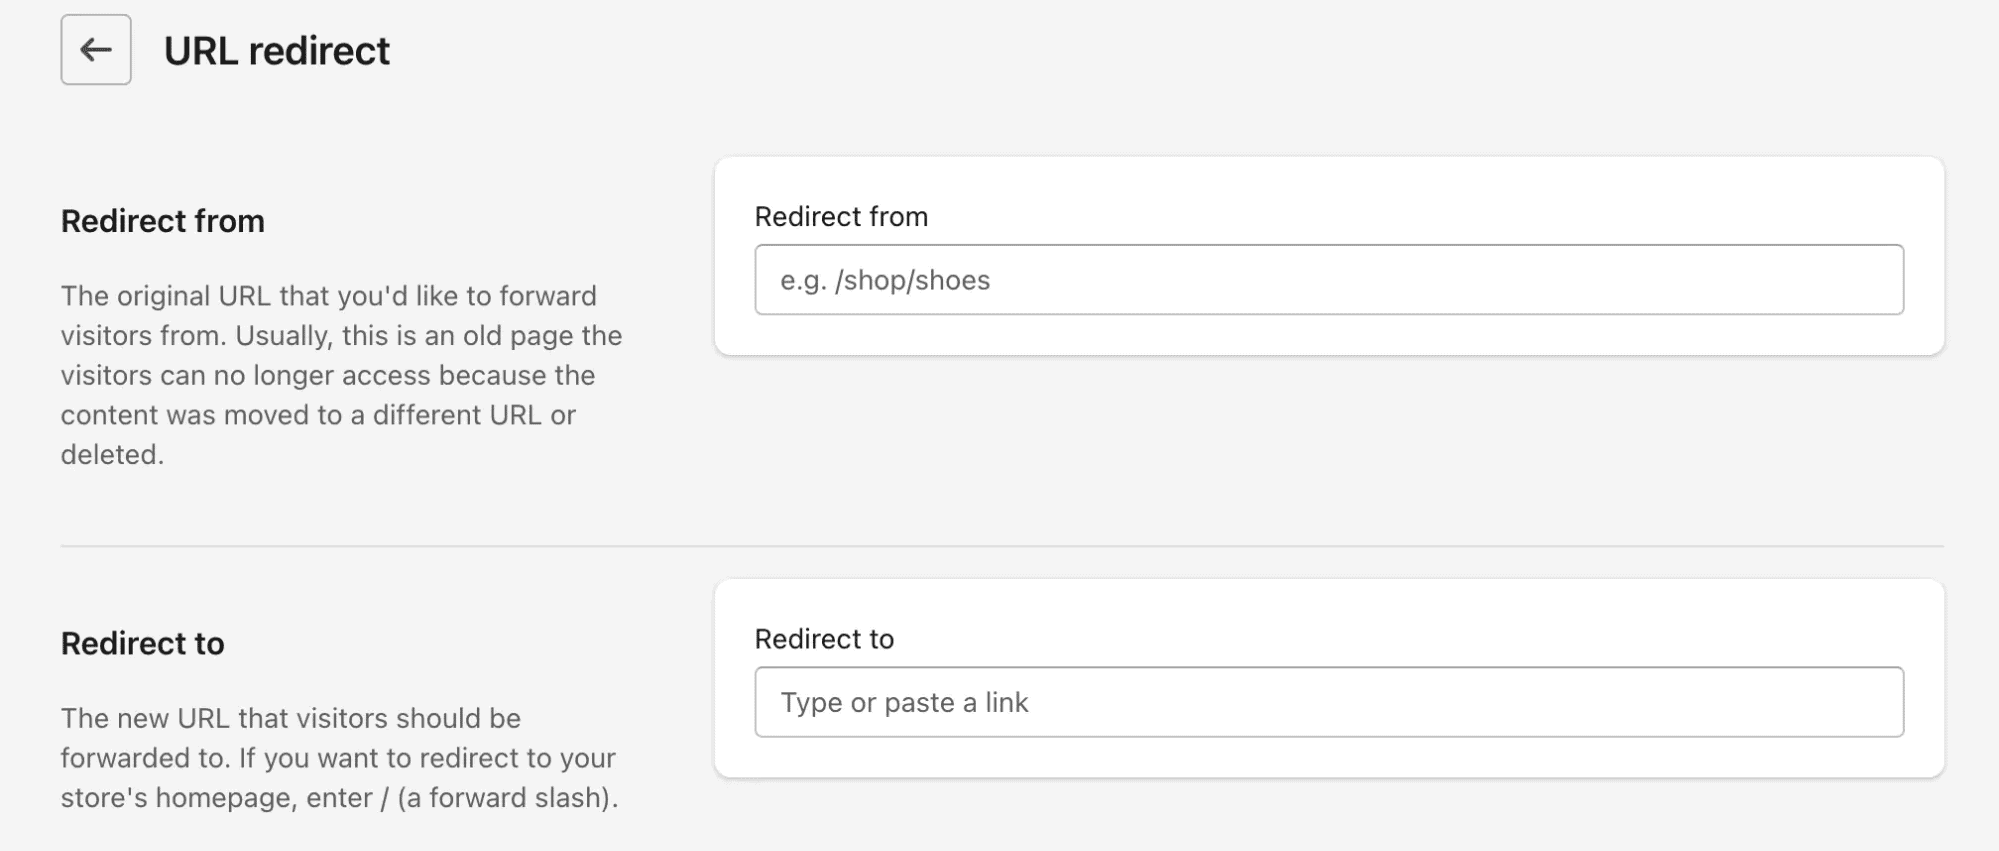
Click “Save Redirect.”
You can also import redirects in bulk from a .csv file.
Migration Checklist Part 3: Launch Your Store
8. Place a Test Order
Before launching your Shopify store. It’s always better to test it thoroughly–from product selection to payment.
Here’s how to do a test run:
Navigate to your online Shopify store and browse products as if you are an actual customer. Add any product to the cart. Feel the user experience here!
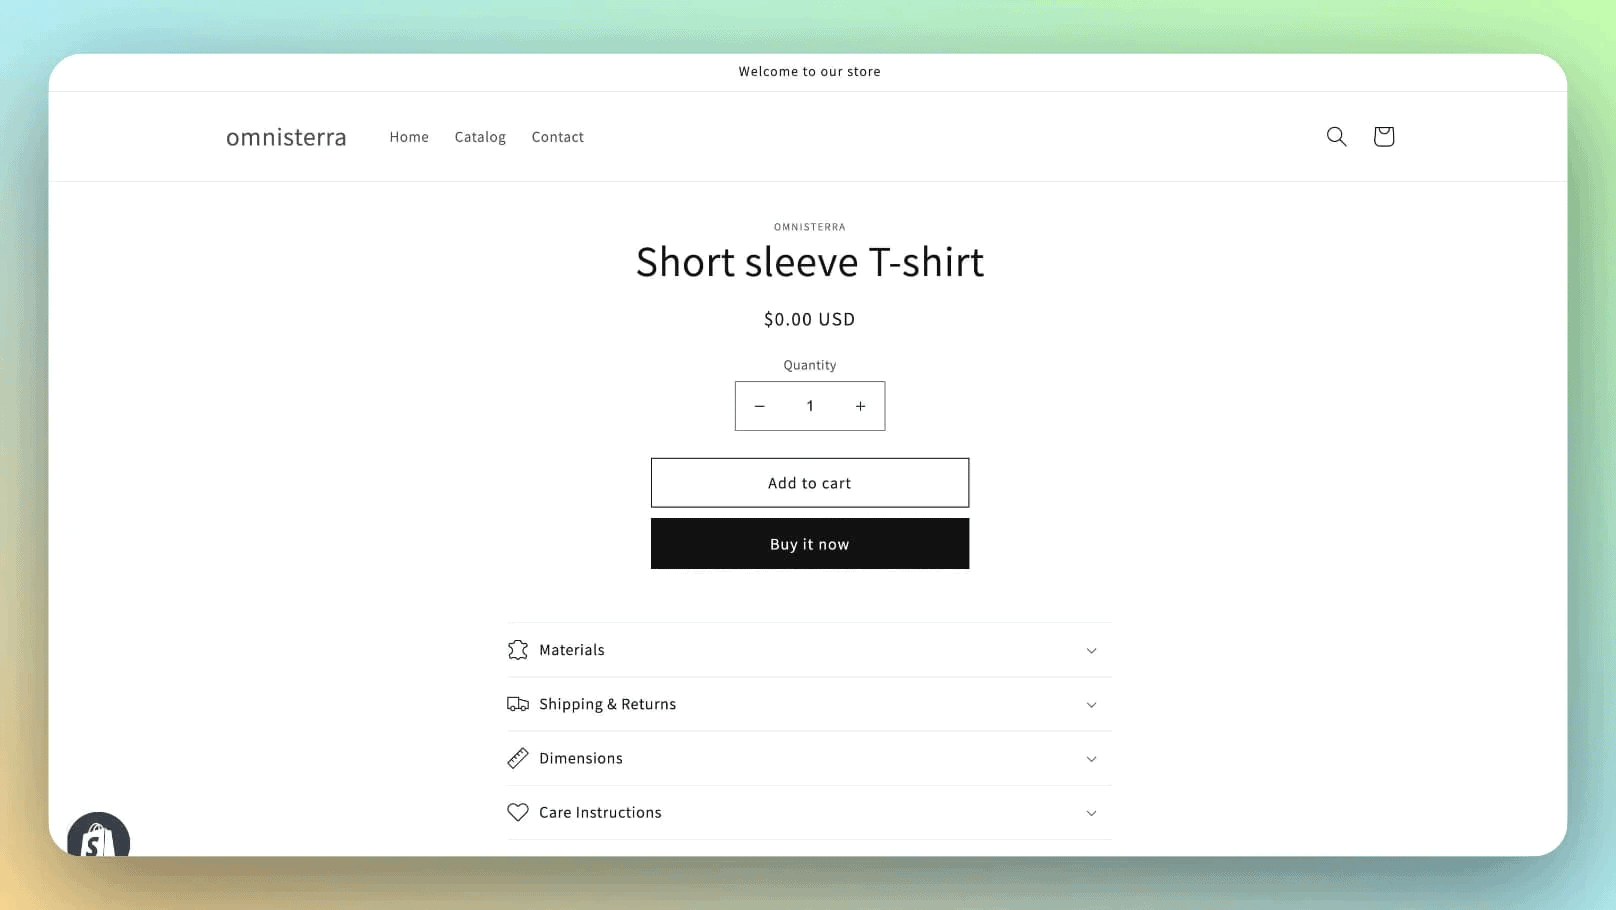
Go through the checkout process. Here’s where you’ll see if all the steps flow smoothly
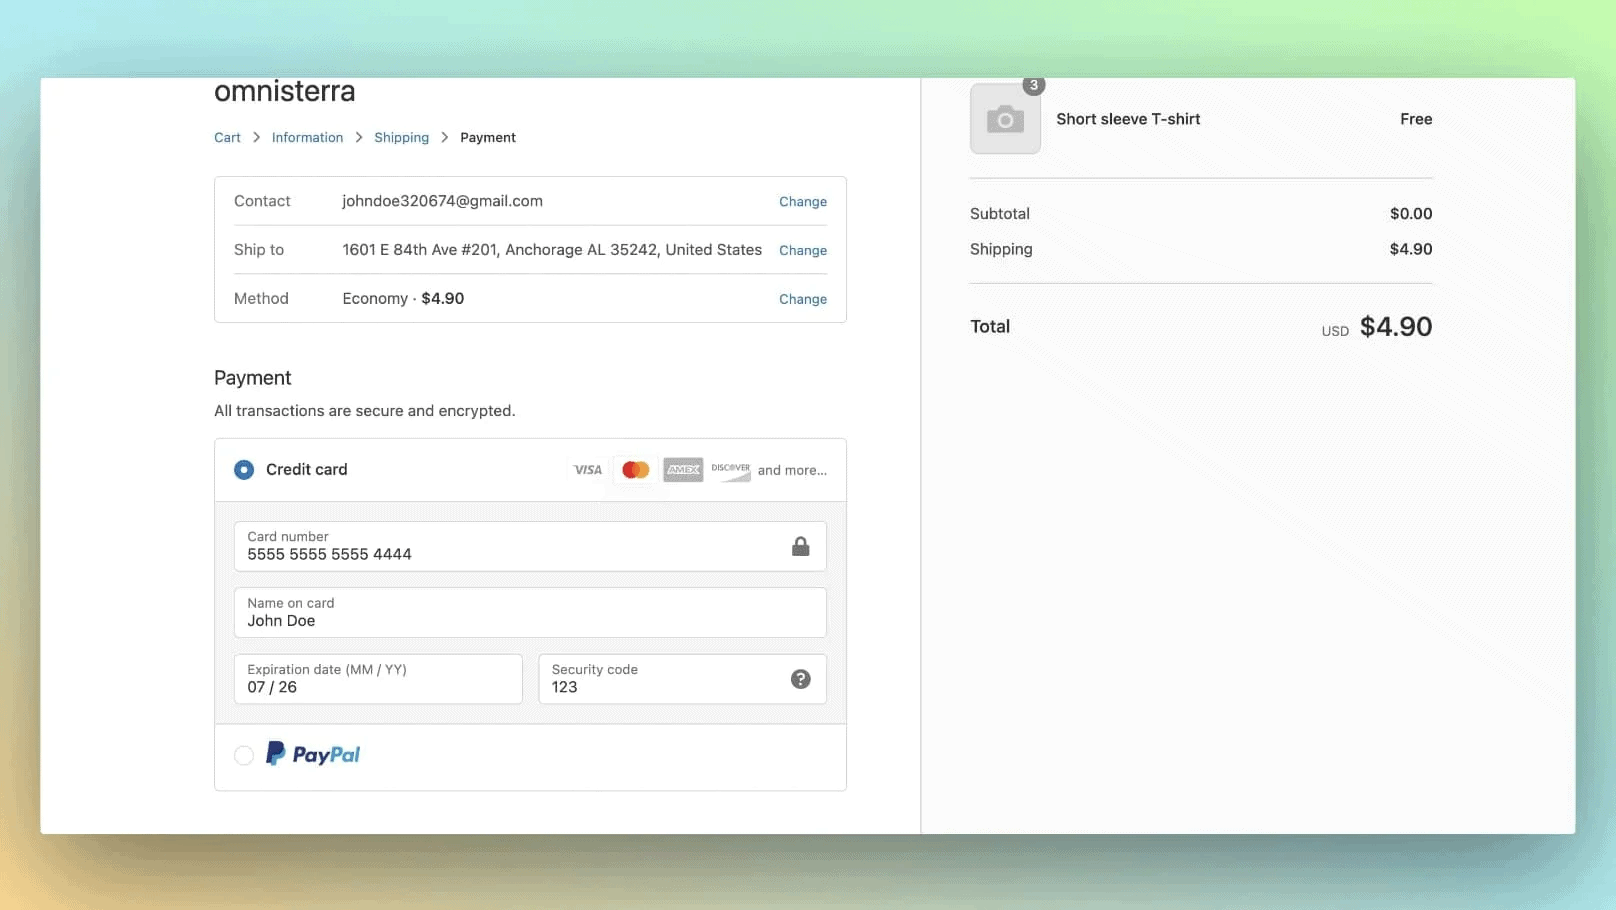
Use a real payment method. Don’t worry; you can cancel and refund the order right after.
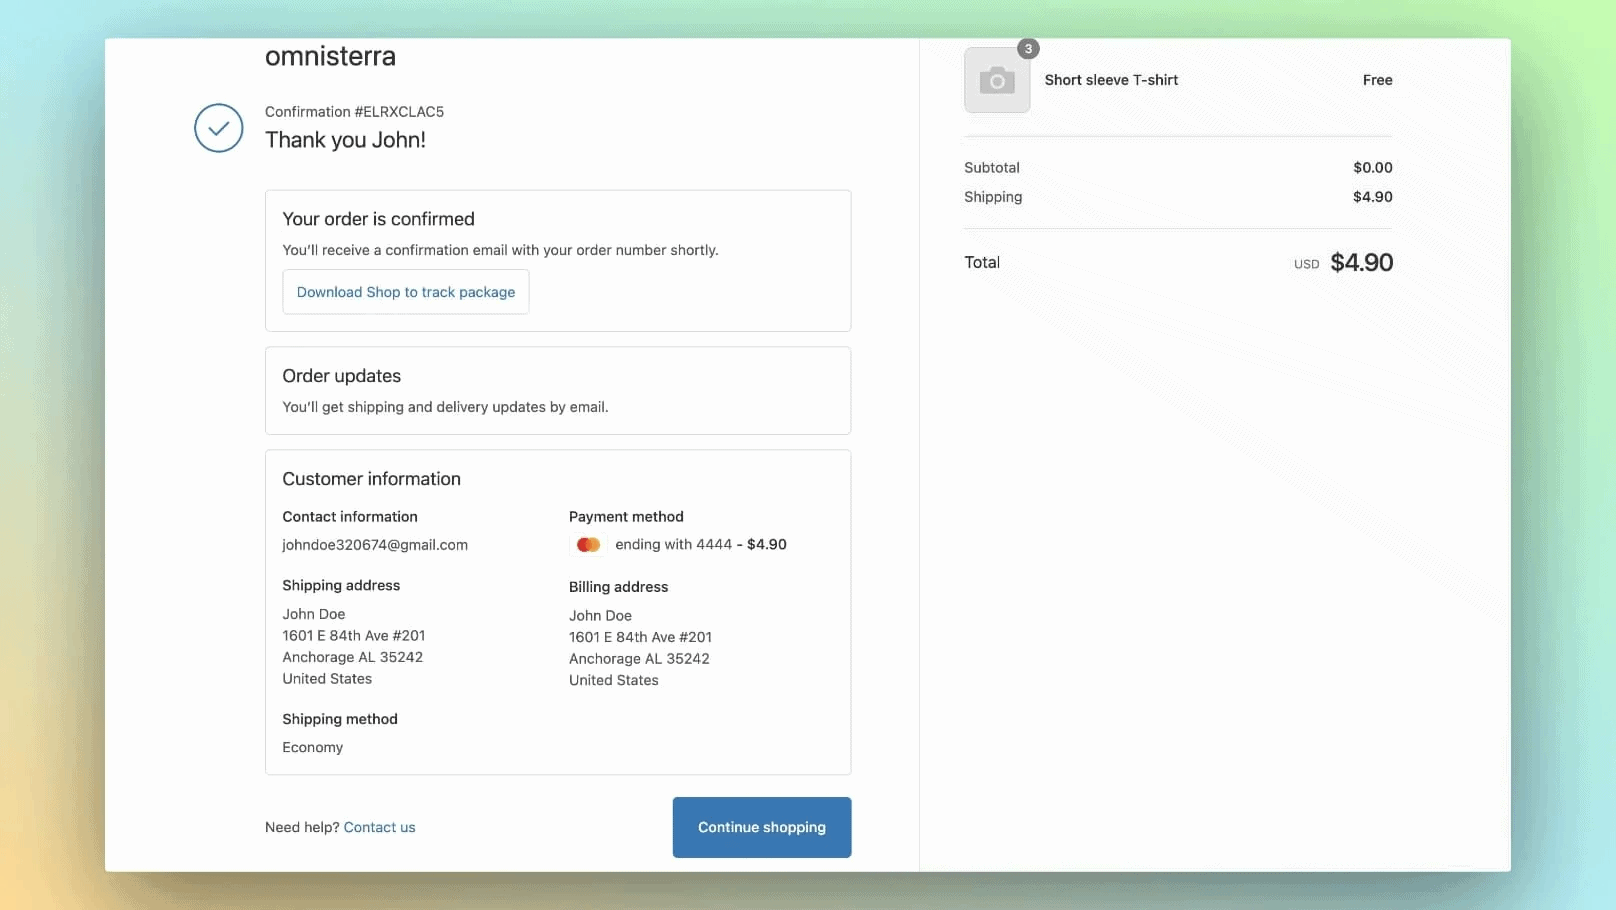
After placing the order, you should receive an order confirmation, both on the site and via email. Does it look okay?
Now, head back to your Shopify admin. Find the order and practice canceling and refunding it.
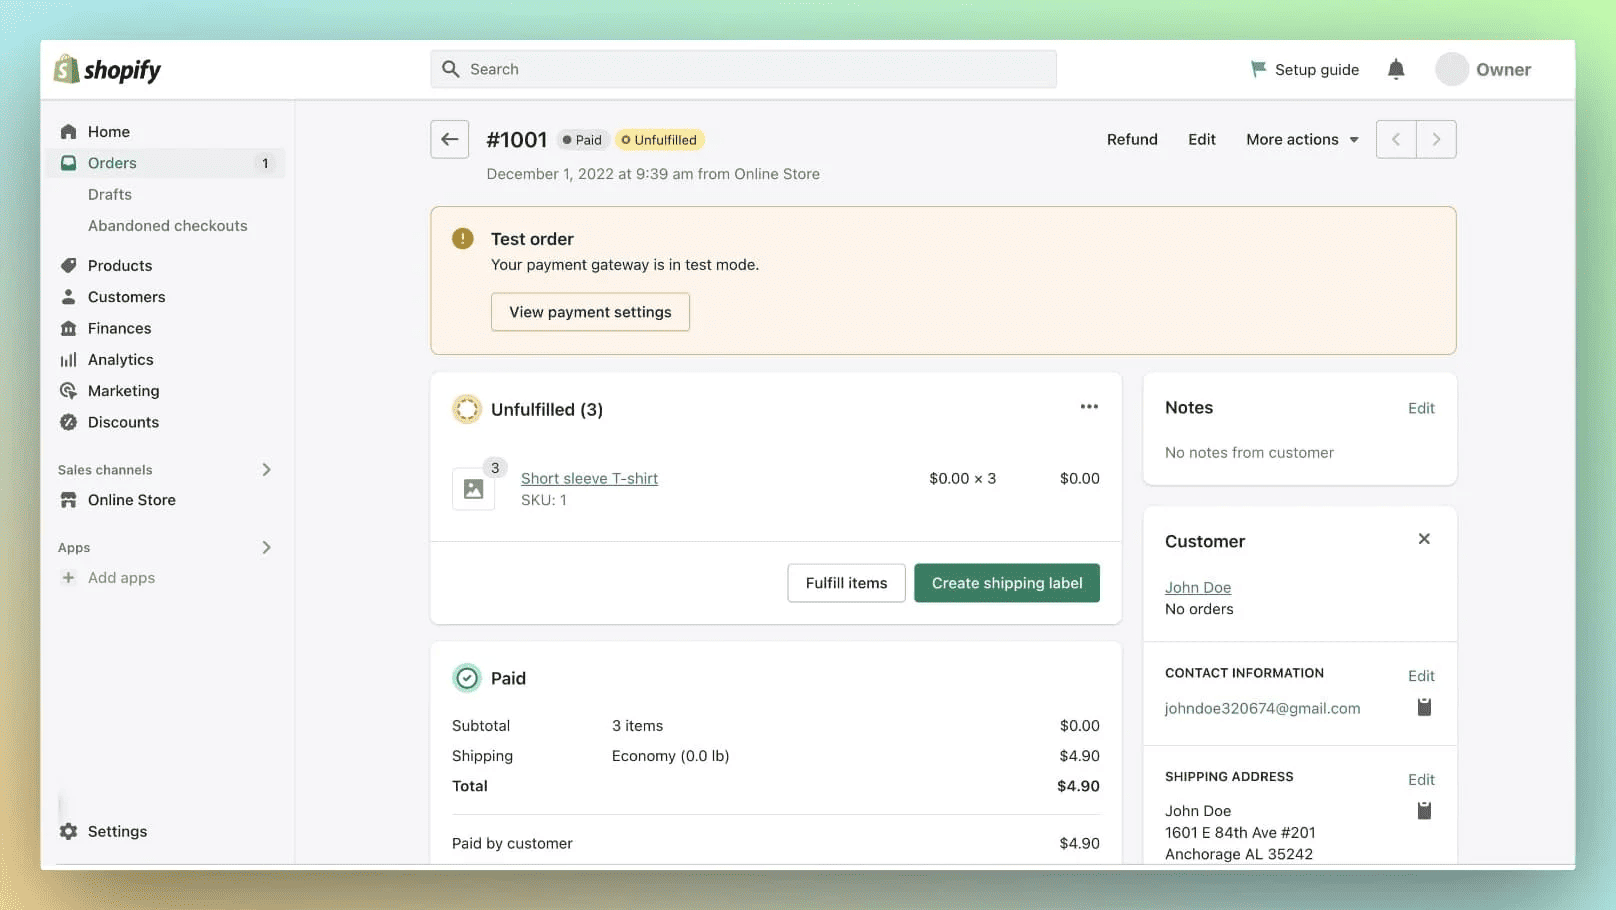
This is a good practice for potential real-life scenarios. Likewise you can test other customer-side functions.
9. Point Domain to Shopify
Now, it’s time to make an important move. This is a crucial step from an SEO’s point of view. You need to ensure that when customers type in your web address, they land on your Shopify store.
To connect your Magento 2 domain to Shopify, go to Settings > Domains and click “Connect existing domain.”
Follow the prompts on your screen and connect/transfer the third-party domain to Shopify.
Note: Domain transfer to Shopify takes approximately 20 days. Monitor email for updates and contact Shopify support for issues.
10. Submit a New Sitemap to GSC
A sitemap helps Google understand the structure of your site, making it easier to find and index your pages. By default, Shopify automatically generates a sitemap for you. You can find it by simply adding ‘/sitemap.xml’ to the end of your store’s domain.
For example, here’s the sitemap.xml file of a Shopify store:

Now, you’ll need to remove old sitemaps from your Google Search Console and add the new one.
Here’s how to do that:
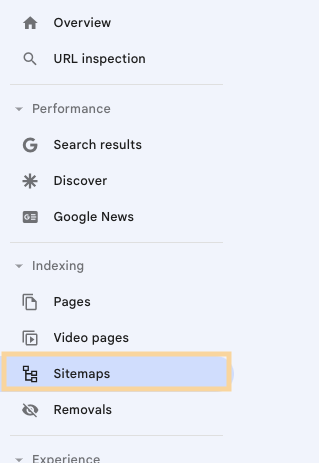
Log into your Google Search Console property, and click “Sitemaps” under the Indexing.
Now, remove the old sitemaps from the list.
Enter the new sitemap URL in the field and click “Submit.”

Once your submission is successful, you will receive a confirmation message.
Google will start crawling and indexing your site. You can check back in GSC later to see if there are any issues or to view the indexing progress.
11. Set up GA4 Property
GA4 is the latest version of Google Analytics. It offers deeper insights and better tracking, ensuring you’re equipped with the most up-to-date tools.
Here’s your step-by-step to set up GA4 property on your Shopify store:
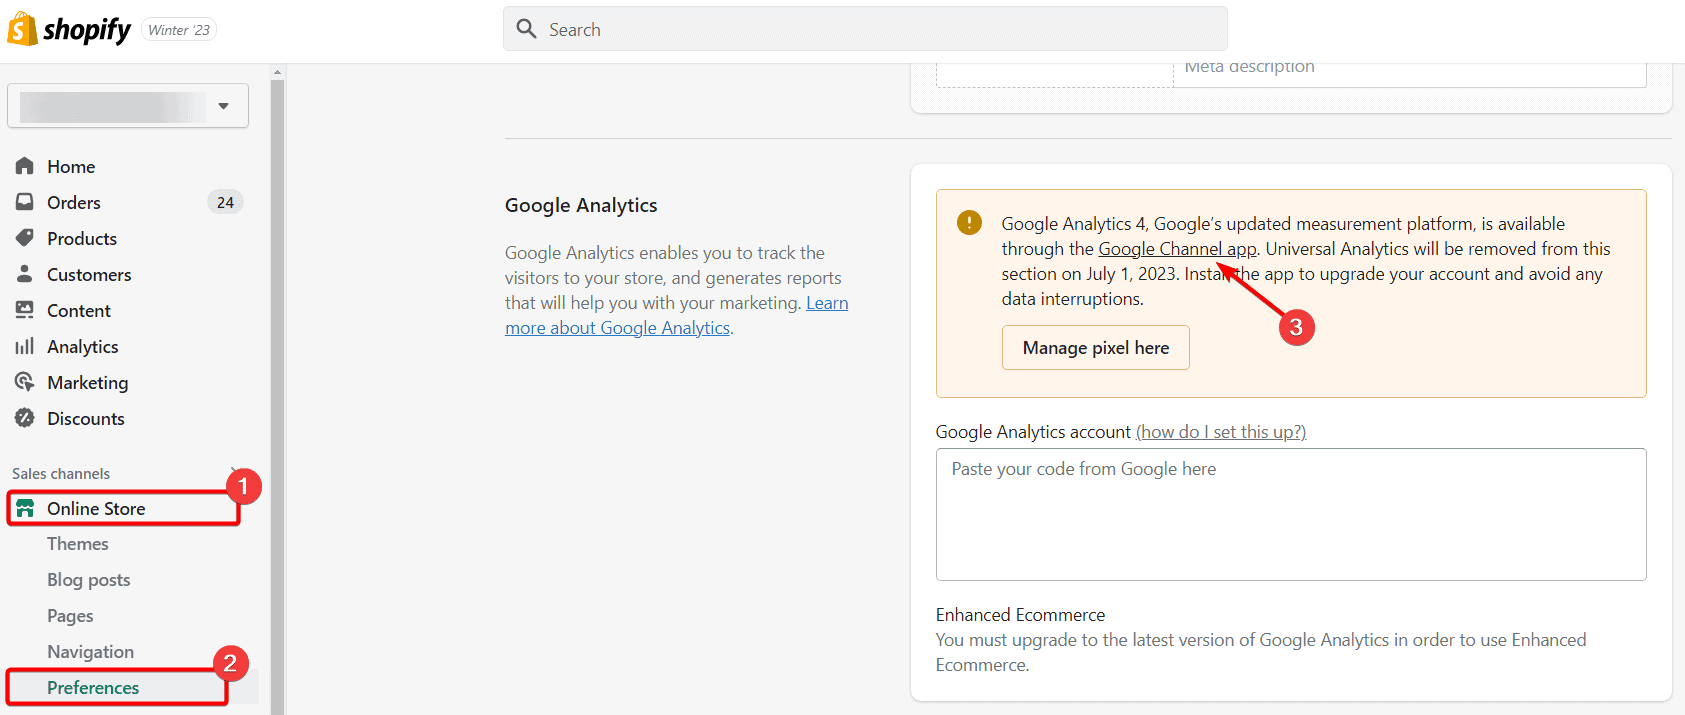
In the Shopify admin, go to Sales Channel > Online Store > Preferences.
Find the ‘Google Analytics‘ section, and in the notification, click on the “Google Channel App.”
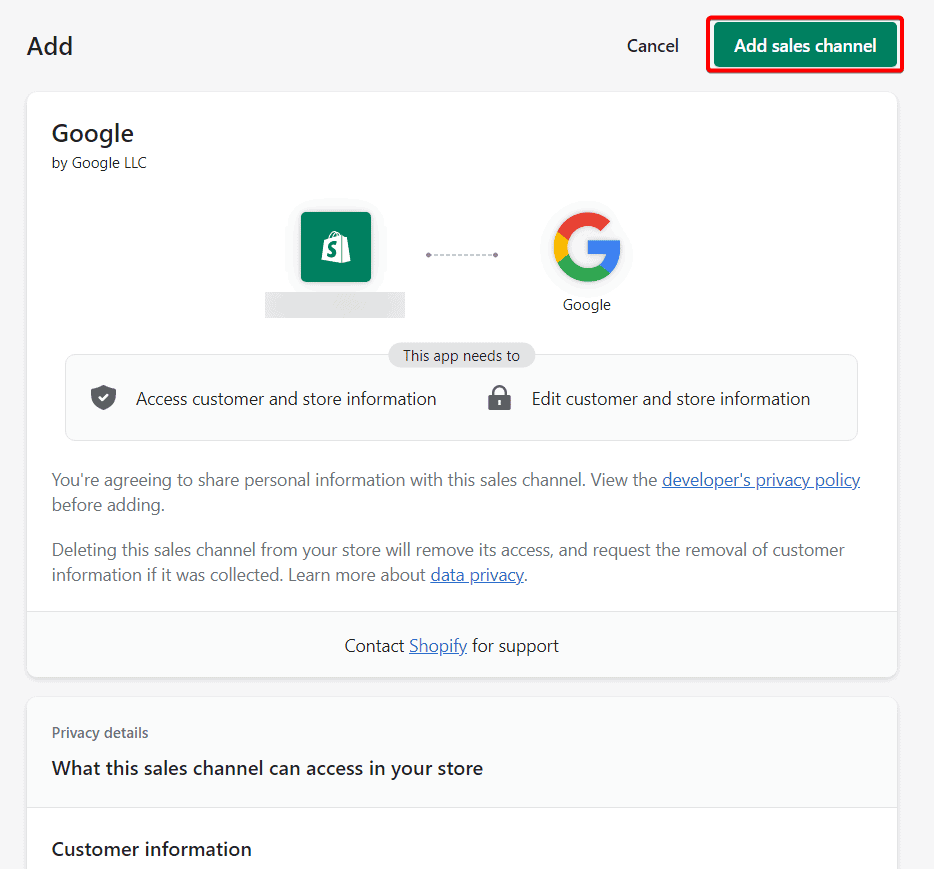
On the following screen, click the “Add Sales Channel” button to initiate the app installation. This will integrate the Google sales channel with Shopify, enabling the GA4 connection.
Once you’ve installed the Google channel app, you can link your Google account to configure the GA4 property in Shopify.
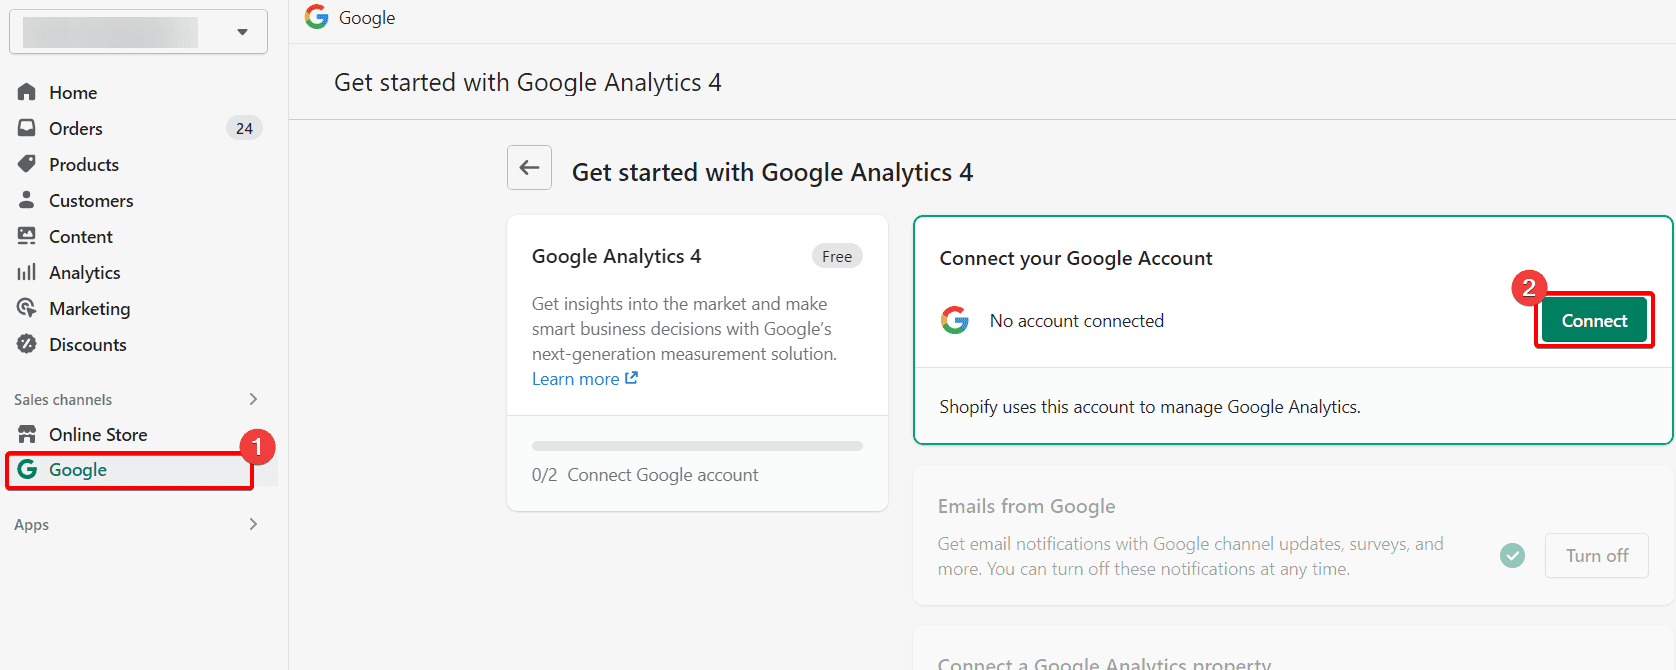
Navigate to Sales channels > Google, and select the “Connect” button to connect your Google account.
Log into your Google Account and provided necessary permissions.
This will link your Google account with the app.
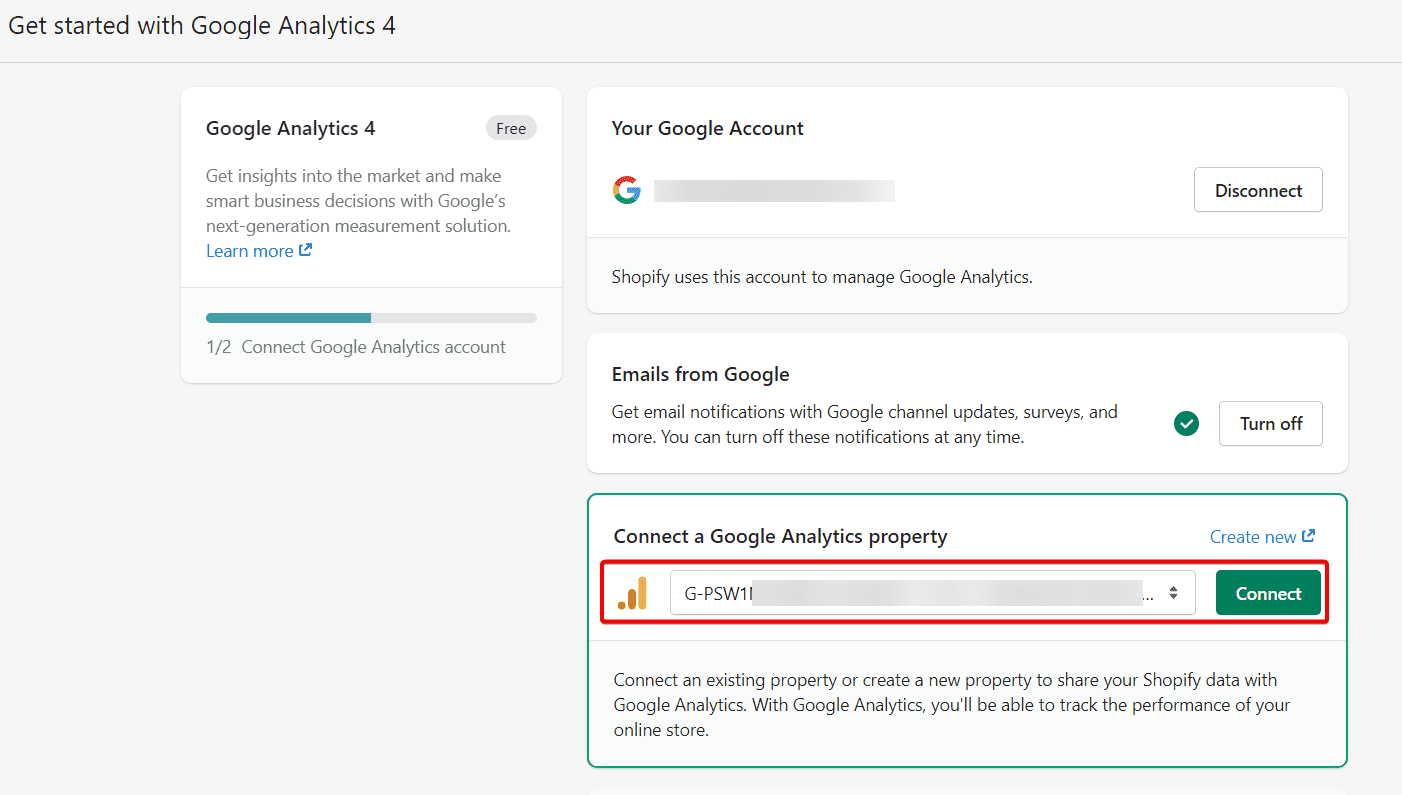
Now, you can connect your existing GA4 property with the store. To do that, click “Connect a Google Analytics property” section, pick your GA4 property from the dropdown list and click “Connect“.
That’s it! You’ve successfully connected Shopify with GA4.
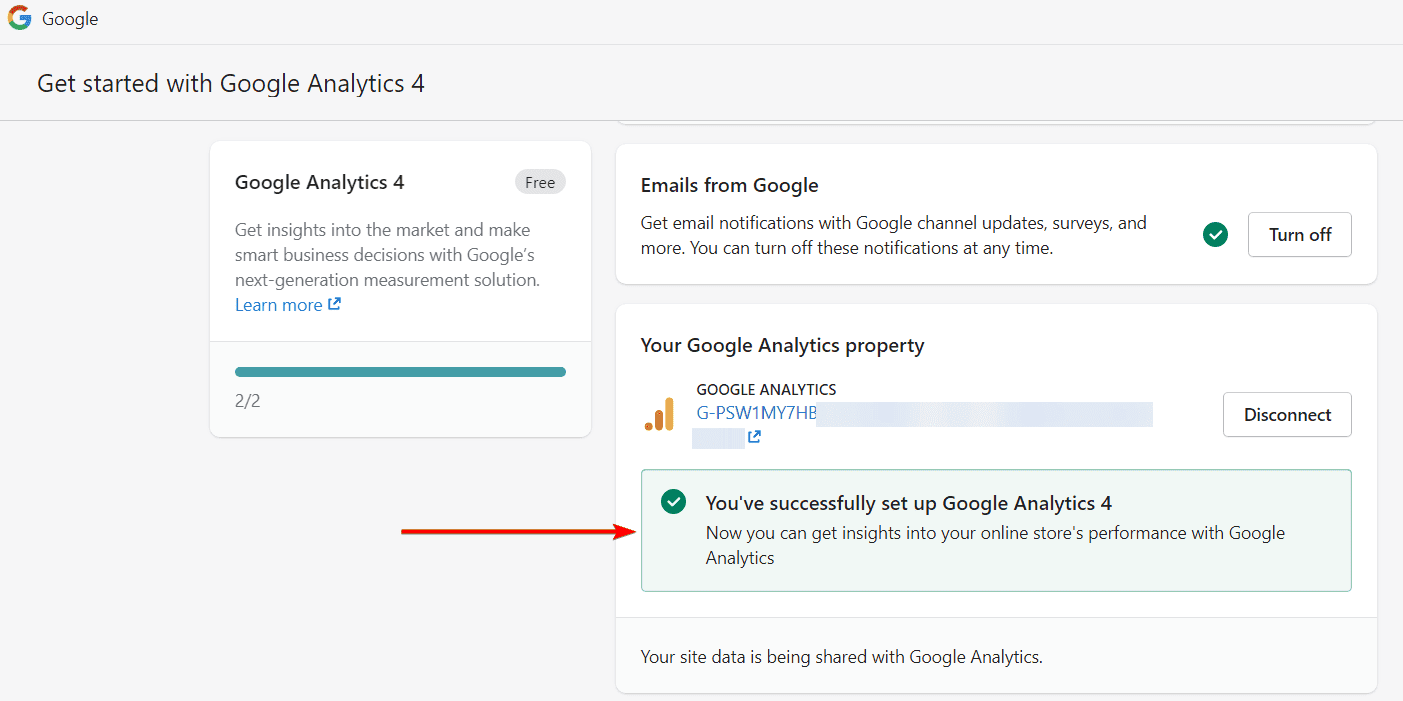
It will start measuring data within 48 hours.
12. Invite Your Customers
Magento and Shopify use different encryption methods for passwords.
Therefore, users will no longer be able to log into your Shopify store using their old password.
You will need to send account invites to customers and help them reset the password. (It is also a good opportunity to announce your new store!)
In Shopify admin, go to Customers, and select the customer to invite. Click “More actions” and click “Send account invite” from the dropdown.
This will send an email to the customer, inviting them to activate their account like this:
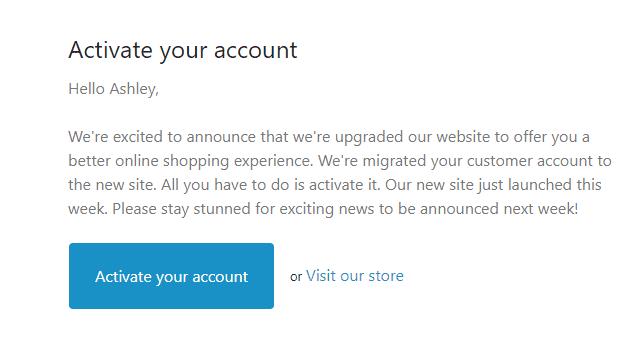
On clicking the “Activate” button, the customer will be asked to set a new password.
You can also send account invites in bulk from the customers section in Shopify.
Better Way to Migrate Magento 2 to Shopify
Magento 2 to Shopify platform migration is a complex process, which demands technical expertise. One mistake can disrupt your rankings, traffic, and customer experience. And that’s why it is always better to choose a reliable migration partner.
Our e-commerce platform migration experts can help you easily move Magento 2 to Shopify.
Here’s why choose us:
- Reliability of experienced professionals
- End-to-end support
- SEO-friendly platform migration
- Super-fast delivery with minimum downtime
- Complete store setup and configuration
