Processing online orders quickly requires clear and instant information. An order label system acts as a visual guide for your Magento admin panel, displaying colorful badges directly on your sales grid to highlight key details at a glance.
When your team views the order list, these tags immediately point out high-value purchases, first-time buyers, or urgent shipping requests. This helps your staff organize fulfillment, create custom columns, and automate rules without coding.
Let’s understand how to enable order labels in your store step by step.
Ways to Add Order Labels to Magento 2
When it comes to displaying visual order tags on your admin dashboard, you have two main approaches to choose from. Here’s how they compare so you can decide which fits your store’s needs.
- Custom Developer Work – This option involves hiring a web developer to write custom code directly into your store’s database. While it gives you a custom setup, it takes longer to finish, costs more money, and carries the risk of causing dashboard glitches whenever you update your website.
- Using a Third-Party Extension (Recommended) – This is the fastest and easiest option for store managers. An Order Label extension adds a ready-to-use menu directly to your store dashboard. It lets you create custom order columns, pick tag colors, and set up automatic rules without touching any code or technical settings.
How to Set Up Magento 2 Order Labels Extension
Adding order labels simplifies backend operations while creating an efficient workflow for store managers. Follow this step-by-step guide to configure your order grid settings and get your order management streamlined fast.
Using Meetanshi’s Magento 2 Order Labels Extension, you can easily organize custom order columns, auto-assign color-coded labels with smart rules, and speed up order processing without touching any code.
Go to Stores > Configuration > Order Labels > General Settings in your admin panel to enable the module and adjust your basic store settings.
Step 1: Create Label Columns
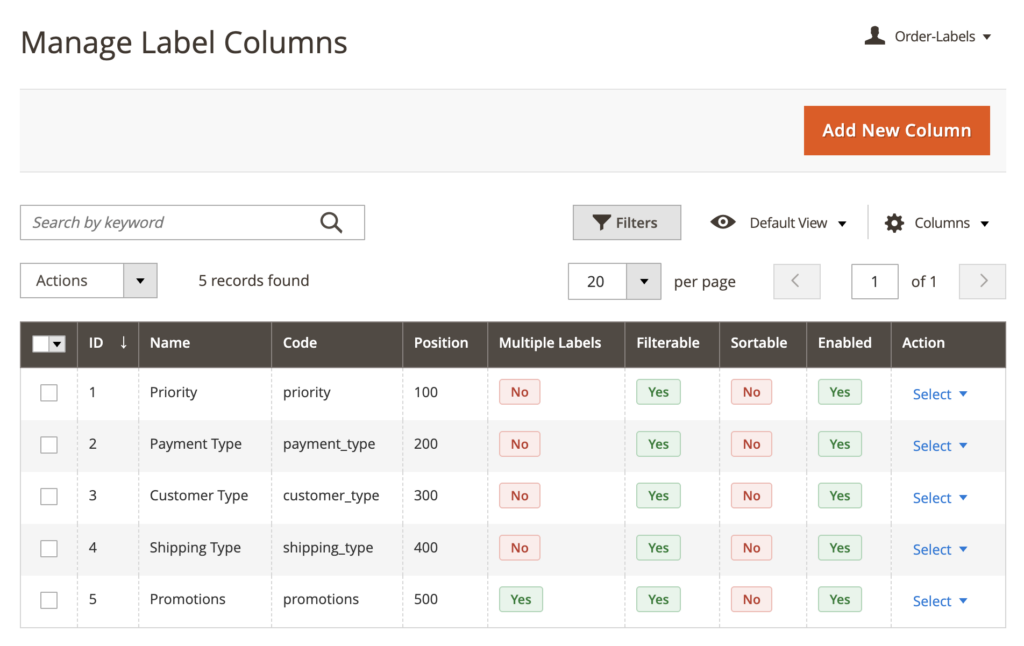
Set up dedicated display columns on your sales screen to keep your tags organized (such as “Priority” or “Customer Type”).
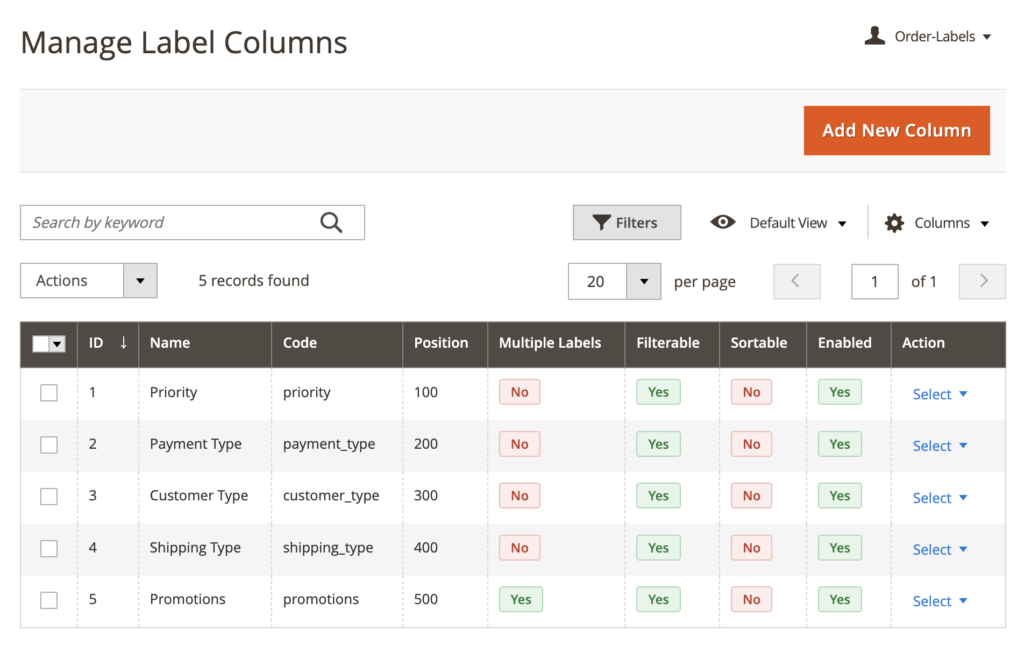
Go to Order Labels > Manage Columns and click Add New Column:
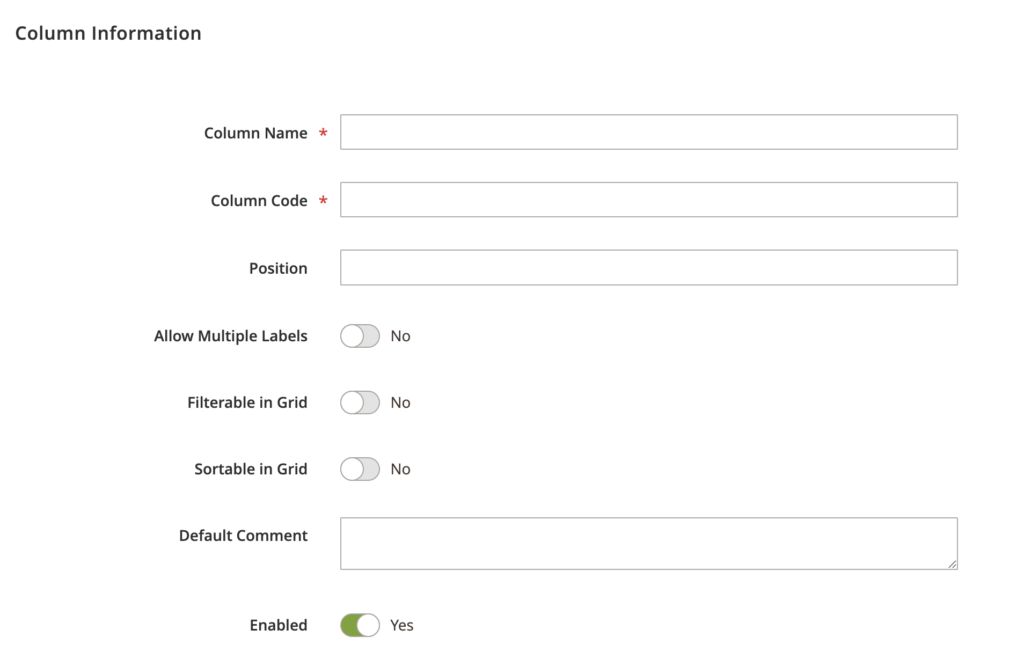
- Column Info: Name your column (e.g., “Order Flags”) and choose where it appears among other headers on your sales screen.
- Multi-Tags & Filters: Allow multiple tags to show in a single column if needed, and turn on grid filtering so your staff can search orders by tag in one click.
Step 2: Create and Configure Your Labels
Go to Order Labels > Manage Labels and click Add New Label to build your visual badges.
- Set General Information: Give your label a name, select a column to display it in, set its priority, and choose whether it is Static to apply manually, Predefined for ready-made presets, or Dynamic to assign automatically.
- Customize Appearance: Pick background colors, readable text shades, and optional graphic icons like a star or delivery truck so urgent orders pop out on screen.
- Enable Auto-Removal: Turn on auto-removal for dynamic labels so the badge clears automatically if an order no longer matches your conditions.
- Apply Visibility Restrictions: Choose specific store views or customer groups such as wholesale buyers if you want the tag restricted to certain shoppers.
- Define Rule Conditions: For dynamic labels, add simple conditions such as order total or order status to determine exactly when the tag applies automatically.
Step 3: Pick Predefined Labels & View Them Live
You can instantly use built-in store tags and manage them directly on your main sales screen:
- Select Ready-Made Presets: Choose predefined options like First Time Customer, Repeat Customer, High Value Order, Back Order, Cash on Delivery, or International without setting up custom rules.
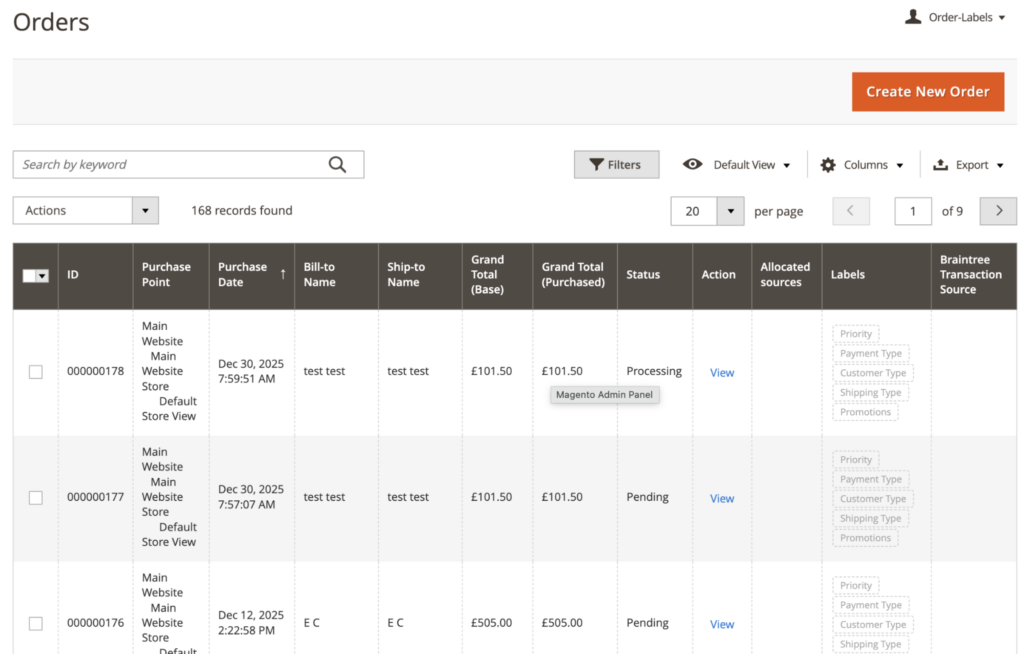
- Instant Visual Badges: Head to Sales > Orders to see your color-coded label columns live on your sales list.
- Quick Filtering: Filter orders by specific tags in a single click to group tasks like express shipping or high-value orders instantly.
- Easy Sorting: Click any column header to sort your entire order list by tag type so your team focuses on priority orders first.
Step 4: Track Activity in the Labels Log
Head to Order Labels > Labels Log to review a complete history of how tags are applied across your store:
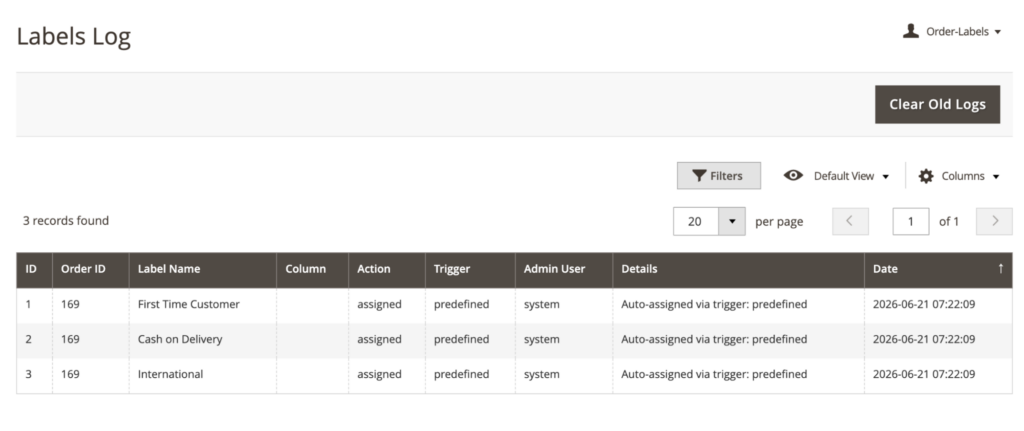
- Complete Record History: See exactly when tags were added or removed from customer orders over time.
- Track Automatic and Manual Changes: Review whether a tag was attached automatically by system rules or added manually by your staff.
- Clear Team Visibility: Monitor backend label activity to keep your entire fulfillment process organized and accountable.
Final Thoughts
Processing orders quickly is key to happy customers and smooth store operations. Using visual order labels stops packing mistakes, highlights urgent sales right away, and saves your staff from clicking into every order page.
With the Meetanshi Order Labels extension, you get an all-in-one, code-free solution that brings order tagging, automated workflow rules, and clear visual design together into a single dashboard.