Want to get your online store ready for the winter rush? Check out this cool trick to make it snow on your Magento 2 site! ❄️ ️
You don’t need any third-party extension for this. In this blog post, I will share all the steps you can follow to add snowfall effects to Magento 2. For a seamless and high-performance experience during the winter rush, consider using reliable Magento Hosting solution to keep your site running smoothly even with added effects and increased holiday traffic.
What is Magento 2 Snowfall Effects?
It’s a visual effect added to the website to make it appealing and festive. Generally, the snowfall effect is added during occasions like Christmas and New Year.
For example, here’s what Magento 2 snowfall effects look like:
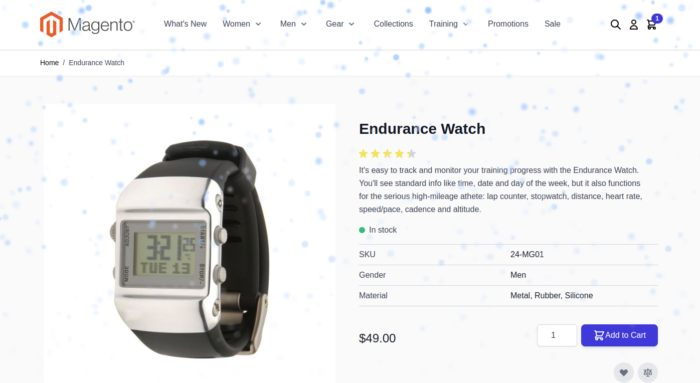
This type of effect can make your website experience more relevant and improve sales.
Running special offers? Learn here to create links that auto-apply coupon codes in Magento 2.
Method to Add Snowfall Effects to Magento 2
In order to create a snowfall effect, we’ll first create a custom static block in Magento 2. Then, we’ll add the block to pages via Widget.
Here are the steps to do it:
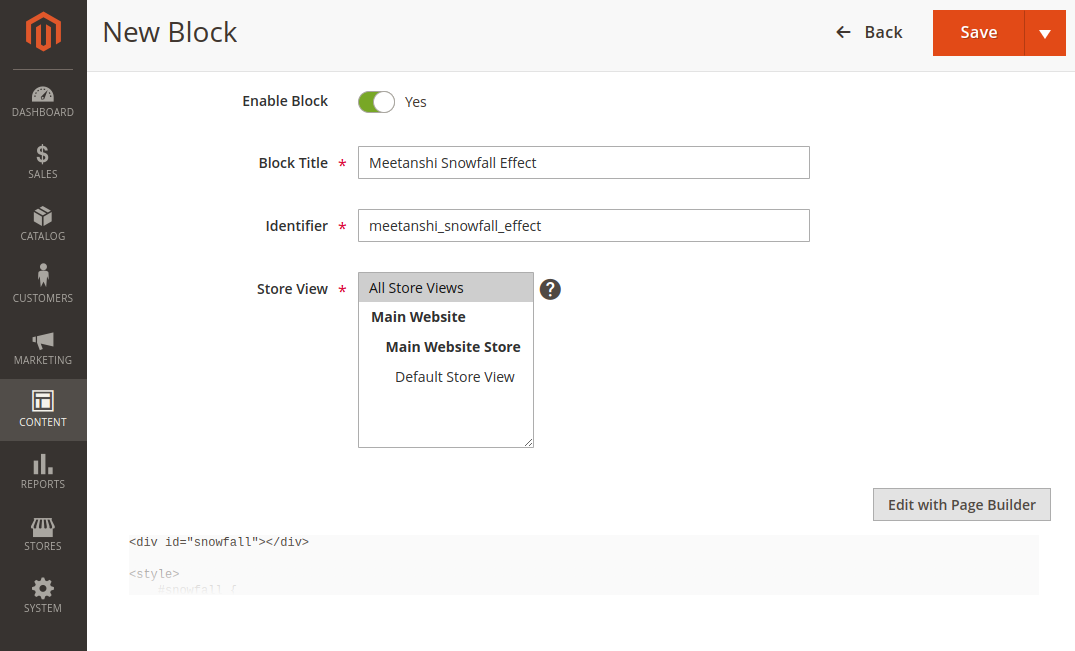
In your Magento admin, go to Content > Blocks and click Add New Block.
- Block Title – Enter a title for the block, for e.g. Meetanshi Snowfall Effect
- Identifier – Enter a unique ID for the block, for e.g. meetanshi_snowfall_effect
- Store View – Select the applicable store views for the snowfall effect
Click on Edit with Page Builder and add the following HTML code into the block:
<div id="snowfall"></div>
<style>
    #snowfall {
        position: fixed;
        top: 0;
        left: 0;
        width: 100%;
        height: 100%;
        pointer-events: none;
        z-index: 9999;
        overflow: hidden;
    }

    .snowflake {
        position: absolute;
        top: -10px;
        border-radius: 50%;
        background-color: lightblue;
        animation: fall linear infinite;
        filter: blur(2px);
    }

    @keyframes fall {
        to {
            transform: translateY(100vh);
            opacity: 0;
        }
    }
</style>

<script>
    document.addEventListener("DOMContentLoaded", function() {
        const snowfallContainer = document.getElementById('snowfall');
        const snowflakeCount = 500;
        const colors = ["#b3d9ff", "#cce6ff", "#e6f2ff", "#99ccff", "#80bfff"];

        for (let i = 0; i < snowflakeCount; i++) {
            const snowflake = document.createElement('div');
            snowflake.classList.add('snowflake');
            snowflake.style.left = Math.random() * 100 + 'vw';
            snowflake.style.width = Math.random() * 10 + 4 + 'px';
            snowflake.style.height = snowflake.style.width;
            snowflake.style.backgroundColor = colors[Math.floor(Math.random() * colors.length)];
            snowflake.style.animationDuration = Math.random() * 3 + 2 + 's';
            snowflake.style.opacity = Math.random() * 0.5 + 0.5;
            snowflake.style.filter = 'blur(' + (Math.random() * 2 + 1) + 'px)';
            snowflake.style.animationDelay = `${Math.random() * -15}s`;
            snowfallContainer.appendChild(snowflake);
        }
    });
</script>
Then, save the block.
This will create a custom block for Magento 2 snowfall effects. Now, we’ll create a widget that will display the block on various pages.
Go to Content > Widgets and click Add Widget.
Select the widget type as CMS Static Block and enter a title (for e.g., Snowfall Effect)
Choose the store views where you want to display the widget.
In the Layout Updates section, you can select the pages where you want to add the snowfall effects. For example, here we’ve selected All Pages.
Choose Page Footer as the container.
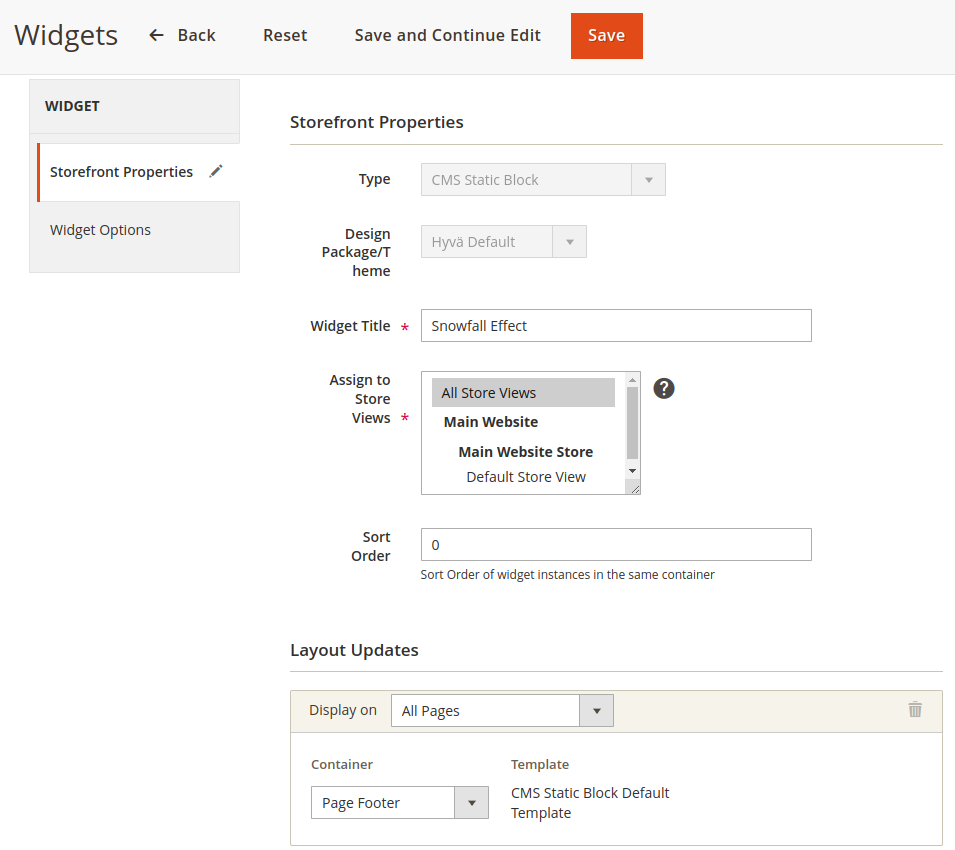
Click Save and Continue Edit.
In the Widget Options, select the static block that we created earlier.
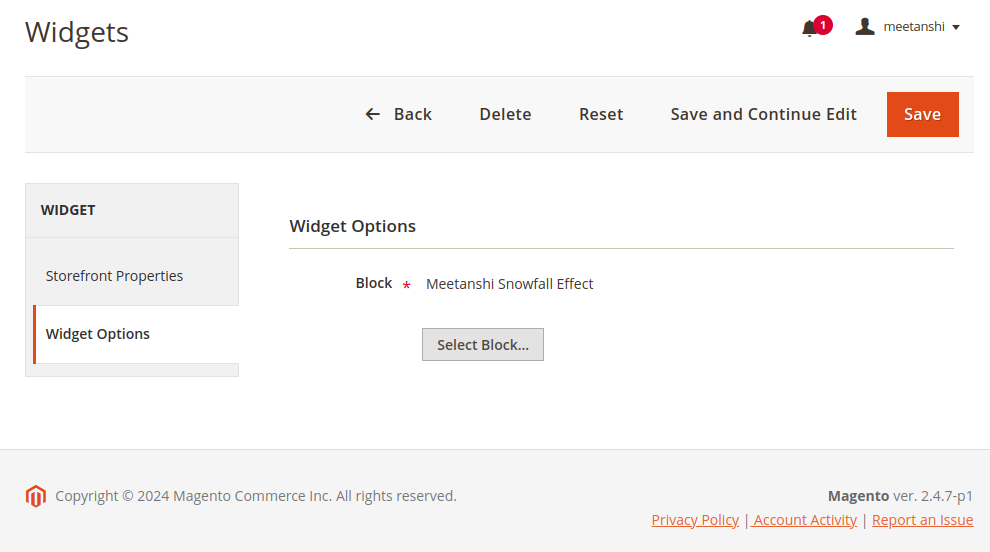
Save the widget.
Go to System > Cache Management to refresh all caches.
The Magento 2 Snowfall Effects will be added to the pages you selected in widget options.
Congratulations! Your website is now snowing… ❄️
Prepare Your Magento 2 Store for the Holiday Season
In addition to Magento 2 snowfall effects, there are ways you can optimize your store for the sales season. Here are some:
- Promote your products through Facebook & Instagram shops using our Facebook Shop extension
- Improve your product listing on Google Search results and merchant listing using our Rich Snippets extension
- Spread your holiday deals and coupon codes in form of links through Coupon Code Link extension
Try out these extensions today and take your holiday sales to the next level.
