If your Shopify store feels trapped in templates that look exactly like your competitors’, custom sections are your ultimate escape plan. In this guide, we’ll teach you how to add custom sections to Shopify and upgrade your store’s design in the easiest way possible.
What are Custom Sections in Shopify?
Custom sections are content blocks on your store’s pages, just like Shopify’s default sections. However, they help you add sections that default to one missing.
For example, many Shopify themes don’t support the before/after slider section. But with the help of a custom section, you can add it to your store to give your shopper a preview of how effective your product is after using it.
A custom section helps you:
- Showcase content in a personalized way
- Extend your theme without changing the entire design
- Control exactly how specific parts of a page look and function
Basically, it works as those glittery, shimmery parts for your Shopify store, adding extraordinary elements that make shoppers stop and explore.
How to Add a Custom Section in Shopify?
There are basically two ways possible in Shopify to add a custom section.
- Edit the Shopify Liquid code to add the custom sections code manually to your theme code editors.
- Use the Shopify App to directly add the Shopify section to your theme editor.
Using the custom code method, you have to create a code from the section you want and then add it to your Shopify theme editor. The process is a bit complex and might need Shopify expertise.
The second is a non-code method using the Shopify section app. These apps provide pre-built, customizable collection slider sections that are compatible with many themes and can be integrated with just a few clicks.
There are both technical and non-technical methods. You can opt for the method that suits your store.
Now, let’s understand how to use each method.
Method 1: Add Custom Sections in Shopify Via App
Here, we will use the MIT Sections Pro app to add a custom section, as it is one of the easiest ways to add multiple sections in your store without editing your theme code file. The app is free to install and comes with over 130 customizable pre-built (free & premium) sections.
Here are the steps to use the app.
Step 1: Find Your Desired Section
Install the MIT Sections Pro app from the Shopify App Store. From the app dashboard, click the Browse section and search for the section you want to add. For example, the featured collection.
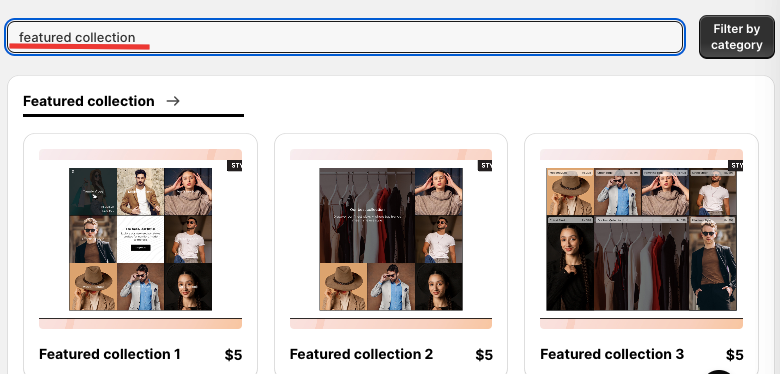
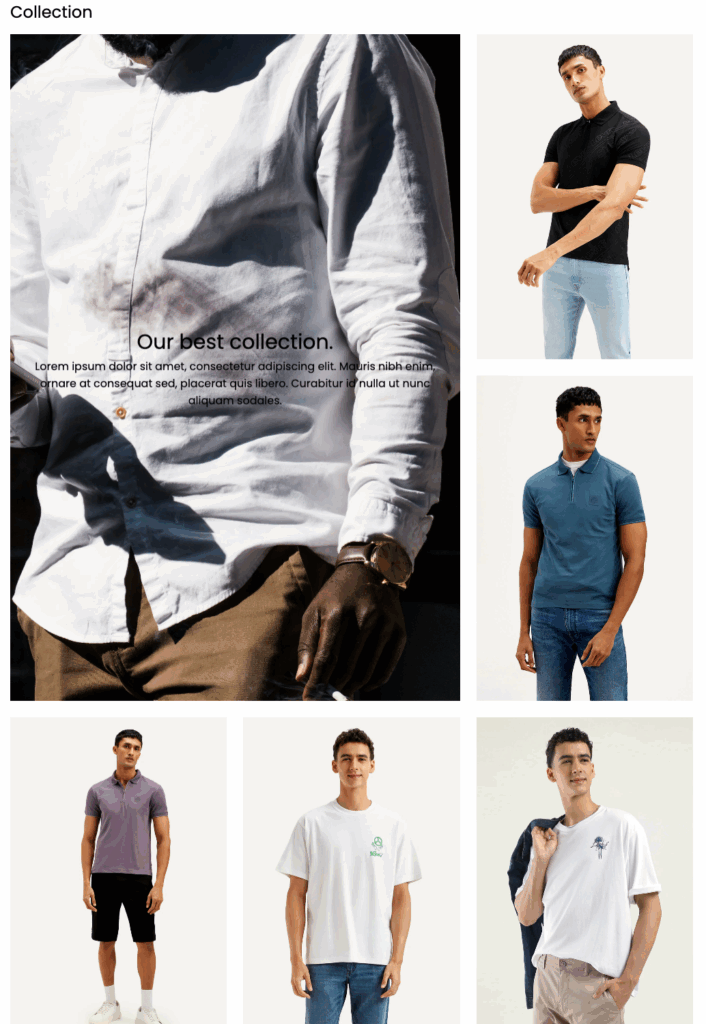
Pick the style of the section that matches your store. We will go for Featured Collection 2.
Select the section, then click Try for free to start a free trial. This allows you to check its design and layout before committing to a purchase.
While using the free trial, you will be redirected to the MIT demo store. After purchasing the section, you can have it in your store.
Step 2: Customize the Section
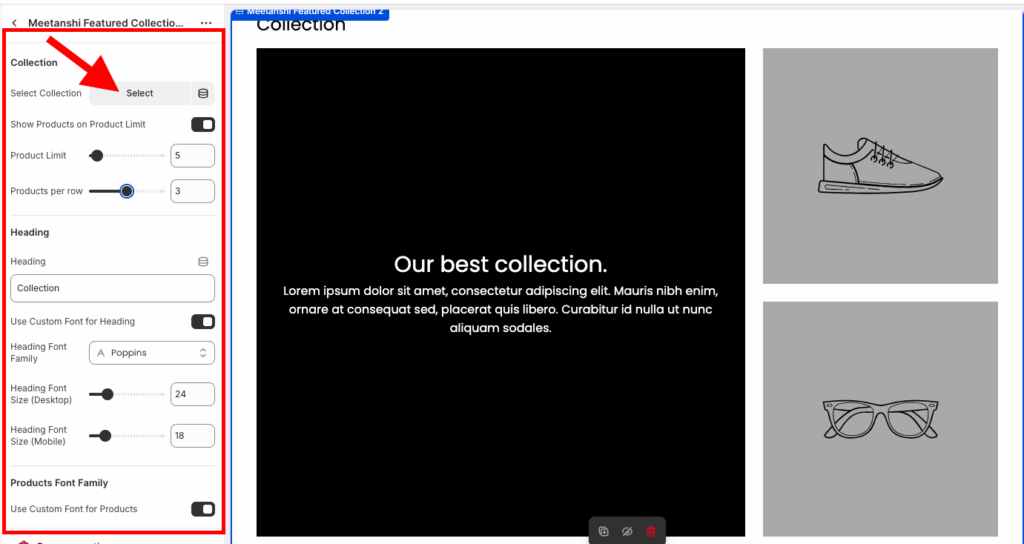
Head to Online Store >Theme >Edit Theme. Then, from the theme editor left sidebar, select Add section > Meetanshi Featured Collection 2.
Then add collections & customize it as per your requirements from the options available on the sidebars.
Step 3: Save the Changes
After you are done making edits to the section, click Save to finalize the changes. This is how attractive and well-organized it will be showcased.
Method 2: Add Shopify Custom Section (Via Code)
The following are the steps to add a custom section using Liquid code.
Step 1: Head to Theme Code
From the Shopify admin panel, head to Online store > Themes > …(three dots) > Edit Code.
Step 2: Paste the Liquid Code
Create a new section, save it as simple-featured-collection.liquid. Insert the following code into this newly created section, and then save it.
{% style %}
   .simple-featured-section {
    padding: 40px 0;
    text-align: center;
  }

  .section-heading {
    font-size: 28px;
    font-weight: 700;
    margin-bottom: 30px;
    color: #1c1d1d;
  }

  .product-grid-simple {
    display: grid;
    gap: 25px;
    margin: 0 auto;
    /* Default for Mobile: 2 columns */
    grid-template-columns: repeat(2, 1fr);
  }

  @media (min-width: 750px) {
    .product-grid-simple {
      grid-template-columns: repeat({{ section.settings.columns_desktop }}, 1fr);
    }
  }

  .product-card-simple {
    text-decoration: none;
    display: block;
    color: inherit;
    transition: opacity 0.2s;
  }

  .product-card-simple:hover {
    opacity: 0.8;
  }

  .product-card-image {
    width: 100%;
    height: auto;
    display: block;
  }

  .product-card-info {
    padding-top: 10px;
  }

  .product-card-title {
    font-size: 16px;
    font-weight: 600;
    margin: 0 0 5px 0;
  }

  .product-card-price {
    font-size: 14px;
    color: #5f5f5f;
  }

  .view-all-button {
    display: inline-block;
    padding: 10px 20px;
    margin-top: 30px;
    background-color: #3d3d3d;
    color: #ffffff;
    text-decoration: none;
    border-radius: 4px;
    font-weight: 500;
    transition: background-color 0.2s;
  }

  .view-all-button:hover {
    background-color: #555;
  }
{% endstyle %}

<div class="simple-featured-section">
  <div class="page-width">

    {% assign selected_collection = collections[section.settings.collection_select] %}

    {% if selected_collection and selected_collection.products.size > 0 %}

      <h2 class="section-heading">{{ section.settings.heading | default: "Featured Collection" }}</h2>

      <div class="product-grid-simple">
        {% comment %} Loop through the collection, limiting the product count {% endcomment %}
        {% for product in selected_collection.products limit: section.settings.product_limit %}
          <div class="product-item-wrapper">

            <a href="{{ product.url }}" class="product-card-simple">

              {% comment %} Product Image {% endcomment %}
              {% if product.featured_media %}
                <img
                  class="product-card-image"
                  src="{{ product.featured_media | img_url: '400x' }}"
                  alt="{{ product.featured_media.alt | escape }}"
                  loading="lazy"
                >
              {% else %}
                {{ 'product-1' | placeholder_svg_tag: 'placeholder-svg' }}
              {% endif %}

              <div class="product-card-info">
                {% comment %} Product Title {% endcomment %}
                <h3 class="product-card-title">{{ product.title }}</h3>

                {% comment %} Product Price {% endcomment %}
                <span class="product-card-price">{{ product.price | money }}</span>
              </div>
            </a>

          </div>
        {% endfor %}
      </div>

      {% if section.settings.show_view_all and selected_collection.products.size > section.settings.product_limit %}
        <a href="{{ selected_collection.url }}" class="view-all-button">
          {{ 'sections.featured_collection.view_all' | t | default: "View All Products" }}
        </a>
      {% endif %}

    {% else %}
      {% comment %} Fallback content when no collection is selected or collection is empty {% endcomment %}
      <h2 class="section-heading">{{ section.settings.heading | default: "Featured Collection" }}</h2>
      <p>Please select a collection in the theme editor to display products here.</p>
    {% endif %}

  </div>
</div>

{% schema %}
{
  "name": "Featured Collection basic",
  "settings": [
    {
      "type": "text",
      "id": "heading",
      "label": "Section Heading",
      "default": "Our Best Sellers"
    },
    {
      "type": "collection",
      "id": "collection_select",
      "label": "Select Collection",
      "info": "Choose the collection whose products will be displayed below."
    },
    {
      "type": "range",
      "id": "product_limit",
      "min": 2,
      "max": 16,
      "step": 1,
      "label": "Max Products to Show",
      "default": 8
    },
    {
      "type": "range",
      "id": "columns_desktop",
      "min": 3,
      "max": 5,
      "step": 1,
      "label": "Columns on Desktop",
      "default": 4
    },
    {
      "type": "checkbox",
      "id": "show_view_all",
      "label": "Show 'View All' button",
      "default": true
    }
  ],
  "presets": [
    {
      "name": "Simple Featured Collection",
      "category": "Collection"
    }
  ]
}
{% endschema %}
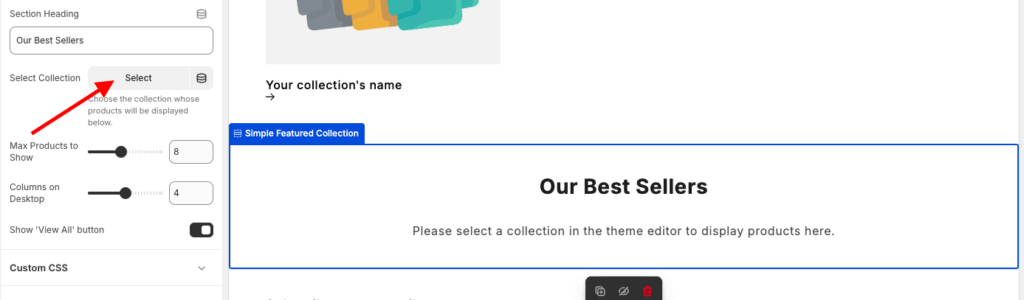
Step 3: Display Section in the Frontend
Head to the theme editor, Online store > Themes > Customize.
From the left sidebar of the theme editor, click Add section, select Simple featured collection. Edit the section and add a collection from the sidebar as per your needs.
Save the changes once you’re done, and this is how it looks (minimal & simple).
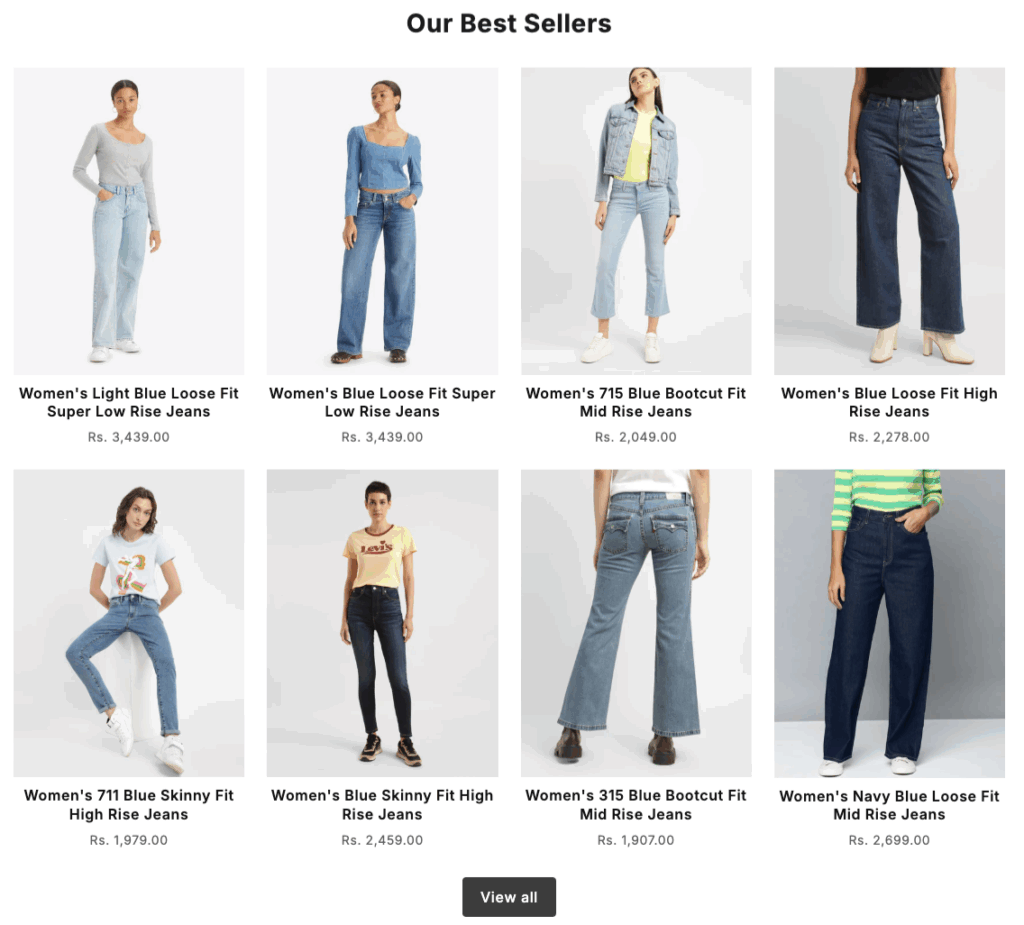
This is how you can create a custom section in your Shopify store.
Examples of Custom Sections on Shopify Pages
These are some of the sections that you can add to the different pages.
Additionally, you can customize the section based on your store vibes to perfectly match your aesthetic. For example, add a Valentine’s Day effect to your store and customize the following section accordingly.
Custom Section on Homepage
- Bestsellers or new arrivals carousel
- Collection grid
- Customer reviews or testimonials
- Promotion announcement bar
- Social media feed
Custom Section to Product Page
- Product image gallery or video demo
- Extended product description
- Size guide or fit finder
- Related/upsell product recommendations
- FAQ accordion about the product
Custom Section on Other Pages
- Contact form (Contact Us page)
- Store locator map (Store Locator page)
- Team/staff profiles (About Us page)
- Blog article teaser grid (Blog or News page)
- Policy details (Shipping, Returns, Privacy)
Best Way to Add Shopify Custom Sections
The MIT Sections Pro app offers a classic, no-code solution for integrating custom sections into your Shopify store.
It features super-fast, pre-designed sections, including all those mentioned previously and more, that are fully compatible with any Shopify theme.
You can drop them in instantly without messing with any Liquid code. It’s really simple and beginner-friendly, making it easy-peasy to upgrade your store’s look and customize pages with just a few clicks.
Your all-in-one solution to create a professional Shopify store
Install App Now