Using social media for e-commerce is among the top ways to get sales.
In this post, learn how to integrate Facebook Shop with Magento 2 and sell your products on Facebook. This integration also makes your products available on Instagram.
Why Integrate Magento 2 with Facebook Shop?
The Magento Facebook integration comes with the following benefits:
- Directly sell your products on Facebook and Instagram via the Meta Business suite
- A cost-effective solution for growing businesses that are not heavily looking to spend on marketing and promotion.
- Better customer engagement as it increases brand visibility and improves the chances of reaching potential customers.
This integration scales your business within your budget and makes your store accessible to a million users actively using Facebook and Instagram.
Steps on How to Integrate Facebook Shop with Magento 2
You can use the Magento 2 Facebook Shop Integration extension to generate a product feed for the Commerce Manager.
Step 1: Install Facebook Shop Extension
Go to Magento 2 Facebook Shop Integration and download the extension for your store.
You’ll get a ZIP file.
Extract it to your Magento installation’s root directory and run the following commands one after the other:
php bin/magento setup:upgradephp bin/magento setup:static-content:deploy –fphp bin/magento cache:flush
Now, the Magento 2 Facebook Shop extension will be installed.
Step 2: Configure General Settings
In your Magento 2 admin, go to Stores > Configuration > Meetanshi > Facebook Store Integration.
Here, you can find an option to generate the product data feed CSV.
But first, let’s configure the settings.
You can choose to add all or specific products, generate store-specific feeds, and also schedule the datafeed generation. For e.g., you can automatically update the product datafeed every hour and keep your Facebook Shop up-to-date.
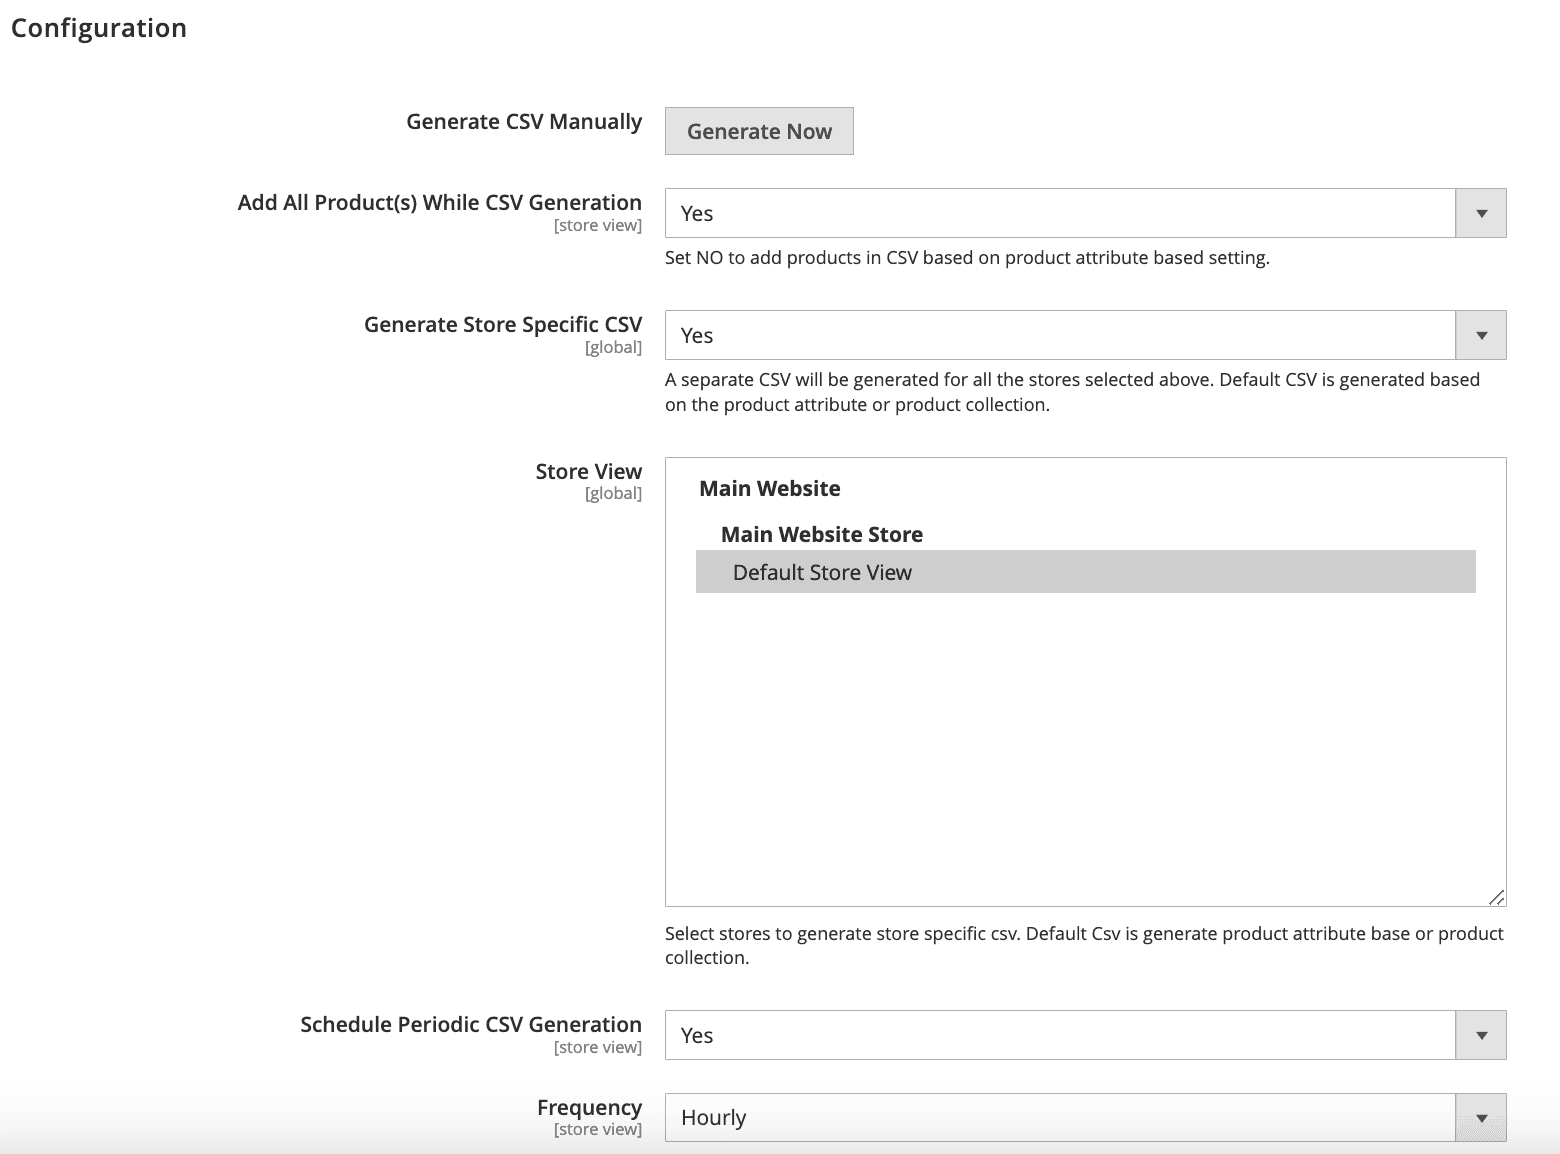
You can also set preferences for out of stock products, catalog rules, add-to-cart redirections, etc. Once you’re done with the configuration, save it.
Step 3: Set Google Product Category
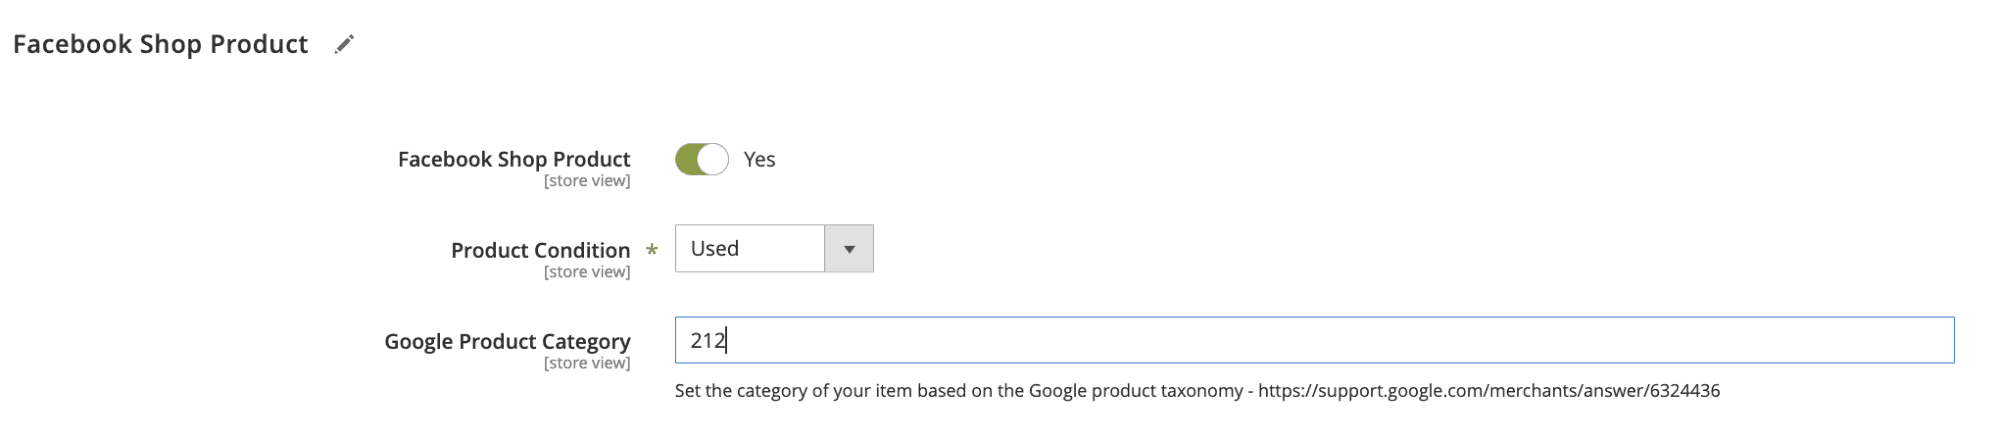
In Facebook Shop, you need to specify the product condition and Google product category for your listings.
To define these details individually, go to Catalog > Products and select the product. Define these details in the Facebook Shop Product section and save it.
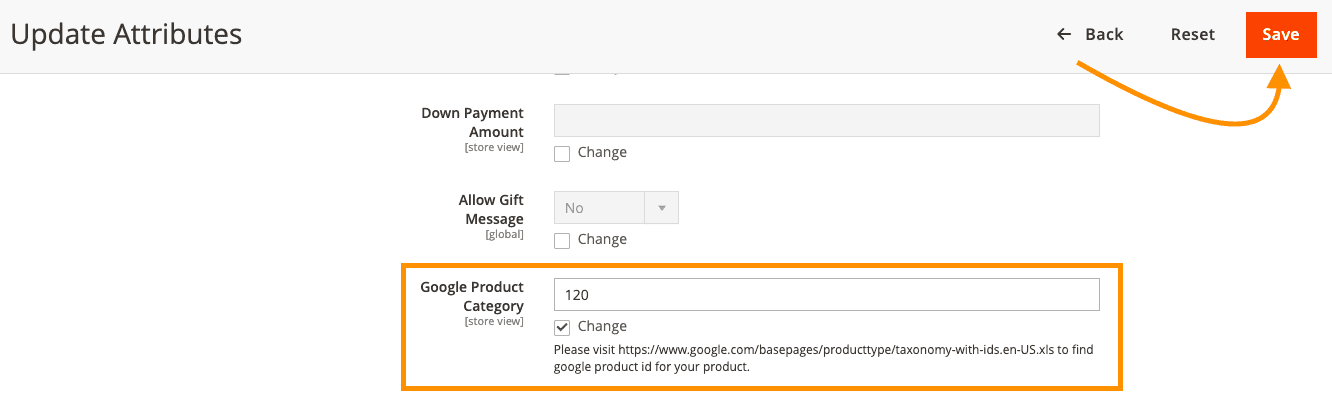
Or you can also bulk update these details. To do that, go to Catalog > Products and select multiple products. Click the Actions dropdown and select “Update Attributes” to update these details in bulk.

Update the Google Product Category and product condition and click “Save.”
Note: It might take some time to reflect the product status action.
Step 4: Map Product Attributes
The extension automatically maps the default Magento attributes with Facebook fields.
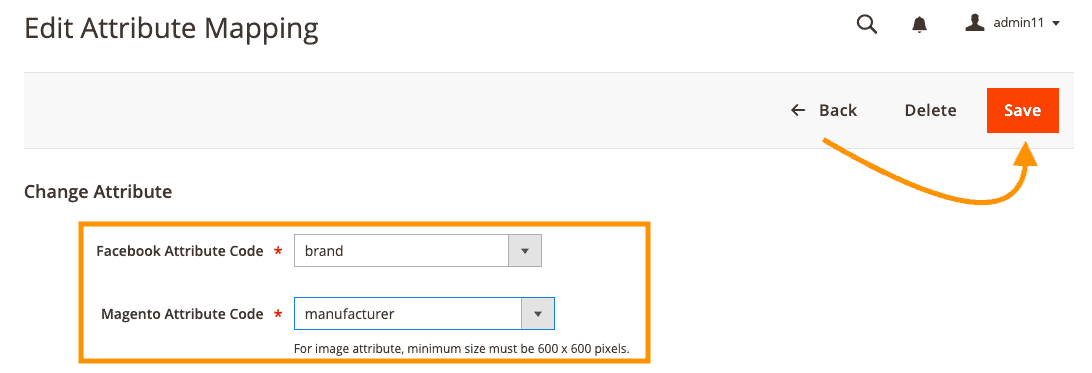
You can modify them or add new ones from the Facebook Store Integration > Facebook Attribute Mapping grid.
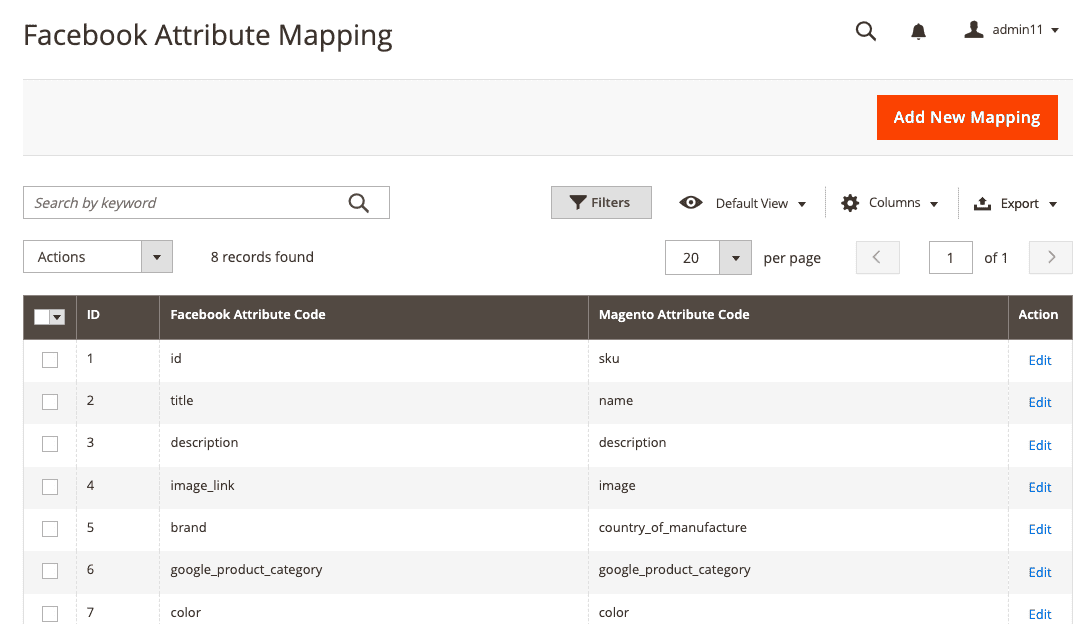
For example, you can select the Facebook and Magento attribute codes to map them.
Once done with the mapping, review them so that correct information is sent from Magento to Facebook Shop.
Step 5: Generate Product Data Feed CSV File
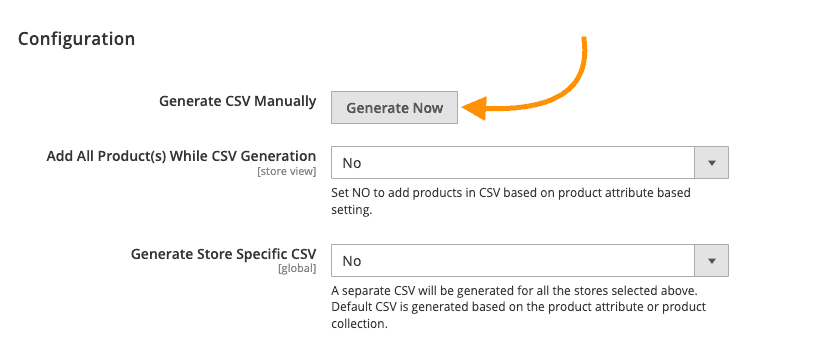
Once you’re done with the configuration settings, you can come back to Stores > Configuration > Meetanshi > Facebook Store Integration.
Click the “Generate Now” button.
Once the Facebook datafeed is generated successfully, you’ll get a success message like the one shown below.

Now, go to Facebook Store Integration > Product Feed CSV Log.
Copy the URL of the CSV file from the log grid.
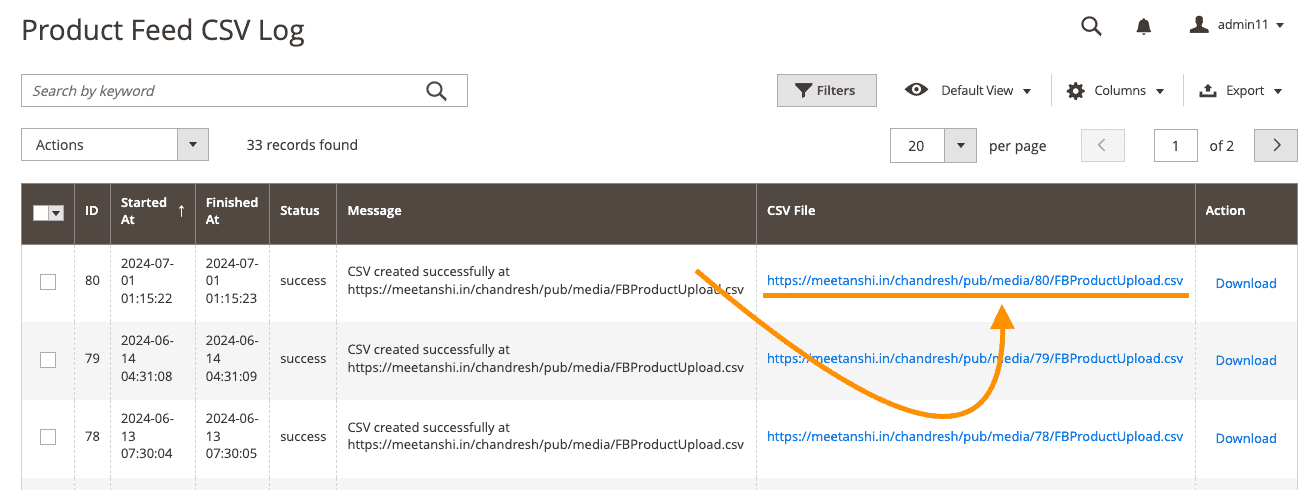
We’ll use this datafeed URL to add products to Facebook Shop.
Step 6: Upload Products Feed CSV to Facebook Shop
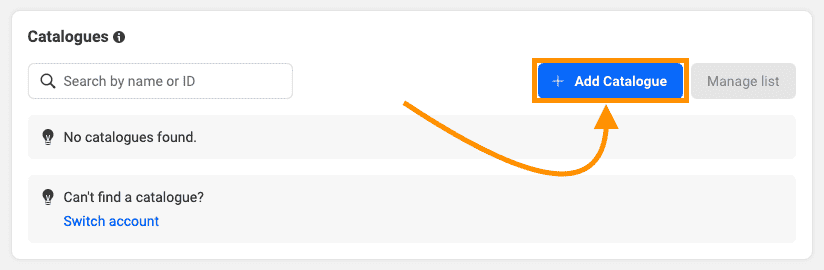
Go to Meta Commerce Manager and select your catalog.
In the Assets > Catalogues, click the “Add Catalogue” button.
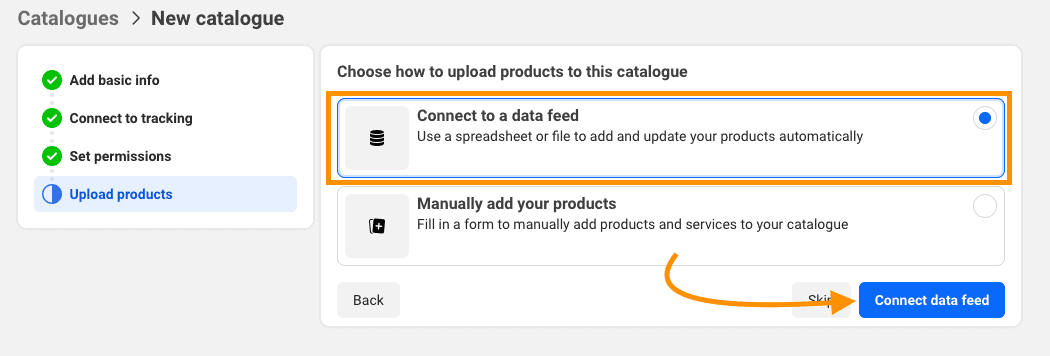
Complete the basic information, set tracking preferences, and permissions. In the final step, select data feed as the option and click “Connect data feed.”
Now, paste the URL of the CSV datafeed file that we copied in Step 5.
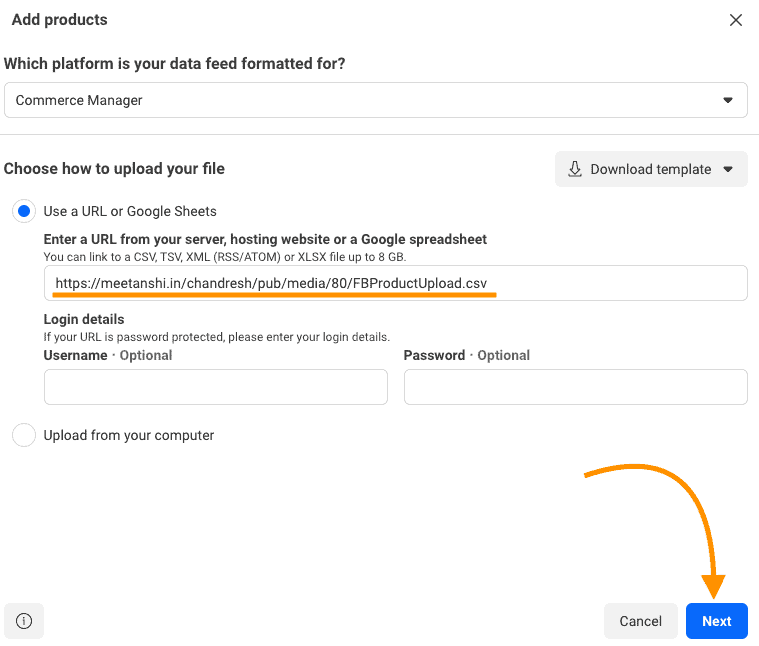
And click the “Next” button.
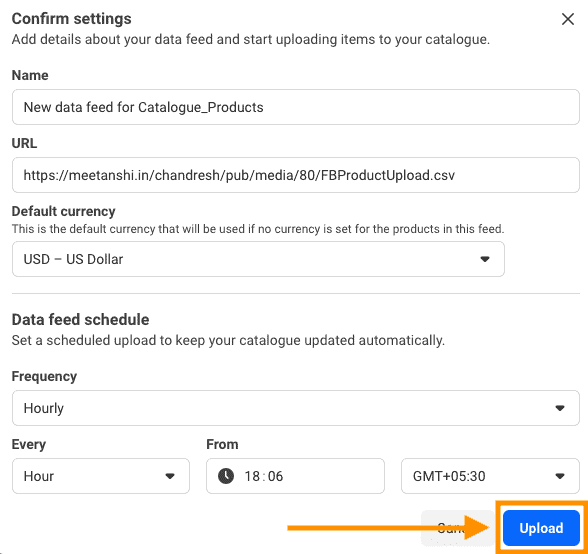
Now, set the auto-update schedule for the datafeed. For e.g., hourly in this case. Make sure that the update schedule is same as that you configured in the Magento admin.
Finally, click the “Upload” button.
Once done, the Magento 2 products will appear in your Facebook Shop as shown below.
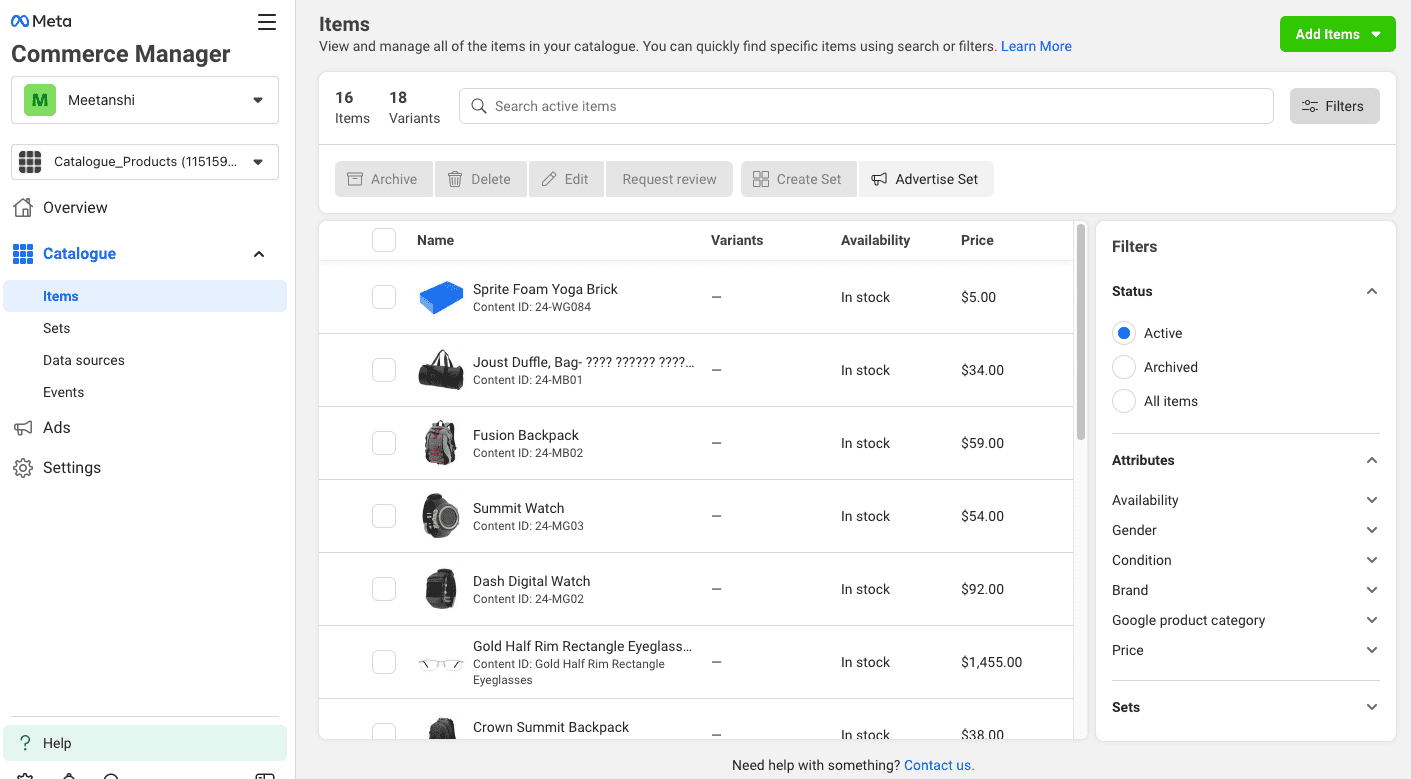
Further, the extension will automatically update the datafeed with the latest information so that your Facebook Shop remains up to date.
Sync your store products with Facebook Shop to start selling.
Sync Today
Take Full Advantage of Magento 2 Facebook Shop
The Meetanshi Magento 2 Facebook Shop Integration simplifies the steps to connect your Magento store with Facebook and Instagram simultaneously. Making it possible for you to offer your products to the right people at the right time and exactly where they are.