Magento 2.4.8 comes with excellent features with better performance, security and much more!
Did you download latest Magento version yet?
Such features can be availed with the installation of Magento 2! However, the process ain’t easy.
No worries, here’s the stepwise method to install Magento 2 on localhost using XAMPP, which can guide even a newbie to install the latest Magento 2.4.8!
Check the system requirements before installing the latest Magento 2 version.
Steps to Install Magento 2 on LocalHost Using XAMPP:
2. Download Magento setup from our blog on Download Magento 2.

3. Navigate to xampp/htdocs and create magento directory.

4. Extract the Magento 2.3.1 archive in xampp/htdocs/magento.
5. Open your XAMPP Control Panel.

6. Click on Apache’s Config and go to PHP (php.ini)
7. Search for extension=php_intl.dll and extension=php_xsl.dll, and remove the semicolon “;” at the beginning from both.


8. Start the Apache and MySQL services from XAMPP control panel.

Your screen would be as below once you’ve started it.

9. Moving forward to Magento installation on XAMPP server, go to phpMyAdmin and create a database with the name magento2.

11. Open the web browser and explore localhost/magento. Click on Agree and Setup Magento.
12. Implement the first step on installation “Readiness Check” as shown below and click “Next“.

12. In the “Add Database” step, enter the database details such as server host, username, password (establish a strong password), name and click “Next“. as shown in the figure.

13. In “Web Configuration” step, enter the store and Magento admin address. Click “Next“

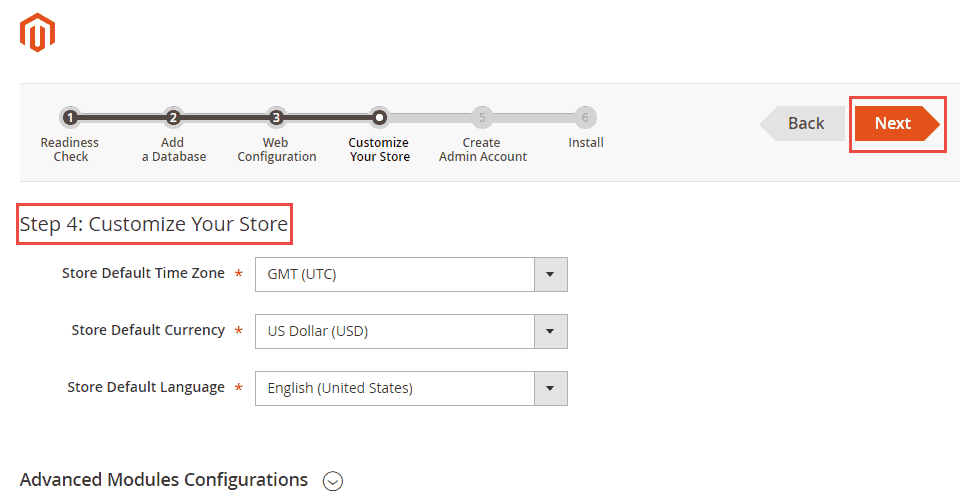
14. In the “Customize Your Store” step, enter the details such as time zone, currency, language and click “Next“
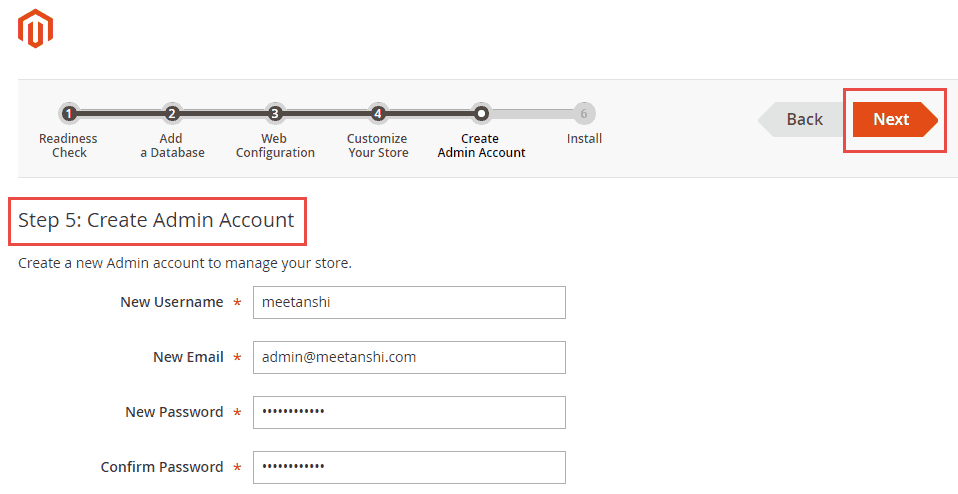
15. In the “Create Account ” step, configure the username, email, and password. Click “Next“
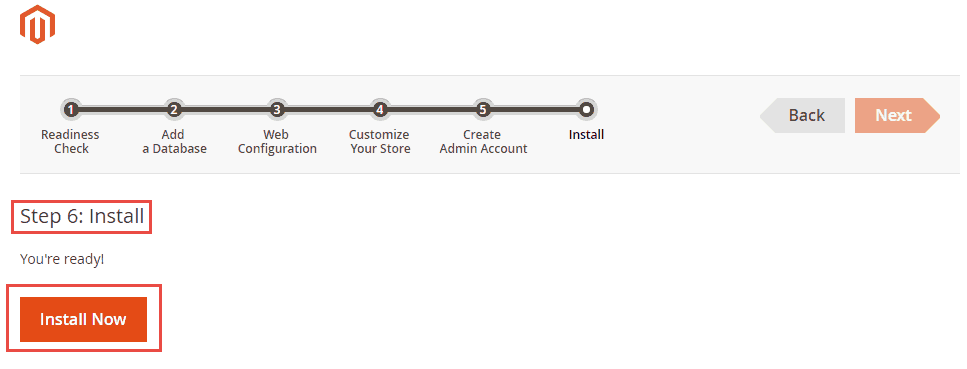
16. Finally, the “Install” step, hit “Install Now“
17. The process may take a while and you’d be kept awaited with this screen:

18. Once the process is completed, “Agree and Setup Magento“

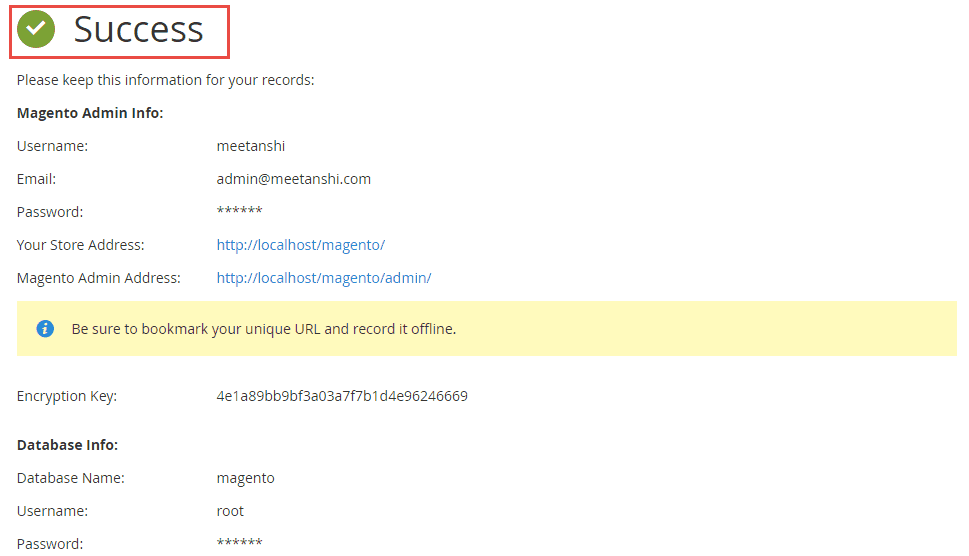
19. Check the success message such as:
20. Open localhost/magento in the browser to see the following:

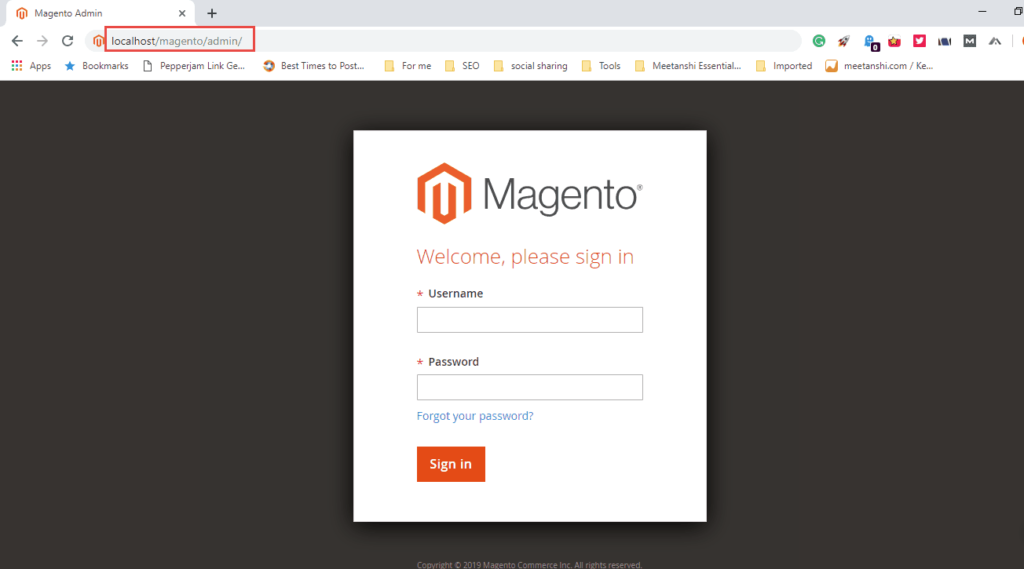
21. Check localhost/magento/admin as below:
If you see a blank admin page after implementing the above steps, check our blog post on Solved: admin page blank issue.
Best Wishes For Your Magento 2 Journey
