Together, Google Cloud and Elastic share a vision of meeting customers where they are on their journey to the cloud. Our partnership has been inspired by our joint customers who are looking for choice, security, a platform for innovation and integrations that helps them get better insights from their data.
– Thomas Kurian, CEO, Google Cloud
This post is all about how to install Elasticsearch on Google Cloud.
Elasticsearch (ES) is an open-source, broadly-distributable, readily-scalable, analytics, enterprise-grade search engine including textual, numerical, geospatial, structured, and unstructured.
Elasticsearch can power extremely fast searches that support your data discovery applications and accessible through an extensive and elaborate API.
In addition to its speed, scalability, and resiliency, Elasticsearch has several powerful built-in features that make storing and searching data even more efficient. Also being a store admin you can configure Magento 2 Elasticsearch to use its features like open source, analytics, readily scalable, etc.
Wherever you are in your cloud journey, Google Cloud gives you the ability to turn data into actionable intelligence so you can make better-informed business decisions.
Steps to Install Elasticsearch on Google Cloud:
First of all, you need to set up your Google Cloud account.
- Once you have created an account, you need to get familiarized with it.
After login into your Google cloud, create a project in Dashboard.

- Search “VM” from the search box and click on “VM instances”.

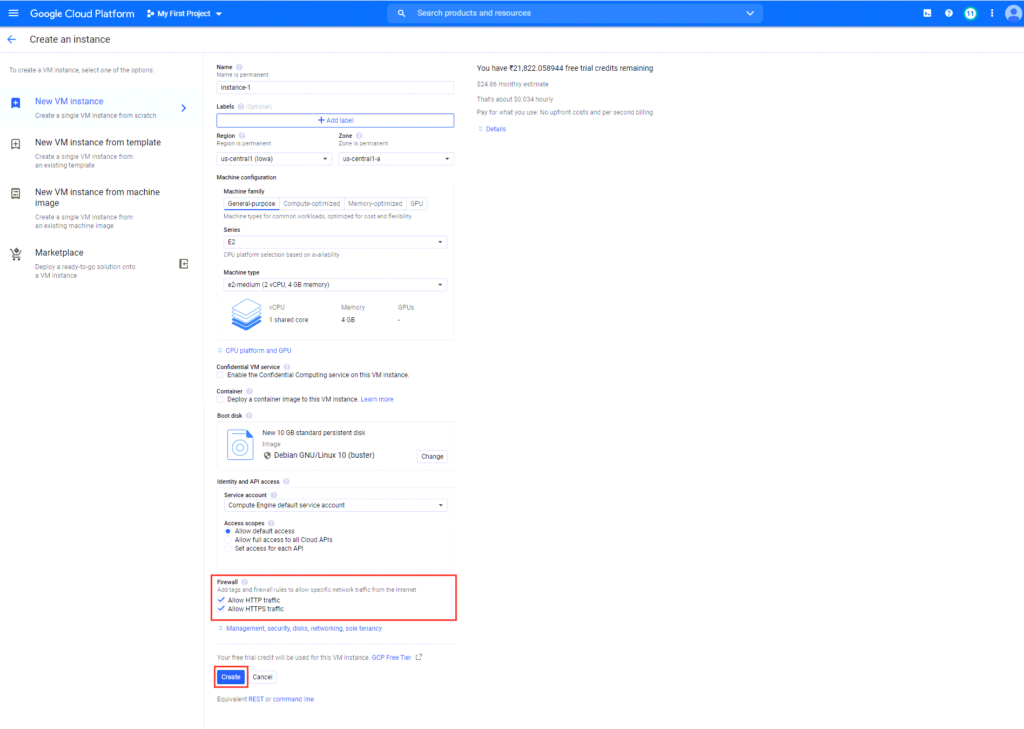
- Create VM instances by clicking on the “Create” button.

- Create a new VM instance by giving the name, allow HTTP traffic and HTTPS traffic then click on the “Create” button.
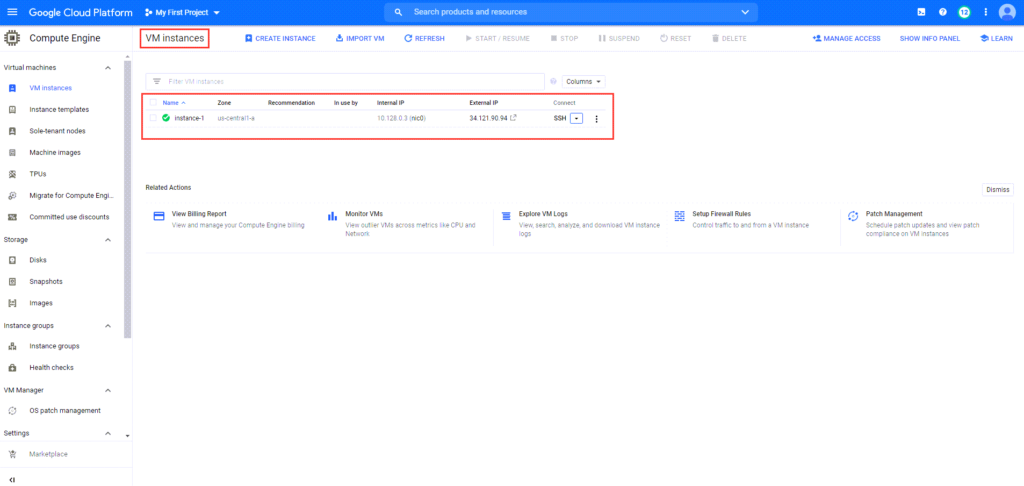
- You can see the created VM instance with the given name and select the ‘SSH‘ from the ‘Connect‘ column of VM instances.
- Update the package index using below command and before continuing with the installation.
sudo apt update
- Allow access to your repositories via HTTPS.
sudo apt install apt-transport-https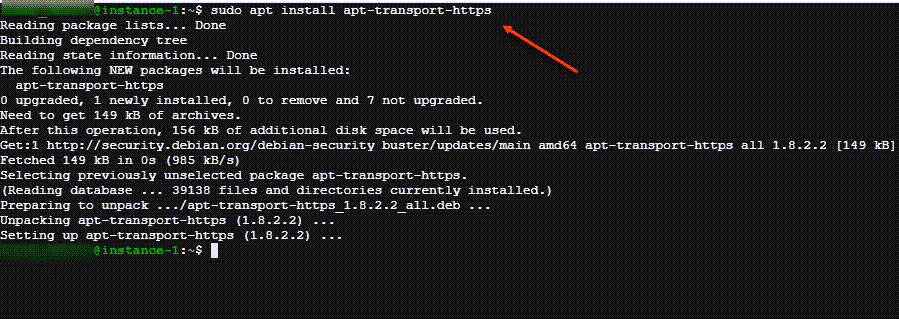
- Update the GPG key for the Elasticsearch repository.
wget -qO - https://artifacts.elastic.co/GPG-KEY-elasticsearch | sudo apt-key add -
- Add the repository to your system.
echo "deb https://artifacts.elastic.co/packages/7.x/apt stable main" | sudo tee -a /etc/apt/sources.list.d/elastic-7.x.list
- Install elasticsearch using below command.
sudo apt install elasticsearch
- Elasticsearch does not run until you start it after finishing the installation. When you reboot the machine, you need to rerun the Elasticsearch service as it does not start automatically.
- If you want to reload the elasticsearch when the system restarts, use the below commands:
- To have elasticsearch automatically, reload when the system restarts, use the following commands:
- First, reload the system configuration:
sudo systemctl daemon-reload
Enable the elasticsearch service
sudo systemctl enable elasticsearch.serviceTo change the status of service, use the below command
start : sudo systemctl start elasticsearch.servicestop : sudo systemctl stop elasticsearch.servicerestart : sudo systemctl restart elasticsearch.serviceCheck the status of the service once you finish the above steps.
status : sudo systemctl status elasticsearch.service
- The default configuration does not allow your machine to be accessed by other hosts. To allow remote access, use a text editor of your choice and open the elasticsearch.yml file.
Give permission:
sudo chmod -R 777 /etc/elasticsearch/elasticsearch.yml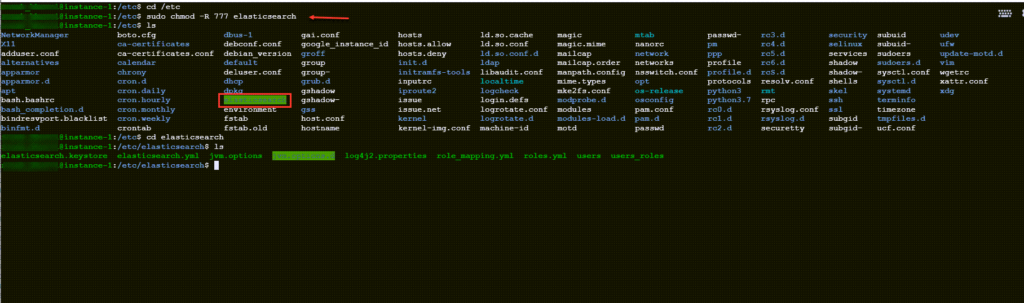
sudo vim /etc/elasticsearch/elasticsearch.ymlThen press “Insert” key from your keyboard and pass your own port to ‘network.host’.

Use UFW firewall to Secure Elasticsearch (Not Necessary).
The Uncomplicated Firewall (UFW) is built into Linux and disabled by default. Before enabling UFW, add the necessary rules.
Write the below command in the terminal,
sudo apt-get install ufw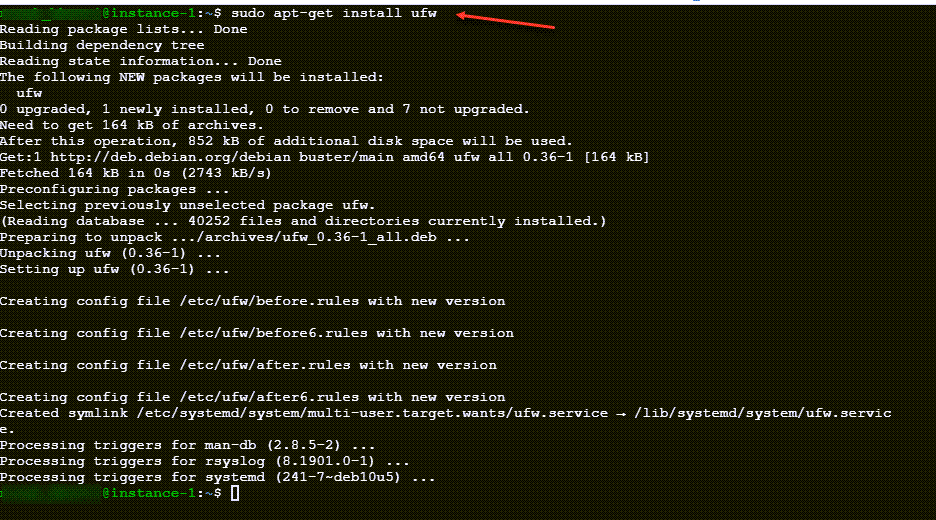
You need to allow access on port 22 for remote access over SSH or the custom port if you changed the default SSH.
sudo ufw allow 22
Elasticsearch listens to that port for incoming requests. Therefore, you have to allow access on port 9200 for your remote machine.
sudo ufw allow from network.host ip to any port 9200
- The Elasticsearch service is active, the machine can be accessed remotely, and you already enabled UFW, if the tool works, you can use curl to test.
- The default port for Elasticsearch is 9200. So, you can send an HTTP request on the localhost and see if you get a response.
curl localhost:9200
It may seem a bit lengthy but is simple to implement.
Do you have a question after the installation of elasticsearch?
Yes, I do… How can I use installed Elasticsearch on my Magento 2?
Visit here to configure Magento to use Elasticsearch.
You can also refer to the video tutorial to Install Elasticsearch on Google Cloud from our Magento 2 video tutorial series:
Also, do share the post with Magento Community via social media.
Thank you.
