If your task for today is to move collections from one Shopify store to another. Then, here is a 3-step tutorial to migrate collections in bulk in just a few minutes.
Curious how? Keep reading.
Can You Generate Collections CSV in Shopify?
The simple answer here is no.
In Shopify, you can migrate products and other entities using CSV files. However, there is no default functionality to import or export collections.
Apps help manage collections in Shopify by enabling bulk editing, automation, and organization of products, making it easier to maintain and update collections efficiently. You can use apps like Meet Collections Import Export to generate collection CSVs for data migration. It helps you:
- Save time with the bulk import-export feature
- Smoothly migrate data from one store to another
- Reduce the chances of errors in your CSV file
Let’s see how you can use the app to migrate collections.
How to Import & Export Collections in Shopify Using an App?
Go to Meet Collections Import Export and install the app in both of the stores, i.e. source and target. It’s free to get started for up to 5 collections per month.

It removes the hassle of moving Shopify collections from your current store to another using a CSV file.
With the help of this app, you can:
- Bulk export & import collection data with a CSV file
- Easily export automated collections or manual collections
- Track all the previous collection exports & imports
Let’s walk through the steps of importing and exporting product collections in Shopify.
Step 1: Migrate Products (for Automated Collections)
If you’re moving automated collections into another Shopify store, you need to migrate products. This is to make sure that the products are automatically assigned to the collections you migrate to the target store.
You can easily do this manually with these steps:
- First, create a CSV file of your products from the source store
- In the target store, go to the products tab and click Import
- Upload your CSV file and click on Import to finish the process
Read in detail: How to Import Products to Shopify Using CSV
Step 2: Export Collections from Source Store
In the source store from where you want to migrate collections, select the collection you want to export. Here, you can choose from Automated and Manually collections.
Select the Shopify collection that you’d like to export and click the Export button.

For manual collections, you also get an option to export collections with or without products.
Once the export is done, the generated CSV file will be available for download. Go to the Import/Export history section and download the recently generated collections CSV file.
Step 3: Import Collections into Another Store
Navigate to the target Shopify store and navigate to the Meet Collections Import Export dashboard.
Drag the collections CSV file you generated in the previous step into the Add file box and click Import.
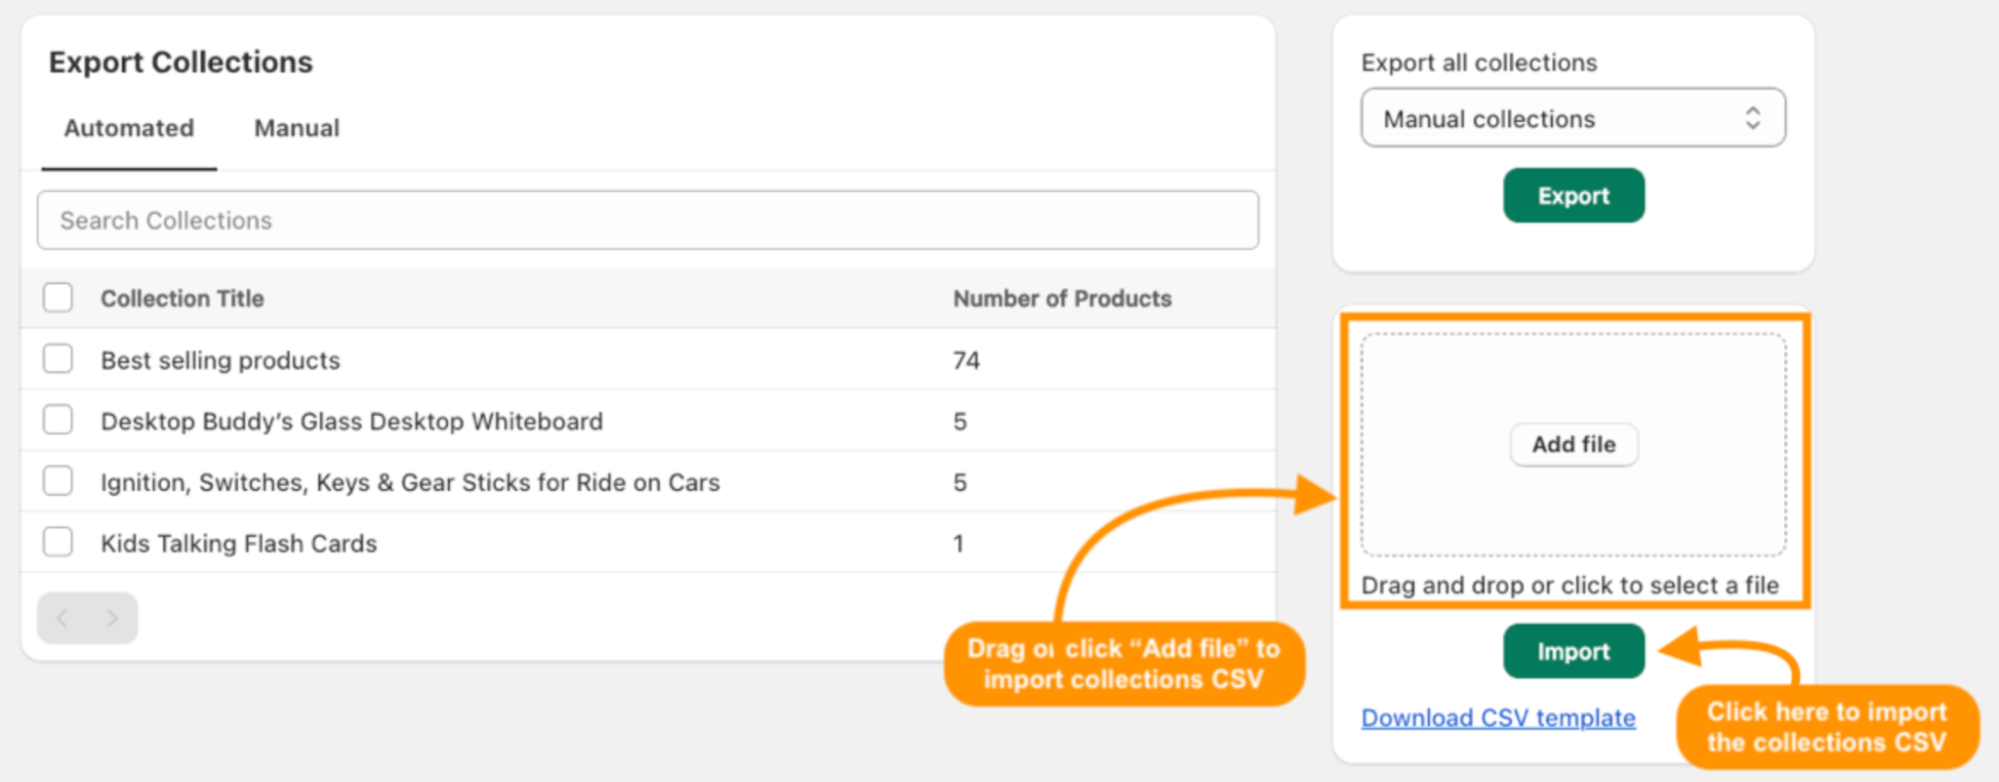
Once the Shopify Import Collections process is successful, a success message will be displayed. You can view the imported collection in the store, along with the products assigned to it.

That’s all. You have successfully migrated product collections to Shopify.
How to Migrate Shopify Collections in Bulk?
You don’t need to migrate each collection manually. The app supports bulk collections import-export option.
In the app dashboard, you can select multiple collections and generate a single CSV file. Then, import it into another Shopify store.
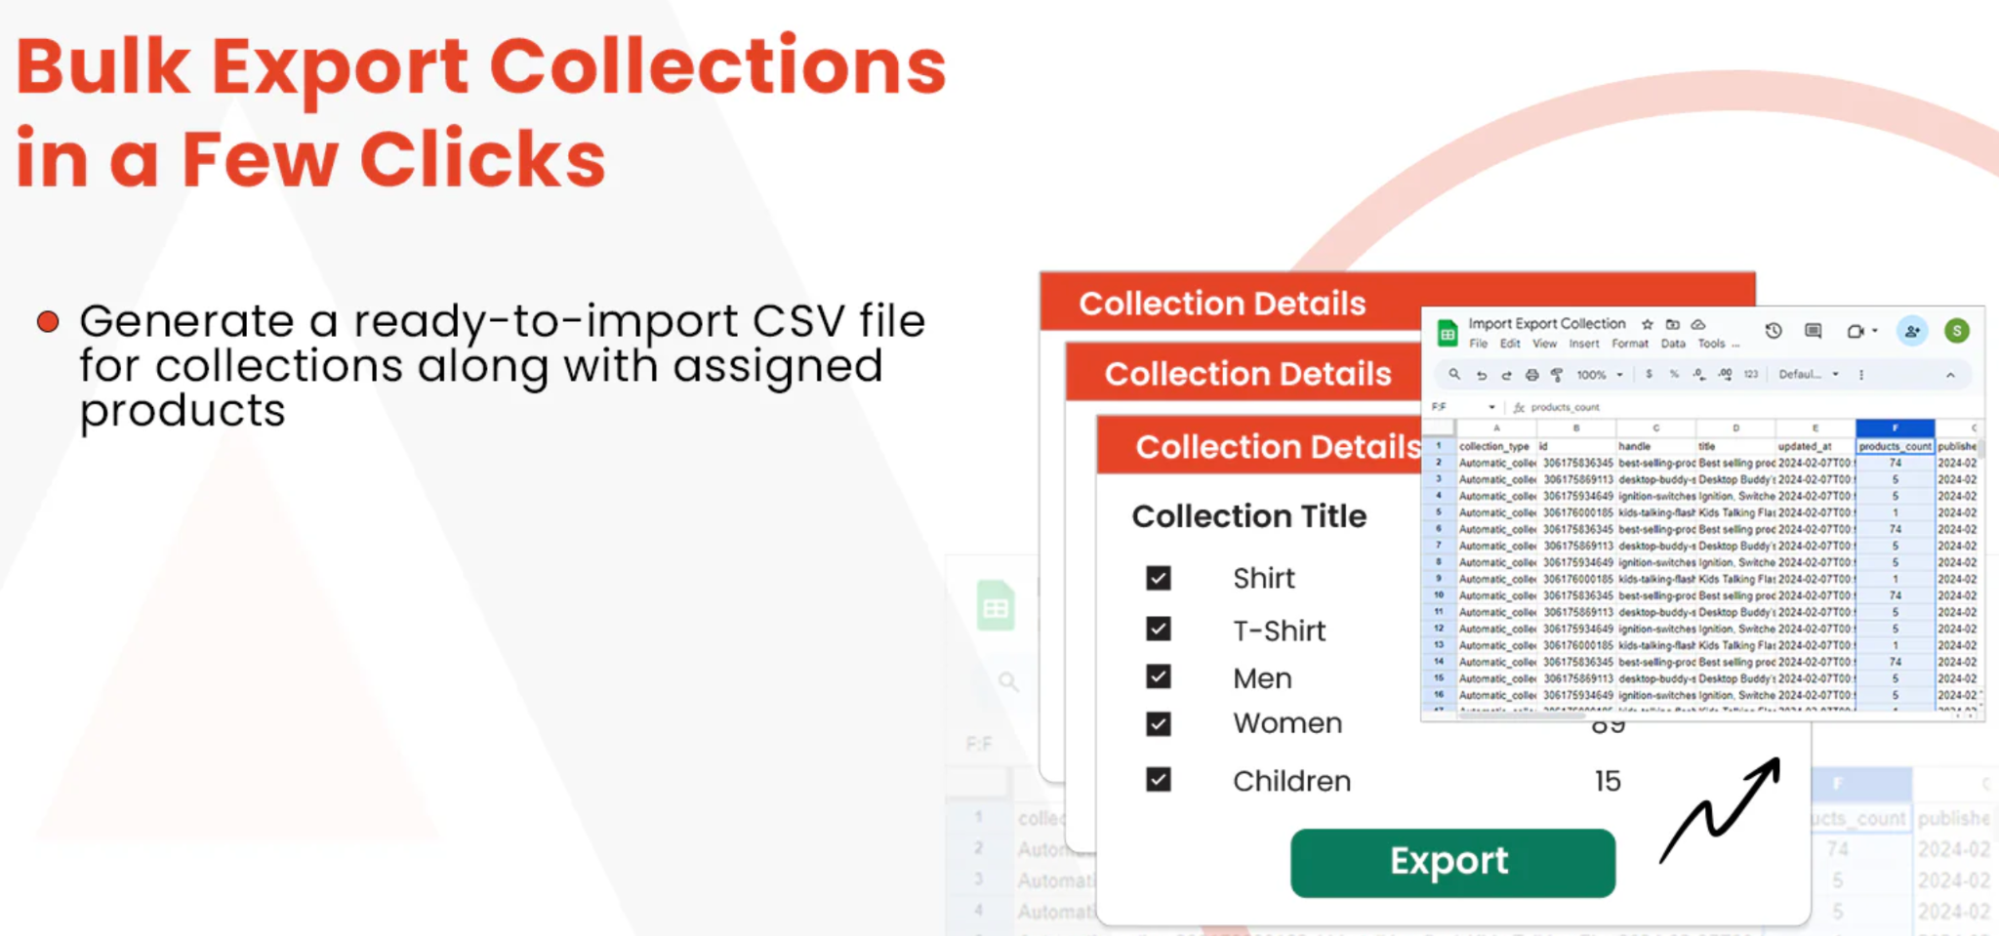
This helps you save a lot of time that you’d otherwise spend on manually creating product collections.
Migrate Shopify Collections in Seconds
Migrating now shouldn’t take you much time. With just a few navigations within one single dashboard, you can complete the task on time. In case you need to create a copy of an existing collection for reuse or testing, learn how to duplicate a collection in Shopify in our detailed guide.