If your shoppers have a smooth experience in your store, your business wins too.
That’s where Hotjar comes in—it shows you exactly how people interact with your Magento 2 store so you can fix what’s not working and boost what is.
In this blog, I will show you how to set up Magento 2 Hotjar tracking quickly and easily. But first, let’s understand the basics.
What is Hotjar Magento 2?
Hotjar Magento 2 means integrating Hotjar with the Magento 2 platform.
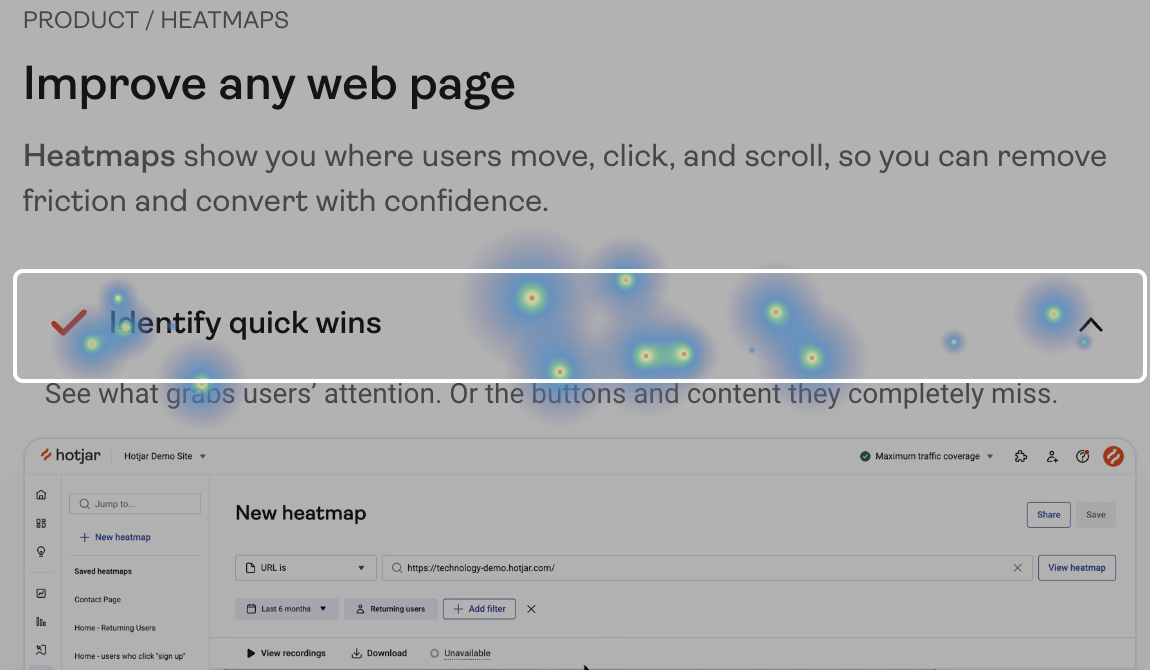
Hotjar is a web analytics and user feedback tool showing where your shoppers spend most of their time on your store website.
With Hotjar integrated, you get access to several useful features, such as:
- Capture user sessions to identify usability problems
- Show pop-up polls or surveys to gather real-time feedback
- Get qualitative data through heatmaps and session recordings
In short, using Hotjar’s tracking tool helps to improve the performance and user experience of your Magento 2 store.
Steps for Adding Hotjar Tracking to Magento 2
You can easily add Hotjar Tracking to Magento 2 by following these four simple steps:
- Step 1: Set up a Hotjar Account
- Step 2: Get the Hotjar Tracking Code
- Step 3: Navigate to Magento 2 Admin
- Step 4: Save & Verify the Configuration
Step 1: Set Up a Hotjar Account
Go to the Hotjar Overview page and generate an Account. Then, enter the valid URL and click Next.
Now, on the Hotjar dashboard, click Install it manually, or you can install it with Google Tag Manager.
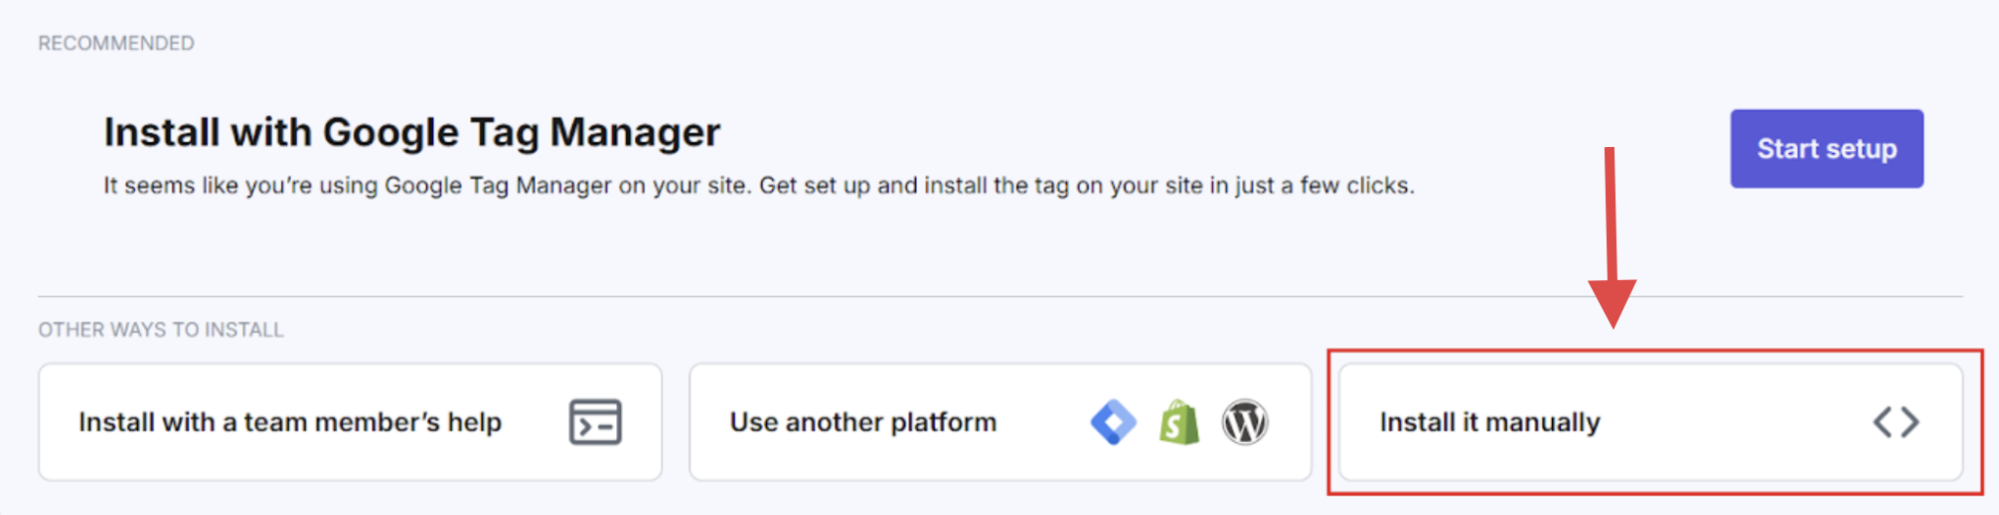
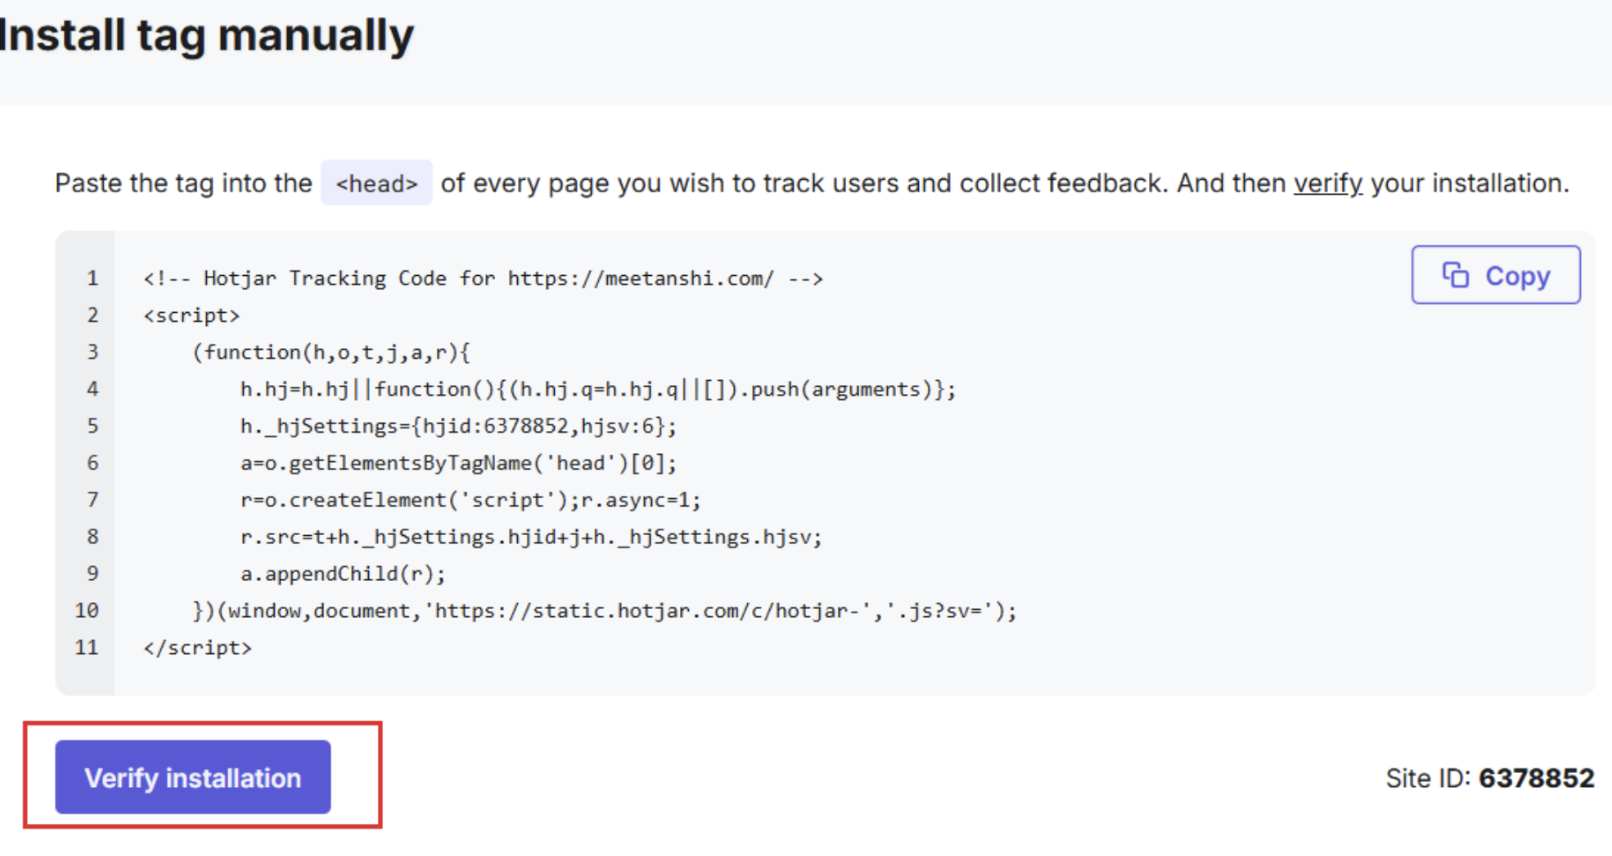
Step 2: Get the Hotjar Tracking Code
From here, copy the tracking code.
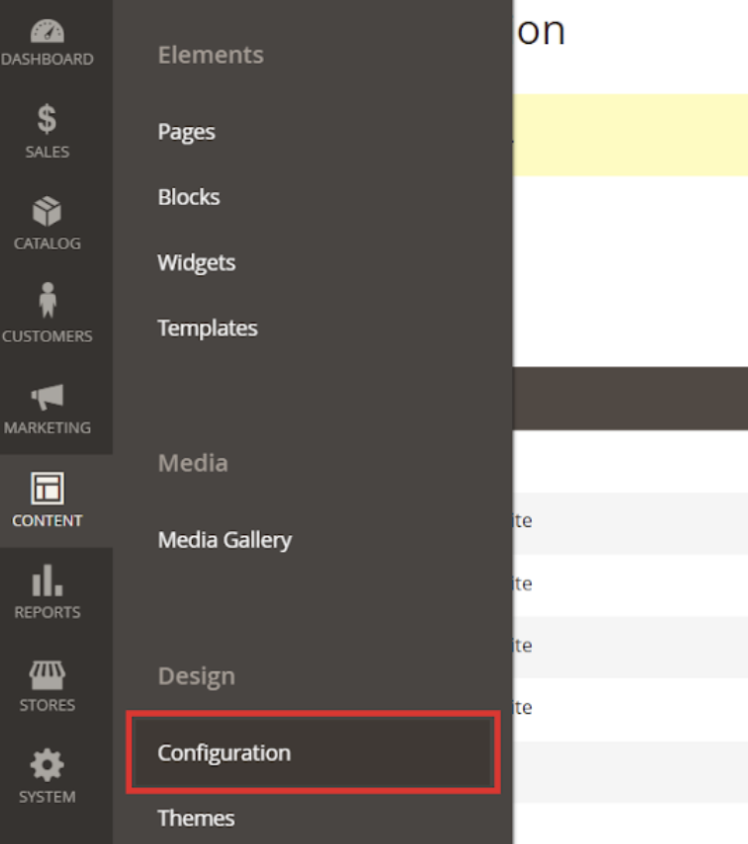
Step 3: Navigate to Magento 2 Admin
Now, navigate to your Magento 2 store and head to Admin Content > Configuration
Then, select the Default Store View > Edit and open the HTML Head drop-down.
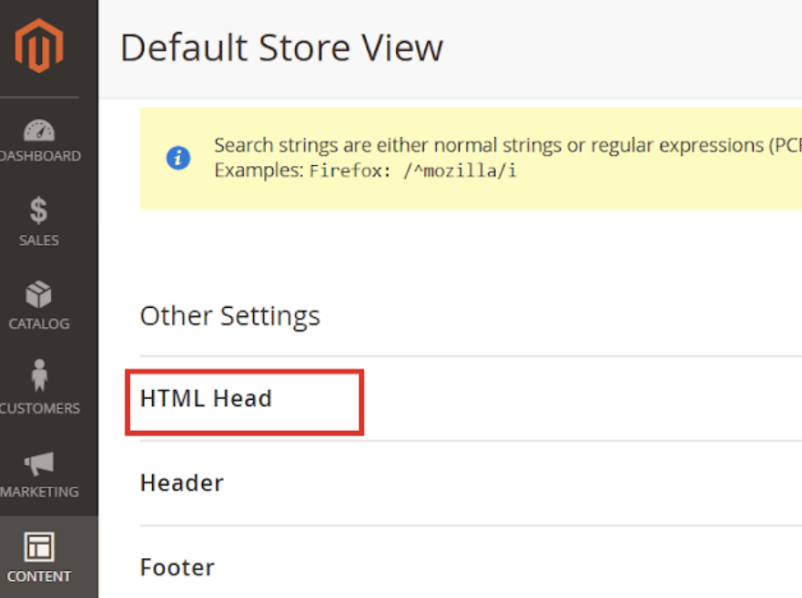
Scroll down to the Scripts and Style Sheet section, paste the Hotjar Tracking code, and click Save Configuration.
Step 4: Save & Verify the Configuration
After saving the configuration, you will see a successful message in your Magento 2 dashboard.
Now go back to Hotjar and click Verify installation to check if it is installed properly.
That’s it, the Hotjar tracking is installed in your Magento 2 store.
Tips to Make the Most of Magento 2 Hotjar Tracking
Hotjar gives you a behind-the-scenes look at what your customers are doing in your Magento 2 store.
To make the most of it:
- Check heatmaps to see where people click (and where they don’t)
- Watch session recordings to spot where users get stuck
- Use polls or pop-ups to ask quick questions like “What’s missing?” or “Was this helpful?”
- Use what you learn to make small changes that improve the shopping experience
