Are you tired of managing tags on your website or looking for a better way to manage them?
Then, Google Tag Manager is the simplest solution to this problem.
Using this tool, you can manage all the tags without getting pulled in different directions. Here, I will guide you on how to add Google Tag Manager to Magento 2.
Let’s start.
What is Google Tag Manager?
Google Tag Manager (GTM) is a free tool developed by Google that allows Magento 2 store owners to manage and deploy marketing tags, and there is no need to make changes in the code.
Keeping all your tags stored in one place is one of the roles, but it does come with the following advantages of adding Google Tag Manager for Magento 2:
- Completely free-to-use tool
- Event tracking & debug features
- You can integrate it with various content management tools
- Easily works with Google Analytics
At times, store owners get confused between Google Analytics and Google Tag Manager.
- Google Tag Manager simply collects the data of the user’s actions on the website, but it doesn’t analyze it. It is a tag management tool.
- Google Analytics is the tool that analyzes the data and provides detailed reports on the users’ actions.
How Does Google Tag Manager Work?
The Google Tag Manager works in three phases. Let me break it down to help you understand better:
- Tag: Here, the GTM notices the event on your website. These tags keep an eye on the activities on your page.
- Trigger: When any action triggers on a particular event, the tags get fired, and GTM stores the action with the needed information.
- Variable: Variable goes specific. You can learn about the specific actions taken on the site with detailed information.
Now that you know the basics of Google Tag Manager. Let’s see the Magento 2 Google Tag Manager Configuration.
How to Add Google Tag Manager to Magento 2 Websites
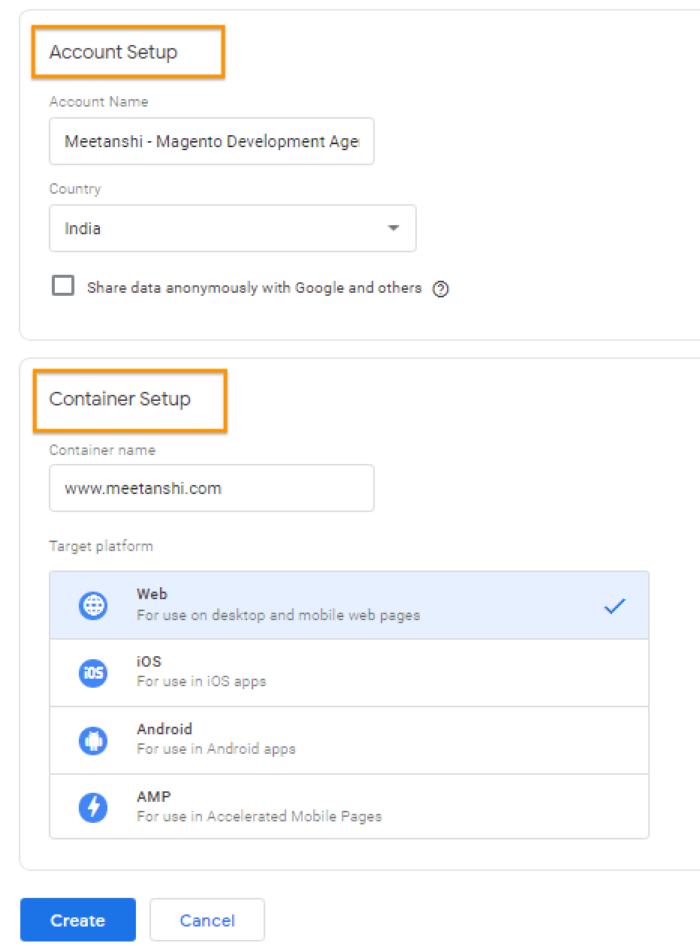
Step 1: Create a Google Tag Manager Account
Getting started with Google Tag Manager login. Click on “Start for free.”
After logging in with your Gmail account, you must create your Google Tag Manager Account. Write down your account name, country and select the target platform. Then, click on Create.
Step 2: Get The GTM Code
There are two sections in the code.
For the first one, you need to paste in the header section, and for the second one, you must paste in the body section of your Magento 2 website.

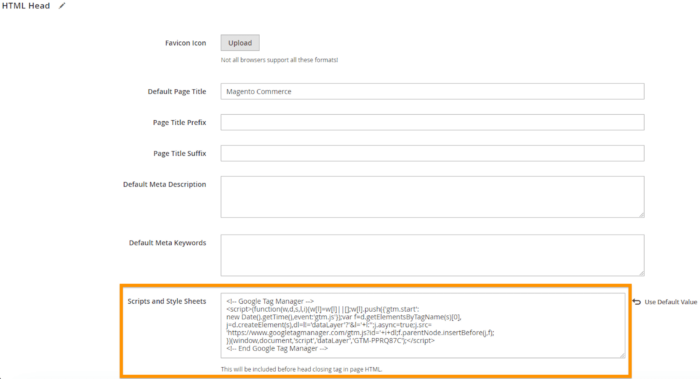
Step 3: Add Google Tag Manager Code in Magento 2
Open your Magento Admin Panel and move to Content > Design > Configuration > Edit the Store View > Other Settings> HTML Head.
Paste the code you got from GTM for the <head> tag here.
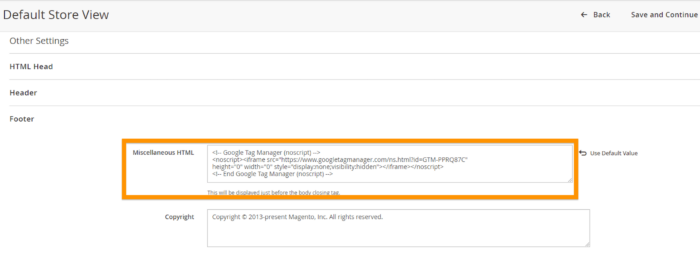
Step 4: Add The Code in The Footer Section
Now move to Footer and paste the GTM code for <body> under the “Miscellaneous HTML.”
And click Save Configuration.
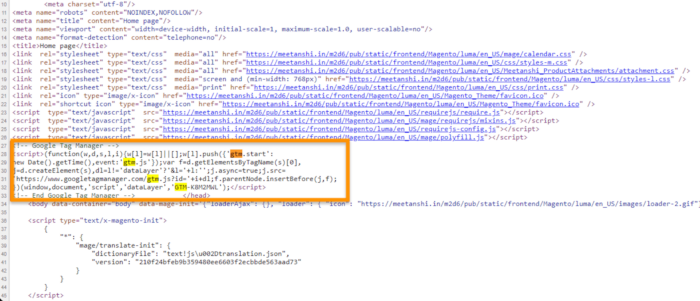
Step 5: Check GTM From The Front End
Now, if you are wondering how to check if Google Tag Manager is working? Go to the front end to know if Magento 2 Google Tag Manager is up.
Open the home page and click CTRL + U to open view source. Find GTM, and you can see the code.
And the Google Tag Manager is successfully added.
Still, feeling stuck? Get help from our Magento 2 experts here.
Measure Your Efforts to Make a Profitable Store
Now that you know how to add Google Tag Manager to Magento 2, you don’t need to worry about tags, as GTM does automatic tag updates.
After Magento 2 GTM, the next move for you can be to add Google Analytics for comprehensive e-commerce tracking.
You can turn the GA4 insights into actionable strategies to turn your visitors into customers.