Inventory management is an overwhelming task.
Whether you are dealing with stock levels, customer orders, or keeping product data updated, the last thing you want is manual work that leads to errors. That’s where integrating Zoho Inventory with Magento 2 can save you time and effort.
In this guide, we’ll take you through the process of seamlessly integrating Zoho Inventory with your Magento 2 store so you can automate your inventory processes and focus on growing your business.
Why Integrate Zoho Inventory with Magento 2?
Magento Zoho integration makes your online store operations more efficient but also benefits you at multiple levels:
- Whenever a sale is made, or stock levels change, Zoho Inventory and Magento 2 communicate instantly. No more manually updating stock across platforms.
- With the integration, you don’t have to juggle between platforms to update your inventory. Everything is managed in one place, ensuring data accuracy.
- When a customer places an order on your Magento 2 store they are automatically synced with Zoho Inventory. You won’t miss a single order, and your stock levels will always be up-to-date.
- Keep product information such as pricing, descriptions, and SKUs consistent across both platforms. Any changes made in the Zoho Inventory will reflect in Magento 2, ensuring your online store is always accurate.
- Real-time data sync ensures that customers never experience issues with incorrect stock information or delayed order processing, leading to better satisfaction and trust.
This integration essentially removes the guesswork from inventory management, giving you peace of mind knowing that your store and inventory systems are perfectly in sync. Likewise you might also consider improving your Magento 2 store’s financial management by integrating Xero with Magento 2.
How to Integrate Magento 2 Zoho Inventory?
Integrating Zoho Inventory with Magento 2 might sound complicated, but with Meetanshi’s Magento 2 Zoho Inventory Integration Extension, it’s easy & quick.

Let’s break it down into simple, actionable steps.
Step 1: Install Magento 2 Zoho Inventory Integration Extension
Download the extension zip file from Meetanshi’s website and extract it to your Magento 2 root directory. Log in to your SSH and run the following commands:
- php bin/magento setup:upgrade
- php bin/magento setup:static-content:deploy
- php bin/magento setup:static-content:deploy –f
- php bin/magento cache:flush
Step 2: Integrate Using Client ID & Secret
Next, you’ll need to get your Client ID, Client Secret, and Organization ID from Zoho to connect the two systems.
- Log in to your Zoho API Console using your Zoho credentials.
- Click on Add Client and select Server-based Applications as the client type.
- Give your client a name, such as “Magento Integration,” and enter your site’s homepage URL.
- In the Authorized Redirect URIs field, enter: https://your-site.com/zoho/connection/success (Remember to replace “your-site.com” with your actual website domain.)
- Click Create to save.
Now, in your Zoho Inventory account, go to your profile and copy your Organization ID. With this information in hand, go back to your Magento 2 admin panel.
Enable Zoho Inventory Integration
To start integrating Zoho Inventory with Magento 2, log in to your Magento 2 admin panel and navigate to Stores > Configuration.
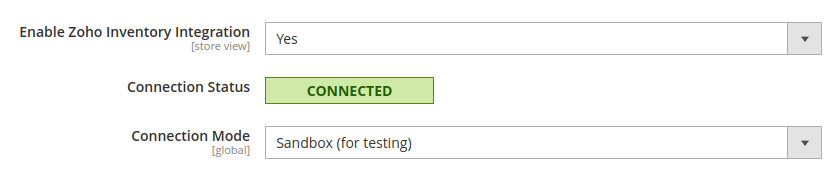
In the left panel under Meetanshi, select Zoho Inventory Integration. Enable the Zoho Inventory Integration by turning on this option.
Connection Status
In this section, you can check the current status of your Magento-Zoho Inventory connection. The status will indicate whether the integration is active or if there are any issues.
Connection Mode
Choose the appropriate mode for your integration:
- Sandbox: Use this mode for testing purposes to ensure everything works correctly before going live.
- Production: Select this mode for live operations once you’re ready to fully integrate Zoho Inventory with your Magento 2 store.
- Sandbox Client ID: If you are using the Sandbox mode, enter the Sandbox Client ID that you received from your Zoho account.
- Sandbox Client Secret: Similarly, enter the Sandbox Client Secret that was provided by Zoho to complete the configuration for the Sandbox mode.

- Domain Region: Select the Domain Region that corresponds to your Zoho Inventory account. This setting ensures proper server communication between Zoho and your Magento 2 store.
- Data Center Region: Choose the Data Center Region where your data will be stored and processed.

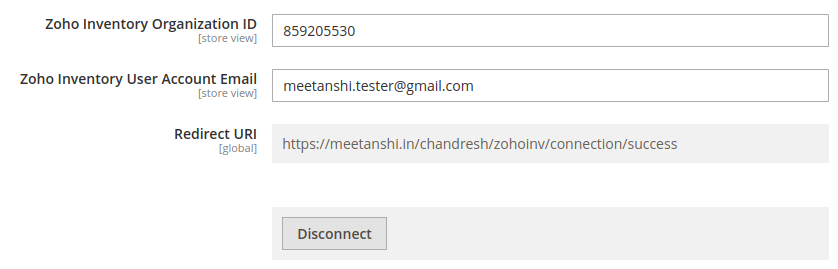
Additional Details
- Enter the organization ID from your Zoho profile.
- Provide the email address associated with your Zoho Inventory user or admin account.
- Input the redirect URL as https://yoursite.com/zoho/connection/success, replacing yoursite.com with your actual Magento 2 store URL.
Click the “Save” button to finalize the integration setup. Once saved, the connection status should update to Connected.
If you need to disconnect the integration later, you can do so using the Disconnect button.
Step 3: Configure Synchronization
With your Magento 2 and Zoho Inventory connected, it’s time to configure how the data will sync between them. You can choose to sync accounts, products, orders, and invoices. Here’s how you can set it up:
Accounts Sync Configuration
Decide if you want to sync customer data, such as names, emails, and addresses, between Magento 2 and Zoho Inventory.
When this sync is active, any new customer details added in Magento will automatically appear in Zoho.
Products Sync Configuration
Sync your product catalog so that product details like SKUs, descriptions, and stock levels remain updated across both platforms. This ensures your Magento store and Zoho Inventory have consistent product data at all times.
This saves you the hassle of manually updating information in two places.

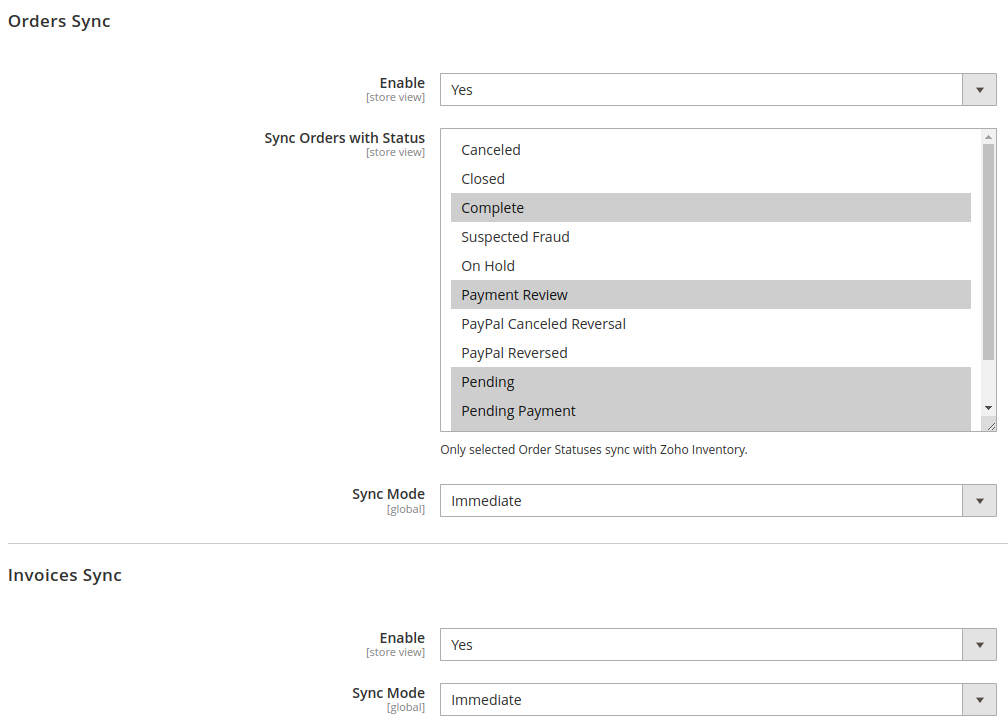
Orders Sync Configuration
When a customer places an order in Magento 2, the details will be instantly pushed to the Zoho Inventory. This includes all relevant information such as customer details, order status, and payment information.
Invoices Sync Configuration
This option allows you to sync invoices, so financial data stays consistent across both platforms. With invoice syncing enabled, you can manage all your financial documents more efficiently.
You don’t have to manually sync your data every time. The scheduled syncs feature allows you to automate the process at specific intervals, whether daily, weekly, or monthly.
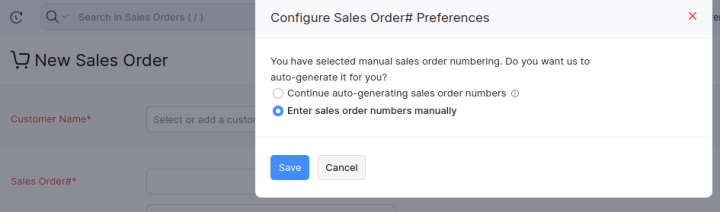
For this,
- Navigate to your Zoho account > Inventory > select the “+” icon located at the top right corner to initiate a new sales order.
- Press the settings button.
- Within the “Configure Sales Order Preferences” section, opt for “Enter Sales Order Number Manually.“
- Press “Save“
Here’s how synced invoices will look like in the Zoho Inventory:

Developer Options
The Developer Options in the extension provide handy tools to help you fine-tune, troubleshoot, and debug the Zoho Inventory integration for your Magento store.
One helpful feature is the Generate Debug Logs option, which creates detailed logs of the integration process. By turning this on, you can easily track how everything is working, spot any issues, and fix them quickly.

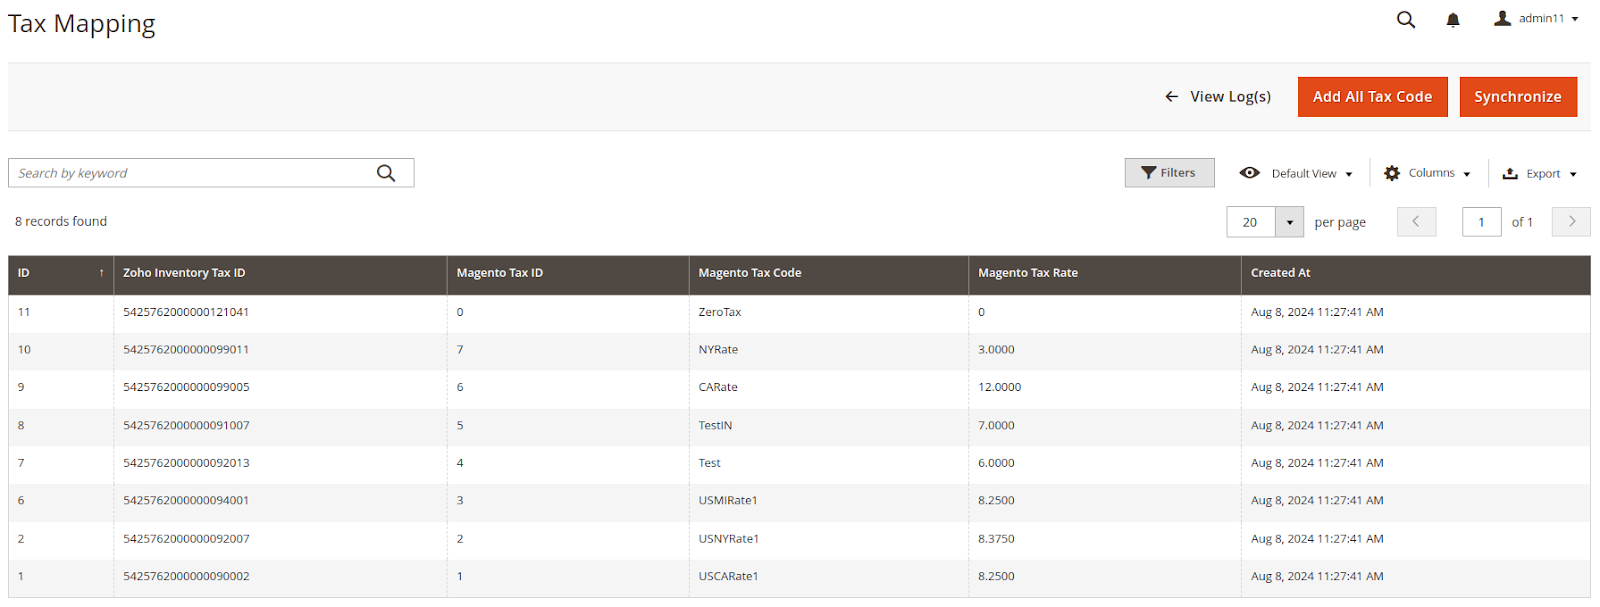
Tax Mapping
Tax mapping ensures that tax codes in Magento 2 are correctly mapped to Zoho, preventing any discrepancies during tax calculations. This feature helps in maintaining accurate invoicing and tax compliance across both systems. To add this feature,
- Navigate to Zoho Inventory Integration > Tax Mapping in your Magento admin panel.
- Click the “Add All Tax Code” button to automatically add all Magento 2 tax codes to the list.
- Once added, click “Synchronize” to sync the tax codes with the Zoho API.
Step 4: Manage Scheduled Syncs
If your store has existing customers, products, orders, and invoices that need to sync with Zoho after installing the extension:
- Go to Zoho Inventory Integration > Sync Queue.
- Click “Add Customers”.
- Click “Add Products”.
- Click “Add Orders”.
- Click “Add Invoices”.
Make sure to add them in the order mentioned above.
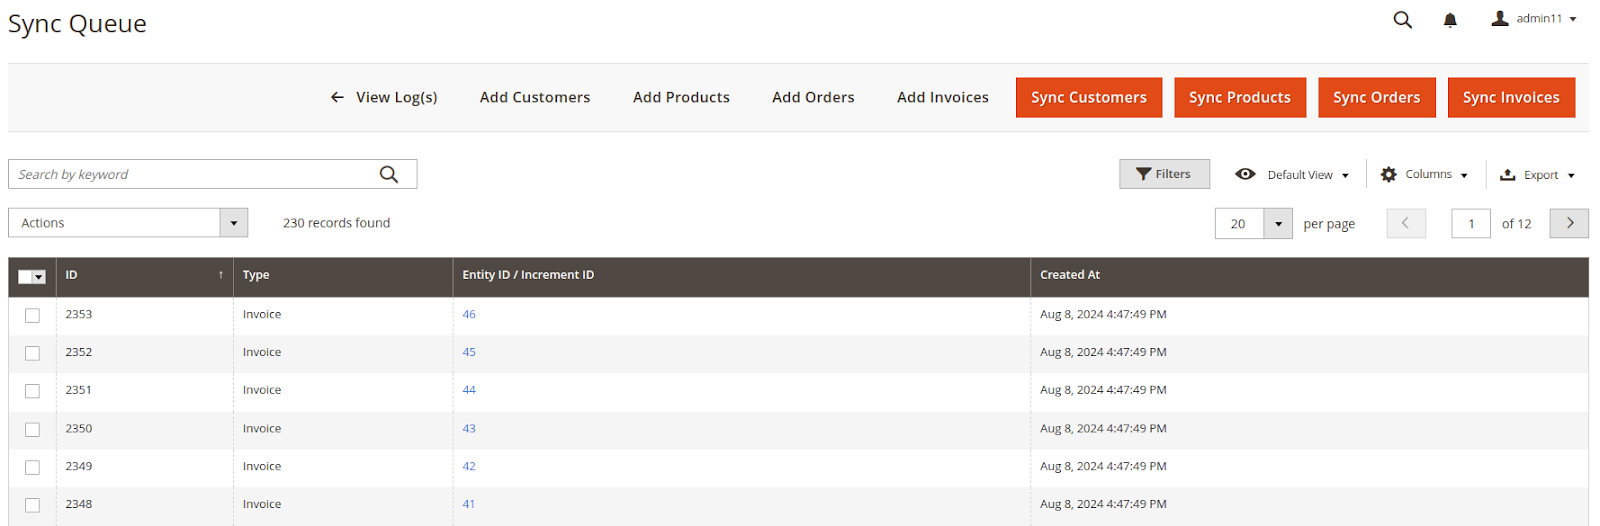
Click the “Synchronization” button to start syncing everything with Zoho gradually.
An easy way to sync products with Zoho Inventory without coding.
Get Extension
What Data Can You Sync with Zoho Inventory?
With this integration, you can sync a wide range of data between your Magento 2 store and Zoho Inventory. Here’s what you can sync:
- Products: Sync product details such as names, descriptions, SKUs, prices, and stock levels.
- Orders: Automatically sync customer orders between Magento 2 and Zoho Inventory.
- Invoices: Keep invoices updated across both platforms for smooth financial operations.
- Customers: Sync customer details like names, email addresses, and purchase histories.
- Vendors: Keep your supplier information consistent across both platforms.
This extensive list of sync options ensures that every aspect of your business is covered, minimizing the chances of manual errors and saving you tons of time.
Frequently Asked Questions
Does Zoho Integrate with Magento?
Yes, Zoho integrates perfectly with Magento using the Meetanshi Magento 2 Zoho Inventory Integration extension. This extension makes it easy to sync data such as products, orders, invoices, and customers between the two platforms, ensuring real-time updates.
How Do I Get the Client ID and Client Secret from Zoho?
You can get the Client ID and Client Secret by following these steps:
- Log in to the Zoho Developer Console.
- Under the API Credentials section, create a new client.
- After creating the client, you’ll be given a Client ID and Client Secret, which can be used to integrate Zoho Inventory with Magento 2.
Optimize Your Inventory Management Today
Managing your inventory across platforms doesn’t have to be a stressful task. Magento 2 with Zoho inventory integration extension, you can automate and optimize your entire inventory management process.
By syncing crucial data points like products, orders, and invoices, you’ll have more time to focus on growing your business while ensuring accurate and efficient operations.
Ready to take control of your inventory management? Install the Magento 2 Zoho Inventory Integration Extension today and experience the benefits of real-time inventory synchronization.
