A virtual try-on has become a popular feature to help shoppers see how clothing might look on them before purchasing.
Shopify does not provide a native feature to enable virtual clothing try-on.
To add this functionality and offer an interactive shopping experience, you need to use a third-party Shopify app.
In this blog, learn how to create a virtual clothing try-on on Shopify using an app step-by-step.
How to Add Virtual Try-On to Shopify Clothing Stores
Use the MIT AI Virtual Try-On Shopify app to enable this feature on your store.
The app doesn’t require any coding. You only need to make a few configurations, and the try-on button is visible on your desired product page. With the pre-configured settings, your shoppers can directly upload their picture and see how the product fits them.
Here is how.
Removing the uncertainty of fit and style, this app helps to improve conversion rates on Shopify and build lasting customer trust.
Here is the three-step process to set up the app.
Step 1: Enable & Design the App Block
Install the MIT AI Virtual Try-On.
Then, head to the app dashboard and click on Open Theme Editor.
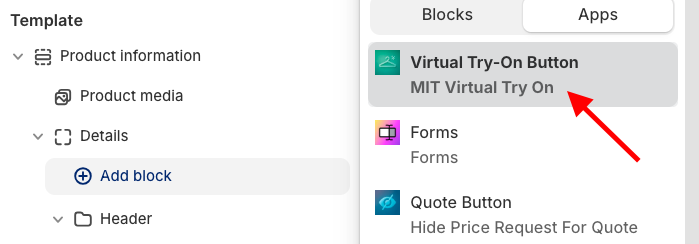
This will open the theme editor of our active theme. Now, click on Product information > Add Block > App > Virtual Try-on Button.
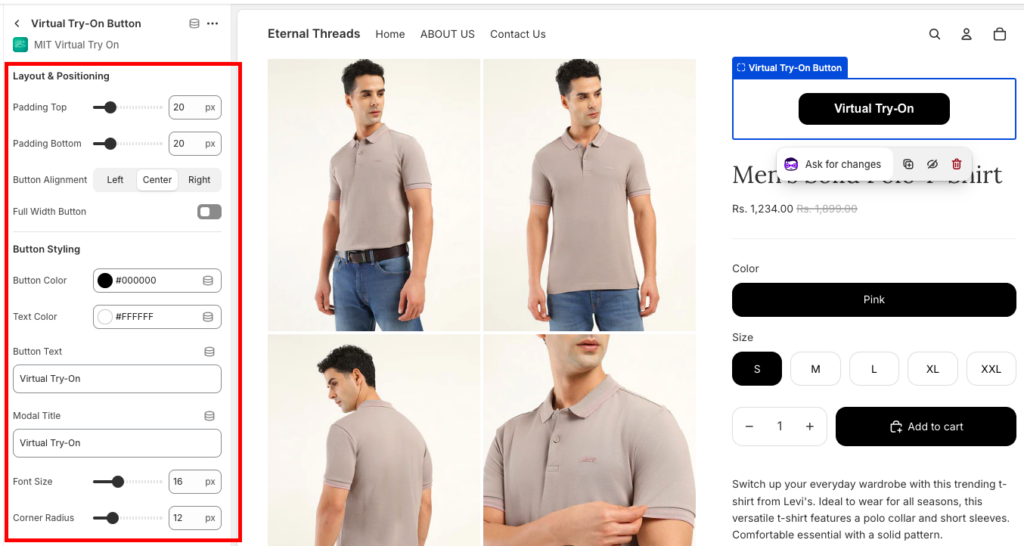
This will add the Virtual Try-On button right above the product details. Click on the button and edit the settings to match your brand’s aesthetic. You can adjust:
- Button background, text color, and labels
- Modify the font size and border-radius (rounded or square corners)
- Padding and alignment (left, center, or right)
Click Save in the top right corner to make these changes live.
Step 2: Configure Display Rules & Limits
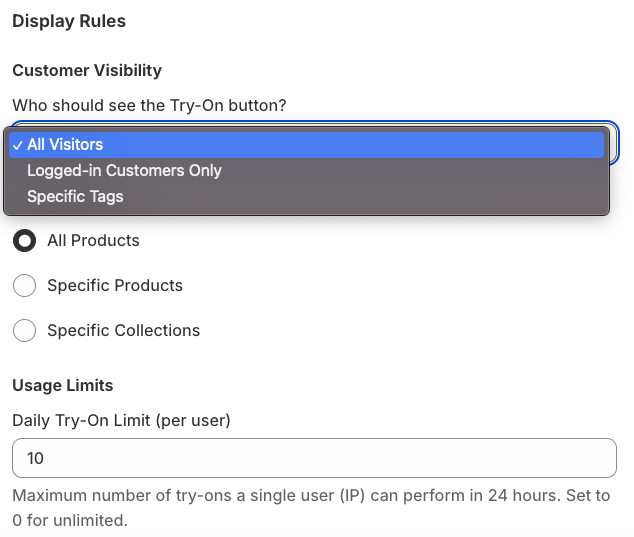
Click Display Rules from the app dashboard to configure the following settings.
- Show the Virtual Try-On button to all customers, or restrict it to logged-in users or customers with specific tags.
- Enable the feature for All Products or restrict it to Specific Collections (e.g., just your New Arrivals or Dresses)
- Set daily try-on limits per user to manage API usage and prevent misuse.
After everything’s done, save the changes.
Step 3: Test the Try-On Button
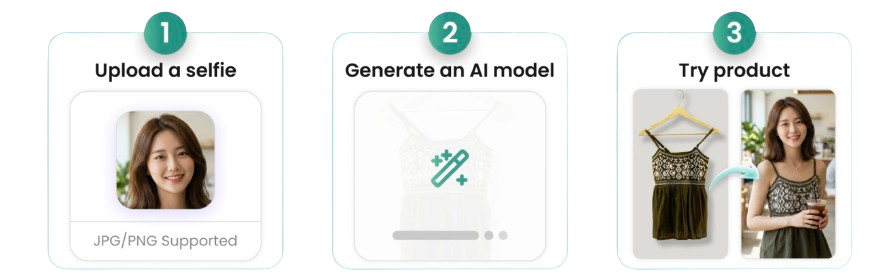
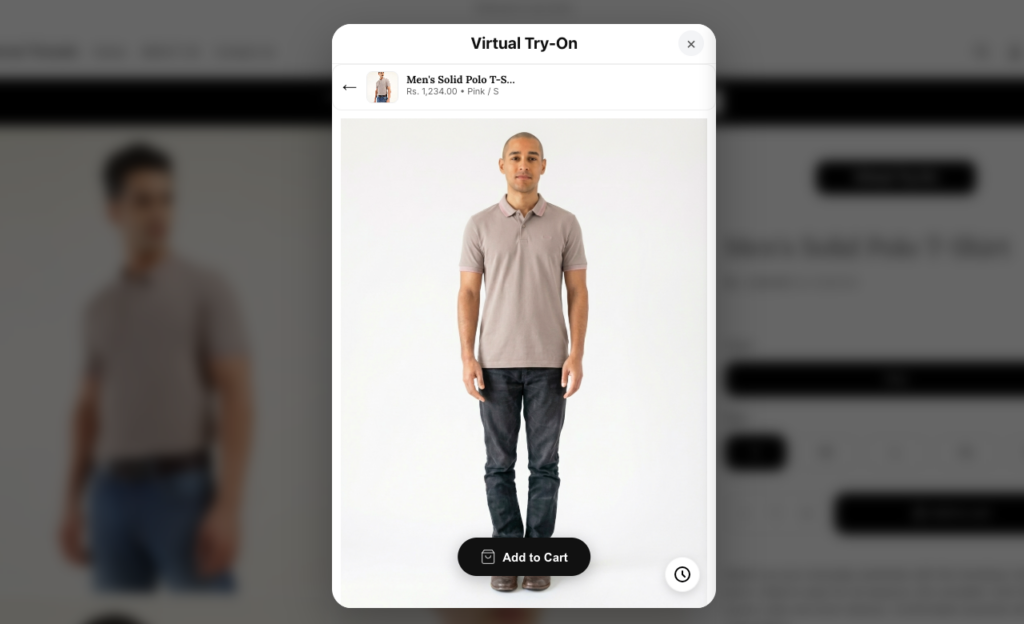
After enabling the feature, customers will see the Virtual Try-On button on supported product pages. When they click it, a pop-up opens where they can upload a selfie or full-body photo.
The app then creates an AI model and shows the customer how the clothing item looks on them. If they like the result, they can directly click Add to Cart from the pop-up.
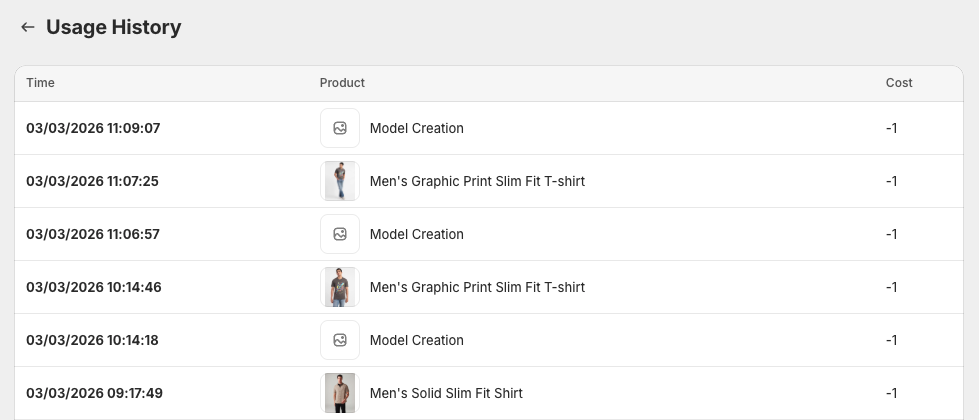
Additionally, from the app dashboard, you can access the Usage History page, which shows how customers are using the app.
You can track your API credit usage and see which products are tried the most.
That’s how you can add an AI virtual clothing try-on for Shopify.
Try AI Virtual Try-On for Free
Many merchants search for how to create a virtual clothing try-on for Shopify to make online apparel shopping more interactive.
The MIT AI Virtual Try-On app makes it simple to deliver a realistic try-before-you-buy experience without any cost or coding. Customers can see how products look in their own photos, helping reduce uncertainty and cart abandonment.
Create a virtual fitting room without any coding to instantly boost customer confidence.
Create Now