Too much information on the product page can frustrate shoppers.
One good way to deal with this is to add tabs to Shopify product pages, which allows you to organize content into a clean, structured layout.
In this tutorial post, find the exact steps to add tabs on the Shopify product page. But first, learn why it matters.
Why Add Tabs on Product Page?
Adding tabs to your product page brings clarity. Instead of overwhelming your shoppers with a long block of text, product tabs allow you to separate content like description, specification, review, and FAQ into navigational sections.
For example:
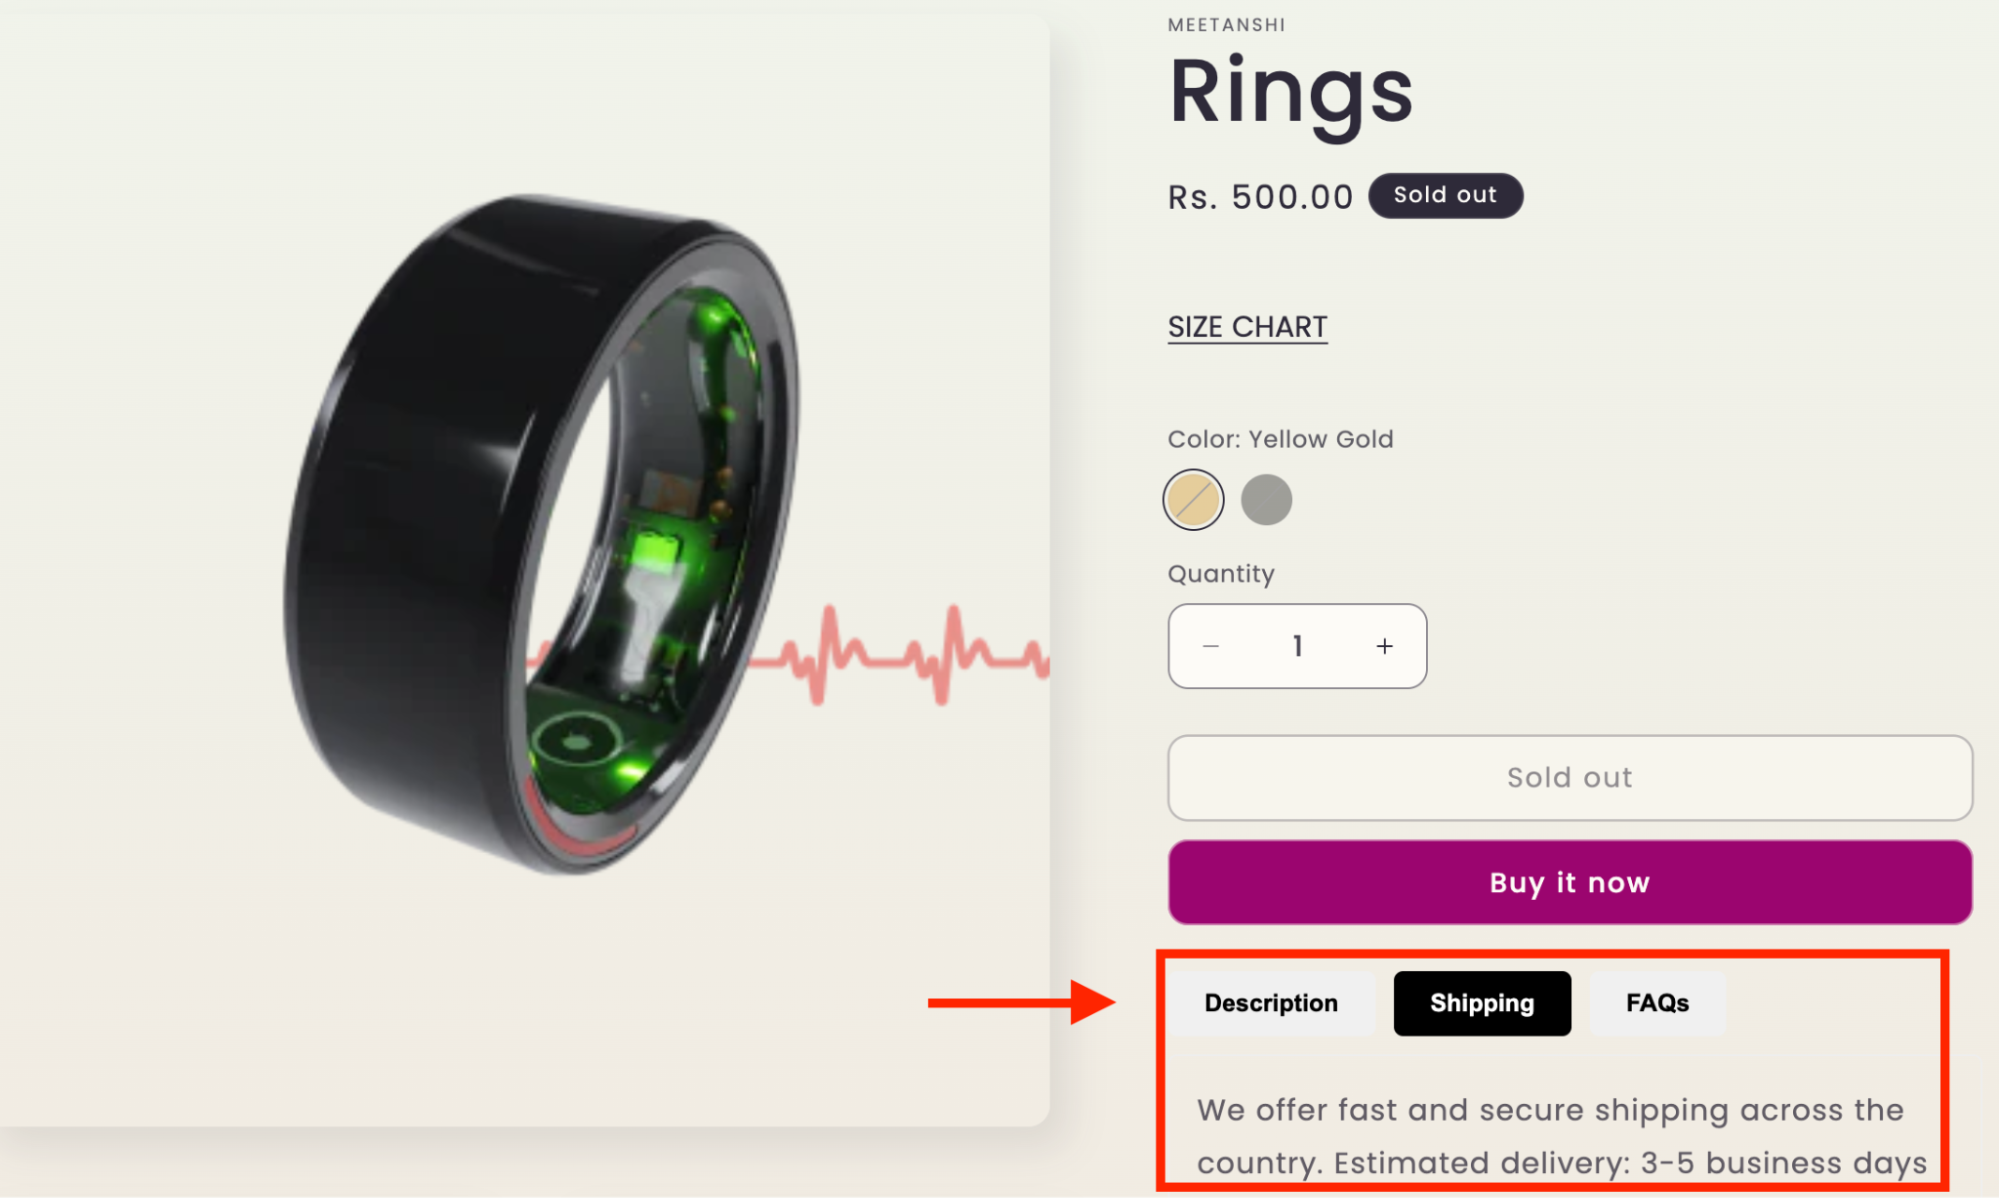
The tabs improve readability, enhance the shopping experience, and make the page manageable.
Liquid Code to Add Tabs in Shopify Product Page
You can add tabs to the Shopify product page by modifying the template Liquid code. Here, we’ll create a metafield first that will contain the details to display in the product tabs.
Follow these steps:
- Step 1: Define Product Metafields
- Step 2: Add Liquid Snippet Code
- Step 3: Fill in the Information in the Admin Panel
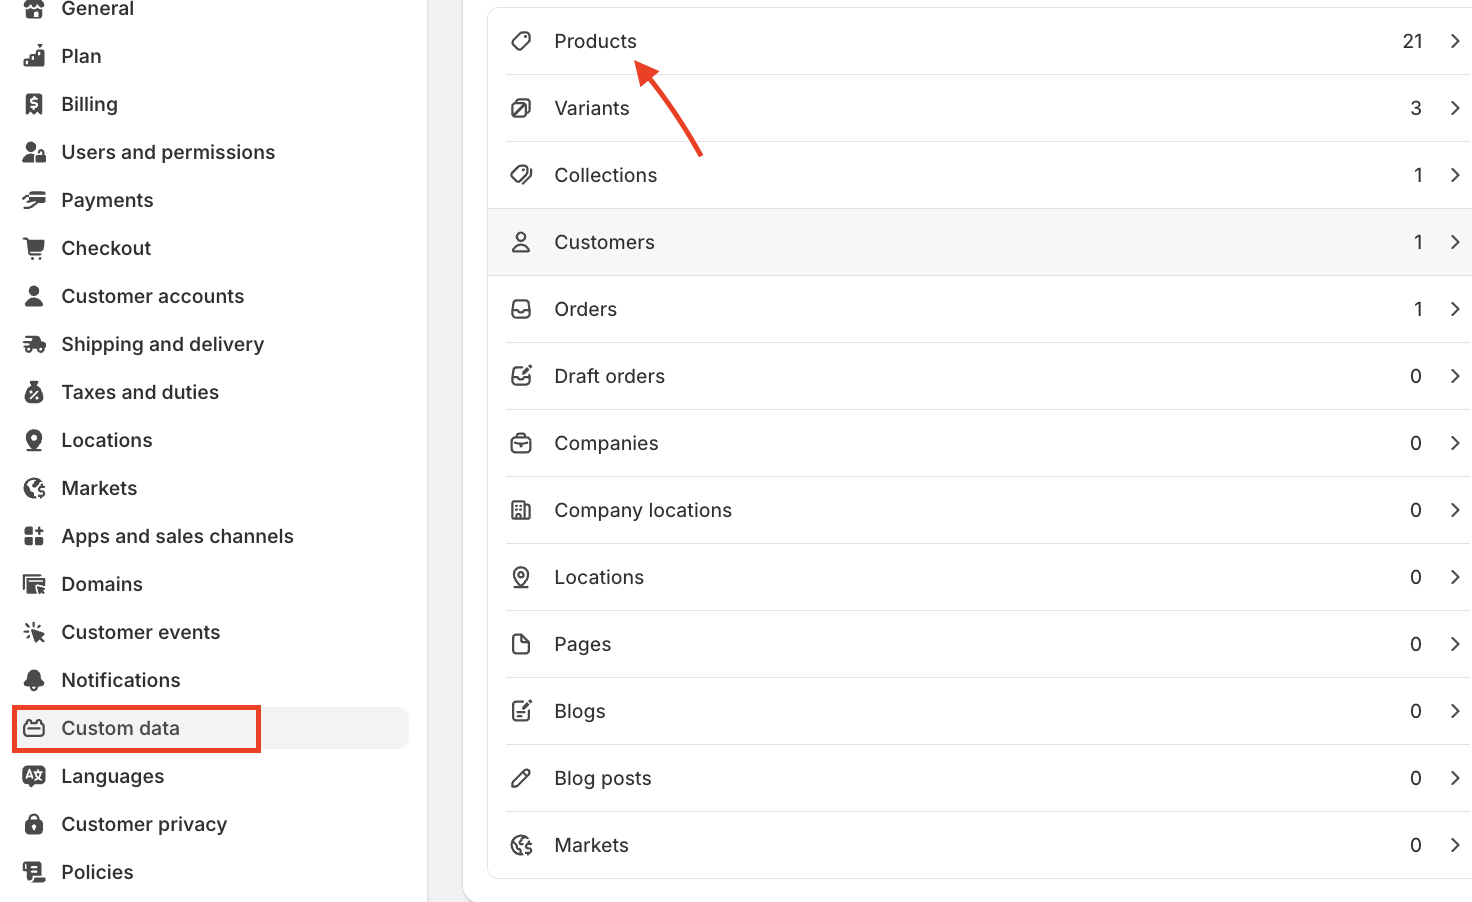
Step 1: Define Product Metafields
First, navigate to Shopify Admin > Settings. Then click Custom data > Products.
Create a new metafield by clicking the Add definition button.
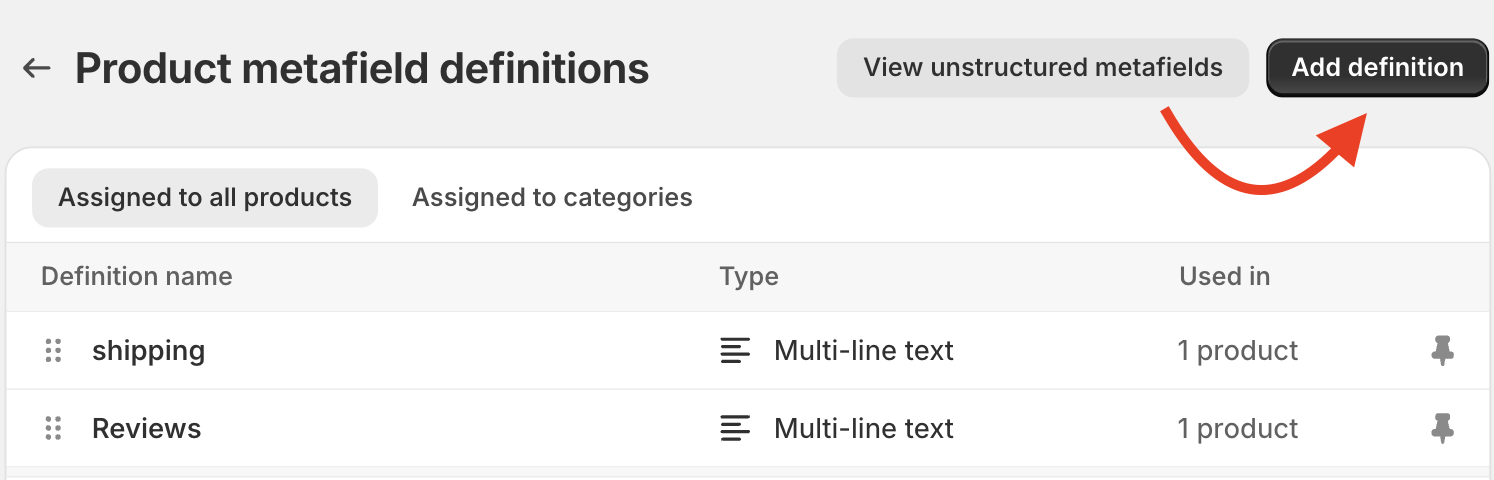
Based on the details you want to add to product fields, create metafields with proper name and type. For example:
| Name | Namespace & Key | Type |
|---|---|---|
| Shipping | custom.shipping | Multi-line text or rich text |
| Reviews | custom.reviews | Multi-line text or rich text |
Step 2: Add Liquid Snippet Code
Now, go to Online Store > Themes > Edit code > Snippets. Click Add a new snippet, name it as meetanshi-product-tabs, and save it.
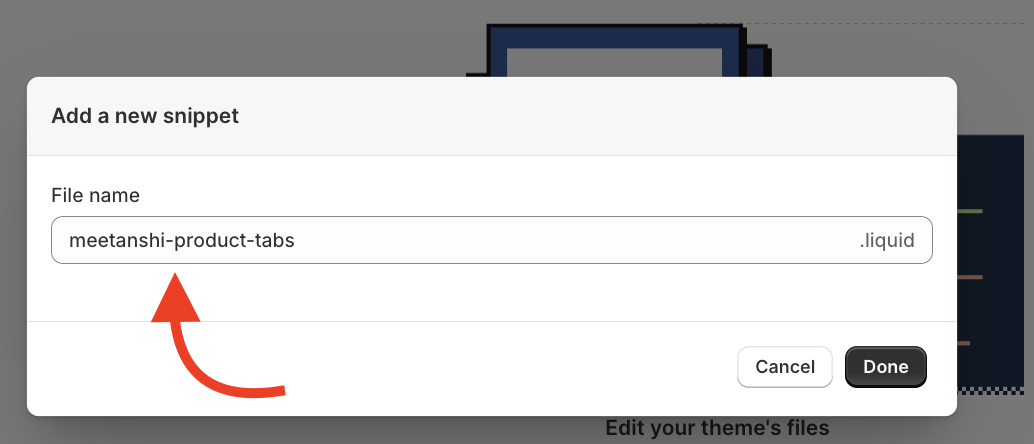
Paste the following code inside the new snippet file and Save it:
<style>
  .product-tabs {
	margin-top: 2rem;
  }
  .tabs {
	display: flex;
	flex-wrap: wrap;
	gap: 10px;
	margin-bottom: 1rem;
  }
  .tab-link {
	padding: 10px 20px;
	cursor: pointer;
	background-color: #f0f0f0;
	border: none;
	border-radius: 5px;
	font-weight: bold;
  }
  .tab-link.active {
	background-color: #000;
	color: #FFF;
  }
  .tab-content {
	display: none;
	padding: 15px;
	border: 1px solid #eee;
	border-radius: 5px;
  }
  .tab-content.active {display: block;}

</style>

{% assign tab_count = 0 %}
<div class="product-tabs">
<div class="tabs">
  {% if product.description %}
	<button class="tab-link {% if tab_count == 0 %}active{% endif %}" onclick="openTab(event, 'description')">
  	Description
	</button>
	{% assign tab_count = tab_count | plus: 1 %}
  {% endif %}
  {% if shipping %}
	<button class="tab-link {% if tab_count == 0 %}active{% endif %}" onclick="openTab(event, 'shipping')">
  	Shipping
	</button>
	{% assign tab_count = tab_count | plus: 1 %}
  {% endif %}
  {% if reviews %}
	<button class="tab-link {% if tab_count == 0 %}active{% endif %}" onclick="openTab(event, 'reviews')">Reviews</button>
  {% endif %}
</div>

{% assign tab_count = 0 %}
{% if product.description %}
  <div id="description" class="tab-content {% if tab_count == 0 %}active{% endif %}">
	{{ product.description }}
  </div>
  {% assign tab_count = tab_count | plus: 1 %}
{% endif %}
{% if shipping %}
  <div id="shipping" class="tab-content {% if tab_count == 0 %}active{% endif %}">
	{{ shipping | metafield_text }}
  </div>
  {% assign tab_count = tab_count | plus: 1 %}
{% endif %}
{% if reviews %}
  <div id="reviews" class="tab-content {% if tab_count == 0 %}active{% endif %}">
	{{ reviews | metafield_text }}
  </div>
{% endif %}
</div>

<script>
function openTab(evt, tabName) {
  const contents = document.querySelectorAll('.tab-content');
  const buttons = document.querySelectorAll('.tab-link');
  contents.forEach(tab => tab.classList.remove('active'));
  buttons.forEach(btn => btn.classList.remove('active'));
  document.getElementById(tabName).classList.add('active');
  evt.currentTarget.classList.add('active');
}
</script>
Now, find and open the main-product.liquid file and replace the product.description with the following code:
{% assign shipping = product.metafields.custom.shipping %}
{% assign reviews = product.metafields.custom.reviews %}

{% if shipping != blank or ingredients_test != blank %}
  {% render 'meetanshi-product-tabs', shipping: shipping, reviews: reviews  %}
{% else %}
  {{ product.description }}
{% endif %}
Replace the product.description division with the following line and Save the file:
Step 3: Fill in the Information in the Admin Panel
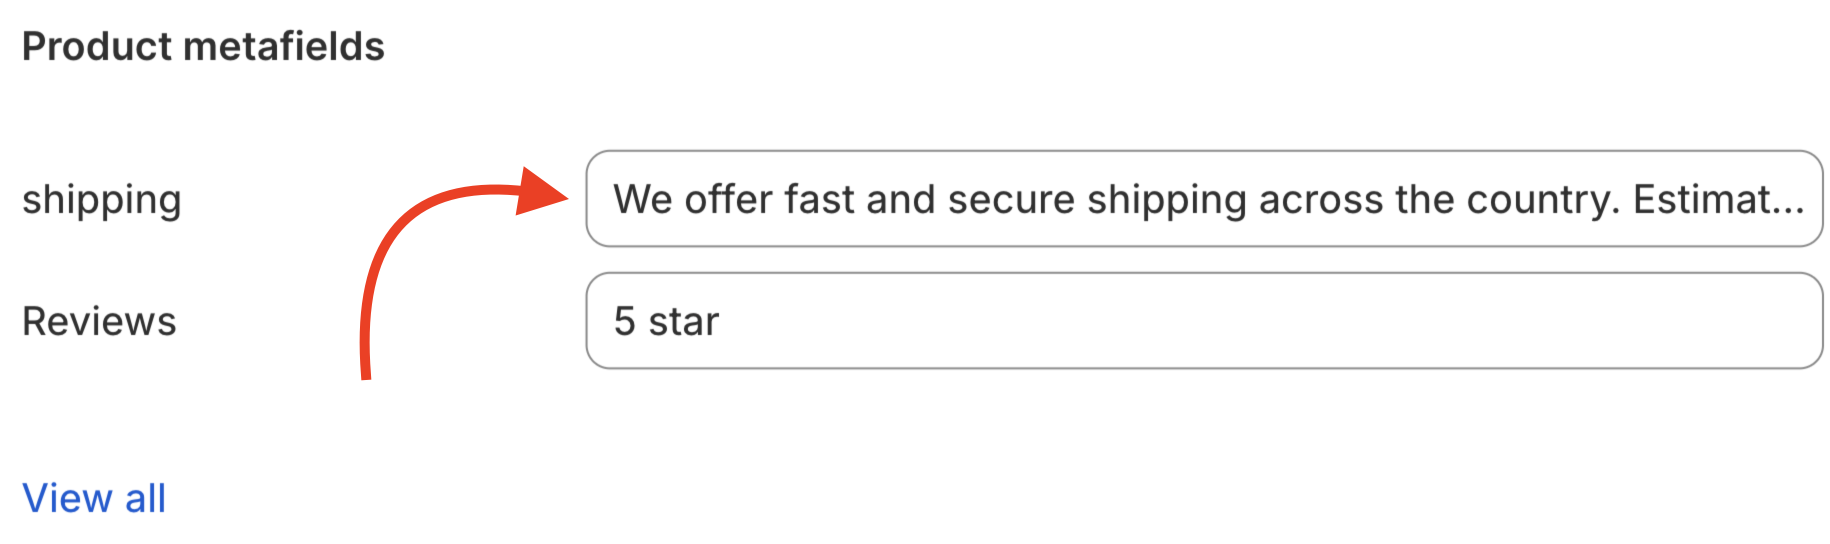
Navigate to Shopify Admin > Products. Open any product and scroll down to the Product Metafields section.
Now, you will see the shipping meta field, which we added earlier here.
This is how it will look to your shoppers.
Optional Steps
Here are some bonus customization tips if you’d like to personalize your tabs, such as changing tab colors, enabling them on mobile devices, or displaying them only on specific products.
In order to win your shoppers’ trust, you can add a Shopify press slider to showcase your achievements and awards you have received over the years.
How to Change Tabs Color?
Navigate to Online Store > Themes > Edit code > Snippets > meetanshi-product-tabs.liquid.
This code is already placed inside the snippet; you only need to change the background color of your choice.
<style>
.tab-link {
	background-color: #f0f0f0;
  }
  .tab-link.active {
	background-color: #000;
	color: #fff;
  }
</style>
Enable Tabs on Mobile Devices Only
Navigate to Online Store > Themes > Edit code > Snippets and edit the meetanshi-product-tabs.liquid file.
And then add this inside the main snippet file code we created in step 1.
<style>
@media screen and (max-width: 749px) {
	.product-tabs {
	display:block;
}
}
@media screen and (min-width: 750px) {
	.product-tabs {
	display:none;
}
}
</style>
Get Help with Shopify Theme Customization
Create a user-friendly content section that improves the shopping experience and helps shoppers make quick buying decisions.
Need help with Shopify theme customization? Our expert team is here to create attractive Shopify product tabs as per your branding.
Let our Shopify experts create a custom theme to boost and elevate your customer experience.
Learn More