Images can greatly enhance the look and feel of your Shopify store.
This blog post is helpful if you want to allow your shoppers to add images to custom sections within the Shopify code.
Shopify Liquid Image Tag
You can use the image_tag filter in Liquid code to add images anywhere in Shopify. It generates an <img> HTML tag to display images.
For example:
{{ image_source | image_url | image_tag }}
Here:
- image_source is the liquid variable or path where the image is present
- image_url generates a CDN-optimized URL for the image
- image_tag converts the data into <img> HTML tag to display the image
You can also specify image attributes in the code to generate images of specific sizes or add image alt texts. E.g.:
{{ product.featured_image | image_url: width: 200 | image_tag: alt: product.title, width: 200, height: 200, loading: ‘lazy’ }}
The above code will generate an image tag from the Product > Featured Image object with specific height, width, alt text, and lazy loading.
How to Add an Image in Custom Liquid Shopify?
You can use the code directly where you want to add images in Shopify. Here are the steps:
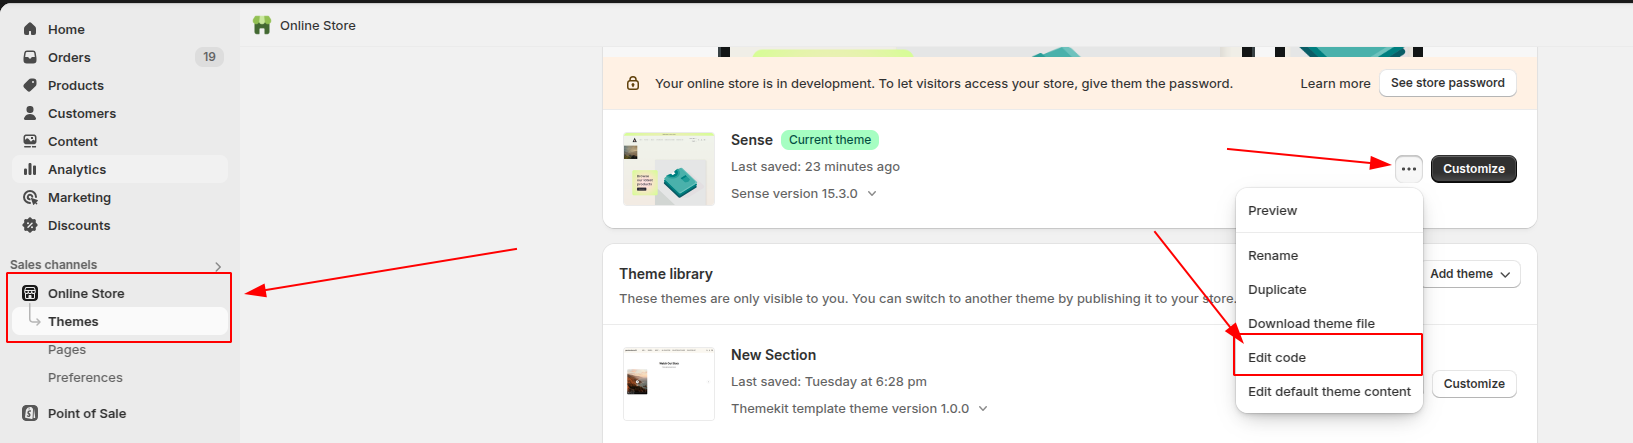
Step 1: Edit Theme Code
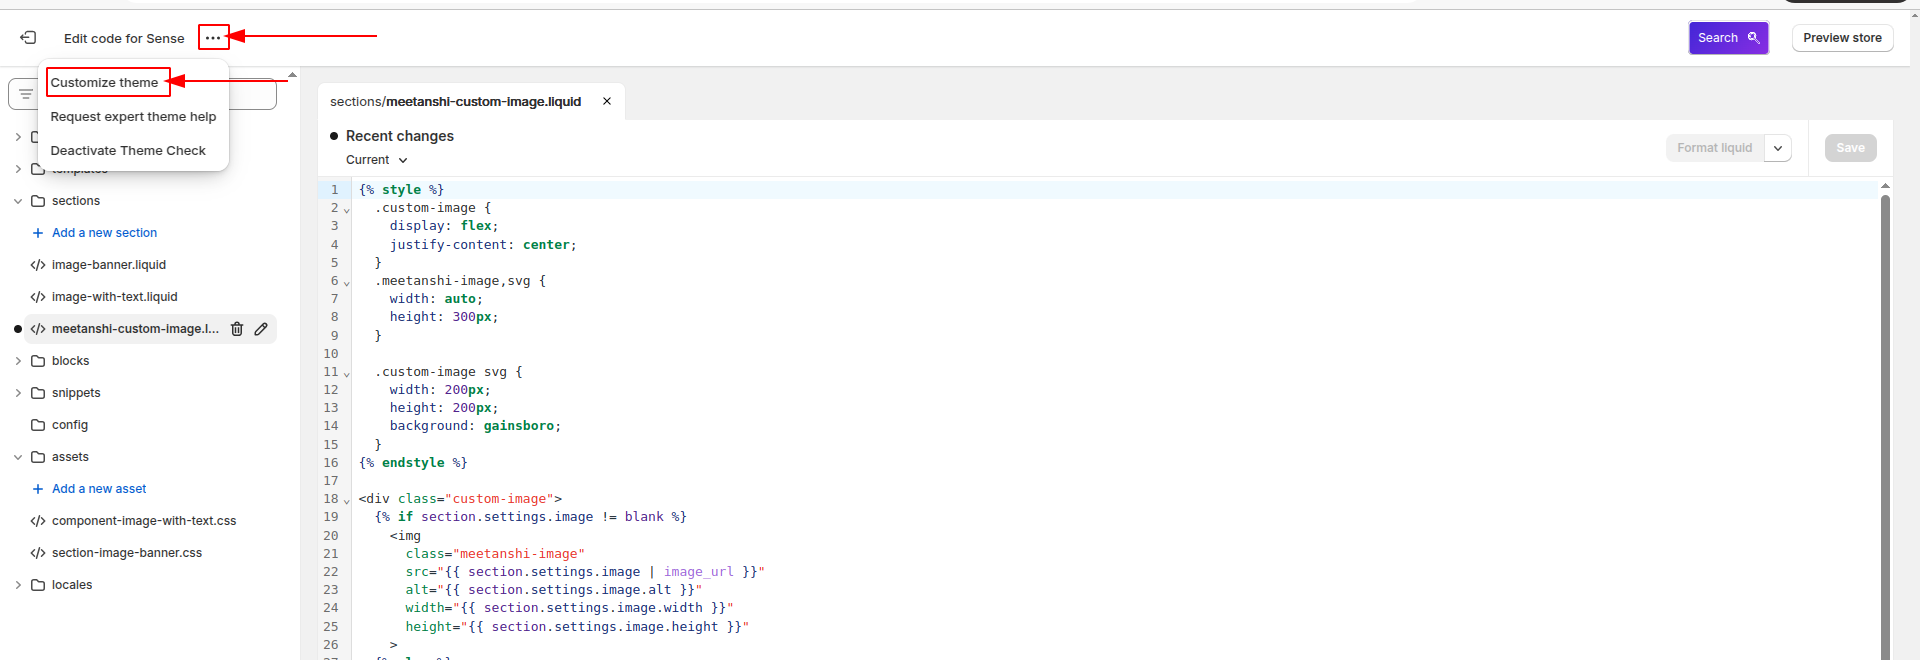
Navigate to Shopify admin > Online Store > Themes > three dots(…) > Edit code
Step 2: Create Custom Liquid Block
Add a Custom Liquid section in the theme editor or edit a .liquid file (e.g., sections/meetanshi-custom-image.liquid).
Click on Add a new section.
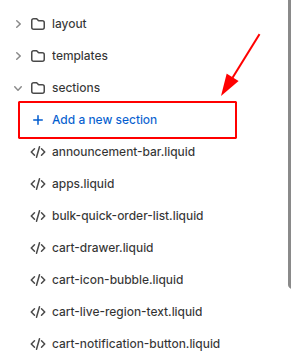
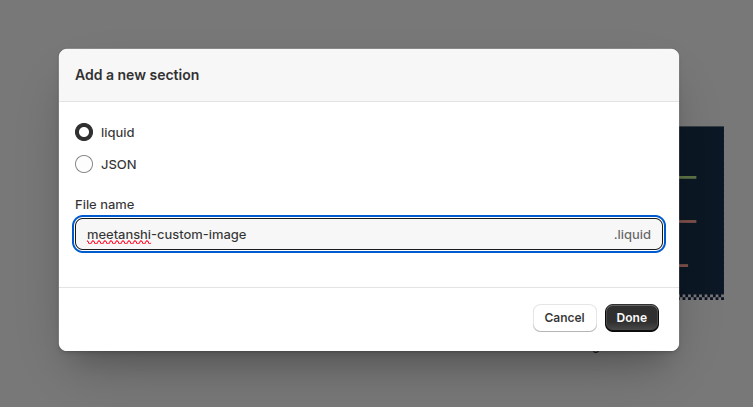
Then create a liquid file named meetanshi-custom-image
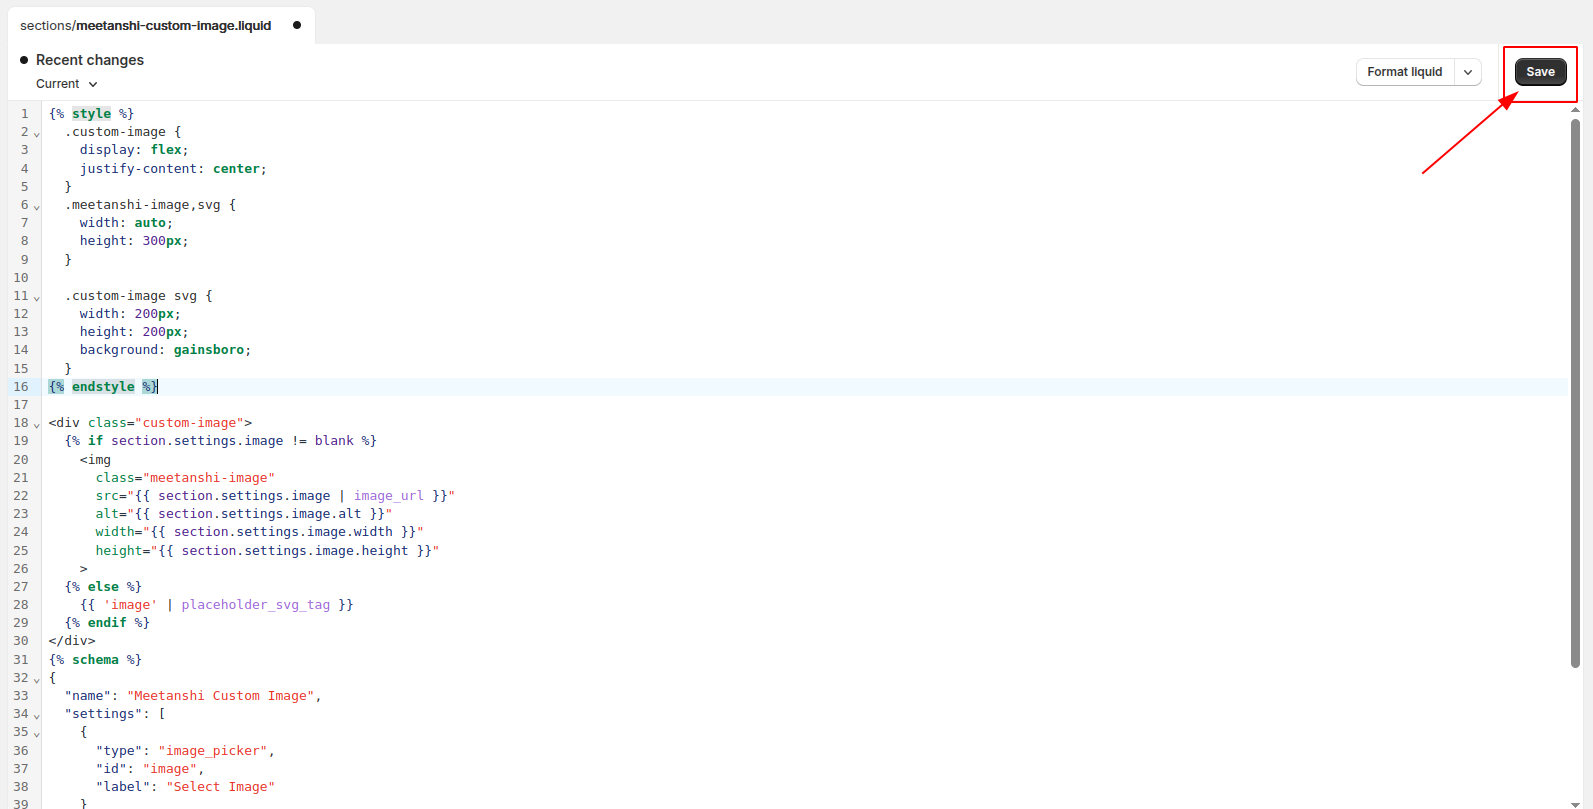
Now, add this code in the file:
{% style %}
  .custom-image {
	display: flex;
	justify-content: center;
  }
  .meetanshi-image,svg {
	width: auto;
	height: 300px;
  }

  .custom-image svg {
	width: 200px;
	height: 200px;
	background: gainsboro;
  }
{% endstyle %}

<div class="custom-image">
  {% if section.settings.image != blank %}
	<img
  	class="meetanshi-image"
  	src="{{ section.settings.image | image_url }}"
  	alt="{{ section.settings.image.alt }}"
  	width="{{ section.settings.image.width }}"
  	height="{{ section.settings.image.height }}"
	>
  {% else %}
	{{ 'image' | placeholder_svg_tag }}
  {% endif %}
</div>
{% schema %}
{
  "name": "Meetanshi Custom Image",
  "settings": [
	{
  	"type": "image_picker",
  	"id": "image",
  	"label": "Select Image"
	}
  ],
  "presets": [
	{
  	"name": "Meetanshi Custom Image"
	}
  ]
}
{% endschema %}
Then, save the file.
Save them file and top Click the three dots(…) > Customize theme
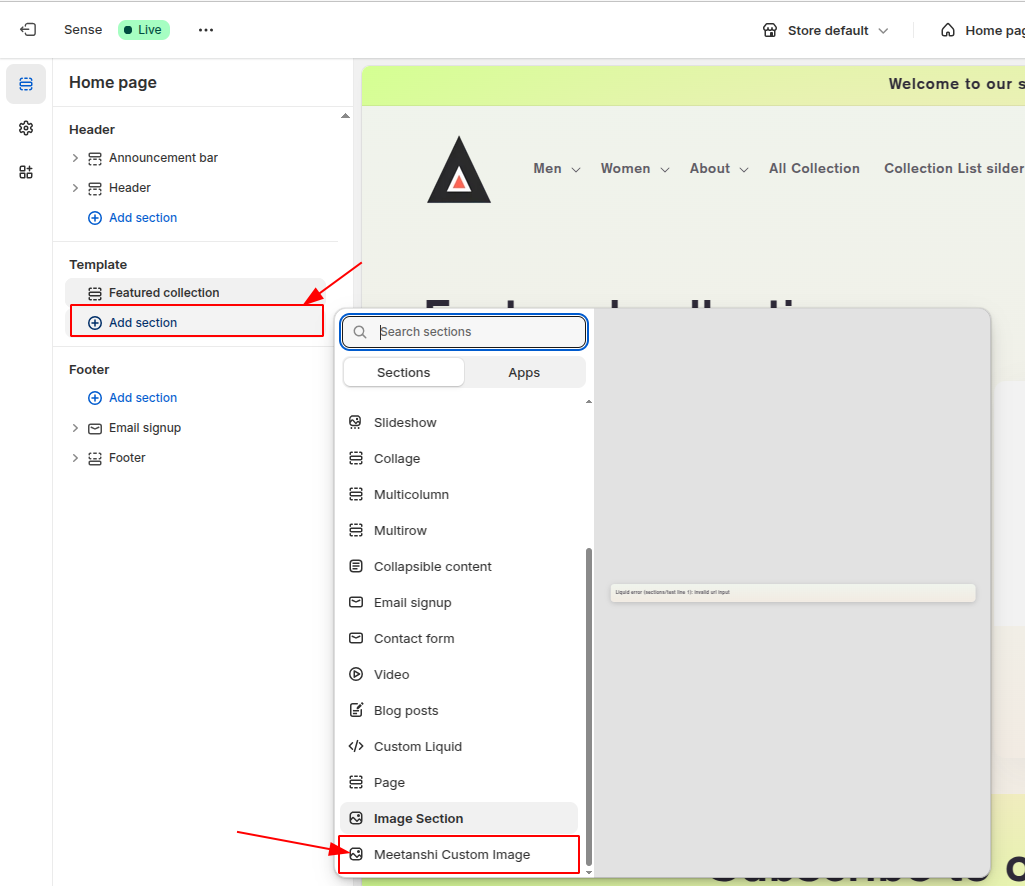
To add the Meetanshi Custom Image section, go to Customize, click on Add Section, and select Meetanshi Custom Image from the list
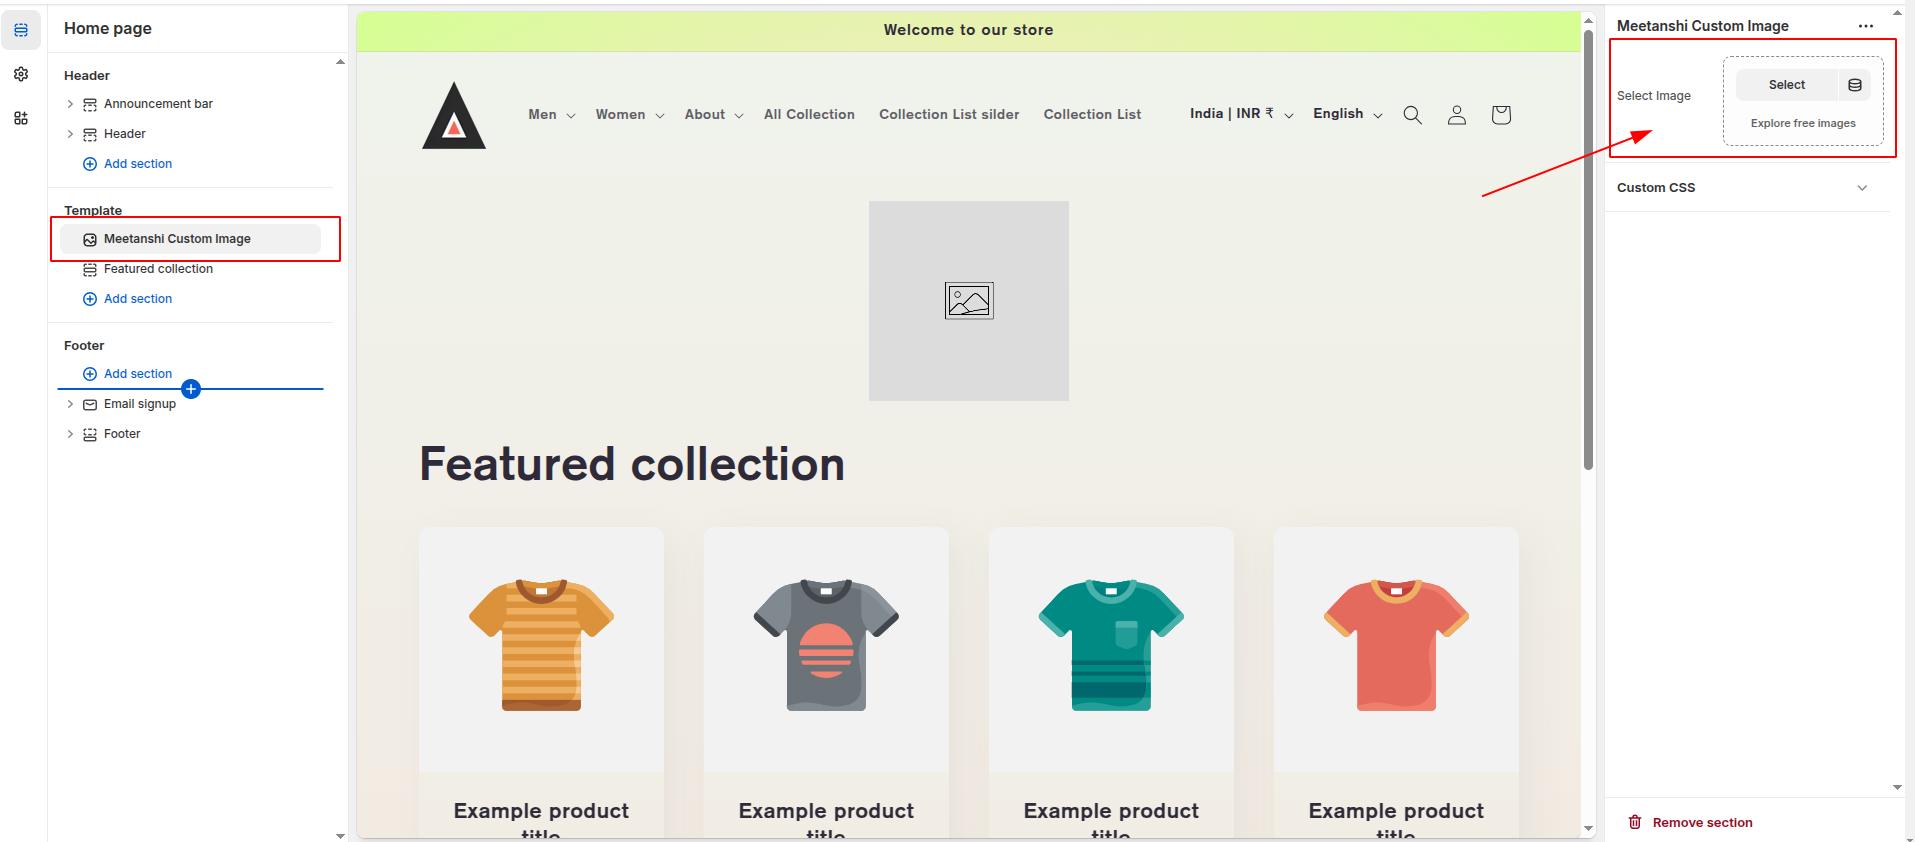
Add a section, then click on any image to select it
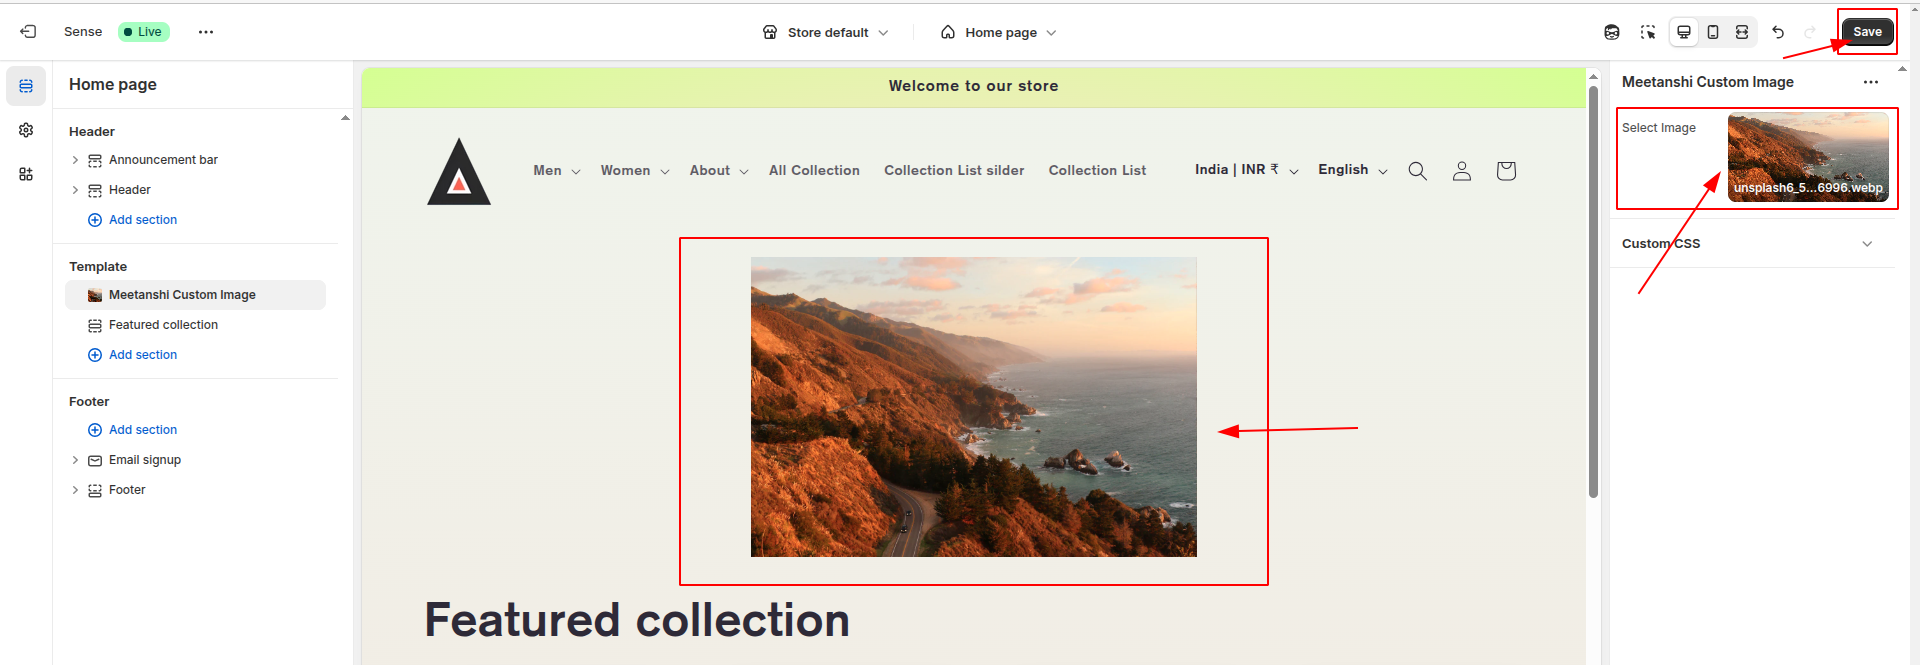
Choose an image, add it, and use the Save or Preview buttons

Dynamically Get Product/Collection Image
To dynamically load the current product or collection image, you can use the image_tag with other Liquid components like:
For product images:
{{ product.featured_image | image_url: width: 400 | image_tag }}
For collection images:
{{ collection.image | image_url: width: 400 | image_tag }}
The above syntaxes will render images of the respective product and collection. This is helpful when you’re making changes to the Shopify template files and want to load media dynamically.
Frequently Asked Questions
How to Apply Image Filters in Liquid Code?
You can specify the filter inside the image syntax code, separated by a pipe | sign. Here are some examples of common image filters in Shopify Liquid:
- Resize image – {{ image | image_url: width: 400, height: 300 }}
- Crop image (top, bottom, left, right, center) – {{ image | image_url: crop: “center” }}
- Change format (jpg, png, webp) – {{ image | image_url: width: 400, format: ‘webp’ }}
- Generate full <img> tag – {{ image | image_url: width: 300 | image_tag: alt: “Custom image alt text” }}
- Add CSS class to image tag – {{ image | image_url: width: 300 | image_tag: class: ‘my-image-class’ }}
You can also combine these filters to achieve specific outputs in Shopify Liquid code.
Can I Set a Background Image in Shopify Liquid?
You can use the following Liquid code to define a background image:
<div style=”background-image: url(‘{{ image | image_url }}’); background-size: cover; height: 400px;”>
In the above code, make sure to replace the image with the correct path to the image.
Get Help with Shopify Customization
That’s it! You have successfully learned how to add an image in Shopify Liquid. Additionally, you can also add a slideshow section play around with it and see how images can bring your pages to life.
Need help with Shopify Theme customization? Our experts can assist with everything from image integration to full store design.
Let our Shopify experts create a custom theme to boost and elevate your customer experience.
Learn More