Shopify popups are an effective sales technique to convert shoppers into loyal customers. This guide walks you through how to add a pop-up to a Shopify store in the easiest way possible.
Popular Popups to Add in Shopify
Depending on your current goal, you can choose a popup that matches your customer’s journey. Here are the most effective and popular types of popups in Shopify:
| Popup Type | Core Purpose | Best Use Case |
| Recent Sales | Build social proof and urgency. | Showing real-time purchases to validate the brand. |
| Discount Code | Drive immediate conversions. | Welcoming new visitors or offering a “last-minute” deal. |
| Newsletter / Email Signup | Lead generation and list growth. | Offering value (guides, early access) in exchange for contact info. |
| Exit-Intent | Reduce bounce rates. | Triggering a message just as a visitor’s cursor leaves the page. |
| Free Shipping | Increase Average Order Value (AOV). | Highlighting spend thresholds (e.g., “Spend $10 more for free shipping”). |
| Announcement | Directing traffic to specific info. | Promoting store-wide sales, restocks, or holiday updates. |
| Cart Abandonment | Recovering lost revenue. | Nudging users to finish checkout before they close the tab. |
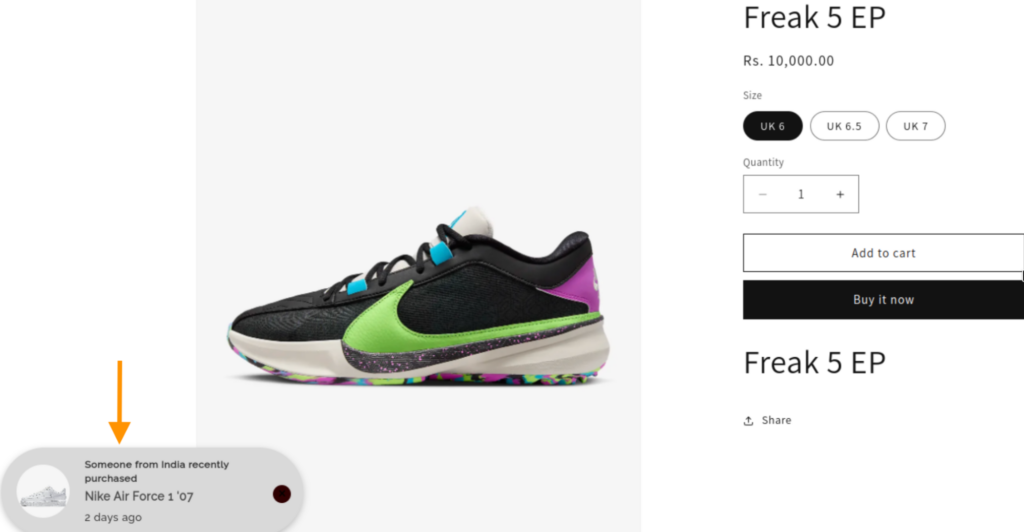
While every type listed above has its place in a healthy marketing strategy, sales popups are the most used by Shopify store owners because they provide instant credibility to new visitors.
In the rest of this blog, I will show you exactly how to set them up and optimize them for your store like the one below:
How to Create a Sales Popup in Shopify via Custom Code
You can create a custom code for a sales pop-up and add it to your theme file.
This gives you the freedom to customize the design of the popup but requires developers if you are not a technical person.
Follow these steps carefully to add a sales popup in Shopify.
Head to your Shopify admin panel, go to Online Store > Themes > Edit Code.
Open Layout > theme.liquid, then scroll to the very bottom and paste this code right above the </body> tag.
Replace the src URL in the <img> tag with the link to your most popular product image to display it in the pop-up.
<div id="simple-sales-popup" style="display: none; position: fixed; bottom: 20px; left: 20px; background: white; border: 1px solid #ddd; padding: 12px; border-radius: 8px; box-shadow: 0 4px 10px rgba(0,0,0,0.1); z-index: 9999; width: 260px; font-family: sans-serif; align-items: center;">
<div style="margin-right: 12px;">
<img src="https://cdn.shopify.com/s/files/1/0533/2089/files/placeholder-images-image_60x60_crop_center.png" id="popup-img" style="width: 50px; height: 50px; border-radius: 4px; object-fit: cover;">
</div>
<div>
<p style="margin: 0; font-size: 13px; font-weight: bold; color: #333;">Someone in <span id="popup-city">New York</span></p>
<p style="margin: 2px 0; font-size: 12px; color: #666;">purchased <span id="popup-item">a Best Seller</span></p>
<small style="font-size: 10px; color: #999;">Verified by Shop</small>
</div>
<button onclick="document.getElementById('simple-sales-popup').style.display='none'" style="position: absolute; top: 5px; right: 5px; background: none; border: none; cursor: pointer; color: #aaa;">×</button>
</div>
<script>
document.addEventListener("DOMContentLoaded", function() {
const popup = document.getElementById('simple-sales-popup');
const cities = ["New York", "London", "Los Angeles", "Chicago", "Sydney", "Toronto"];
setTimeout(() => {
document.getElementById('popup-city').innerText = cities[Math.floor(Math.random() * cities.length)];
popup.style.display = 'flex';
}, 5000);
setTimeout(() => {
popup.style.display = 'none';
}, 12000);
});
</script>
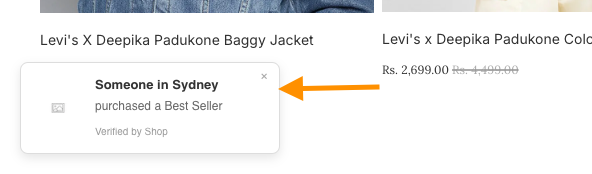
Save the file and preview it in the frontend, and this is how it will look (simple & basic).
Though adding a popup via code is free of cost, it comes with some fallbacks you must know.
Pulling actual, real-time sales data requires connecting to Shopify’s Admin API. This is significantly more complex to code than a basic popup and requires a secure way to handle your store’s private data.
This fake sales notification on Shopify can negatively impact your branding.
Secondly, when Shopify updates its core Liquid or JavaScript libraries, custom code can stop working or break other parts of your store (like the “Add to Cart” button).
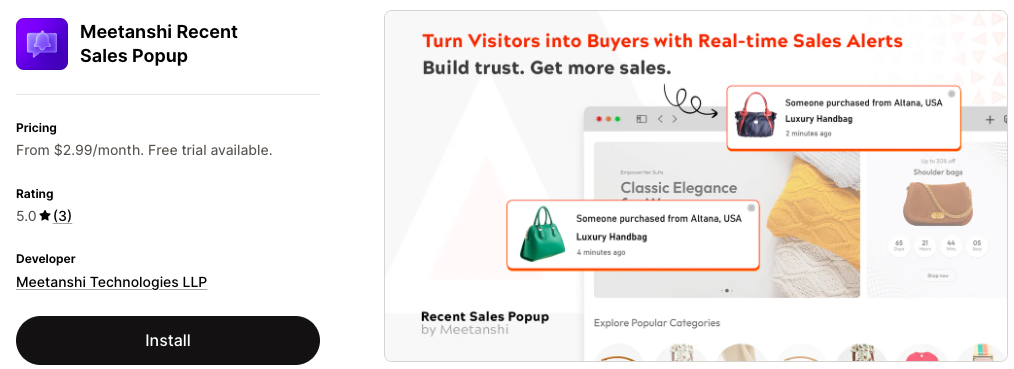
Steps Using the Meetanshi Recent Sales Popup Shopify App
Instead of handling everything through manual coding, you can use the Meetanshi Recent Sales Popup app, which shows real-time sales popup extracting the data from your recent orders.
Let’s understand the app working with easy steps.
Step 1: Configure the Popup Setting
Install the Meetanshi Recent Sales Popup app and enable it in your theme.
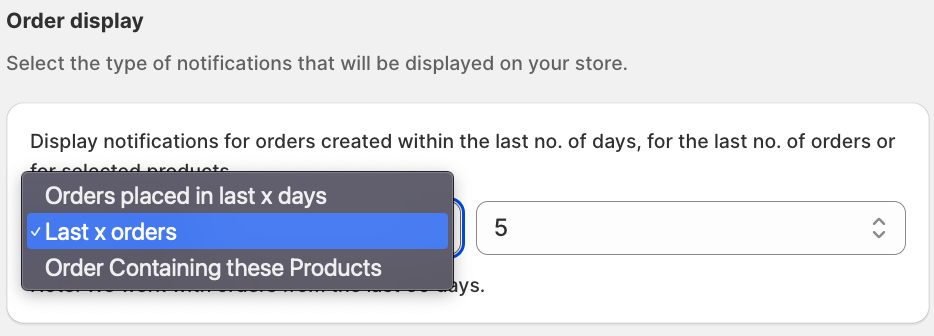
From the app dashboard, go to the Popup behaviour and toggle on Active Sales Popup. Then configure the data you want to show:
Orders for specific high-priority products
Orders placed in the last X days
The last X number of orders
You can also set:
- Email pop-up statistics reports every month (Yes/No)
- Popup display timings
- Close button actions
- Popup page visibility (Homepage, product page, etc.)
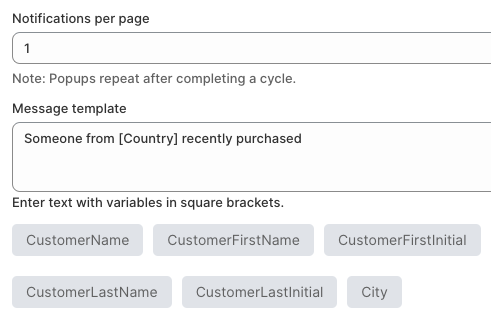
Step 2: Customize Appearance and Set Timing
Click Style & Appearance to modify the look of the pop-up. Here, you get multiple options to customize the appearance, like:
- Select pop-up appearance position
- Choose a pop-up layout
- Add a personalized message with font & size customization
- & more
Step 3: Save and Preview
You can also exclude any products, tags, countries, or specific orders that you don’t want to appear in the pop-up to ensure the notifications stay relevant and accurate.
Once all configurations are complete, click Save and then preview the popup on the frontend to confirm that the design, timing, and display rules are working exactly as expected. This helps you identify any adjustments needed before it goes live for shoppers.
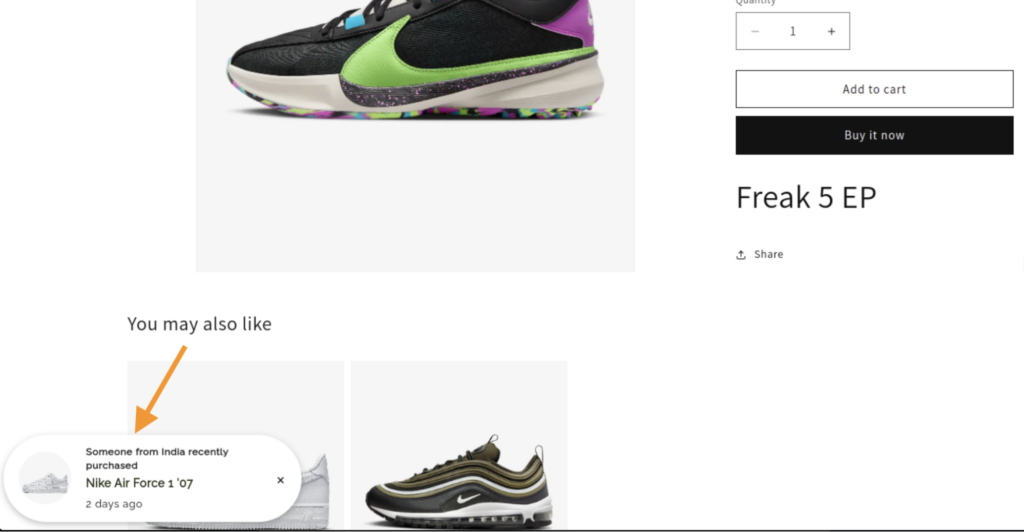
And this is how it is easy to add the pop-up in your Shopify store using our app.
Display real time purchase notifications of recent purchases & improve visitors trust.
Shopify Recent Sales Pop up
Ways to Set Up Other Shopify Popups
Apart from sales popups, you can add other popups in Shopify to capture leads, grow subscribers, or promote offers.
Here are the easiest ways to set them up.
Using the built-in Shopify Forms app – The Shopify Forms app lets you create simple email pop-ups without coding. Just create a form, choose a pop-up, customize the message, and publish it on your storefront.
Install a pop-up builder app – Many apps offer multiple pop-up options with customization. You can set up spin-to-win popups, cart abandonment popups, and free shipping bars.
Add the custom Liquid code – Some themes include built-in sections for announcements or modal popups. You can add a promotional pop-up directly through theme settings, embed scripts, or add custom Liquid/JS for a basic custom pop-up.
How to Remove Popups on Shopify
If you no longer need a popup, here are the easiest ways to remove it.
Most popups come from third-party apps, so you can remove them by opening the Apps section in your admin and disabling the popup inside the app or uninstalling the app entirely.
If the popup was created using the Shopify Forms app, you can open the app, select the form, and then toggle it off or delete it.
If the popup was added through custom Liquid or JavaScript, you need to go to Online Store > Themes > Edit Code and remove the popup snippet or script file from your theme.
And this is the end, hope you learn how to add a popup to a Shopify store, and probably using the Meetanshi Recent Sales Popup app is the easiest and quickest way.
Display real time purchase notifications of recent purchases & improve visitors trust.
Shopify Recent Sales Pop up
