Every Shopify store has one main goal: to set up a smooth and user-friendly store for their customers.
One way to do that is to create subcategories in Shopify. They make your store more organized and easy to navigate.
And that’s what we’re going to do today. In this blog post, you will get a clear idea on:
- Understanding Shopify Categories & Subcategories
- Why Create Shopify Subcategories?
- How to Create Subcollections in Shopify?
- Create Subcategories in Shopify: FAQs
- Take Help From Shopify Experts
So, let’s start!
Understanding Shopify Categories & Subcategories
Categories in Shopify are product groupings with similar characteristics, themes, or purposes.
They serve as the primary structure for products, helping customers navigate and find items efficiently.
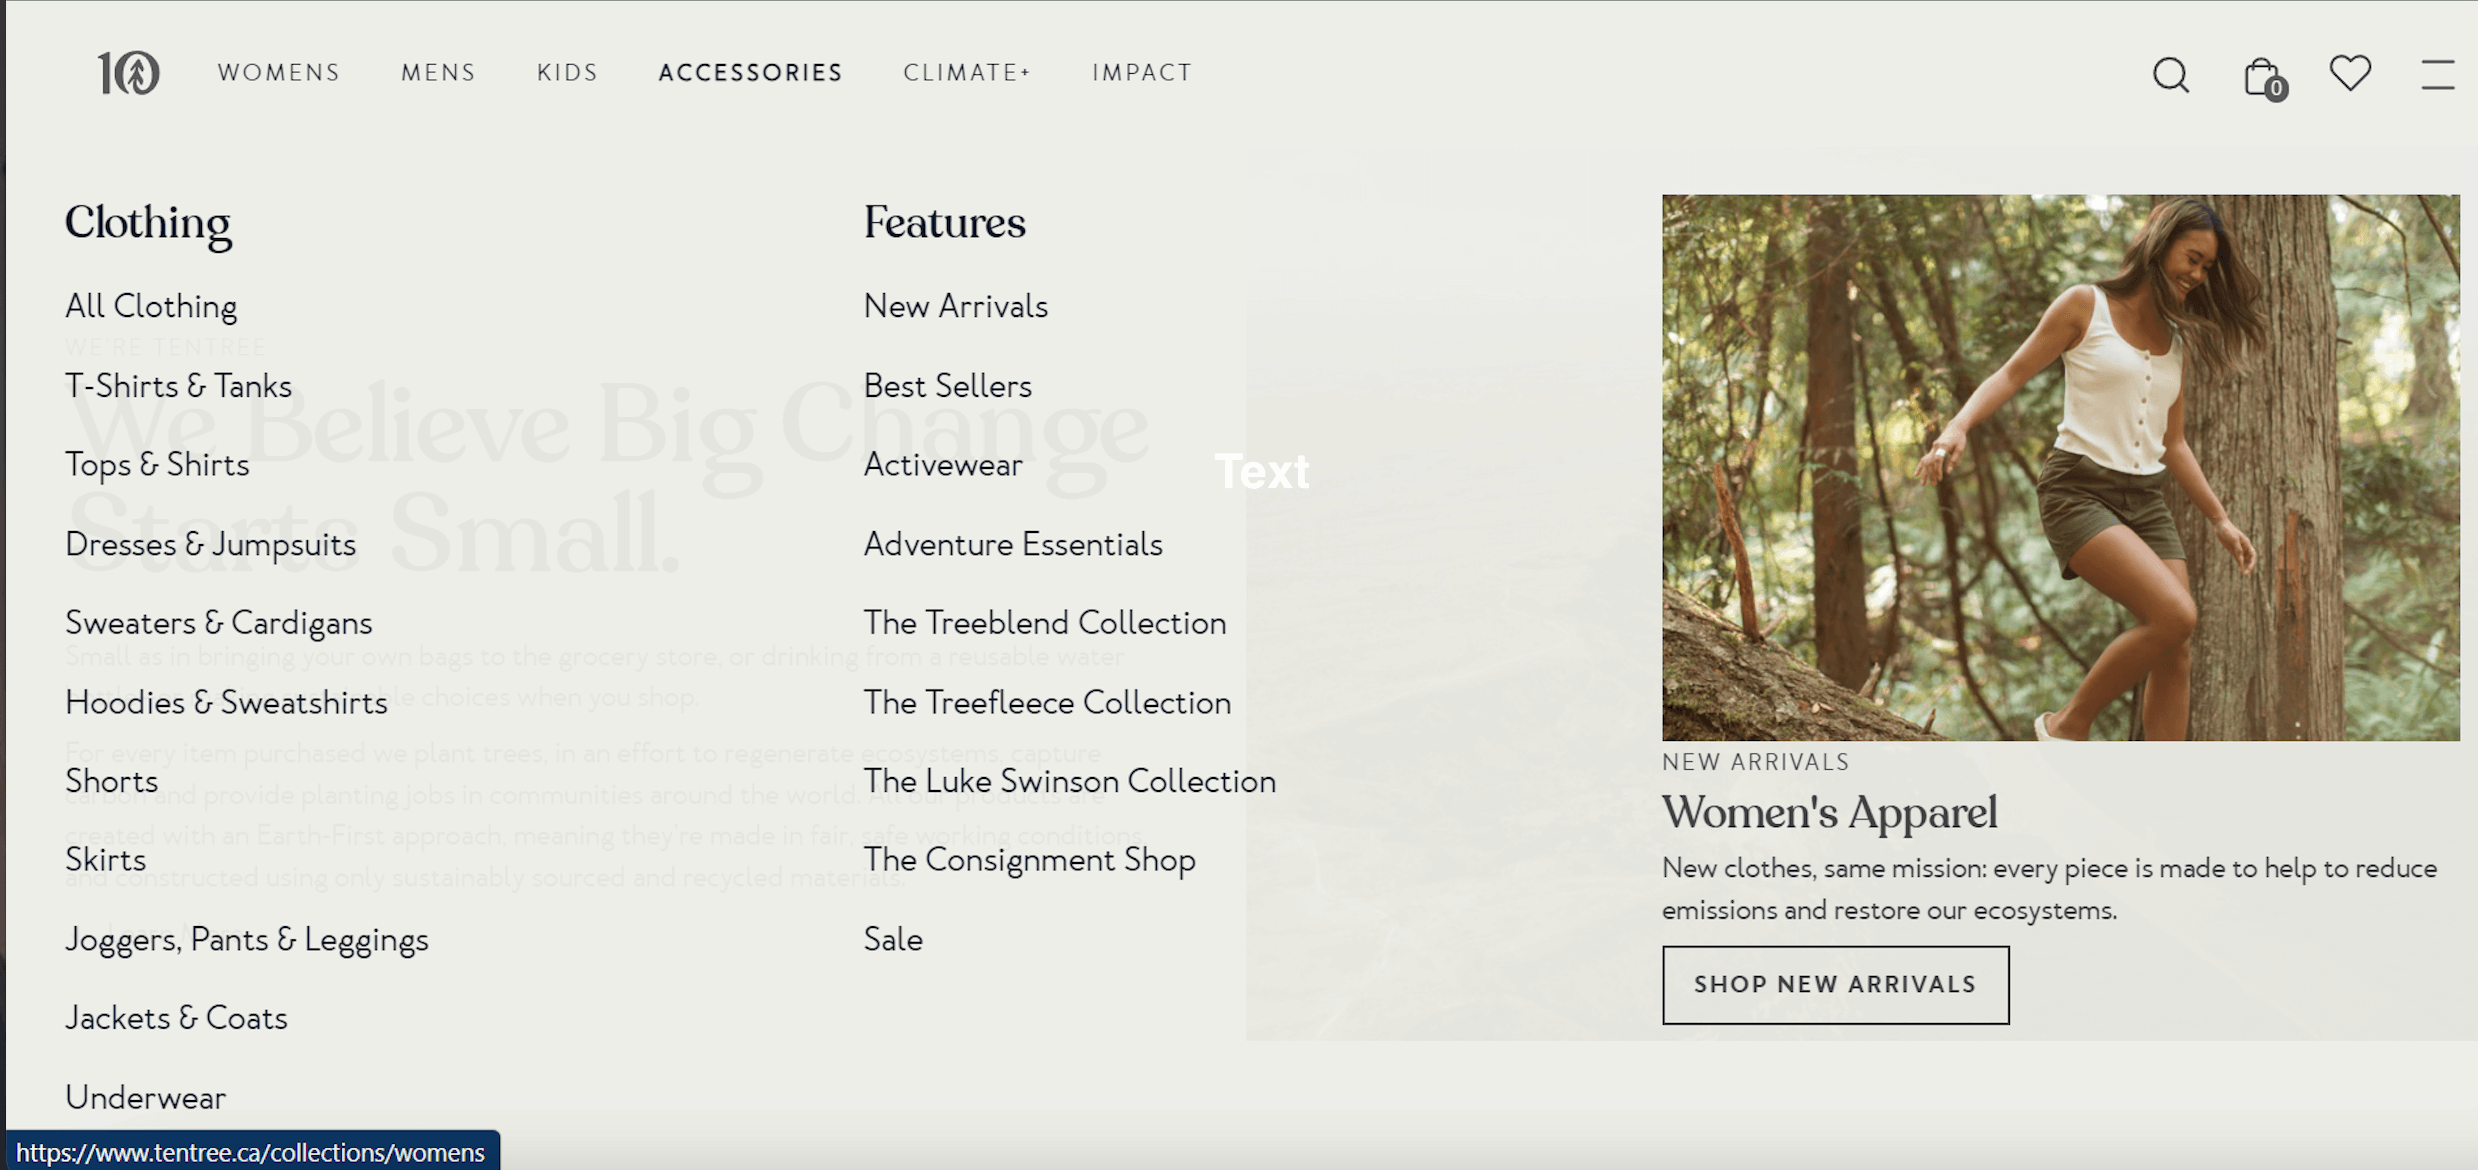
Take, for example, Tentree, a Shopify clothing brand. The categories here are Womens, Mens, Kids, and Accessories. These are the broad groups they primarily sell, under which they have subcategories that make it easier for visitors to navigate and find what they specifically want.

Shopify’s subcategories are more specific product groupings that fall within larger categories.
They offer a more detailed navigation experience for customers. Subcategories help break down larger product categories into more manageable and focused sections, making it easier for customers to locate the items they seek.
In the same clothing store, here’s what the subcategories look like:
Why Create Shopify Subcategories?
Well, you should create Shopify subcategories for a few good reasons.
First off, adding subcollections can make your website easier to use and look nicer. This helps customers find what they’re looking for more quickly and easily, leading to more sales and happier customers.
Also, setting up subcollections in Shopify isn’t too hard. Once you follow the steps outlined in this guide, you should be able to do it yourself without too much trouble.
How to Create Subcollections in Shopify?
There are two ways to do so:
- Add Subcollection in The Shopify Navigation Menu
- Create a New Template For Subcollection in Shopify
Add Subcollection in The Shopify Navigation Menu
Creating sub-collections in Shopify involves organizing your products into nested categories to make it easier for customers to navigate your store.
Let’s break down the steps with an example using United by Blue, a sustainable outdoor brand.
Once you log in to your Shopify Admin Panel, you must first access the collections section—
1. Access The Collections Section
Locate and click on the “Products” tab, then select “Collections.”
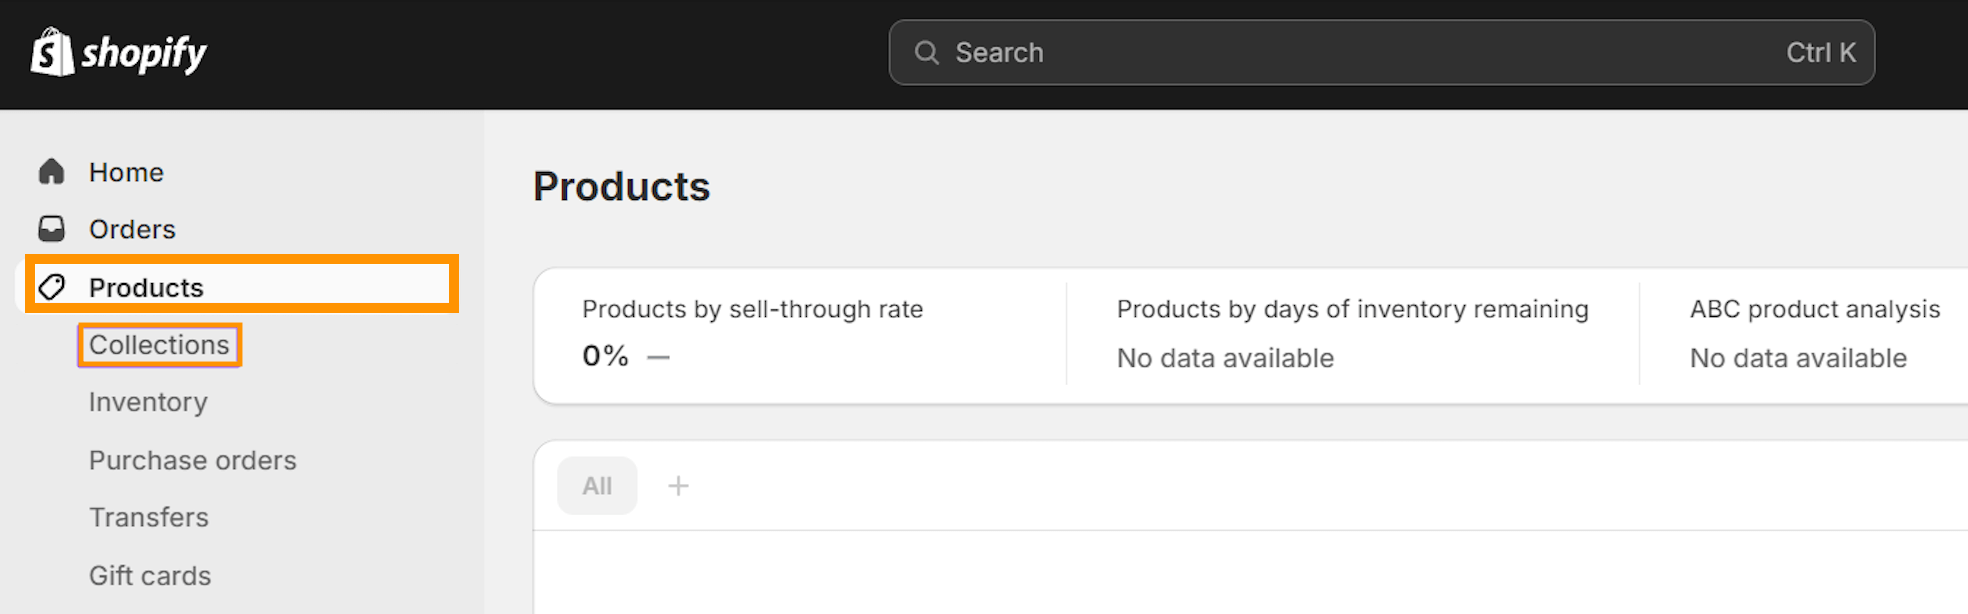
This is where you can manage all your collections, including creating new ones and organizing existing ones.
While organizing products into subcategories, you might encounter situations where certain products appear in smart collections unintentionally. To address this, you can refer to our guide on remove a product from a smart collection.
2. Create a Parent Collection
To create a parent collection—
- Click on the “Create collection” button.
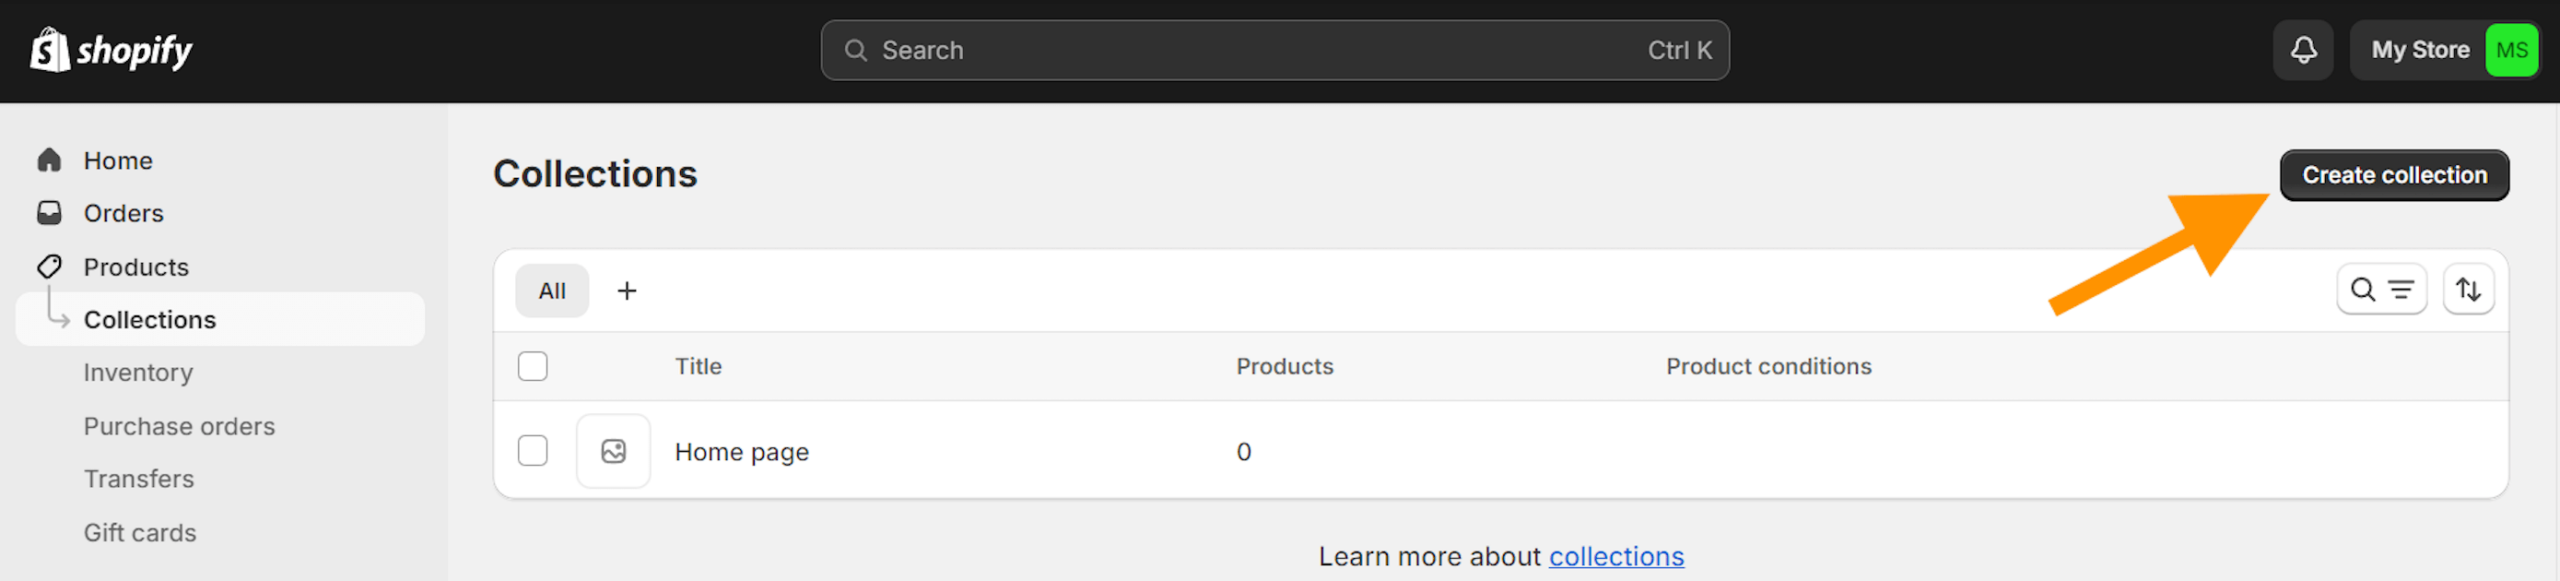
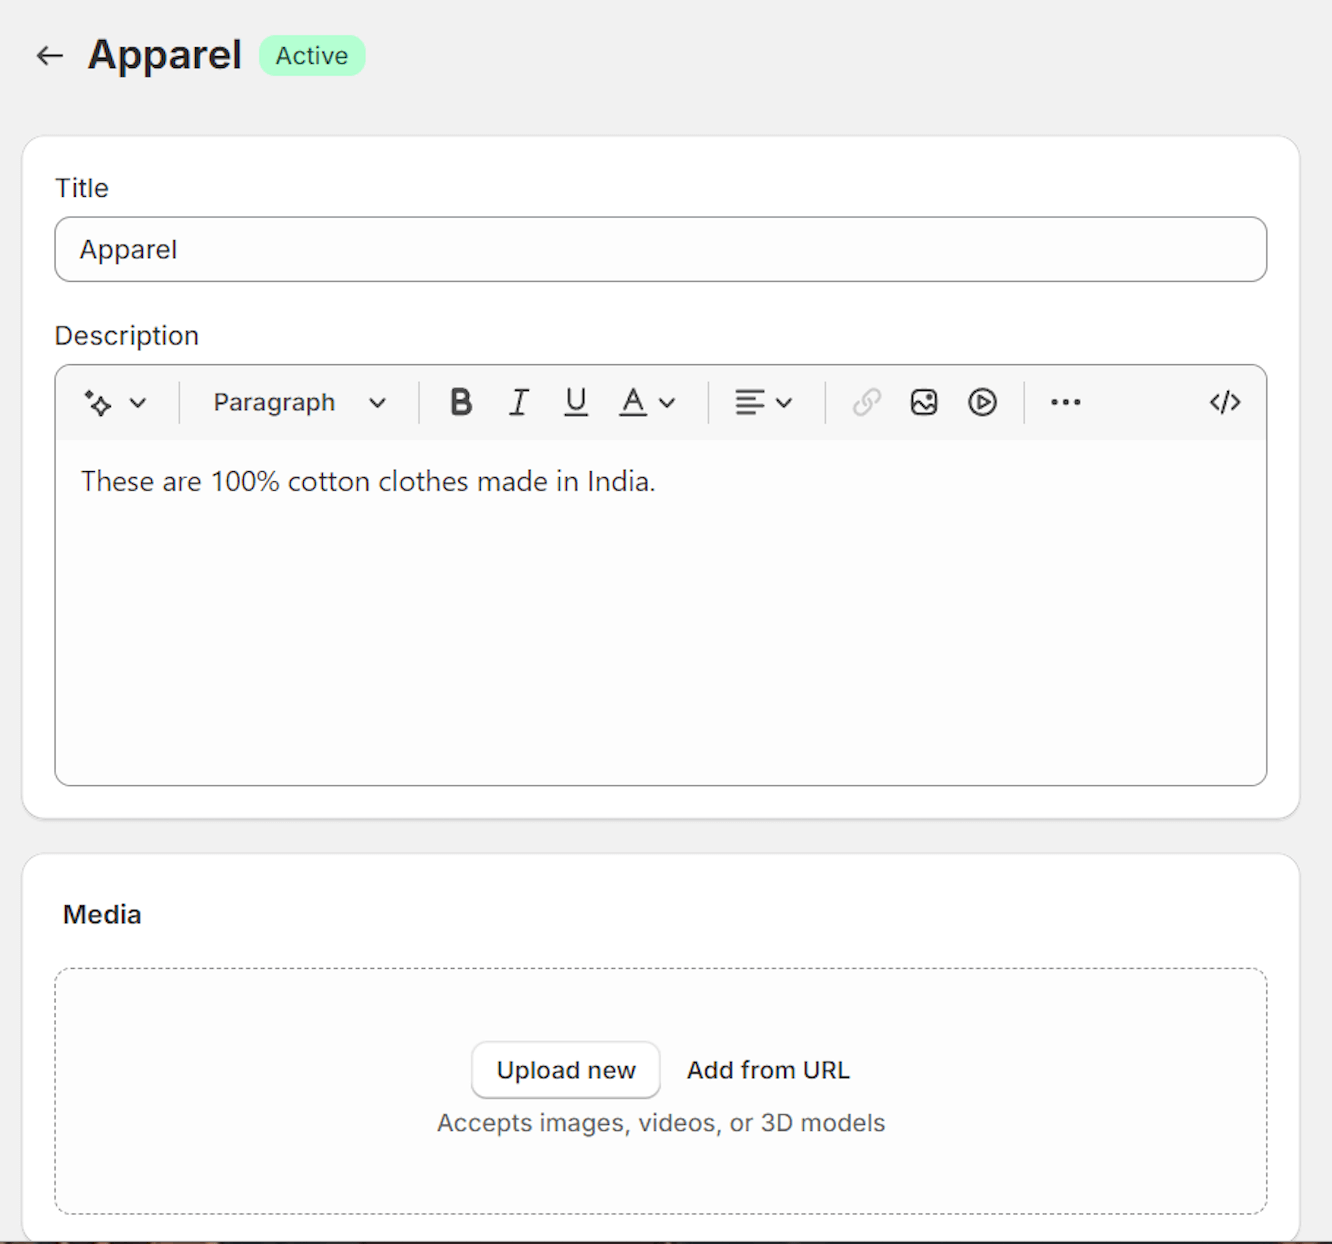
- Name your collection, for example, “Apparel.”
- Add a description, theme, and image if needed.
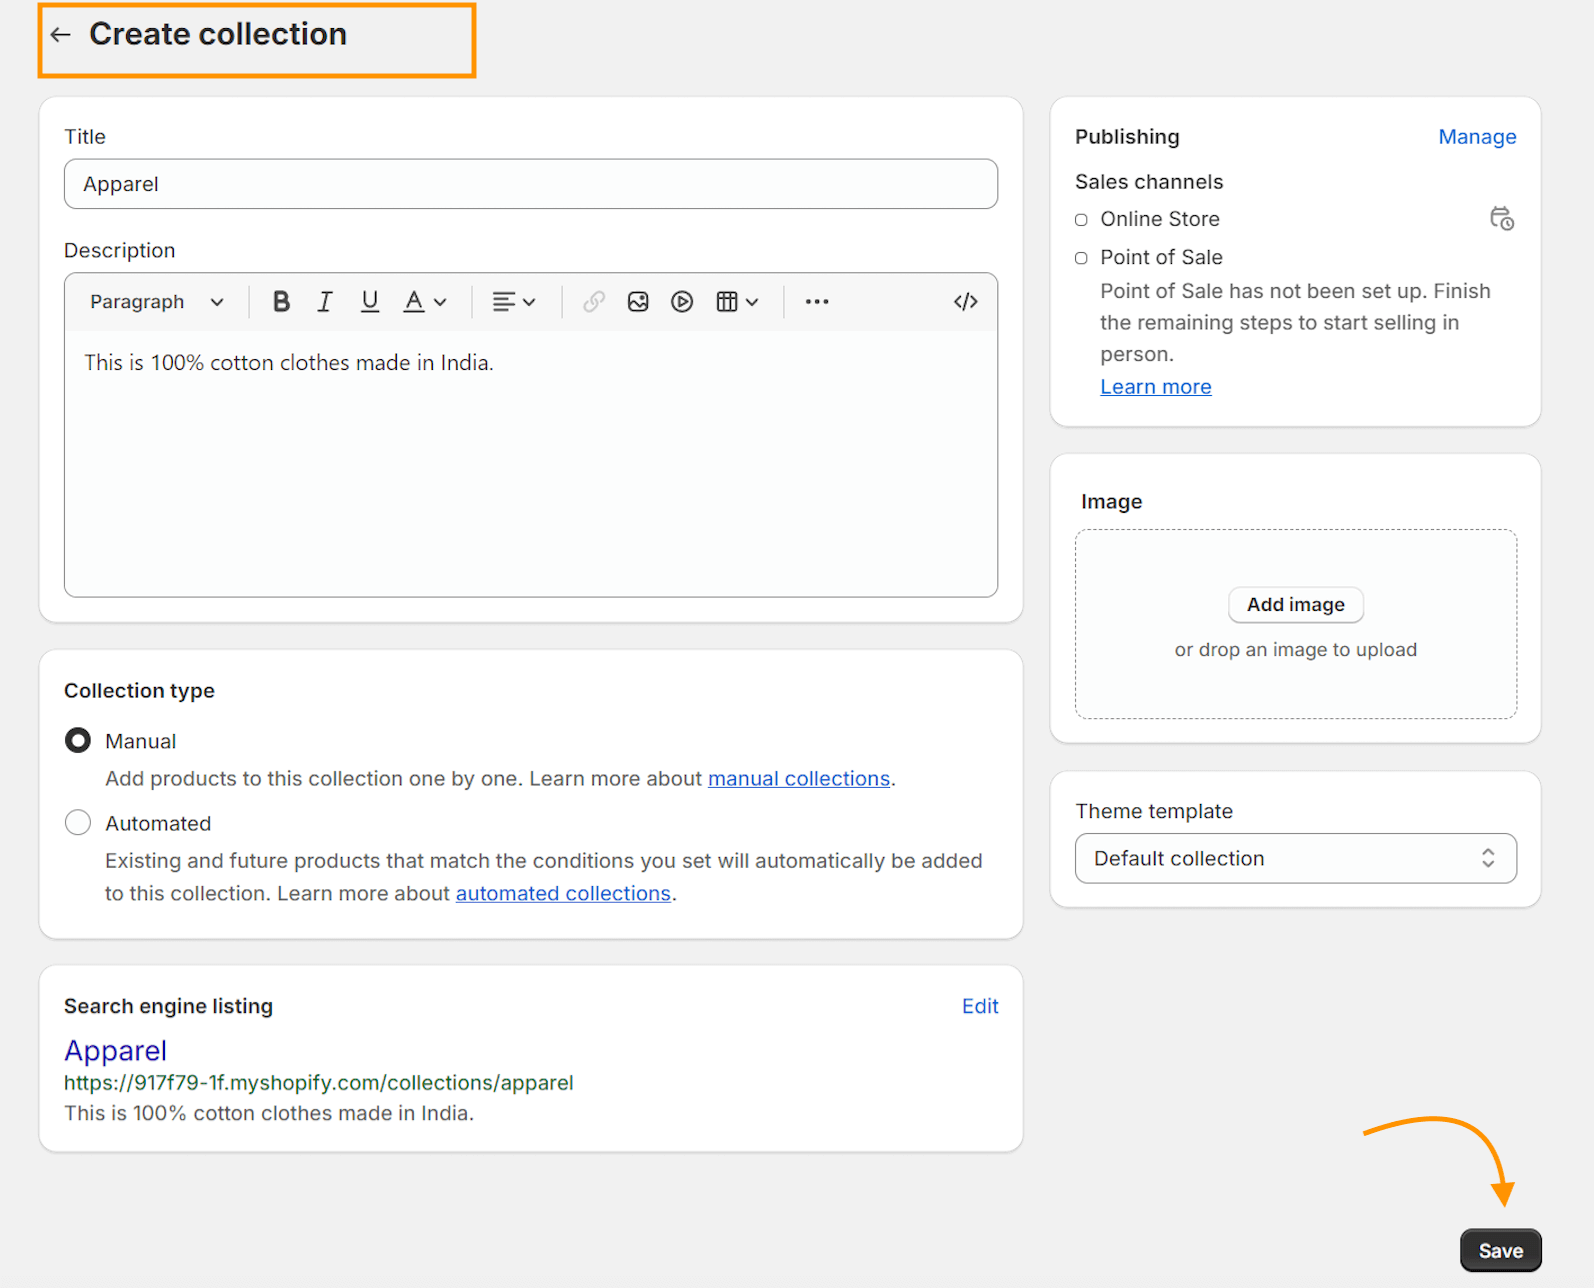
- Click “Save,” and you’re done!
Further, you can define the collection conditions, such as products tagged with specific keywords or belonging to certain product types.
3. Create Subcollections
Once you have created the parent collection, you can develop subcollections. These subcollections will further categorize your products, making browsing easier for customers.
Continuing with our United by Blue example:
- Within the “Apparel” collection, you might want to create subcollections for different types of clothing, such as “Tops,” “Bottoms,” and “Outerwear.”
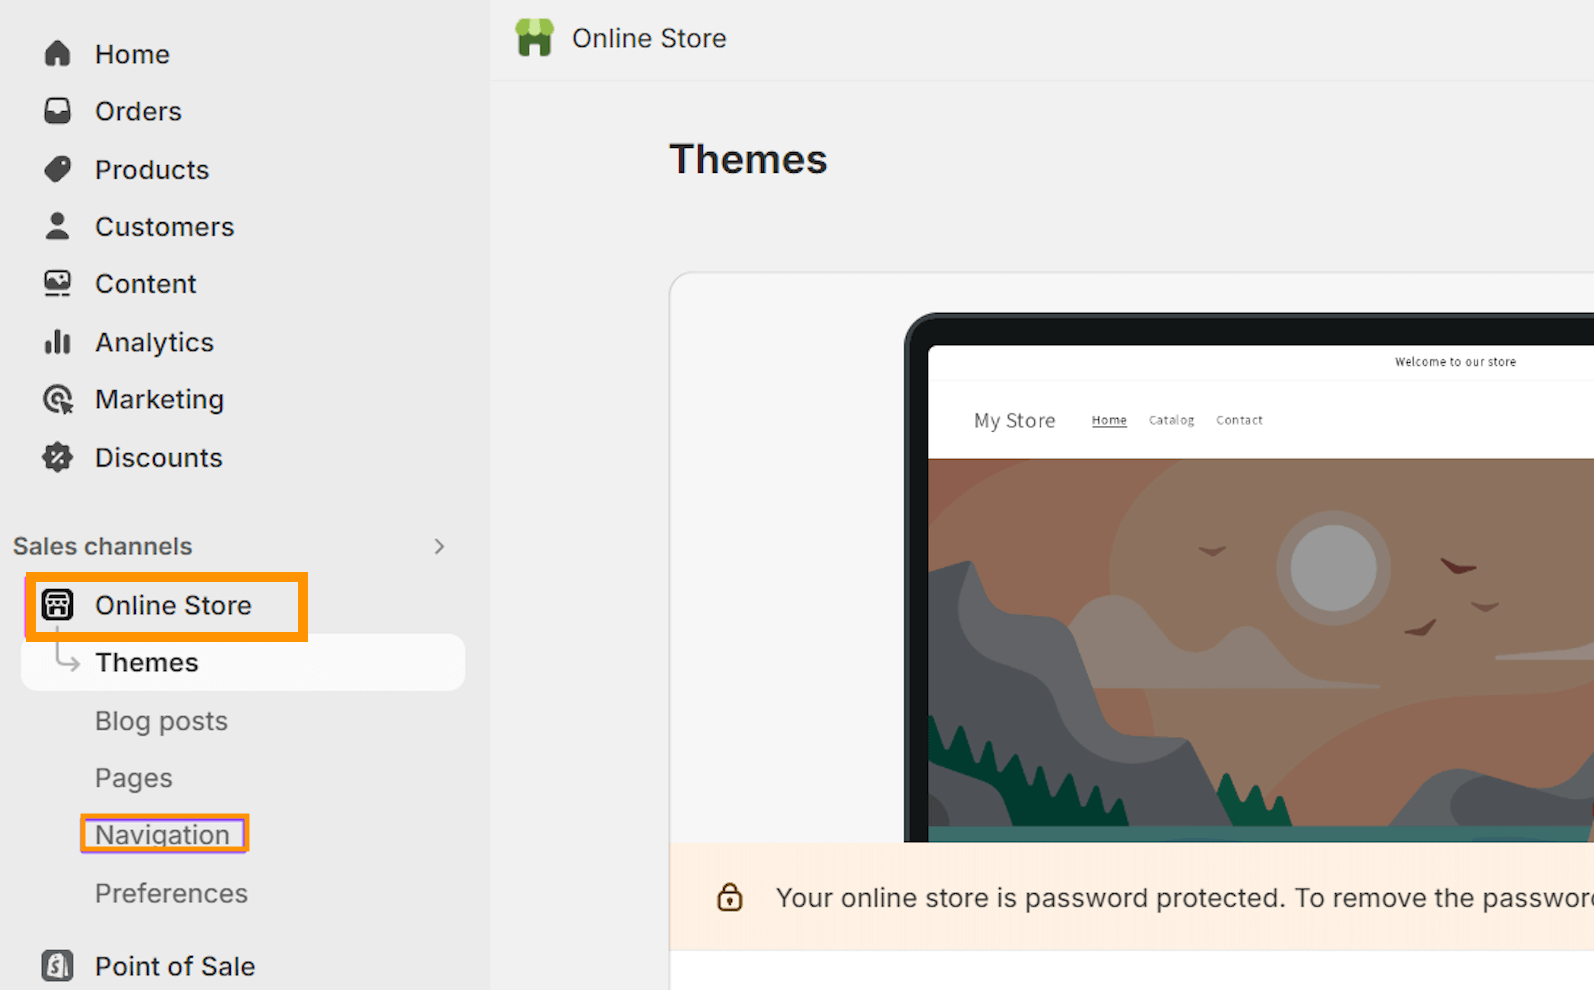
- From your Shopify admin, go to Online Store > Navigation.
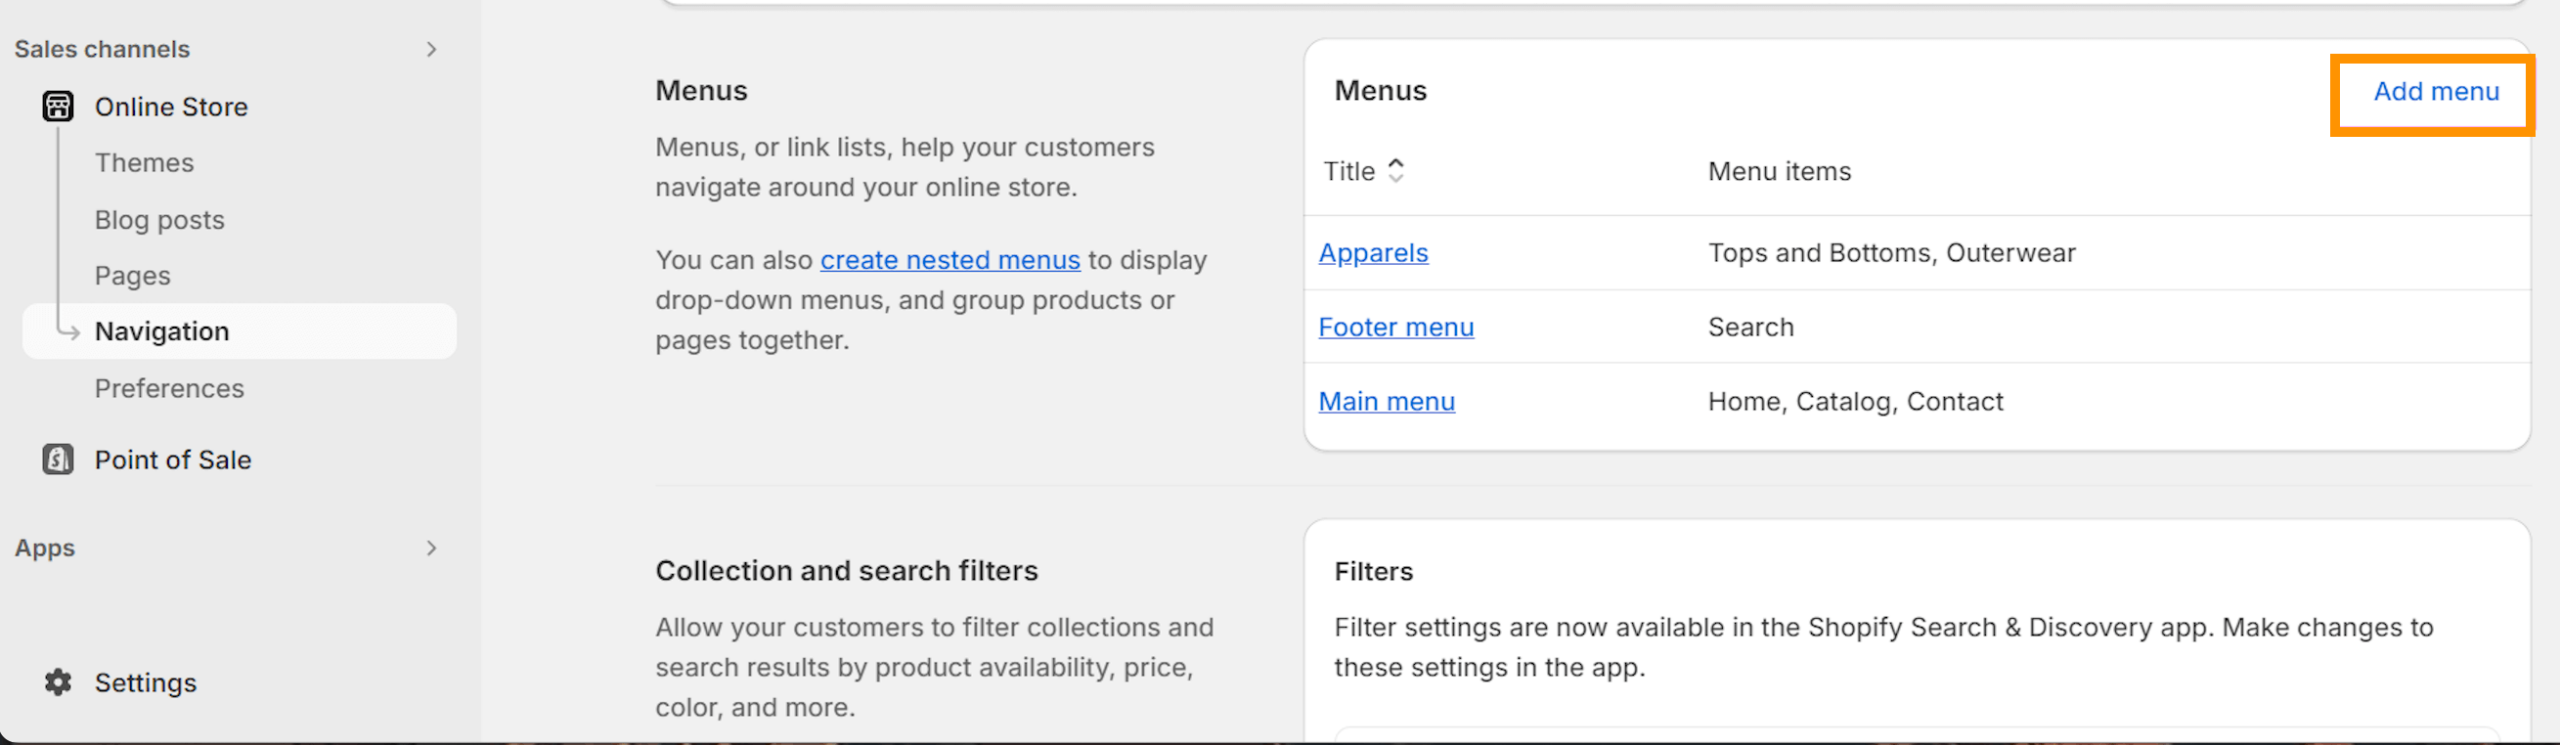
- Click the name of your main menu and choose one of the menu items to be the header for your drop-down menu, or add a new menu item to be the header.
- Click “Add menu item,” enter the menu item’s name, and enter or select a destination for the link.
- Click the “Save menu”.

4. Customize Display
Customize the display of your collections to ensure they align with your store’s branding and layout. Simply click on any product you want, and customize the details.
It’s as simple as that.
Create a New Template For Subcollection in Shopify
Alternatively, you can create a separate page to perform the function of the parent collection.
This is how to do it—
1. Create a New Page
First, log in to your Shopify admin panel and navigate to the “Online Store” section.
From there, click “Pages” and then “Add page” to create a new page for your sub-collection.

- Give your page a title, such as “Featured Items.”
- Add any content or descriptions you want to include on the page.
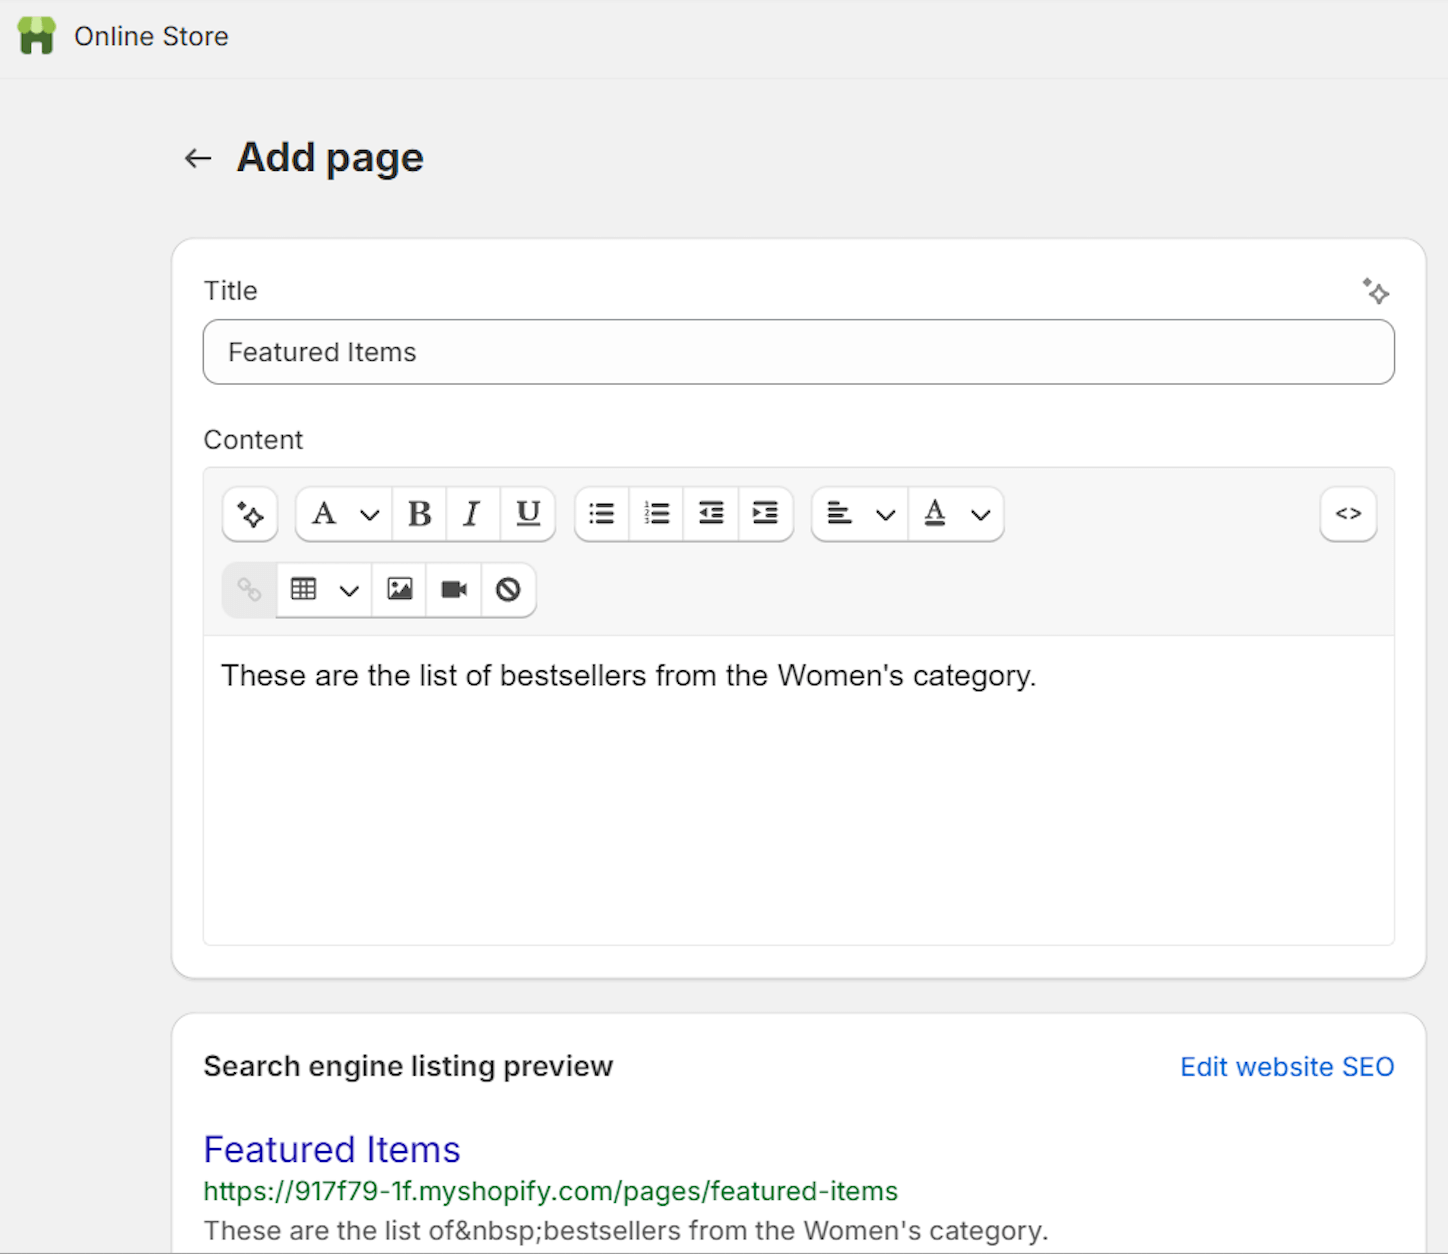
- Don’t forget to click “Save.”
2. Add The Template For The page.list-collection.liquid Page
To create a custom layout for your sub-collection page, you’ll need to add a new template file to your Shopify theme.
Here’s how:
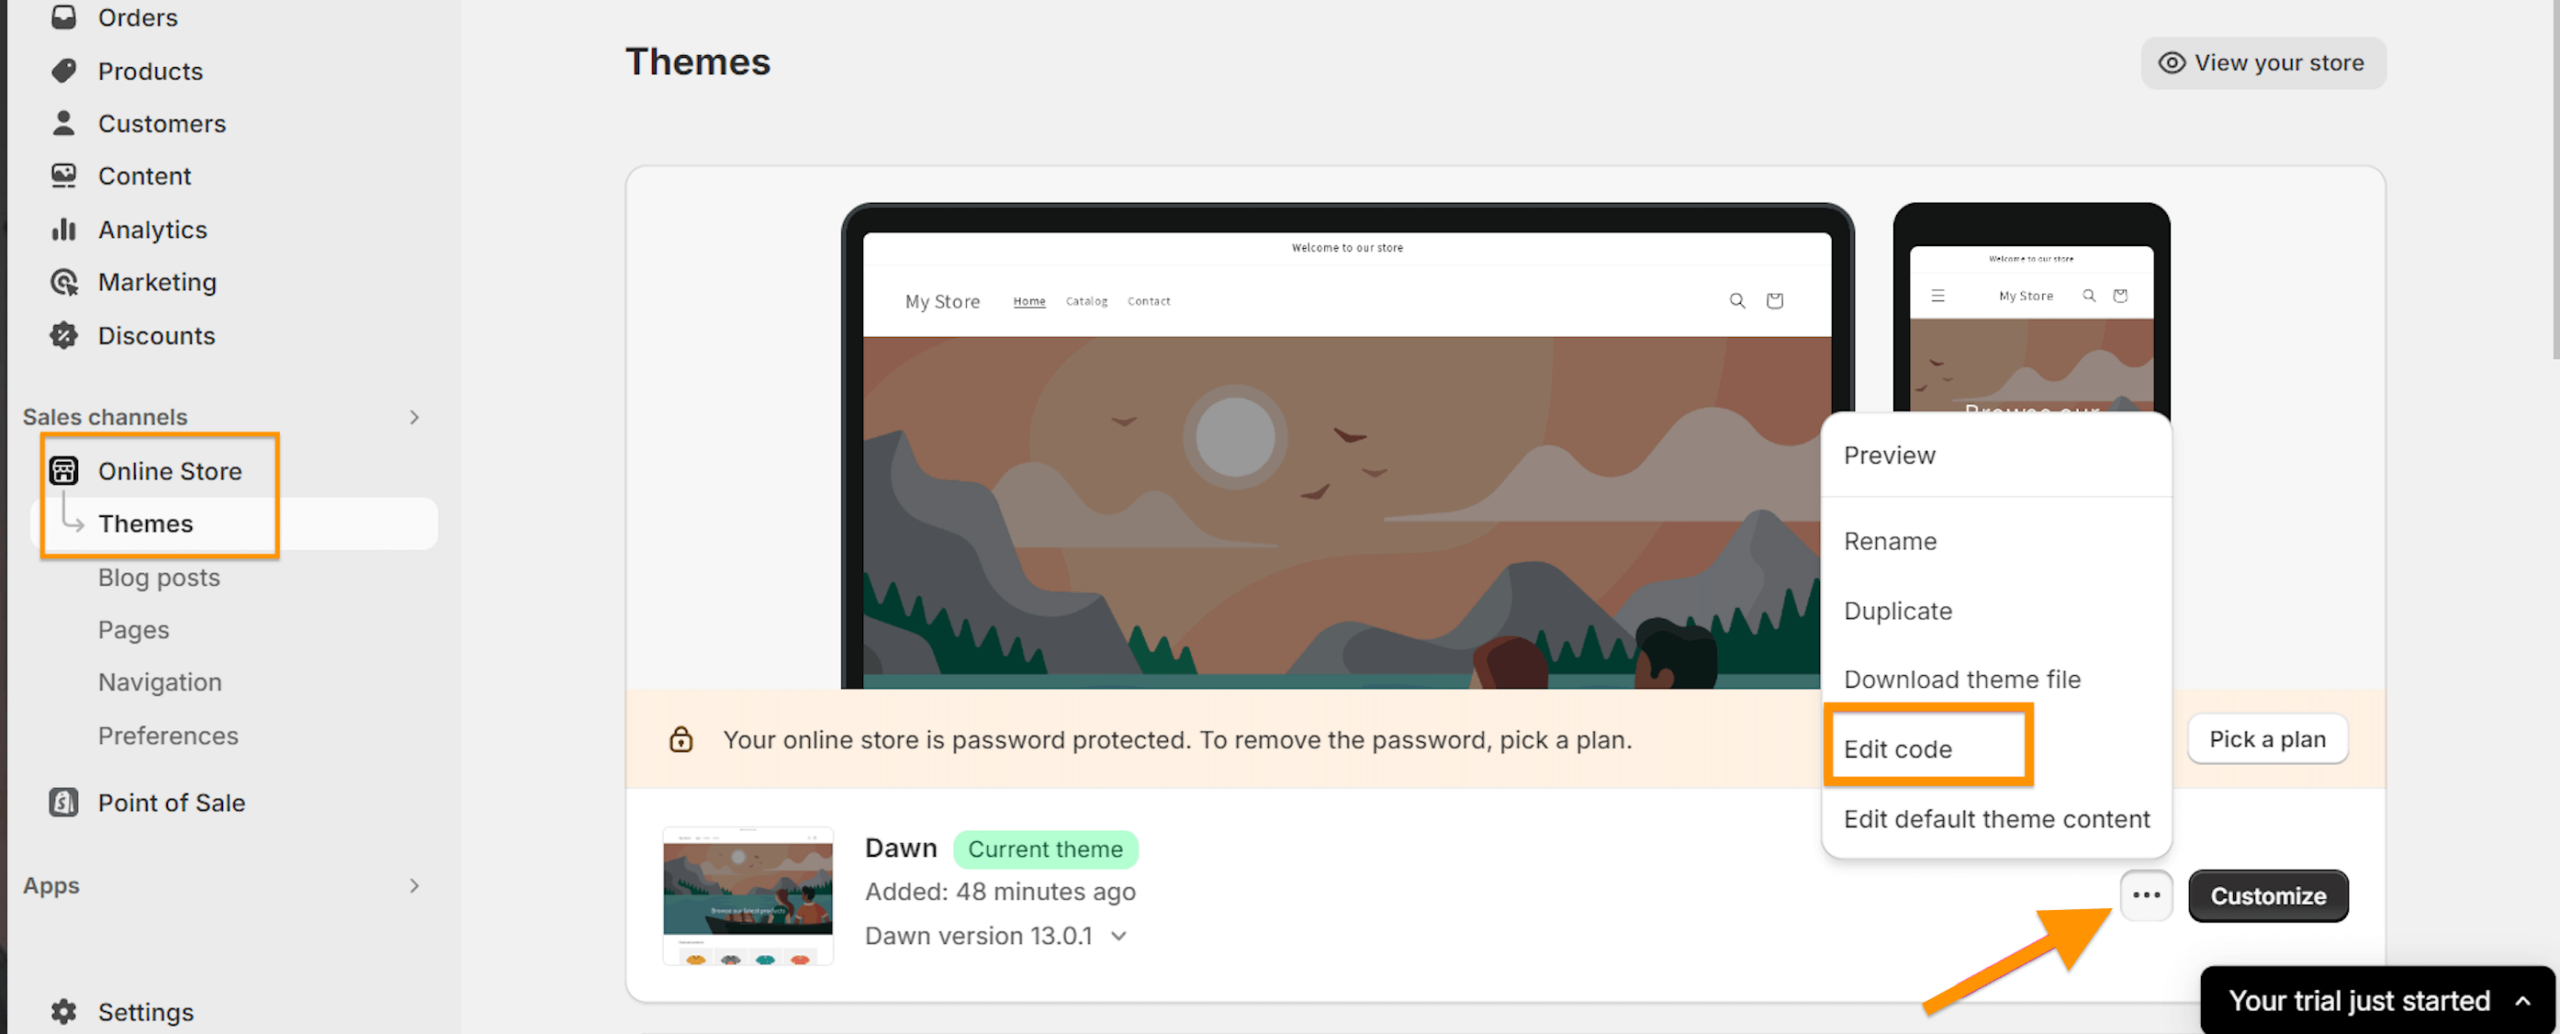
- In your Shopify admin panel, go to “Online Store” > “Themes.
- Find the current theme you’re using and click on “…” > “Edit code.”
- Click “Add a new template” and create a new template for “Page” called list collection.
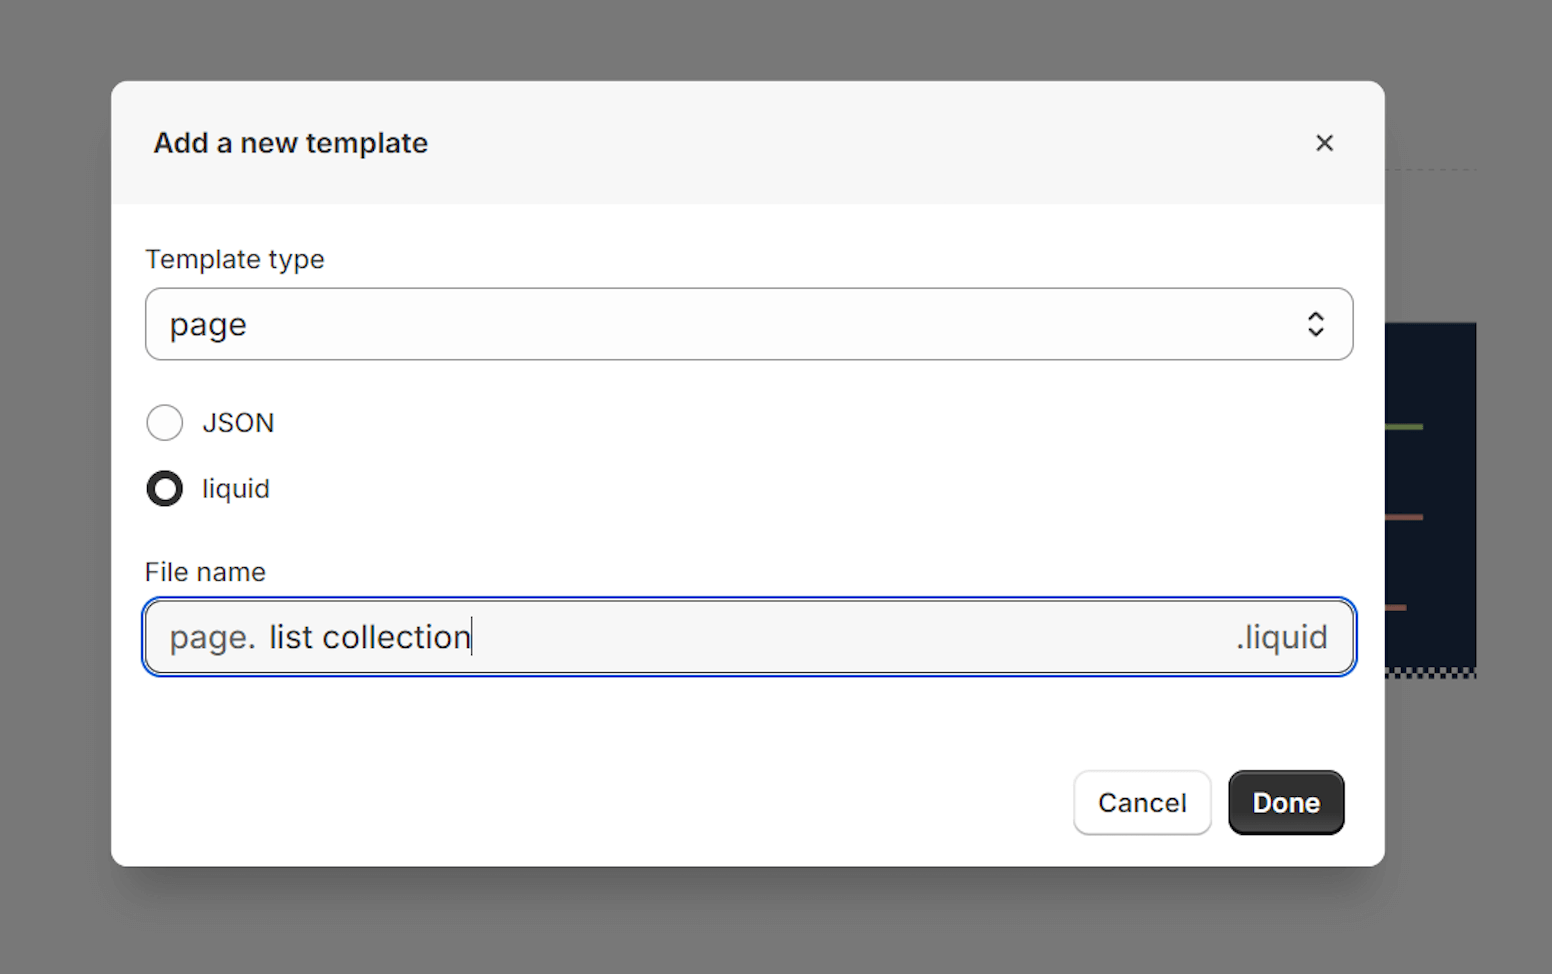
- Click “Done,” and your template is ready.
3. Create a Menu
Now, you’ll want to create a menu to link to your newly created sub-collection page.
- In the Shopify admin panel, go to “Online Store” > “Navigation.”
- Click “Add menu” and give your menu a name, such as “Custom Collection Menu.”
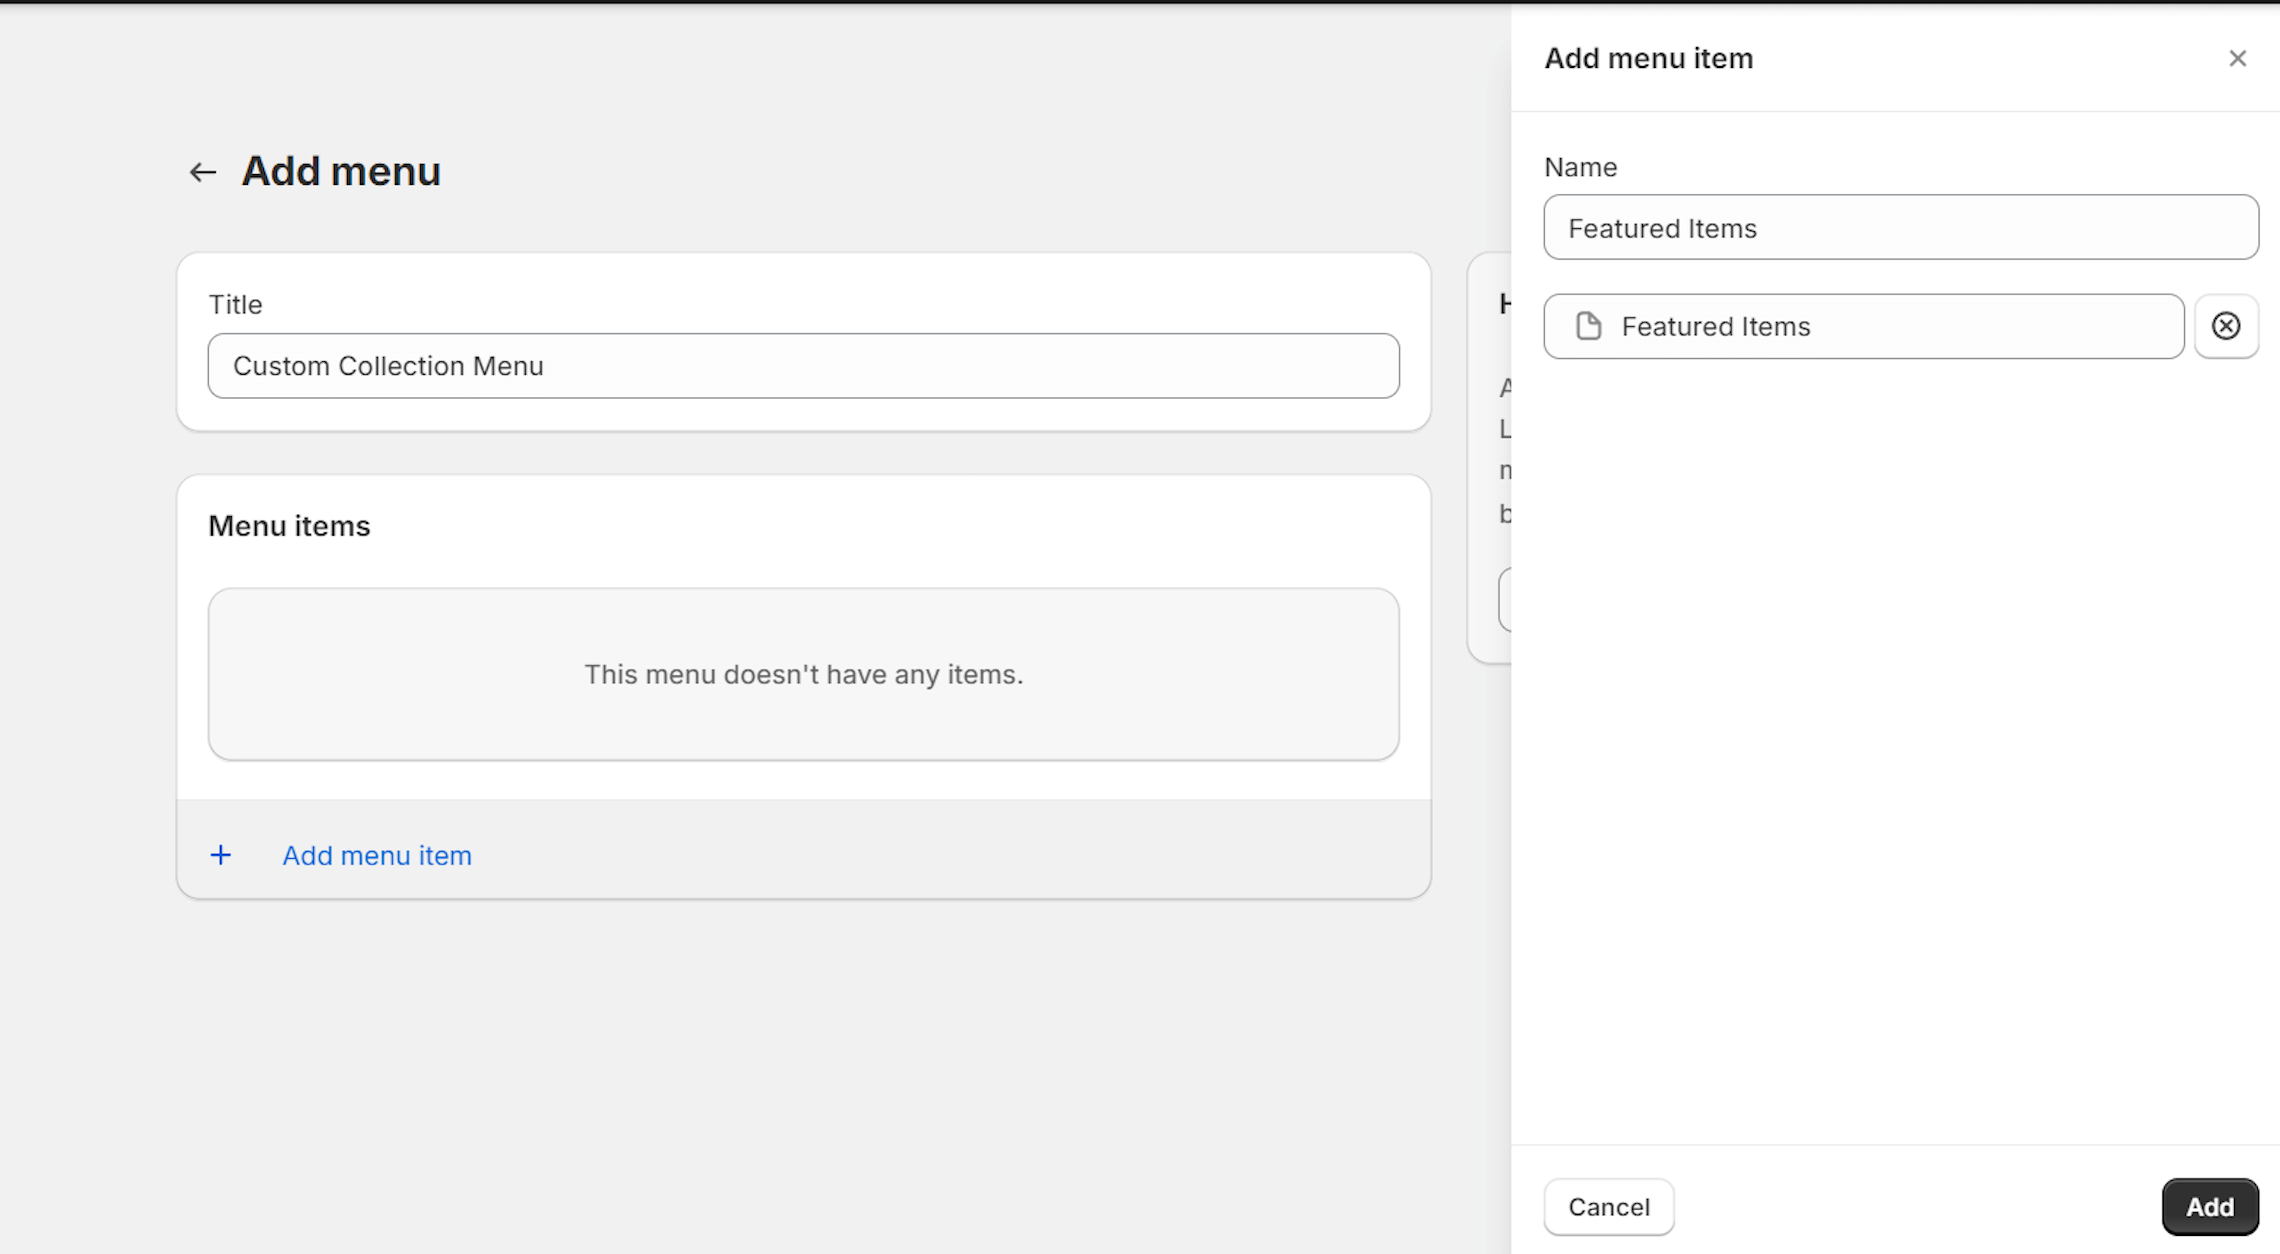
- Add menu items for your subcollection pages by selecting “Add menu item” and choosing the pages you’ve created.
Create Subcategories in Shopify: FAQs
1. How do I Create a Subheading in Shopify?
To create a subheading in Shopify, return to the Metafields app and navigate to the ‘Products’ section in the top navigation menu. Then, select one of your products.
Each product can have its unique subheading.
Once in the product’s settings, enter your desired text for the subheading and apply any formatting using the built-in toolbar.
After adding the subheading, click ‘Save’ to apply the changes.
2. How do I Create a Subpage in Shopify?
To create a subpage in Shopify, go to Settings > Customer Accounts in your Shopify admin.
Click Change domain in the URLs section. In the Customer account domain field, enter a descriptive string, such as account.
This creates a subdomain like account.your-store.com.
Click Continue to proceed to the Connect existing domain page.
3. How do I Add Categories Under a Shop in Shopify?
Follow these steps to add categories under a shop—
Step 1: Log in to your Shopify admin panel.
Step 2: Navigate to the ‘Products’ section and click on ‘Collections.’
Step 3: Create a new collection by clicking the ‘Create Collection’ button.
Step 4: Save your collection and preview it to ensure it appears correctly on your online store.
Take Help From Shopify Experts
Creating subcategories in your Shopify store is your best bet for enhancing user experience, organizing your products effectively, and boosting sales.
However, setting up subcategories and optimizing your Shopify store requires technical expertise beyond what’s provided in basic Shopify packages.
That’s where Meetanshi (us), a leading Shopify development company, comes in.
With our team of experienced developers, you can enhance your online store’s features, security, user experience, and more at feasible prices.
By hiring a Shopify expert from Meetanshi, you can:
- Customize your store’s design and functionality to meet your business requirements.
- Improve your SEO score to increase online visibility and attract potential buyers.
- Save time and focus on your business while experts handle the technical aspects of setting up and optimizing your Shopify store.
So are you ready to set up your eCommerce Shopify store for success?
