Magento released the latest version, Magento 2.3.0 and there are changes in the basic Magento 2 admin panel menus and fields.
So, here I’m with a detailed post on how to create new pages, blocks, and widgets using Magento 2 CMS. The methods here are in reference to the latest Magento 2.3
Magento 2 CMS pages are used to display parts of your catalog or other details useful to the customers. Magento 2 blocks allow admin to add and control the chunks of HTML code that can be displayed throughout the store. You can get all CMS Pages In System Configuration in Magento 2 for an reason, when the admin needs to choose and exclude CMS page from a list of all CMS pages in system configuration.
Widgets in Magento 2 CMS are reusable components that can be added to any CMS blocks. They offer a lot of features and extend the core functionalities.
Method to Create New Pages, Blocks, and Widgets Using Magento 2 CMS:
Create a New Page Using Magento 2 CMS:
Follow the below steps:
1. Add a new page
2. Enter the content
3. Search Engine Optimization
4. Pages in Websites
5. Design
6. Custom Design Update
7. Save
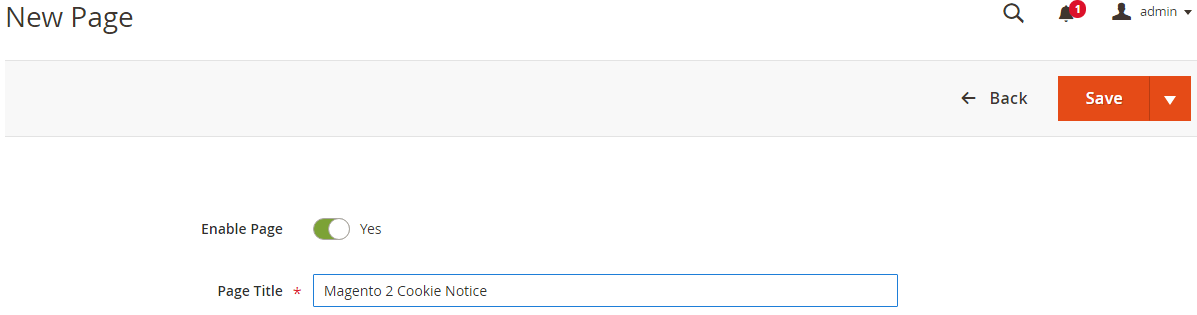
1. Add a new page
- Login to Admin Panel
- Navigate to Content > Elements > Pages.
- Click the “Add New Page” button.

- Enable the page
- Enter the page title.
2. Enter the Content
- Expand the Content to fill the page content.
- Enter the main heading of the page in the “Content Heading“
- Click on the “Show/Hide Editor” to add or edit the text of the page.

3. Search Engine Optimization
- Expand the Search Engine Optimization to fill the data important for SEO.
- Enter the URL Key of the page.
- Enter the Meta Title.
- Enter the Meta Keywords
- Enter the Meta Description.

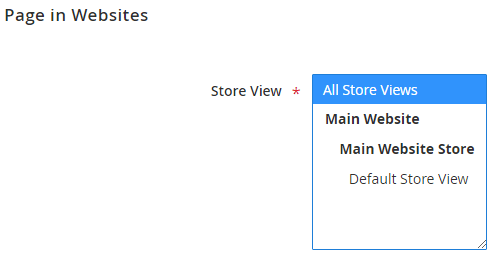
4. Pages in Website
- Expand the Pages in Websites to select the store view.
- In the “Store View“, select the store view for which the page is displayed.
5. Design
- Expand the Design
- Select the Page Layout
- Enter the Layout Update XML if required.
6. Custom Design Update
- Expand the Custom Design Update to customize the page design.
- Select the time period for the design. For example, offers, holidays, etc.
- Select new theme from the dropdown
- Select a new layout from the dropdown.

7. Save
- Save the configuration with the “Save” button.
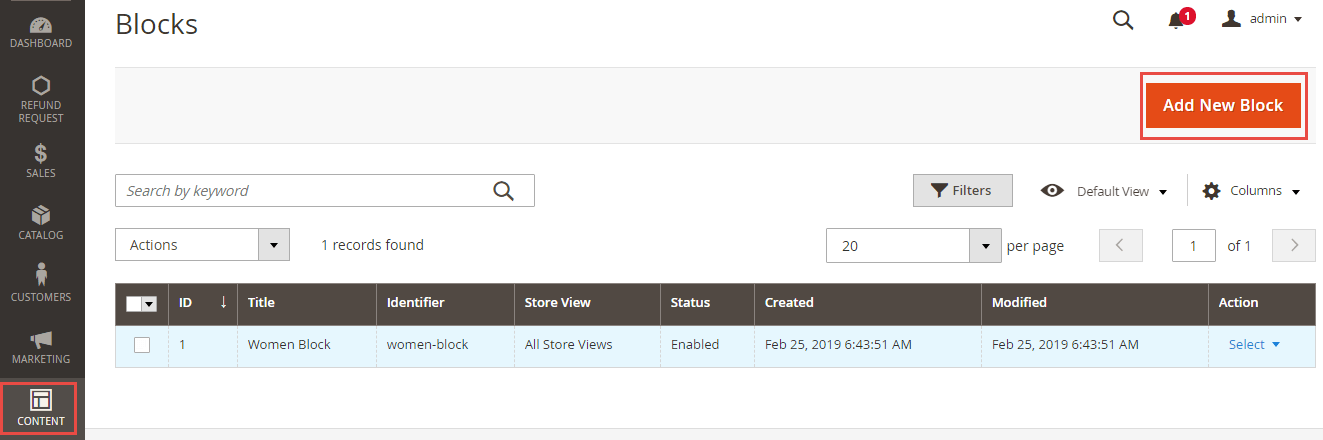
Create a New Block Using Magento 2 CMS:
1. Navigate Content > Elements > Blocks.
2. Click the “Add New Block” button.
3. Enable Block status.
4. Enter the “Block Title” which can be descriptive.
5. Enter the “Identifier” which has to be unique and in lowercase. Do not use space, instead use the underscore. The identifier is the internal reference used by the system.
6. Select the Store View to enable the block for.
7. Enter the content for the block. You can place links, images, videos, tables, etc. in the content.
8. Save the block configuration with the “Save” button.

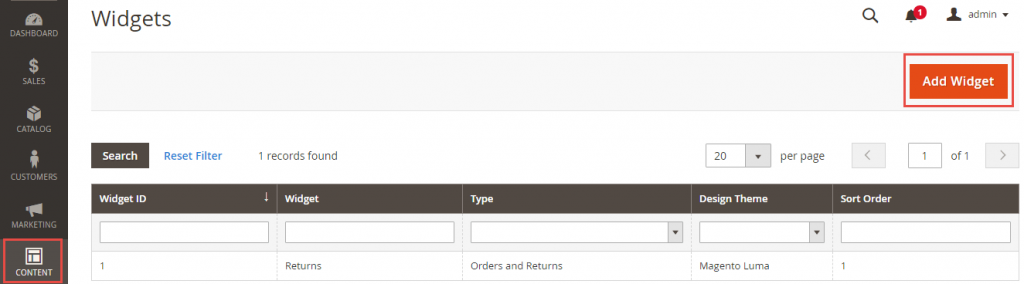
Create a New Widget Using Magento 2 CMS:
1. Navigate to Content > Elements > Widgets.
2. Click the “Add New Widget” button
3. Select the “Widget Type” that you want to create and the “Design Theme” that is to be used in the widget.
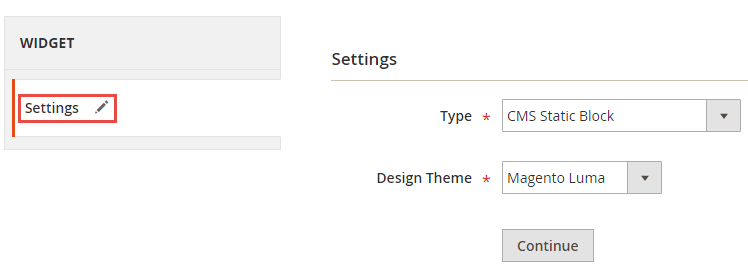
4. Click on “Continue“
5. Add the descriptive “Widget Title“
6. Select the store views in “Assign to Store Views” where the created widget will be available.
7. Enter the sort order. Enter 0 for the top position.
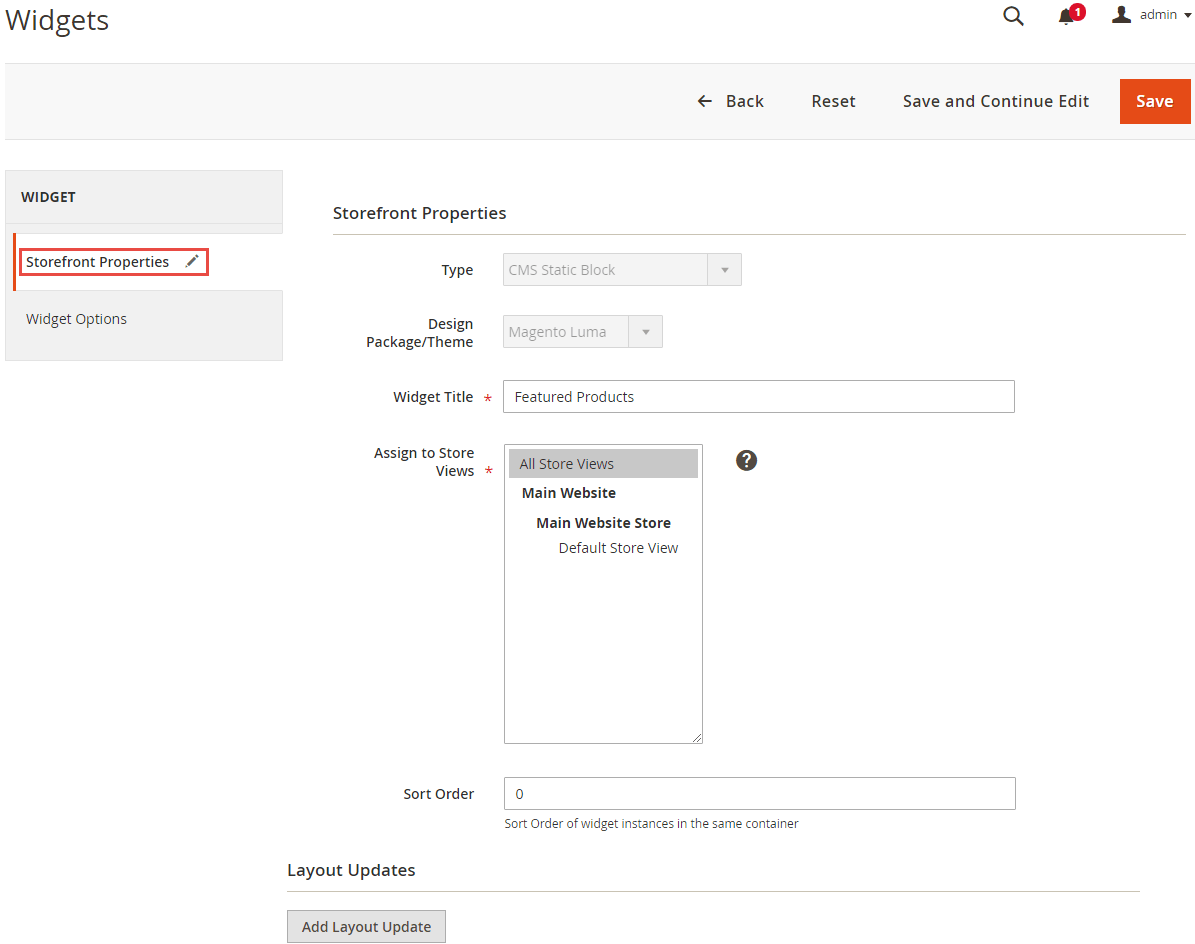
8. Click on the “Add Layout Update” button under Layout Updates.
9. Select the type of category or product page where the widget will appear, from the “Display On” dropdown.
10. In Page, Container and Template lists set the block or section for the widget to appear.

11. Click “Save and Continue Edit” to save these configurations.
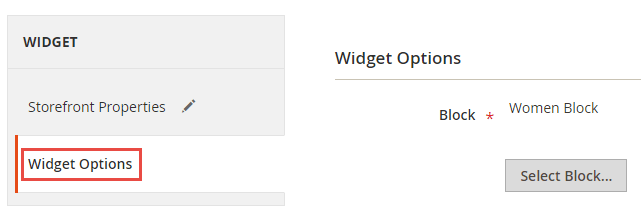
12. Under “Widget Options” select the block where you want to locate it.
13. Save the configuration.
Clear cache after you create new pages, blocks, and widgets using Magento 2 CMS. You can also add seasonal design effect by adding snowfall effect to make your website more engaging.
Hopefully, the above guide is helpful to you.
You can also refer to the video tutorial to Create New Pages Using Magento 2 CMS from our Magento 2 video tutorial series:
Thank you.
