Streamline your store data reporting in Looker Studio using Google Sheets; it acts as a live data source to help you create fresh reports.
Eliminating the need to manually export and upload data, wherever you want to analyze your store’s performance.
Learn here how to connect Magento 2 to Looker Studio using Google Sheets.
Use Meetanshi Magento 2 SQL Report Builder Extension
The Meetanshi Magento 2 SQL Report Builder extension plays a role in providing fresh data to your Google Sheets.
It gives fresh data to Google Sheets > Google Sheets reflects the data on Looker Studio.
A structured data flow.
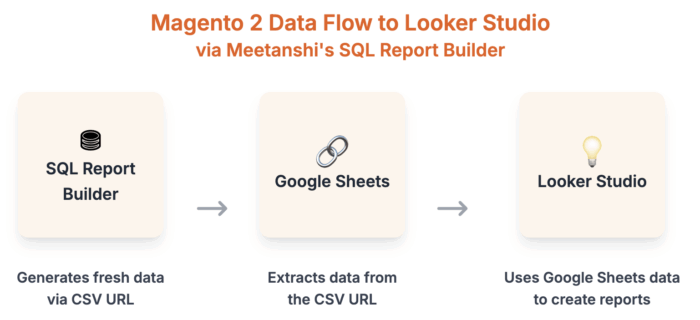
It runs a custom SQL query based on your inputs directly on your Magento 2 database and generates a live CSV URL. This URL updates automatically based on a schedule you define, making it the perfect data source for your Google Sheet.
The extension also:
- Executes and saves multiple custom SQL queries.
- Schedules automated report generation.
- Export data using CSV file or JSON.
Step-by-Step Guide: How to Connect Magento 2 to Looker Studio
Here are the direct steps to get your store data into Looker Studio using the extension.
- Generate the Report in Magento 2
- Copy the Live CSV URL
- Load Data to Google Sheets
- Connect Google Sheets to Looker Studio
- Build Reports on Looker Studio
Step 1: Generate the Report in Magento 2
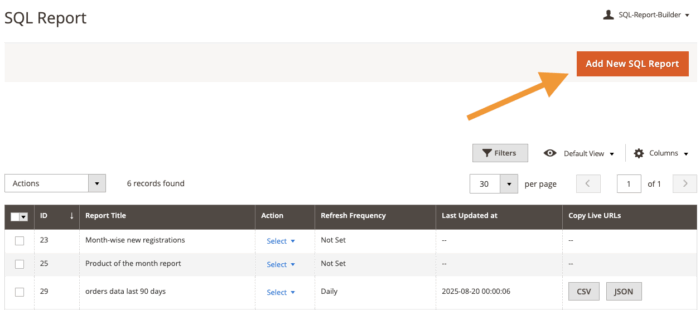
Install the Meetanshi Magento 2 SQL Report Builder extension. Then, from the extension dashboard, click on Create a new SQL report.
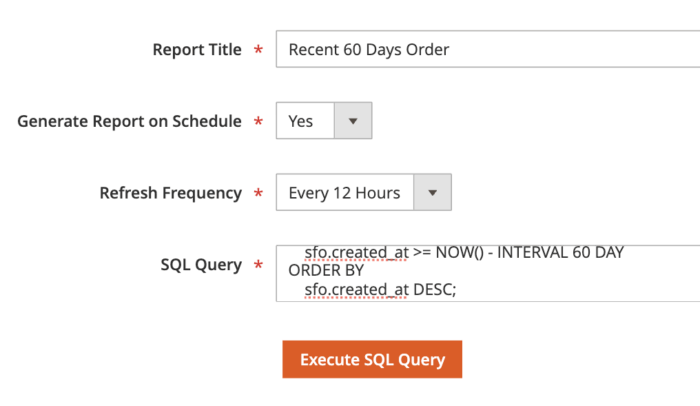
Fill in the report details and click on the Execute SQL Query button.
- Report Title: Add report title. This will be reflected as your CSV file name.
- Generate Report on Schedule: Set yes to automatically generate custom SQL reports.
- Refresh Frequency: Set how often your reports should be regenerated (daily, weekly, monthly, etc).
- SQL Query: Enter a custom SQL query to generate the required report (you can use AI tool to get the SQL query)
After a while the report will appear in the grid, like this. Now, go ahead and Save SQL Report from the top right.
Step 2: Copy the Live CSV URL
Head to the SQL report dashboard and click on the CSV button that appears in front of your report name. As you click the report link is copied.

Step 3: Load Data to Google Sheets
Open a new Google Sheet.
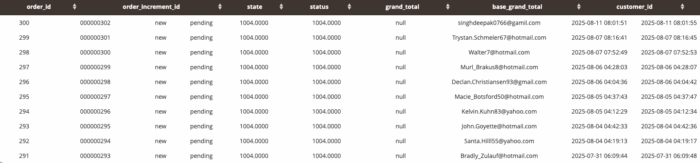
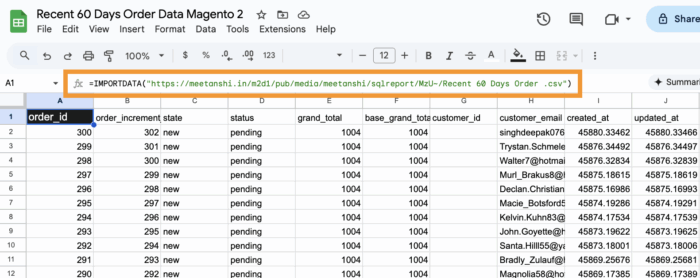
Use the IMPORTDATA function to pull the data from your Magento 2 CSV URL.
In cell A1, enter the following formula: =IMPORTDATA(“YOUR_LIVE_CSV_URL”). The Google Sheet will automatically populate with the data from your report, like this:
Step 4: Connect Google Sheets to Looker Studio
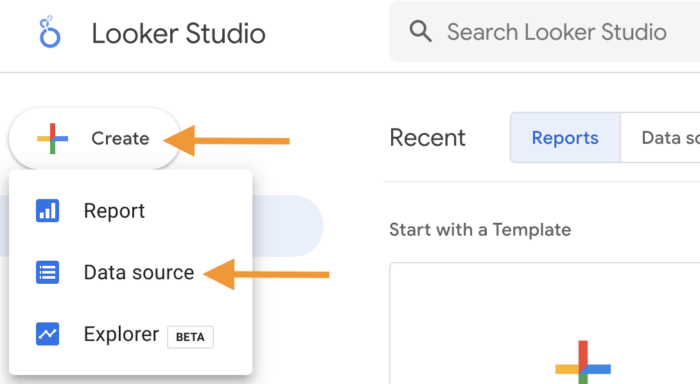
Go to Looker Studio > Create> Data Source.
Then, from the list of Google tools, select Google Sheet. After this, select your data sheet, which you just created using the formula, and click Connect.

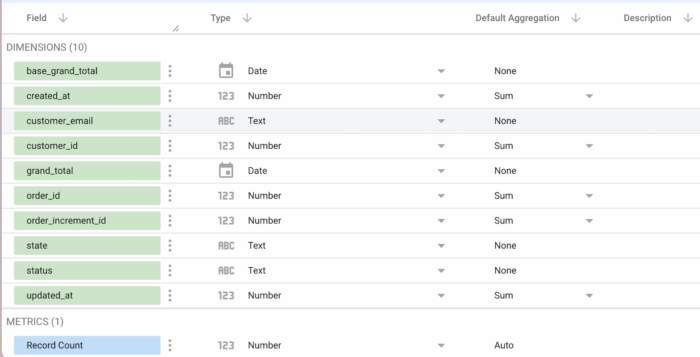
Within a few seconds, your entire data will load. This means now your Magento data is connected with Looker Studio.
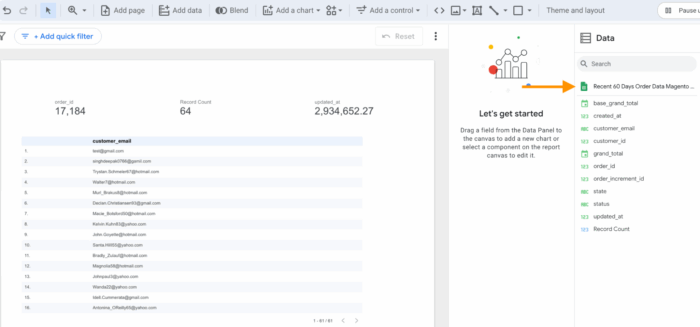
Step 5: Build Reports on Looker Studio
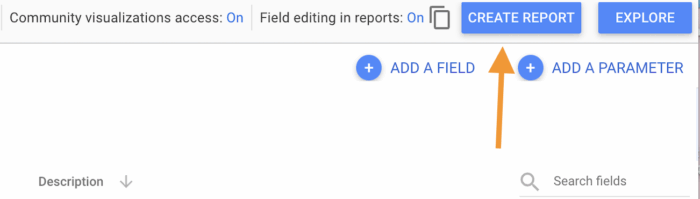
Now, from the top robin click on Create report.
Now, Looker Studio will extract your file, and then you can drag your data element from the right to the main workboard on the left to start building charts, graphs, etc and monitor your store performance.
This completes the full process of connecting Magento 2 to Looker Studio through a Google Sheet.
Goodbye manual reporting forever; get our no-code solution to auto-update your data.
Get Now
Why Choose the Meetanshi Method Over Other Solutions?
The other two solutions to integrate data with Looker Studio are: Third-party connector or Manual CSV upload.
Meetanshi offers significant advantages over other integration methods, here is the comparison.
| Feature | Meetanshi Method | Third-Party Connectors | Manual CSV Exports |
| Cost | One-time payment | Recurring subscription fees | Free (excluding labor) |
| Automation | Fully automated via scheduled reports | Automated | Manual |
| Data Control | Full control via custom SQL queries | Limited to pre-defined fields | Full control over exported data |
| Technical Skill | None | Minimal to none | Minimal |
| Security Risk | Very low (uses a simple URL) | Low | High (direct database exposure) |
- Third-Party Connectors: They provide a direct API connection between your Magento store and Looker Studio. While they are a no-code solution, they operate on a recurring subscription model, which becomes expensive over time.
- Manual CSV Exports: This is the most basic method, where you need to manually export and upload CSV from both the platforms. The process is time-consuming, prone to human error, and completely lacks automation.
- Meetanshi SQL Builder: The Meetanshi method strikes a perfect balance. With its one-time cost, you can automate unlimited reports with complete data control, all without the ongoing costs and security risks.
Get Fresh Data Without Manual Efforts
Spend more time on decision making and less on creating reports.
This SQL Builder workflow eliminates manual efforts and expensive subscriptions, giving you a powerful, flexible reporting system to analyze your store’s performance anytime with fresh data.
Goodbye manual reporting forever; get our no-code solution to auto-update your data.
Get Now
