QR codes are more than just techy-looking boxes, they are a super handy way to connect shoppers with your Shopify store.
Let’s break down the process to generate a QR code for Shopify.
Advantages of Using a QR Code in Shopify
Using QR codes in your Shopify store provides a bunch of strategic and customer experience benefits:
- Quick access to product pages, as shoppers can scan a QR code from packaging, posters, or receipts
- Provide product details, care instructions, how-to videos, or upsells for smart packaging
- Enhance marketing campaigns to track the effectiveness of campaigns using UTM-tagged URLs
- Include location-based promotions to direct event visitors to your Shopify site
Steps to Generate a QR Code in Shopify
You can create a QR code in Shopify through the in-built manual method, but it is a very time-consuming and inconvenient process.
Using a Shopify app for this is handy. Here are the steps to generate a QR code using a Shopify app.
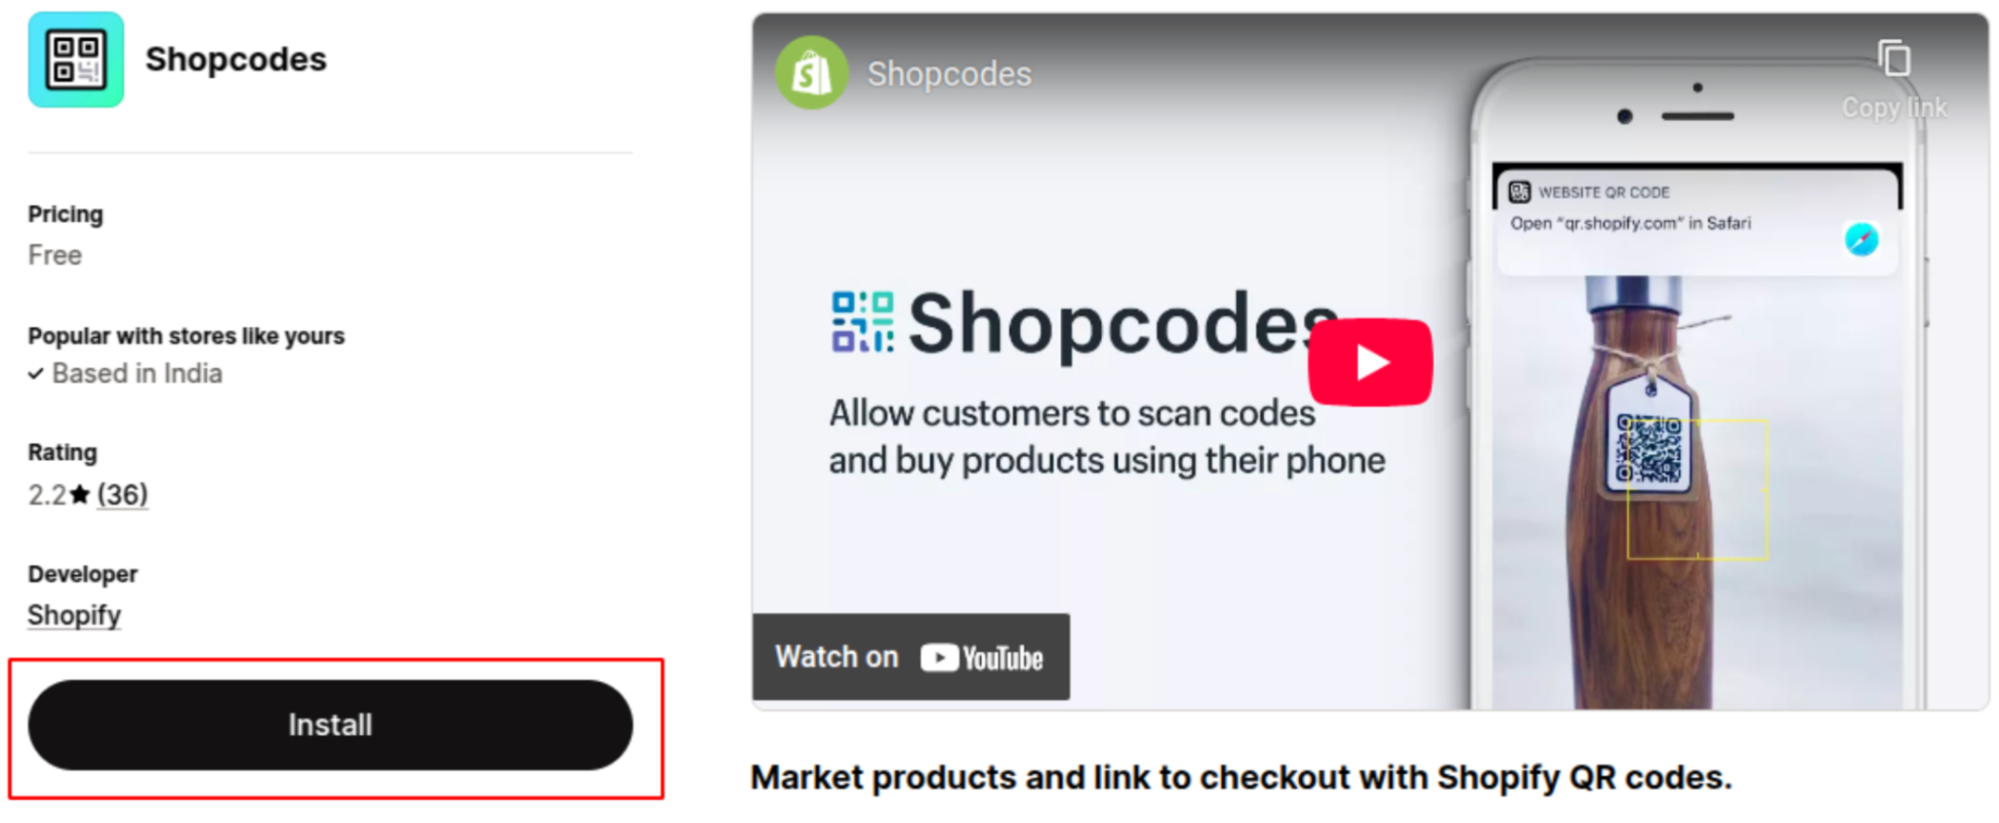
Step 1: Install a QR Code App
Head to the Shopify App Store and install the Shopcodes free Shopify app to generate QR codes.
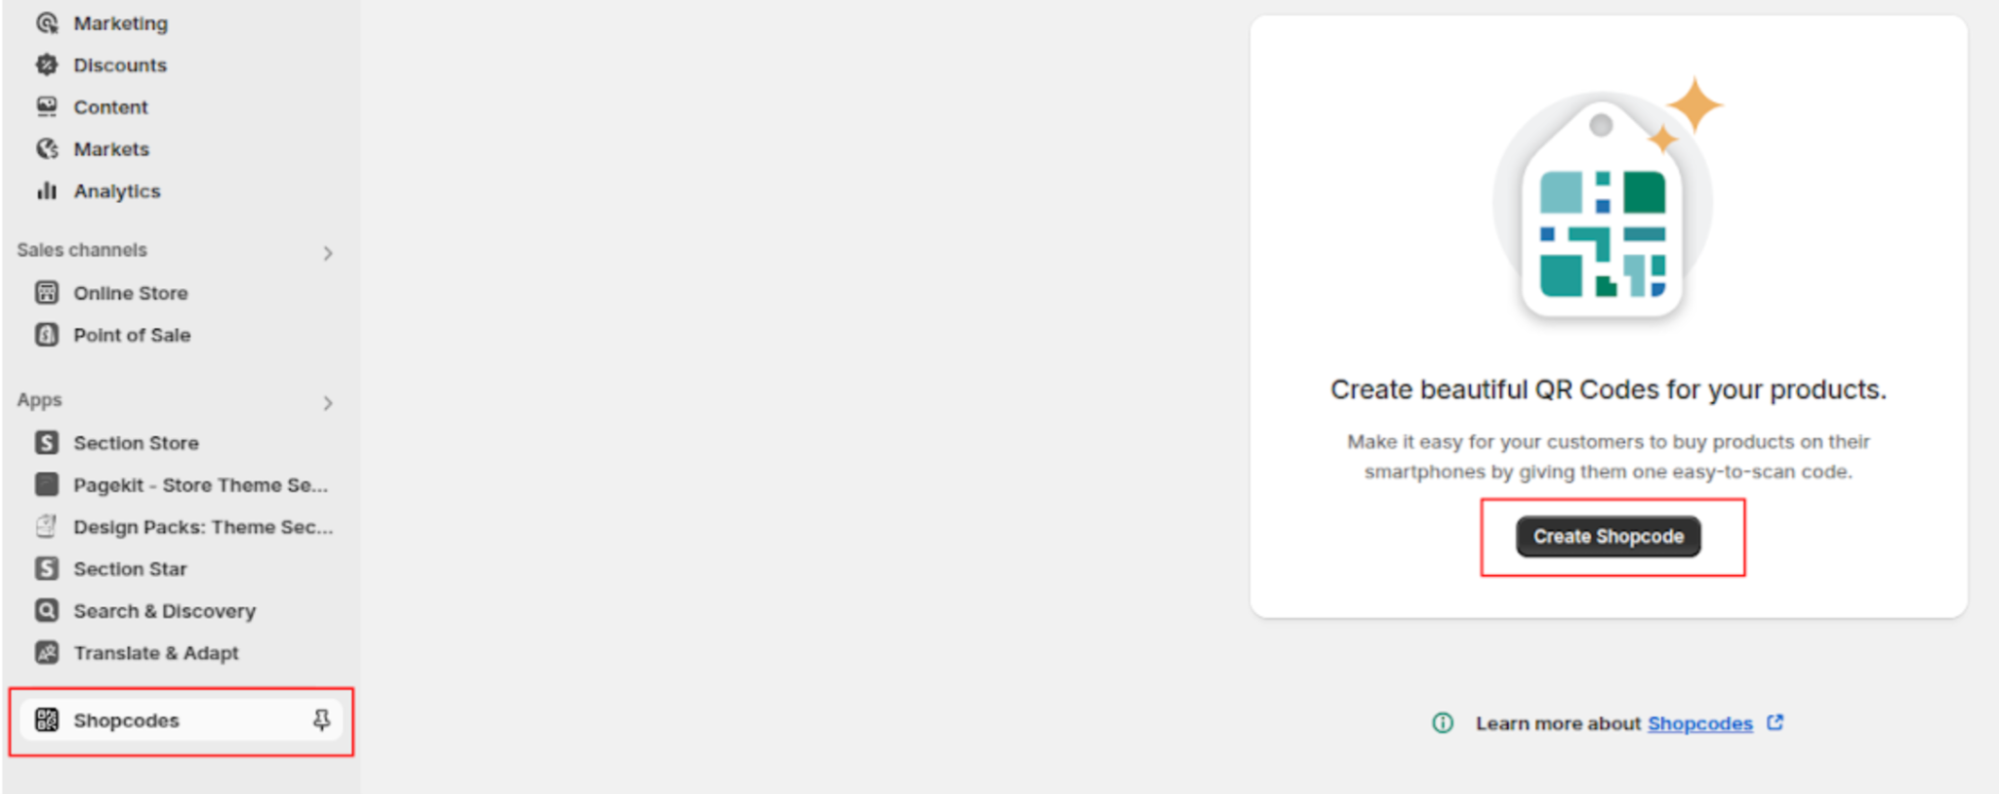
Step 2: Open the Shopcodes App
Now, head to the Shopcodes dashboard and click on “Create Shopcode”. Then, select the product you want to generate a QR code for.
Step 3: Customize the QR Code
Start customizing your QR code and set the title, product, scan destination, discount, and help text.
After filling in the details, click on Create Shopcode to see the QR code on the right side.
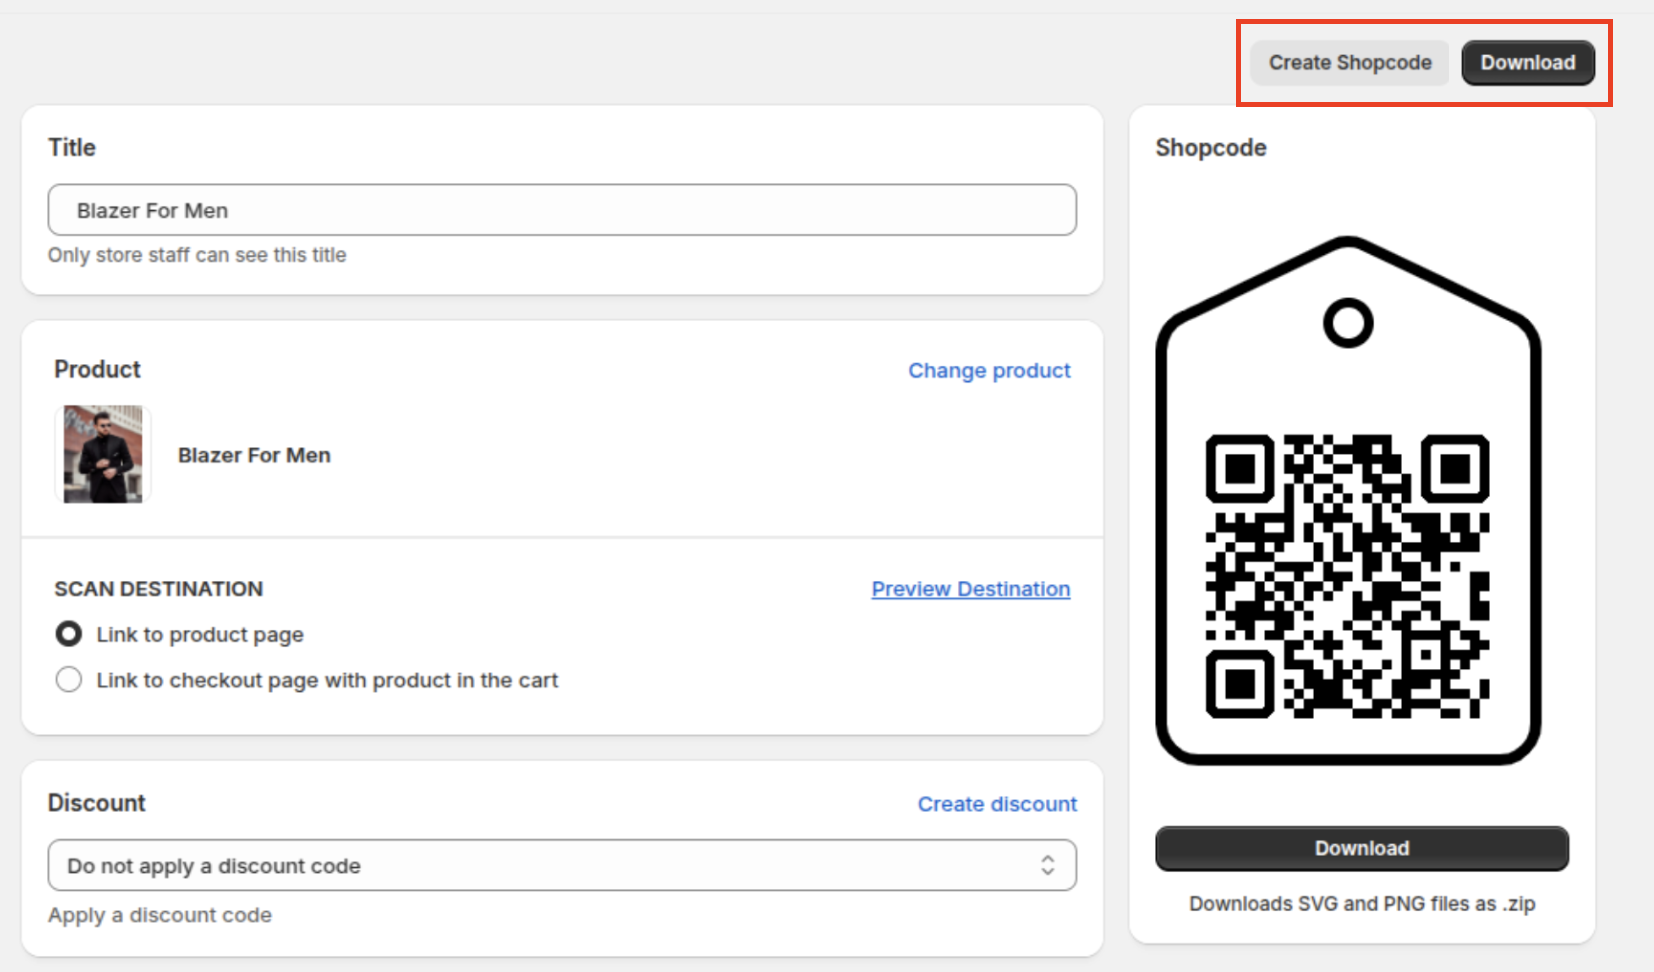
Once created, click Download to get the QR code image, which you can use offline as well.
The Shopcodes app is a free way to create QR codes that don’t expire, and you can use it time and time again whenever needed.
If you are looking for an advanced QR code setting, check out our recommendation for the 5 Best Shopify QR code generator apps.
I hope you are clear on how to generate a QR code for Shopify. Try this free method and streamline your communication.
