You can also refer to the video tutorial to configure pagination controls in Magento 2 from our Magento 2 video tutorial series:
A watermark is usually a logo, stamp, or a signature superimposed on a photo with a degree of transparency so that it does not distract the objective of the picture.
A watermark is used to show the authenticity, ownership or copywrites of an image or product. It is used to prevent unethical competitors or spammers to steal your quality hard work and gain from it.
Magento 2 offers Images Watermark for the store owners to protect the copyrights of the store products and prevent the unauthorized use of the store images.
Apart from this, watermarks can also be leveraged to increase the brand awareness of a Magento 2 store.
The store admin can use the watermarks of various format like jpg, jpeg, gif or png, etc.
Check the steps to add watermark to product images in Magento 2 and experiment using the watermarks with different sizes, opacity, and position from the admin panel.
Steps to Add Watermark to Product Images in Magento 2:
For Magento 2.0
- Login to admin panel
- Navigate to Stores > Settings > Configuration
For Magento 2.1 or above
- Login to admin panel
- Navigate to Content > Design > Configuration
Now, follow the below steps, for both the versions:
- Select your current theme

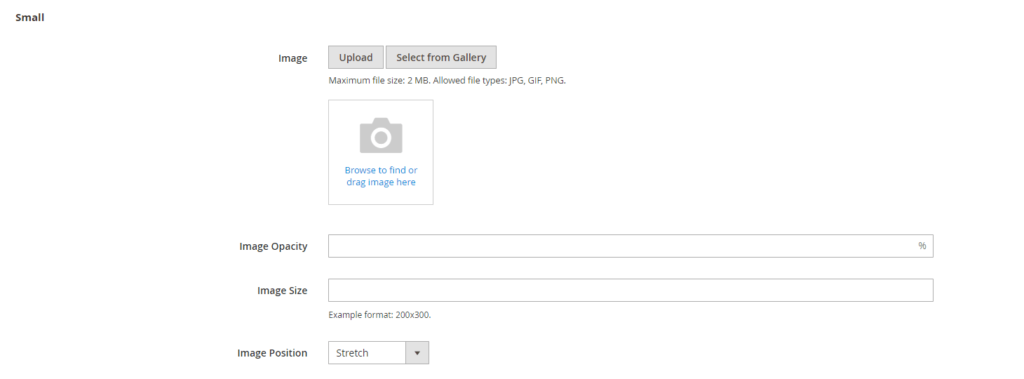
- Expand “Product Image Watermarks” and configure the Base, Thumbnail, Small, and Swatch Image image settings

Upload the watermark image
Enter the Image Opacity as percentage
Enter the Image Size in pixels
Set the Image Position
- Similarly, configure the fields for Thumbnail and Small

- Save the configuration
How to Delete Watermark Image in Magento 2:
- Click the Delete icon as shown here:

- Save the configuration
- Refresh cache.
That’s it.
You can also refer to the video tutorial to Add Watermark to Product Images in Magento 2 from our Magento 2 video tutorial series:
Also, please share the post with the Magento community via social media.
Thank You.
