If you want to display your products on Google Shopping, you will have to first create a product feed for your Magento 2 store and upload it to the Google Merchant Center.
There are a few ways to do it, and in this blog, I will discuss them all.
Then, show you the step-by-step way to add Magento 2 Products to Google Merchant Center using a code-free and flexible solution.
But first, let’s clear the air.
What is Google Shopping Feed & Merchant Center?
Google Shopping Feed is a product data file with product attributes like title, description, pricing, brand name, and more.
This data file is the primary source of information for Google to understand your product and show it accordingly based on the details added in it.
Google Merchant Center is a platform to upload, distribute, and manage your Magento 2 product listing file.
The platforms act as a bridge between your file and the Google ecosystem. Once the file is uploaded to the Google Merchant Center, it starts to distribute your products to the right places to maximize your visibility.
In short,
- Google Shopping Feed is a file with your product information
- Google Merchant Center is a platform to upload the file and manage your presence on Google
For this, you must have a proper Google Merchant Center account to carry out the entire task.
Ways to Add Magento 2 Products to Google Merchant Center
There are three ways to add Magento products to the Google Merchant Center. The need for technical knowledge falls within the range of high to none based on the method you pick.
- Manually create a file: You need to create a manual product file and upload it. Here, you will encounter limited flexibility when you want to update your product attributes or make any changes required.
- Using Magento 2 Extension: With a third-party extension, oversee your Magento Google Shopping sync and automation as it handles it all on your behalf — without any need for coding, even during the setup.
- API-based Integration: Using the Google Merchant API, you can manage all your products in the Google Merchant Center. You must be well-versed in the technicalities to create the product feed.
| Elements | Manually create a file | Magento 2 extension | API-based Integration |
| Auto-update product feed | ❌ No | ✅ Yes (scheduled or real-time) | ✅ Yes (real-time) |
| Auto-generate Product XML file | ❌ No | ✅ Yes | ❌ No |
| Add various product rules | Basic | Advanced (Product mapping, conditions & more) | Advanced |
| Technical dependency | Medium | None | High (Need experienced developer) |
| Risk | High (prone to manual errors) | Low | High |
Listing Magento products to Google Merchant Center using extension stands out in terms of saving your manual hours of creating and updating your files on a regular basis. With a simple one-time setup, your new products are easily reflected on Google without the need to upload any XML file.
How to Upload Bulk Magento 2 Products in Google Merchant Center?
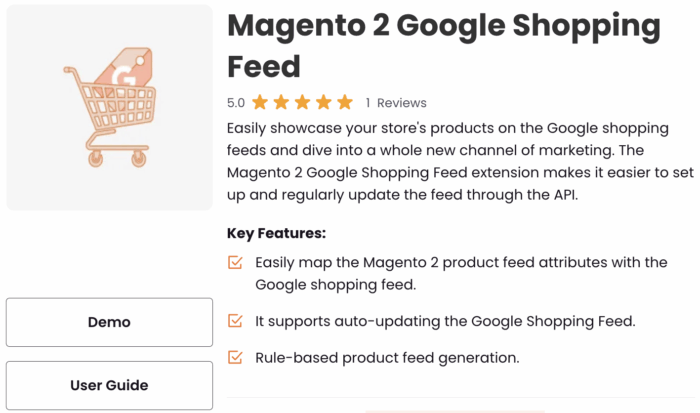
Here, I will use the Meetanshi Magento 2 Google Shopping Feed extension.
You need to create your file once and submit the product feed to Merchant Center via XML, and never again worry about: manually updating product listing, managing product synchronization, or re-upload a feed for every update.
The extension automatically keeps everything up-to-date.
Here are the 5 simple steps to generate a Magento 2 product feed for Google Merchant Center and set up the entire process all at once.
- Generate XML File
- Set Google Product Category
- Add Mapping Attributes
- Bulk Update Product Status
- Upload Product Feed XML file to the Google Merchant Center
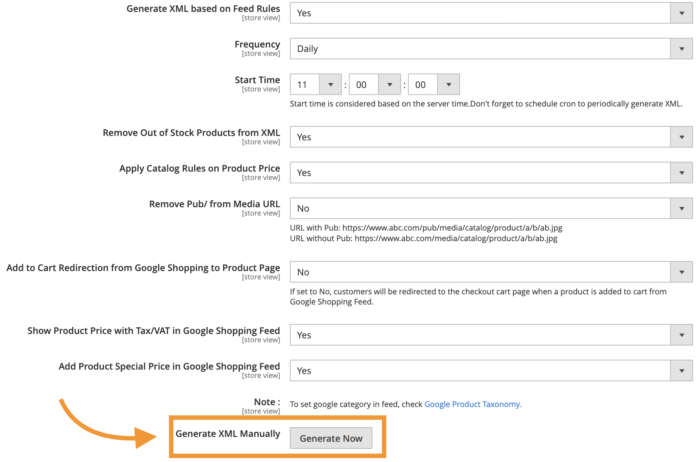
Step 1: Generate XML File
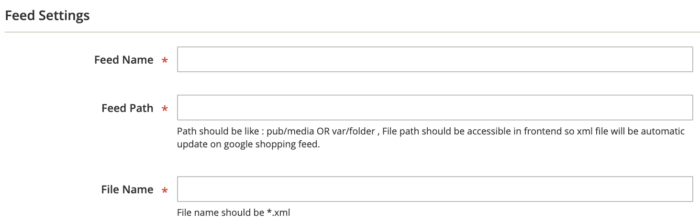
- From the extension dashboard, head to Google Shopping Feed > Configuration. Then, fill in the details to generate your XML file
- Most importantly, set the frequency of the XML file and other rule-based conditions
- Lastly, click on Generate Now.
Step 2: Set Google Product Category
- Head to Catalog > Categories
- Go to the tab “Google Shopping Feed“, and set the ID of the Google product category listed here
- Follow a similar process for products, go to Catalog > Products and head to “Google Shopping Feed”
- Set the needed ID and set yes to include the product in the Google Shopping Feed

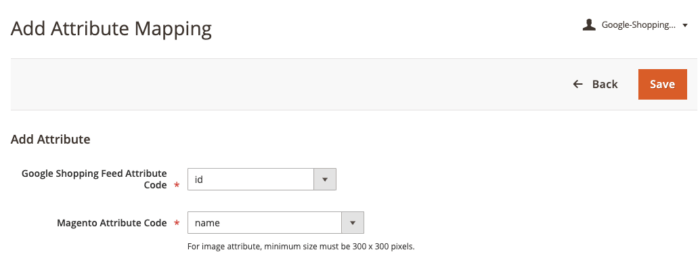
Step 3: Add Mapping Attributes
- Navigate to Google Shopping Feed Attribute Mapping
- Click on Add New Mapping to add extra custom fields
- The extension automatically maps basic custom rules like SKU, name, description, image, etc.
- Add the needed details and click Save
Similarly, add rule-based XML feed, for example, if you want to exclude products or categories you can easily add the rule.
- Head to Google Shopping Feed > Google Shopping Feed Rules > Add New Rules
- Add the needed details and click on Save
Additionally, you can create a product condition that will apply to your XML file.
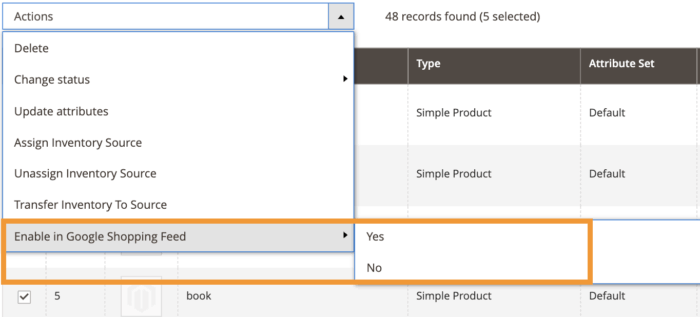
Step 4: Bulk Update Product Status
- Head to Catalog > Products and select the products to include or exclude from the product feed file
- Then, select Action, and then go to “Enable in Google Shopping Feed” select yes to include the product and no to exclude them
Step 5: Upload Product Feed XML file to the Google Merchant Center
- Head to Google Shopping Feed > Google Shopping Feed XML Log
- Download the created XML file

- Now, head to Products > Feeds from the sidebar in the Google Merchant Center
- Click on the + button to upload your XML feed file
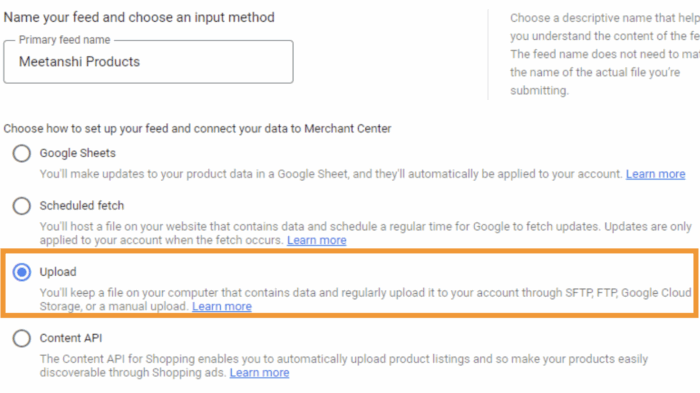
- Fill in the basic details on the first page and click on Continue
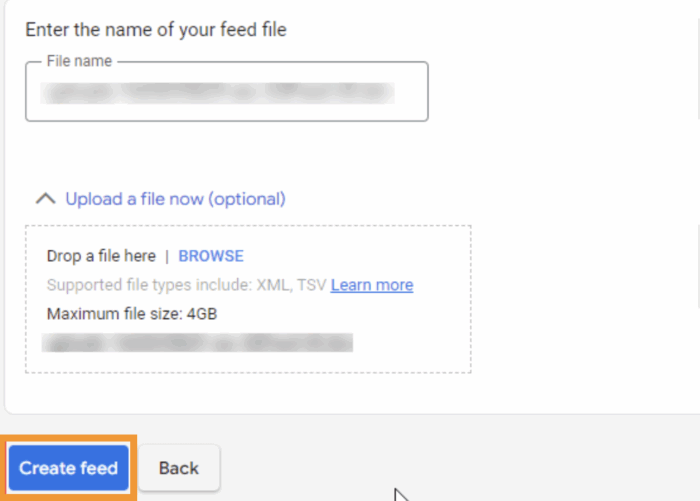
- Now, enter the name of your feed and pick an option to upload the file (manually or schedule fetch)
Now, give the feed a name, upload the XML file, and click “Create Feed.”
And now, you have successfully listed Magento products at the Google Merchant Center using the extension.
This is how your listing will look like:
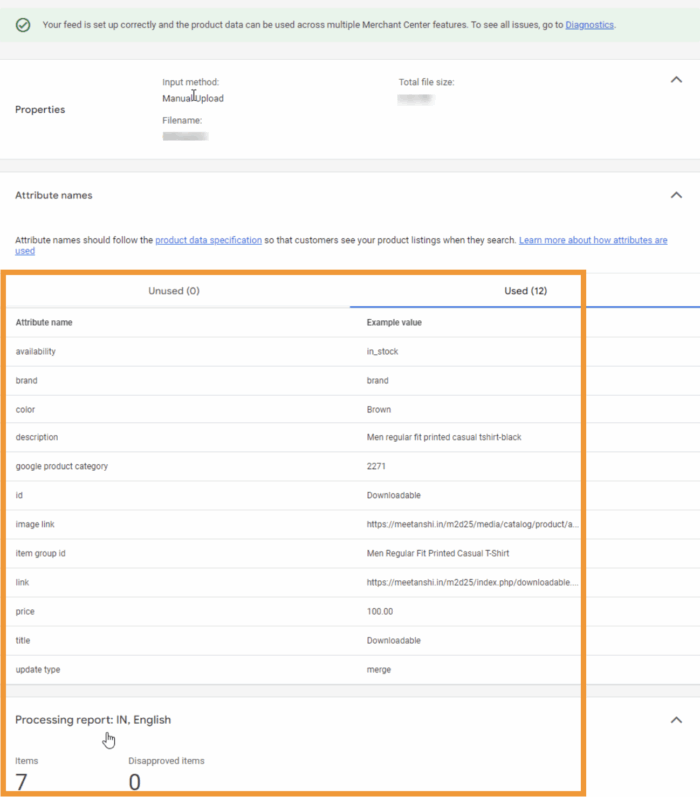
After this, use the Google Shopping Feed XML Log from the Magento backend to get details about the created XML file and other necessary information.
Goodbye manual updates; automate your Google product feed today.
Automate Now
Tips to Enhance Your Magento 2 Product Listing
The product details play an imperative role in attracting more shoppers through Google Shopping.
The most important tip here is to work on your product details. Not merely editing the content here and there, but:
- Using high-quality product images, focusing more on the product
- Highlighting specific features of your product in the description
- Leveraging on product reviews & ratings as social proof
- Writing and adding product keywords naturally in your content
- Communicating clear pricing even when you are running a discount
- Showing product availability and other extra details to catch shoppers attention
Working on them helps to optimize your Magento 2 for Google Shopping Tab to reach the right shopper and turn them into your customers.
Frequently Asked Questions
1. Why should you list Magento products to Google Merchant Center?
Listing your Magento 2 products to Google Merchant Center helps to improve your product visibility on Google and enhance the shopping experience for your shoppers.
2. How to connect Magento 2 with Google Merchant Center?
Here are the steps to connect your Magento 2 store with Google Merchant Center:
- Create your Google Merchant Center account
- Install the Meetanshi Meetanshi Magento 2 Google Shopping Feed extension
- Configure and generate a product feed
- Upload & submit the product feed file to the Google Merchant Center
3. Does connecting Magento 2 to Google Merchant Center support all product types?
The Meetanshi Magento 2 Google Shopping Feed extension supports all product types, such as simple, bundled, or grouped products.
Work on Automate Mode for Magento Product Listing
The Meetanshi Magento 2 Google Shopping Feed extension adds product feed to Merchant Center via XML on automation mode.
You only need to set it once, and then you can easily forget about this task until you have to come back and make an edit in the XML file.
Skip the manual hassle and start working with automation now!
Goodbye manual updates; automate your Google product feed today.
Automate Now
