You can make good marketing campaigns better through data-driven decisions. Facebook Pixel in Magento 2 is a tool that can help you collect data and optimize your Meta ads strategy.
But how do you add one?
Let’s learn through this step-by-step guide on Magento Facebook Pixel.
What is Facebook (Meta) Pixel?
Facebook Pixel (a.k.a Meta Pixel) is a JavaScript code for tracking data for Facebook Ads campaigns. It’s added to the website’s HTML code and tracks visitors from ad campaigns. The code helps you to:
- Track conversions
- Optimize Meta ads
- Remarket ads to visitors
- Create targeted audience
Generally, the Meta Pixel tag is added within the <head> section in the website’s header. Therefore, it appears on all the pages.
How to Get a Facebook Pixel Code?
First, you’ll need to create a new dataset in the Facebook Events Manager. Then, you can create a Pixel code to track data into it.
Log into your Facebook account and go to Facebook Events Manager.
In the left menu, click Connect data sources and select Web from the list.
Click “Connect”.

Enter a suitable name for the dataset as per your preferences. It’s used for identifying multiple data sources within the Events Manager and could be anything.
Click the “Create” button.
Next, enter the homepage URL of your Magento 2 website and choose Explore other options.
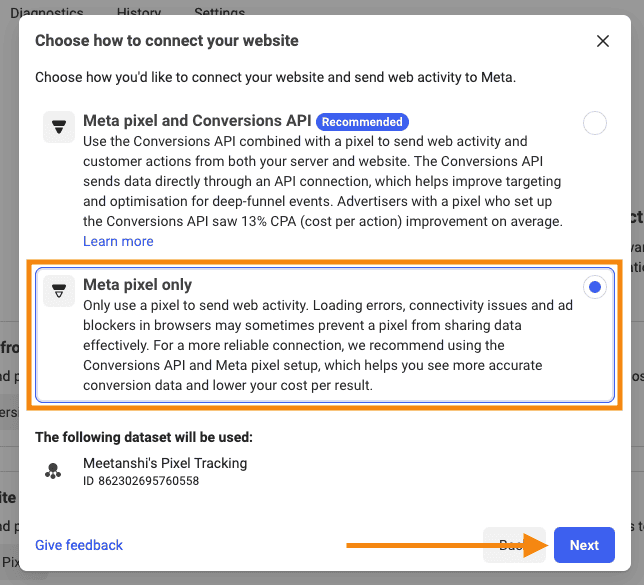
Next, Facebook will ask if you need guidance with the setup, choose the Do it yourself method and choose Meta pixel only.
Next, two options will be displayed to add meta pixel code to your Magento 2 store.
Choose Install Code Manually.
The Facebook Pixel tracking code for the dataset will be displayed on the screen. Click the Copy code button.
Once the code is copied, continue and select the events that you want to track and complete the setup.
Options to Add Facebook Pixel in Magento 2
In Magento 2, you need to add the Facebook Tacking code at the bottom of the header section section inside the <head> tag. You can do this in two ways:
- Use an Integration Extension – You can use a third-party extension like Meetanshi’s Facebook Pixel for Magento 2 for the integration. It offers you more control over tracking preferences and also works well with custom themes.
- Install Code Manually – This method requires you to manually add the Pixel code to the theme’s header. It requires technical expertise and does not offer control over the tracking preferences.
Let’s start with our preferred method for adding FB Pixel to Magento 2.
Method 1: Use an Integration Extension
You can use a third-party extension to add the tracking code to your store. For example, Meetanshi’s Magento 2 Facebook Pixel extension is an easy option to do this. It supports setting preferences for tracking conversions in Magento 2.
You can also use this extension to set up multiple pixel tracking for multiple store views on your website. Here’s the step-wise method on how to add Facebook Pixel in Magento 2 using extension.
Step 1: Install Magento 2 Facebook Pixel Extension
Go to Magento 2 Facebook Pixel and get the extension for your store.
Once downloaded, extract the zip package file to the root directory of your Magento 2 installation.
Run the following commands, one-by-one:
php bin/magento setup:upgradephp bin/magento setup:static-content:deploy –fphp bin/magento cache:flush
The Facebook Pixel Magento 2 extension will be installed on your store.
Step 2: Add Facebook Pixel Code
In your Magento 2 admin, go to Stores > Configuration > Meetanshi > Facebook Pixel to configure the extension.
Enable the extension and paste the copied code in the Facebook Pixel JS Code field.
Click the button at the top-right to save the progress.
Step 3: Configure Tracking Preferences
Next, you can also set additional Facebook Pixel tracking preferences for your Magento 2 store.
Choose to calculate the conversion value based on Grand Total or Sub Total. You can also set custom success page paths (in case you’re not using the default checkout.)
Optionally, you can also configure to exclude zero-value orders from being tracked as conversions.
Finally, click the “Save” button at the top-right.
That’s it — with three simple steps, you’ve successfully installed Magento 2 Facebook Pixel code. You can test the implementation of the setup through the Test Events feature.
Track your customers action and maximize your Facebook campaign performance.
Track NowMethod 2: Install Facebook Pixel in Magento 2 Manually
You can directly install the Magento 2 Facebook Pixel code in the head from the admin panel. However, this offers the most basic method of tracking and may not work for all stores.
Here’s the method for Magento 2 add Facebook Pixel code:
In your Magento 2 admin, go to Content > Design > Configuration.

Now, a list of store themes will be displayed on the screen. Click on the theme you’re currently using to edit it.
In the configuration screen, scroll down to the HTML Head section and paste the Facebook Pixel code in the Scripts and Style Sheets field.
Save the configuration and you’re done.
The Facebook Pixel code will be added to all the pages on the website.
How to Debug Facebook Pixel Tracking?
Once you’ve set up Facebook Pixel for the Magento 2 store, you can test the implementation in the events manager.
Go to Facebook Events Manager and select the dataset you created earlier.
You can find the recent events activity on the website from the Overview tab.

You can also move to the Test events tab and perform events manually on your website to see if they’re being tracked properly.
Other Helpful Resources
Try any of the methods provided above to install Facebook Pixel Magento 2 and start optimizing your ad campaigns.
Continue your learning journey with these Magento 2 guides: