If you are struggling to get organic traffic then chances are the search engine bots have not crawled important pages of your Shopify store yet.
Your Shopify robots.txt file plays a key role to play here.
In this blog, learn in detail about robots.txt file in Shopify and how you can edit it for SEO benefits.
What is Shopify Robots.txt?
Robots.txt is a file that tells search engine crawlers/bots which pages they must access from your website and which they must avoid to manage its visibility on the Search Engine Result Pages (SERPs).
Think of the file as a guiding map, telling the bot where to go and where to not go.
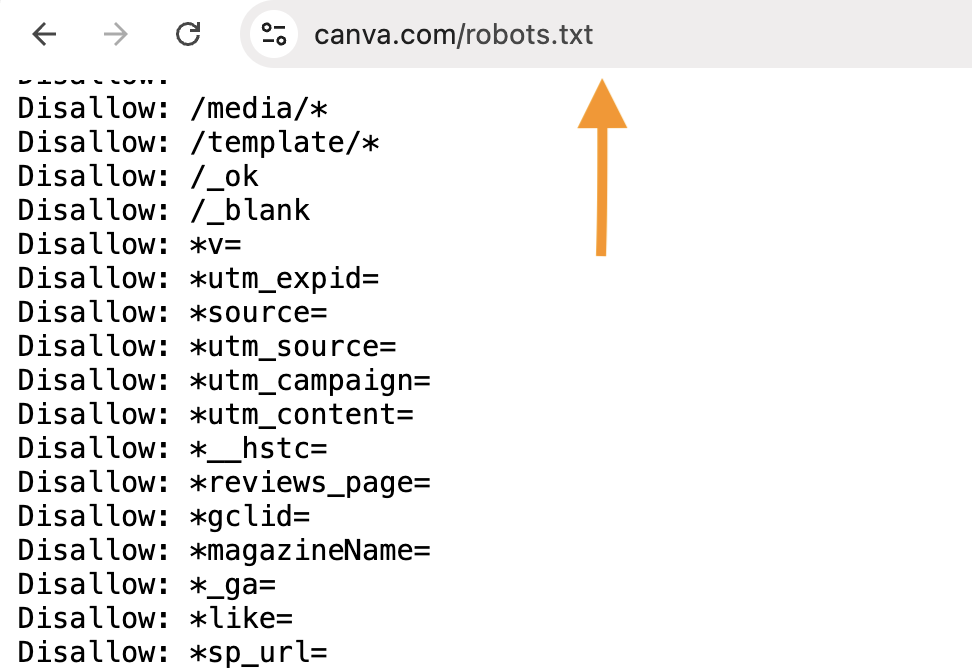
You can easily check the robots.txt file of your store or any website online with a simple /robots.txt at the end.
Here is an example.
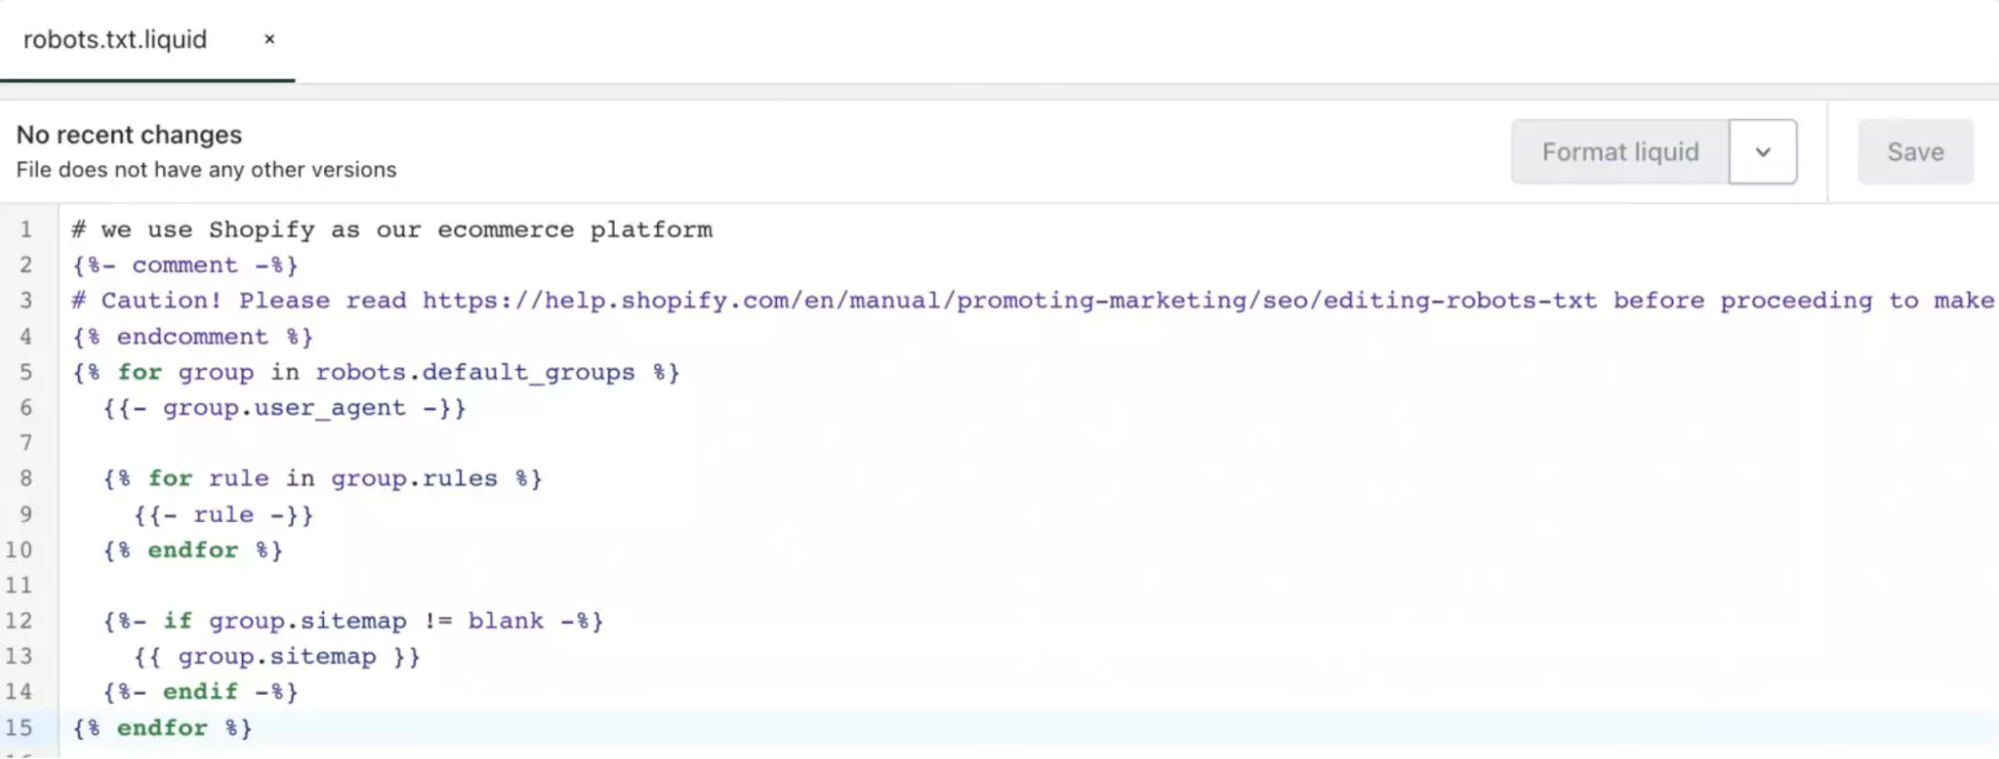
The good news is Shopify provides a default robots.txt file using the dynamic Liquid template called robots.txt.liquid. The file is a mix of plain text and Liquid code.
The search bots generally check the file before crawling any of your store’s web pages. While the bots are not forced to adhere to the file, many popular search bots do refer to it before crawling.
Customize Robots.txt in Shopify
Since Shopify creates a default robots.txt file for you, there is no need to create and add one to your store.
You can customize it based on preference.
In some cases, Shopify’s default rules might disallow crawling for pages you actually want to rank. Such rules prevent search engines from seeing your newest content and potentially limiting your organic traffic.
What can you change in the Shopify Robots.txt file?
There are three important changes you can make in your file.
Add a new rule to existing rules
This implies you would like to add new rules to the default set of rules.
You will add the conditions for which new rules will be applicable. If you want to update different bot settings for other search engines, you can also update them here.
| Condition | Meaning | Example |
| Disallow: / | This tells crawlers to stay away from your entire website. | Used mainly for staging sites or during a major site maintenance. |
| Disallow: [path] | This blocks crawlers from a specific folder or group of pages. | Disallow: /collections/ blocks all collection pages. |
| Allow: / | This explicitly gives crawlers access to your entire site (overriding broad blocks). | Usually used to “reset” access if a previous rule was too strict. |
| Allow: [path] | This opens a specific door inside a section that is otherwise blocked. | Allow: /collections/bestsellers opens one collection even if others are blocked. |
Remove a rule from existing rules
Although it’s not recommended practice from Shopify if you want to remove any existing rules from the default robots.txt.liquid file, you need to mention the code for the same accurately.
{% for rule in group.rules -%} {%- unless rule.directive == 'Disallow' and (rule.value == '/search' or rule.value == '/blogs') -%} {{ rule }} {%- endunless -%} {% endfor -%}
Add custom rules
If you want to add new rules that aren’t in the default group, you can update those changes at the bottom of the file template.
Shopify Robots.txt Example
When you create your robots.txt.liquid file, Shopify pre-fills it with a Liquid loop. You can make your own rules, you should insert them into that loop.
Here is a comprehensive Shopify robots.txt example of a customized file that includes:
- The Default Shopify Rules.
- Custom Disallows.
- A Custom Allow.
- AI Bot Blocking.
{%- comment -%}
# This is a customized Shopify robots.txt.liquid template.
# It includes default rules plus custom SEO tweaks.
{%- endcomment -%}

{% for group in robots.default_groups %}
 {{- group.user_agent -}}

 {% for rule in group.rules %}
 {%- comment -%}
 REMOVE RULE EXAMPLE: Uncomment below to 'unblock' policies
 {%- unless rule.directive == 'Disallow' and rule.value == '/policies/' -%}
 {%- endcomment -%}

 {{- rule -}}

 {%- comment -%}
 {%- endunless -%}
 {%- endcomment -%}
 {% endfor %}

 {%- if group.user_agent.value == '*' -%}
 {{ 'Disallow: /blogs/*/tagged' }}
 {{ 'Disallow: /collections/vendors*?*q=' }}
 {{ 'Allow: /collections/bestsellers' }}
 {%- endif -%}

 {%- if group.sitemap != blank -%}
 {{ group.sitemap }}
 {%- endif -%}
{% endfor %}

# BLOCK AI CRAWLERS (Added at the very bottom)
User-agent: GPTBot
Disallow: /
User-agent: CCBot
Disallow: /
How to Edit Robots.txt in Shopify (Two Methods)
Method 1: Manually Edit
Since the robots.txt is a generated file, you don’t find it in your folders. You must create a Shopify robots.txt.liquid template that overrides the default file.
- Open your Shopify admin head to the Online Store.
- Under the Themes section, find your Live theme.
- Click the three dots (…) or Actions button and select Edit code.
- In the left sidebar, scroll to the Templates folder and click Add a new template.
- A pop-up will appear. In the first dropdown, select robots.txt.
- Click Create Template and add the needed changes.
- Save the file.
Once you create a template, you will get a default Shopify robot.txt.liquid template ready. It’s good to go for SEO purposes.
However, you can update the code here if you wish to make any amendments.
Method 2: Using Shopify Robots.txt App
Use the MIT Custom Robots.txt Rules Shopify app to easily edit the default file, it manages the creation and updating of the file for you, providing a user-friendly interface so you don’t have to touch any Liquid code.
It directly extracts the default file in the Shopify admin, ready to edit using the structured editor or the raw file.
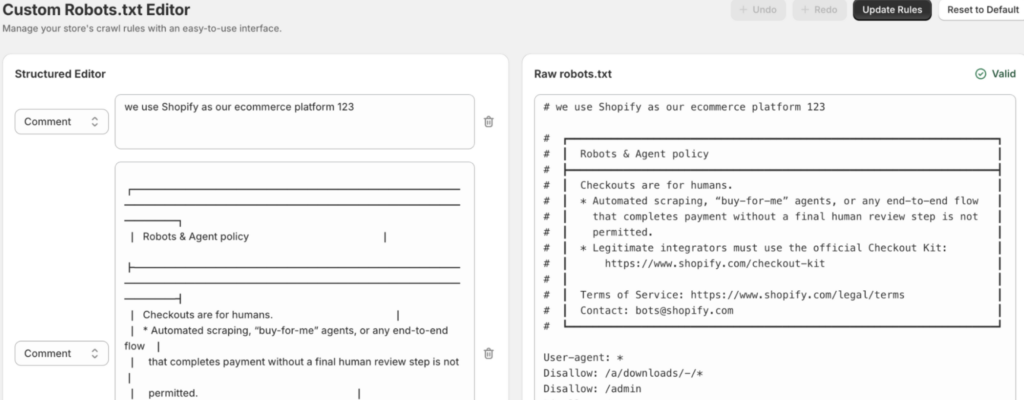
The app manages the creation and updating of the file for you, providing a user-friendly interface so you don’t have to touch any Liquid code.
Pick the format you are comfortable with and add user-agent groups or edit directives (Allow, Disallow, or Crawl-delay).
Additionally, you can easily perform:
- Undo – Reverse the last performed action.
- Redo – Restore the change you just reversed.
- Reset to Default – Revert the file back to the original default file.
The app completely manages the workflow: simply make your Shopify robots.txt edit, save them, and it directly updates the file on Shopify, making it live for the next crawl.
Test & Verify Your Shopify Robots.txt File
It’s tricky to look at the file after making the needed changes. Even a small syntax error can impact the functioning of your site and block unnecessary pages.
The best way to verify your file is using the Shopify Google Search Console dashboard.
Go to Settings > Crawling > robots.txt. Then, click on Open Report.
From here, you can verify whether the robots.txt file is correctly implemented for your store or not.
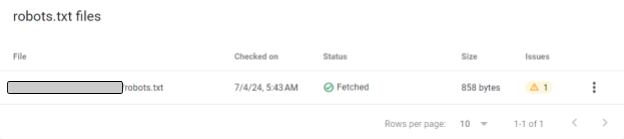
You can check the issues in this report and fix any errors.
Best Practices for Configuring Robots.Txt File in Shopify
- Understand which website pages should be accessible to search engines to minimize the crawl budget for your online store.
- Use ‘Disallow’ directives to block access to the irrelevant pages of your store, like admin pages, checkout, cart, or any duplicate content. Here’s how you can restrict access or fix duplicate content pages based on filters.
- In the robots.txt file, include a link to the sitemap to help search engines find all the pages of your online store.
- When you block search engine bots, be specific about managing how different search engine bots will access your site.
- Verify the updates you’ve made in robots.txt before implementation. Using the Google Search console tester tool, you can check whether the file’s syntax is correct and functioning as expected.
- Avoid blocking too many URLs and use comments to clarify wherever necessary to explain the purpose of directives. This will be helpful for your team and future reference.
Frequently Asked Questions
1. How to fix “Blocked by robots.txt” on Shopify?
If you see this error in Google Search Console, it means Google found a page it thinks is important, but in your robots.txt it is blocked. Edit the robots.txt template file and set the “Allow” rule.
2. When should you edit a Shopify robots.txt file?
You don’t need to edit it just for the sake of it. You should only touch it in these specific scenarios like you want to save your crawl budget, prevent AI bots, or enhance the visibility of quality pages.
3. Why is a page “Indexed though blocked by Shopify robots.txt”?
The core reason is external backlinks the page is still getting while you have blocked it in your robots.txt file.
If you want the page gone completely from Google, unblock it in robots.txt and add a noindex tag to the page’s <head> section. Google needs to be allowed to “crawl” the page to see the “No Index” sign!
Over to You
Implementing best practices in your robots.txt file can effectively enhance the performance of your Shopify store.
Editing your robots.txt file is easier using the MIT Custom Robot.txt file without any need to copy/paste from the default .txt file. You can also add comments in the file to keep rules organized for future edits.
There are high chances of making errors while editing manually, which can impact your SEO ultimately your store traffic.
The app makes editing and updating organized and easier.
Optimize your robots.txt file easily to ensure search engines find what matters most.
Optimize Now