Shopify store owners who’ve migrated to a new store should send an account invitation as a prime step to re-engage their customer base.
It allows customers to create a new password and activate their account on the new store without losing their purchase history or information.
By sending these personalized invites, you can maintain customer loyalty and get your business running efficiently.
This blog provides complete steps to send an account invite in Shopify.
Let’s get started.
Ways to Send Account Invite in Shopify
Shopify has two types of customer accounts: Legacy and passwordless.
For stores using classic/legacy customer accounts, inviting customers to create a password-based account is a necessary procedure after migrating the customer data.
This process is distinct from the newer passwordless accounts, which use a one-time code for login.
You can only invite existing customers who have a customer profile but no account. To invite a new customer, you must first add them to your customer list.
There are basically two ways to send an invite, which are individually via the Shopify admin and sending bulk invites using a third-party app like BAIS Bulk Account Invites Sen.
Steps to Send Shopify Customer Account Invite – Individually
The following is the 3-step walkthrough to send account invites.
- Step 1: Set up your customer accounts
- Step 2: Create an account invitation email
- Step 3: Send customer account invitations
Step 1: Set up Your Customer Accounts
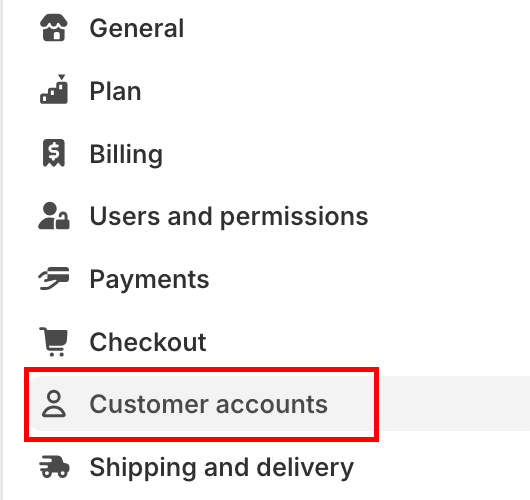
From your Shopify admin > Settings > Customer Accounts
In the Sign-in links section, enable the Show sign-in links toggle to showcase the version of customer accounts.

In the Choose which version of customer accounts to use section, ensure that the Legacy (classic) customer accounts option is selected.
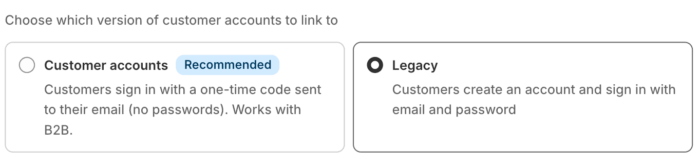
And Save the changes.
Step 2: Create an Account Invitation Email
Navigate to Shopify admin > Settings > Notifications > Customer notifications
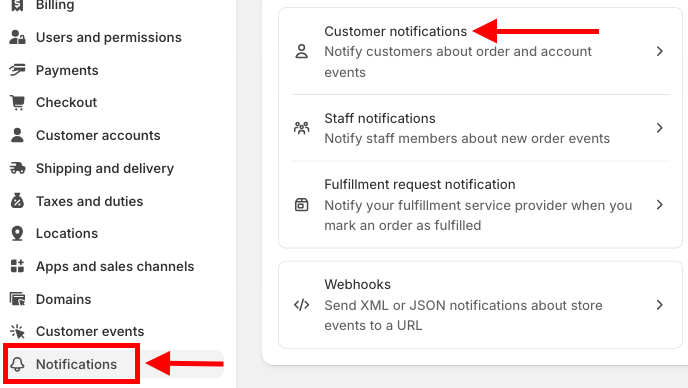
Then scroll down to the Customer account invite and open it. Here you can see the preview of your invitation email.
From there, click on Edit code to customize the email.
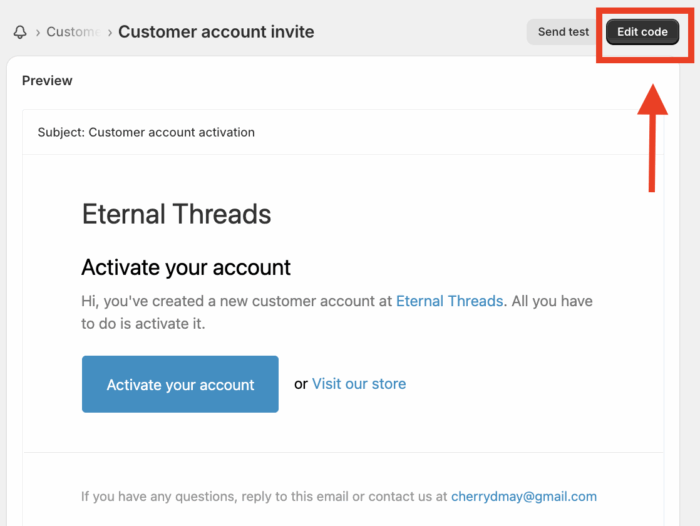
Edit the subject line and body message of the invitation email to suit your brand and communication style.
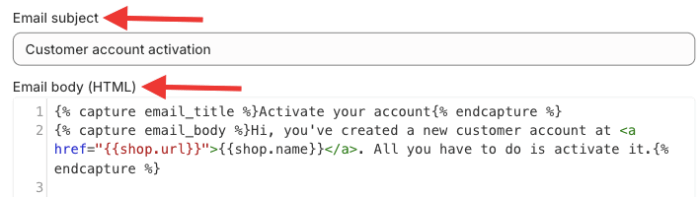
Your account invitation email is ready.
Step 3: Send Customer Account Invitations
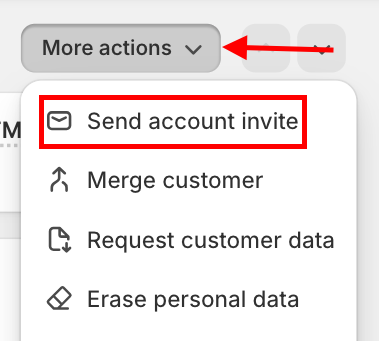
From your Shopify admin > Customers. Click the name of the customer that you want to invite.
Then, on the top-right, click More actions > Send account email
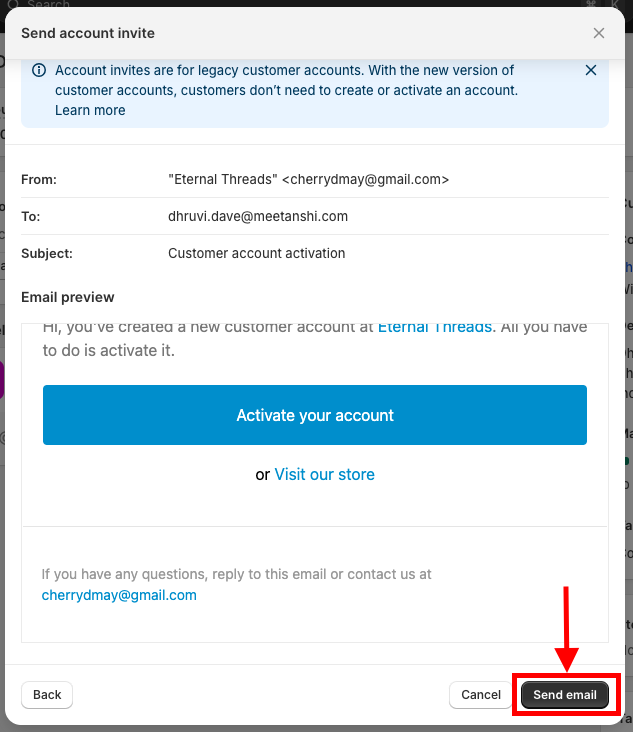
In the Custom message field, add a message for your customer. If you leave this field empty, then the default message is sent to the customer.
You can also change the subject of the email if needed.
Then click Review email. If everything looks good at the review, click on Send email.
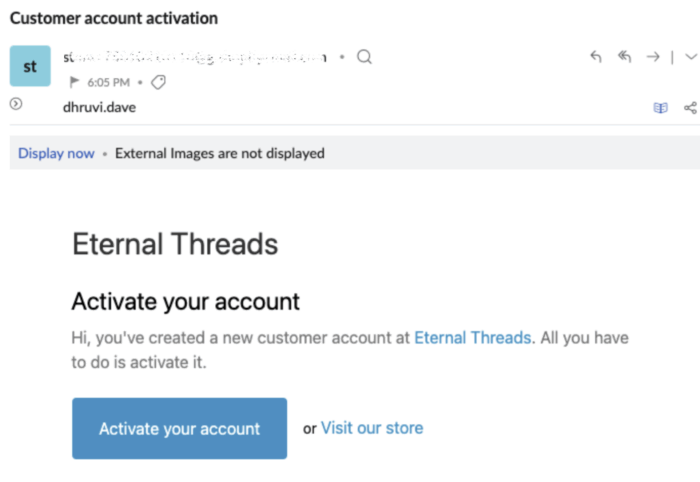
And that’s it, you have successfully sent an account invitation email to your customer.
Now, your customers click on Activate your account and they will be redirected to your new Shopify login page.
As they add their old password, they have easily created their account in your new store.
Frequently Asked Questions
1. What is a Legacy Account on Shopify?
A legacy account on Shopify, also known as a classic customer account, is the original account type that requires customers to log in using a traditional email and password.
2. How do I Resend a User Invite on Shopify?
Click the customer you want to resend the email, then click More actions > Resend account invite.
3. How Many Customer Account Invitations Can I Send in Shopify?
Shopify sets a limit of 5 customers per 10 minutes. If you exceed this time, you might encounter an error.
Solution for “Failed to Send Account Invite” Error
These issues can arise from a few different causes. Here are some common reasons for these errors and solutions for them.
Invitation Account Limit Exceeded
The typical limit is 5 customer invitations per 10 minutes, which applies to the entire store, not individual staff members. To avoid this, plan your outreach by sending invites in small, managed batches.
If you need to send a large number of invitations at once, consider using a third-party app from the Shopify App Store. These are built for bulk invitations and can help you bypass the manual sending limit.
Double-check the Email Address
A simple but often overlooked reason for the error is an invalid or malformed email address.
To ensure this, go to the customer’s profile in your Shopify admin and carefully review their email address. Correct any typos or formatting errors, and then try sending the invite again.
Email Sending Option is Enabled
For an account invite to be sent, your store’s email sending settings must be properly configured and enabled.
To check this, navigate to Settings > Notifications in your Shopify admin. Ensure that your store’s primary email address is verified and that there are no red flags or errors in your notification settings.
So it’s a wind-up on how to send an account invite in Shopify, and it is very important for re-establishing your customers after a store migration.
By following this simple process, you provide an excellent experience for your entire customer base.
This not only allows them to activate their accounts and access their purchase history but also helps maintain customer loyalty.
