Installing Facebook Pixel can be useful if you’re running Facebook Ads. It can help you retarget the visitors and optimize the campaigns for better performance.
But how to install Facebook Pixel in Shopify?
Let’s learn it through this post.
In this post, you’ll learn how to add Facebook Pixel to Shopify store. Let’s get started.
What is Facebook Pixel?
The Facebook pixel is a small, lightweight piece of code that is implemented on your website. You can find it through your Facebook ads account dashboard.
Once installed, it allows Facebook to track and record your site visitors’ activities like the pages they visit, and products they view. It transmits data to Facebook servers by sending requests for various events.
Facebook Pixel in Shopify helps to:
- Retarget Customers: You can retarget the customers that visit your site
- Track Conversions: Measure the metrics such as conversion rate for the ad campaigns
- Get Analytics & Insights: Gather data about how does customers interact with your site
- Build Custom Audience: Laser-target the audience based on the data you collect
Now, let’s learn to install Shopify Facebook Pixel.
Options to Add Facebook Pixel to Shopify
There are two ways you can add Facebook Pixel:
- Install it using Shopify Facebook app
- Insert the Facebook Pixel code manually
In this post, we’ll learn how to add Facebook Pixel to Shopify manually.
Manually Install Facebook Pixel in Shopify
Step 1: Get Facebook (Meta) Pixel ID
Log into your Facebook account and move to Meta Business suite.
Go to Tools > Events Manager.
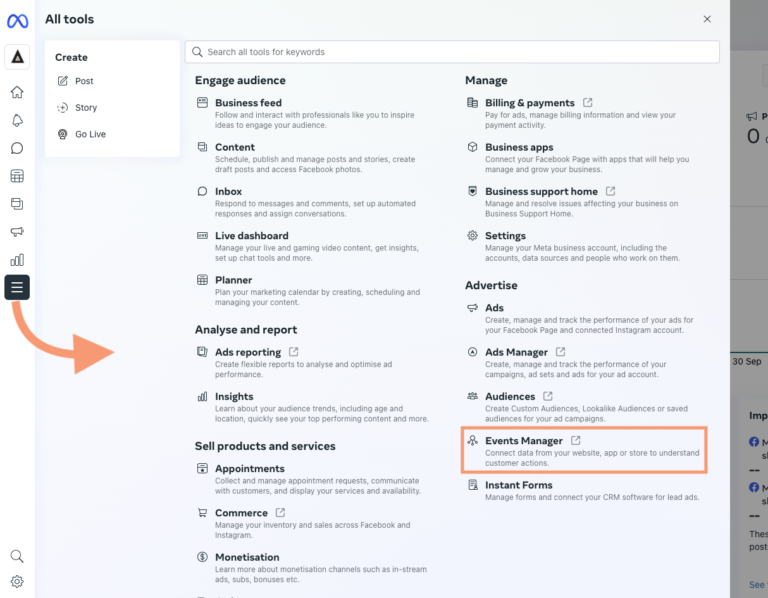
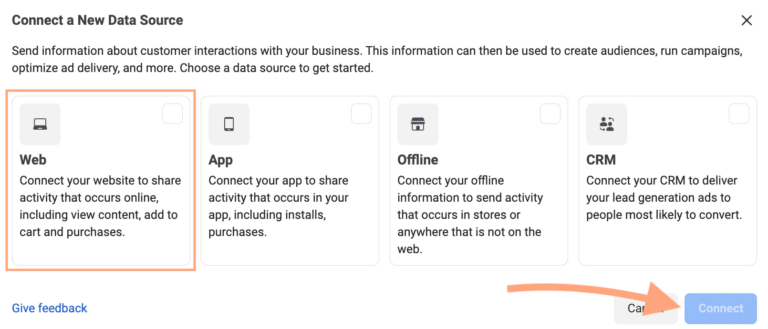
Create a new data source by clicking the + icon and click “Connect data sources.”
Select “Web” as the data source type and click “Connect.”
Now, enter the Pixel name and click “Create Pixel.”
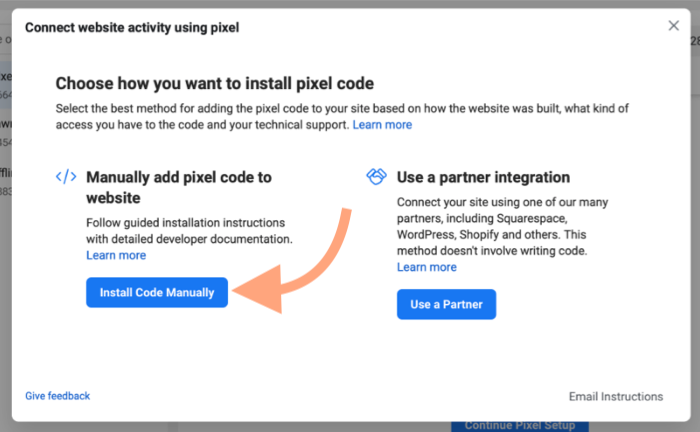
Choose “Install Code Manually” to get Facebook Pixel code for Shopify.
Now, the Facebook (Meta) Pixel code will be displayed on the screen, copy it.
Step 2: Go to Shopify Theme Editor
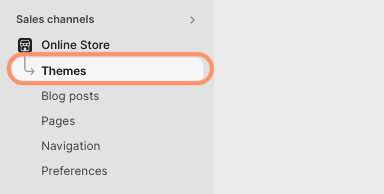
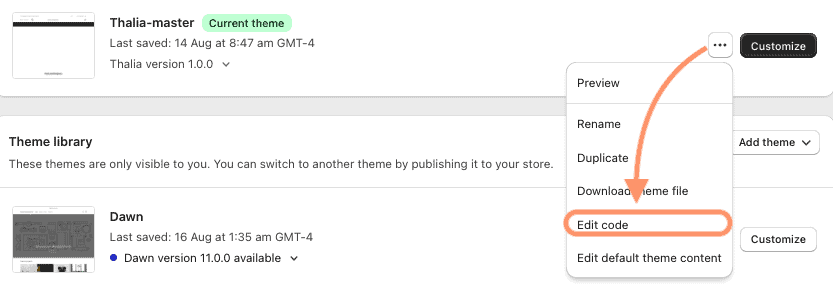
Now, log into your Shopify admin and go to Online Store > Themes
Click the three dots left to the Customize button and click “Edit code” from the dropdown.
Step 3: Add Facebook Pixel Code to Shopify theme.liquid File
The Shopify theme editor will display all the theme files.
Look for the theme.liquid file and open it.
Paste the copied Facebook Pixel (Meta) code under the <head> tag as shown below.
Click “Save.”
That’s how easy it is to manually add Facebook Pixel code to Shopify.
Facebook Pixel for Shopify: Tips
Here are some things to keep in mind while adding Facebook Meta Pixel to Shopify:
- Always test the Facebook Meta Pixel code in Shopify after installing
- If you’re using multiple themes, remember to deploy Meta Pixel to all of them
- In case of any issues, use the Facebook Pixel Helper Chrome extension to debug
- If you’re not proficient with Shopify themes, hire a Shopify expert to help you
Meetanshi is a leading ecommerce development company. We have a team of Shopify experts you can hire to help you set up Meta Pixel conversion tracking in Shopify.