Building a Shopify store in India is much easier as you skip past the complex technical processes.
In this piece, learn how to create a Shopify store in India step-by-step to successfully launch your business.
Set Up a Shopify Store in India: Requirements
To build your Shopify store in India, you will need:
- A registered business
- GST registration
- Domain name
Based on your business type (a sole proprietor or a private company), you must register your business as it keeps you within the legal laws and improves your credibility.
Next, having a GSTIN (Goods and Service Tax Identification Number) is a must to charge and collect tax. While small businesses with a turnover of less than ₹40 lakhs are exempted from the GST registration.
Lastly, you need a domain name that fits what you are offering. You can get a domain directly from Shopify or use third-party providers like GoDaddy.
How to Start a Shopify Store in India?
Step 1: Create a Shopify Store
Start by creating your Shopify store. Go to Shopify and click on the free trial. Fill in the necessary information and select a plan that fits your budget.
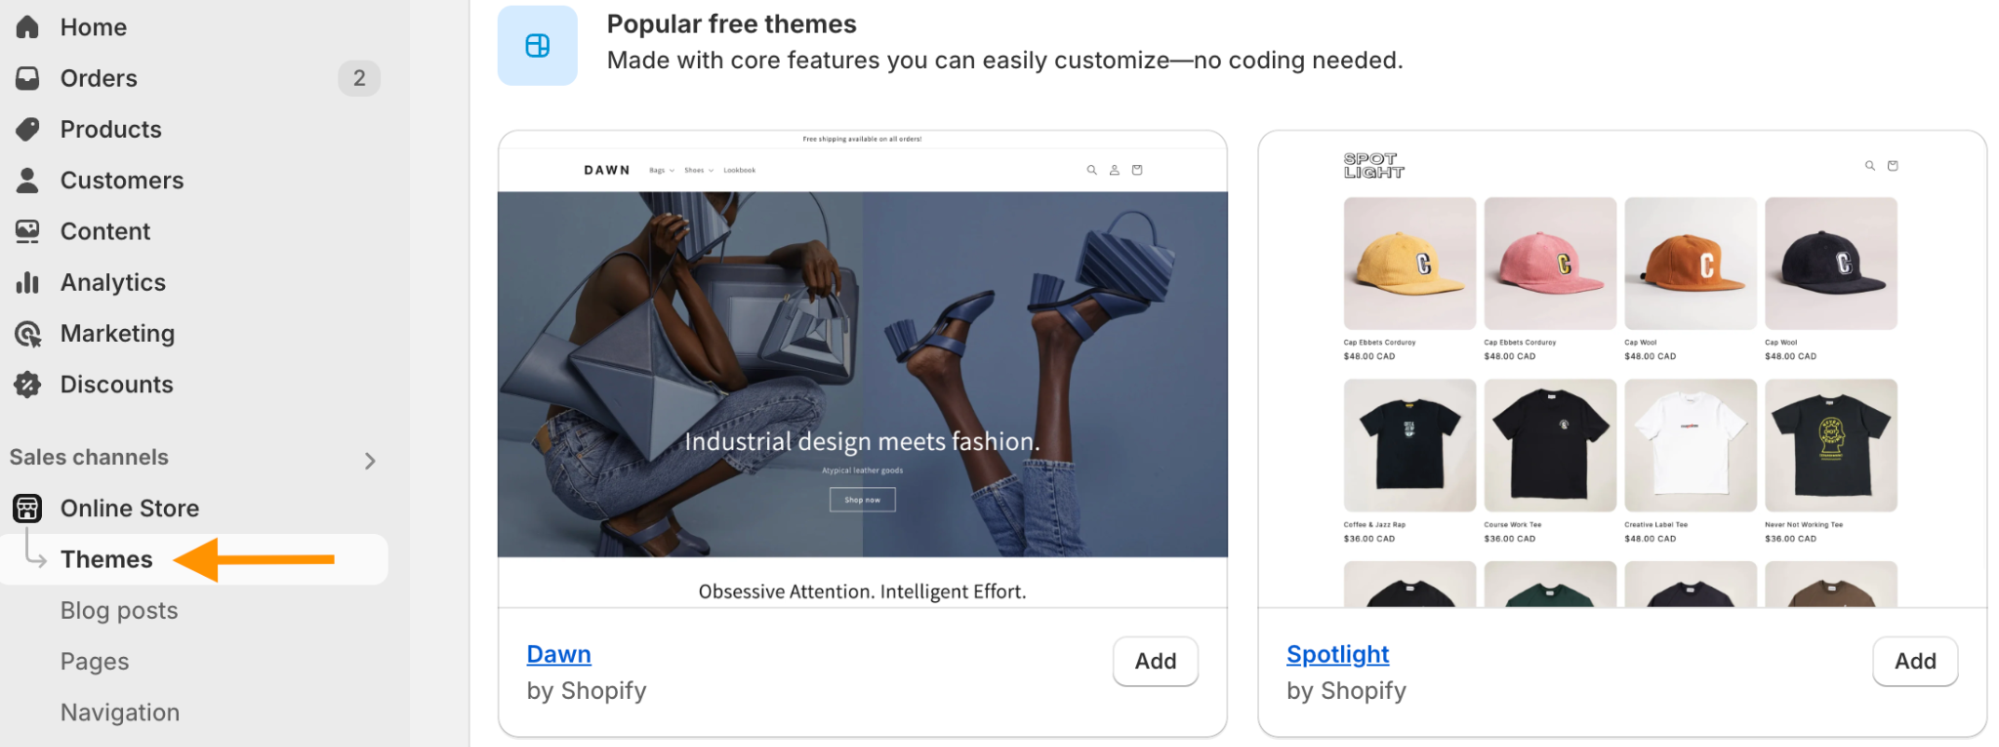
Step 2: Install & Customize a Theme
Now, start giving a visual look to your store by selecting a theme of your choice. By default, Shopify uses the Dawn theme.
In order to pick any other theme, head to Sales channels > Online Store > Themes. Select any theme available from the theme library and customize your store with its elements.
Step 3: Create Products & Collections
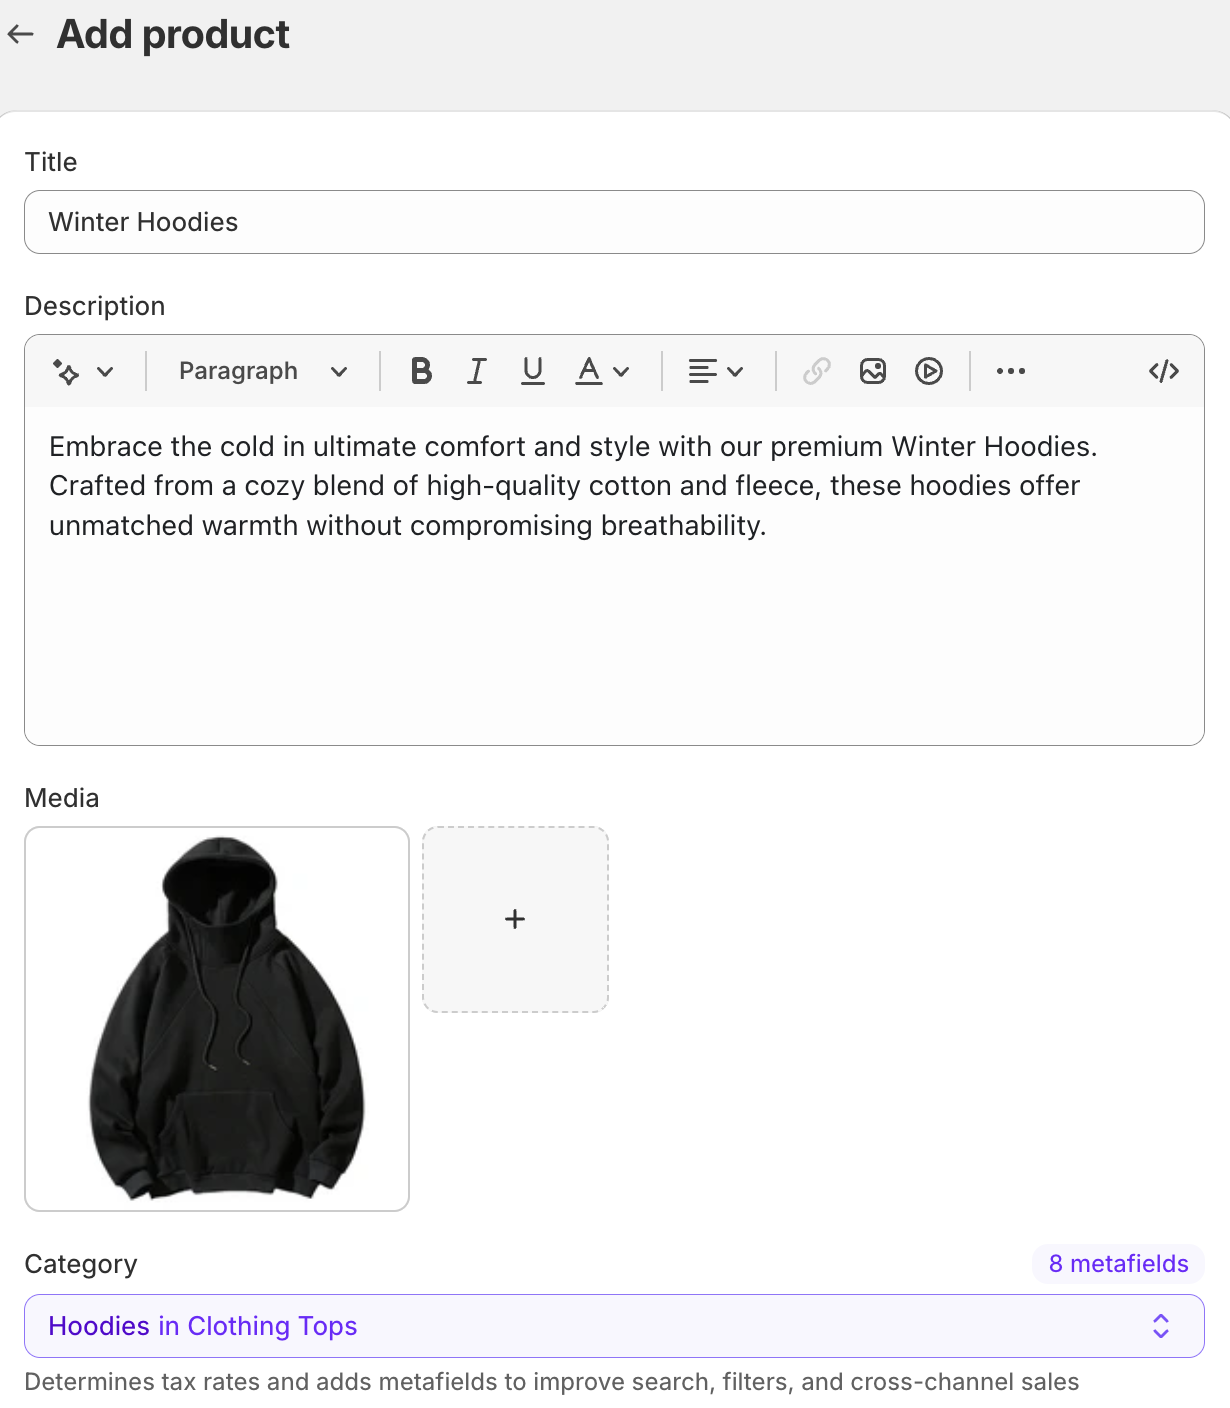
Head to Products > Add product to start adding products in your store.
You can either upload each product manually or use a CSV to upload them in bulk. In this case, let’s see the manual process.
Your product page section is loaded with important fields for you to fill.
Start with adding a crips title, explain your product in the description tab, add a high-quality image in the media section, and give it a category.
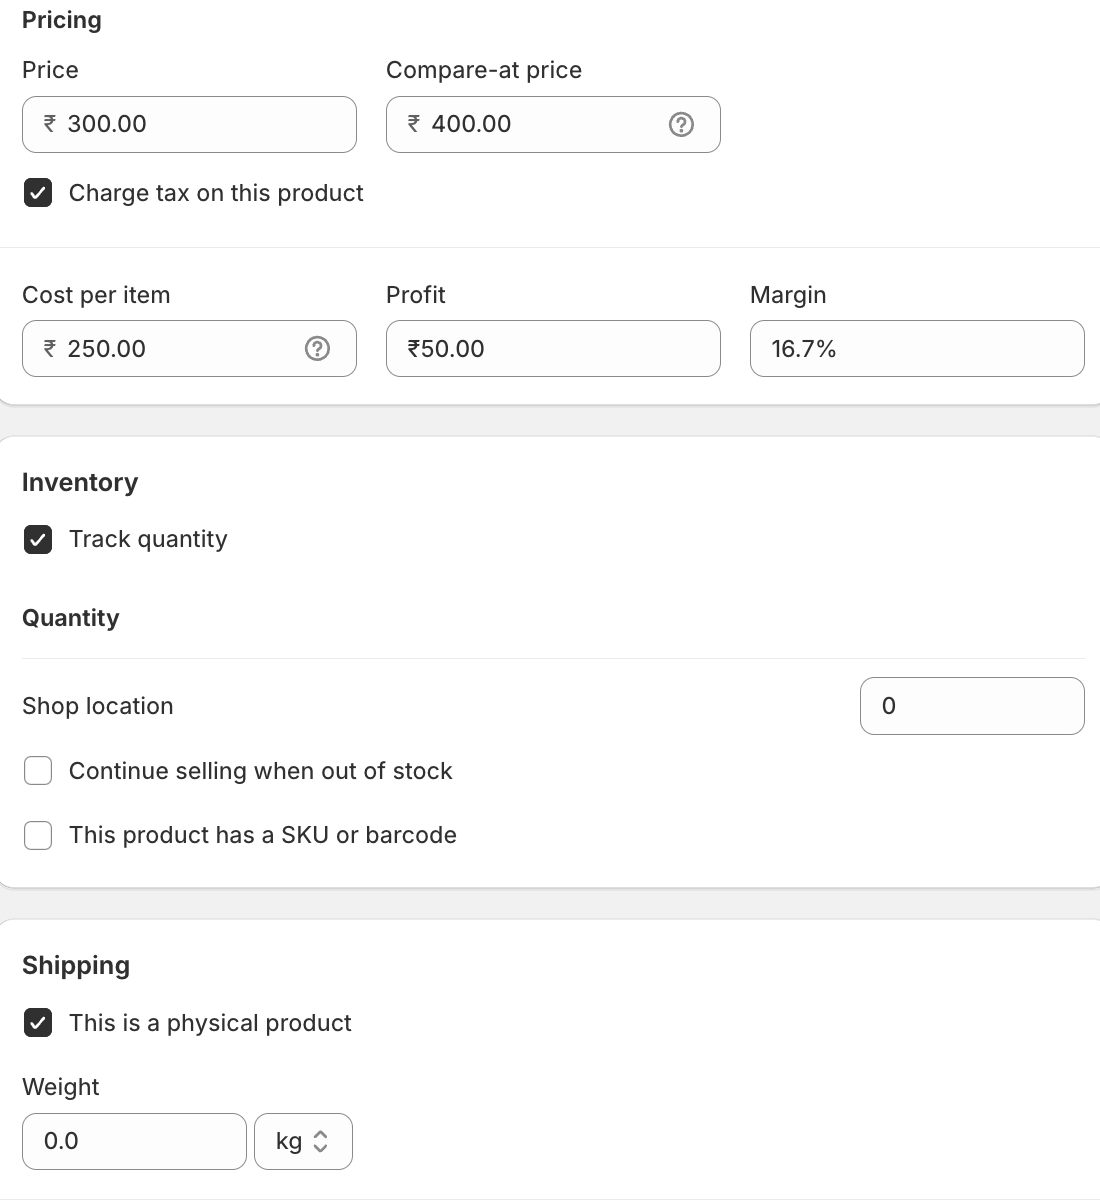
Scroll down and set the pricing of your product here. You get two options:
- Price – Payable amount by the customers
- Compare-at price – Strikes the original price with the product price
Check the inventory for complete records with Shipping (if you are not selling a digital product).
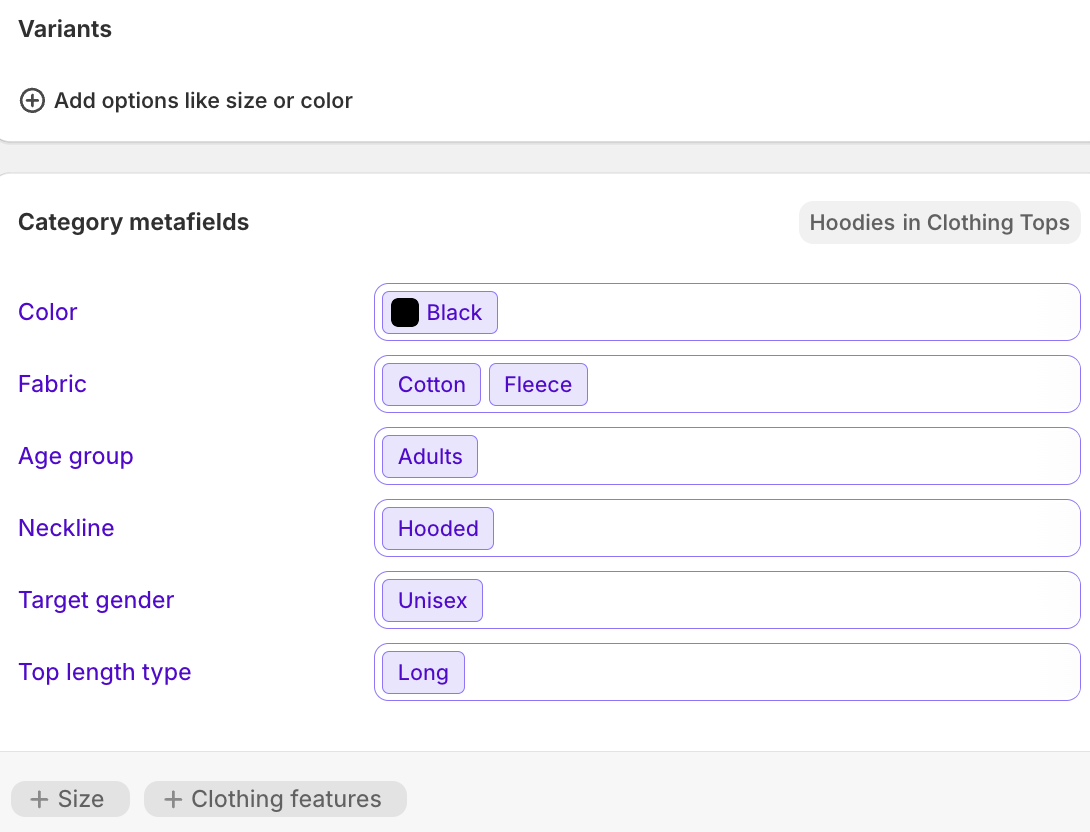
If your product has different variations, add them based on color or size. Here, Shopify will also suggest some meta fields based on your product and the category you chose.
The last section here is essential to get traffic to your store. Write an SEO-friendly title, meta description, and URL.
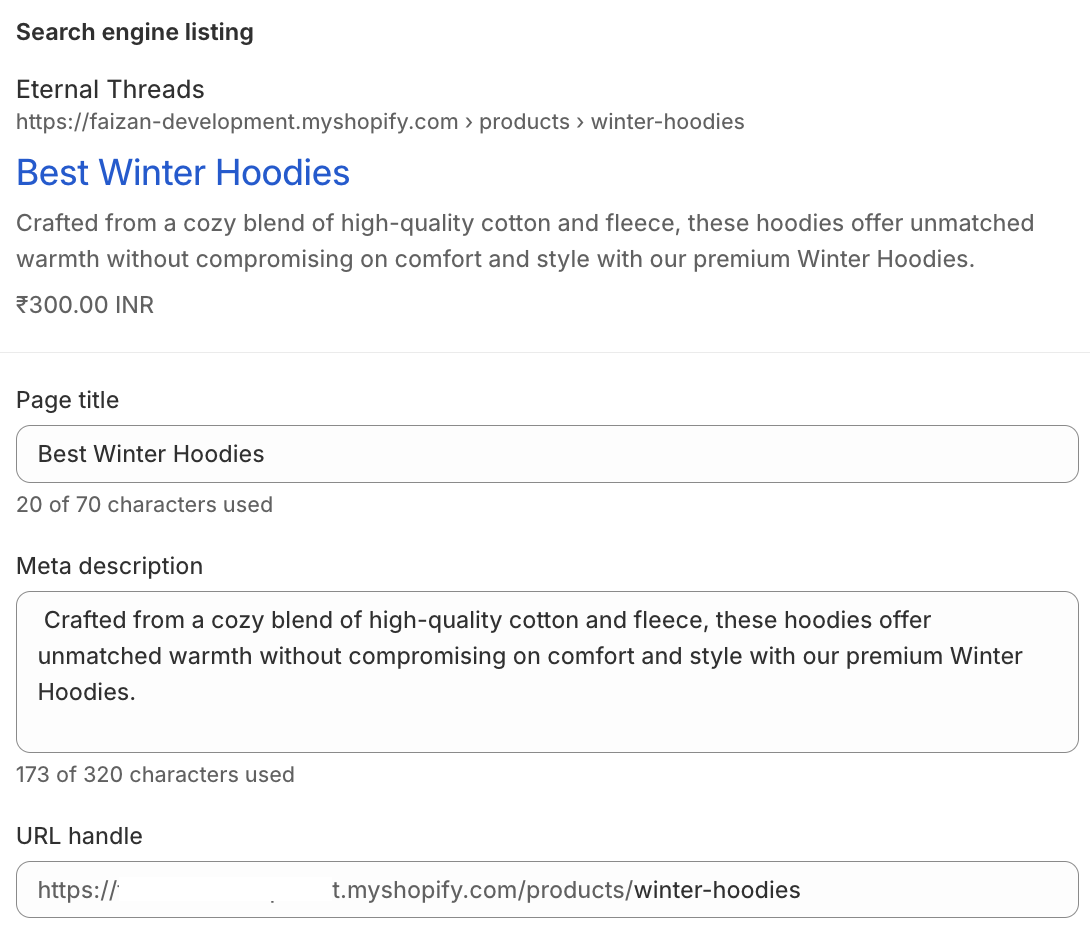
We recommend spending some time here writing quality titles and meta descriptions as it has an impact on your ranking. If you need help writing quality content, you can use an AI content generator app (free plan available).
Then head to the top right of the page, set your store’s status as active or draft, and click Save.
Now, move to creating collections that are basically your product categories. Head to the Collections tab and start creating a manual or automated collection.
- Manual – Manually assign products to the collections
- Automated – Based on the set conditions, products are automatically assigned to the products
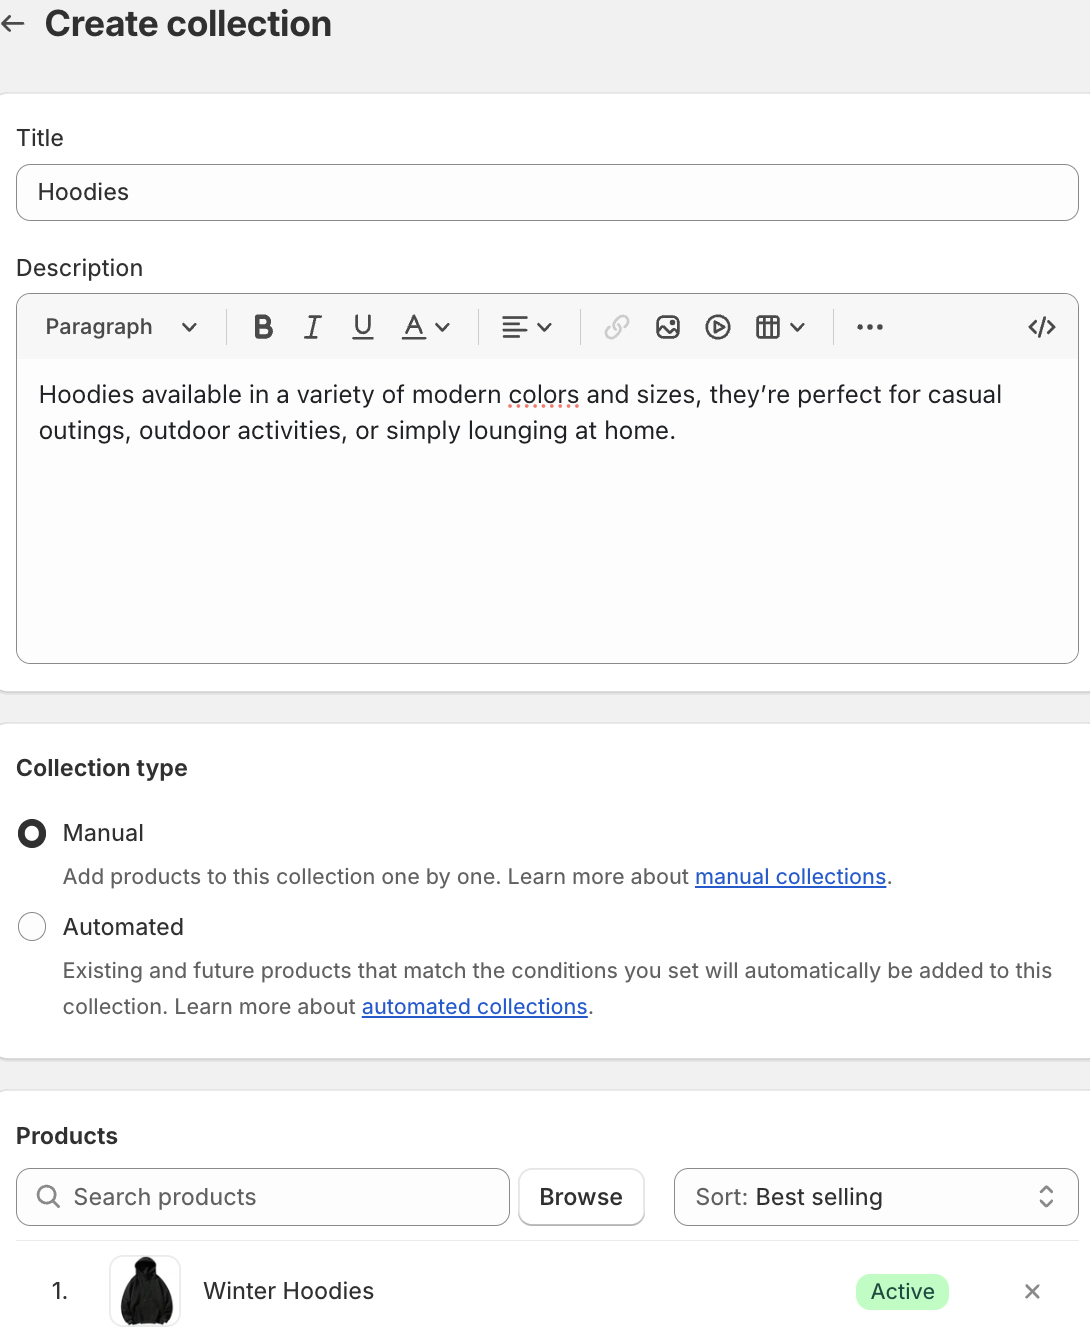
Create all the needed collections and organize your product accordingly.
Step 4: Integrate a Payment Method
You will have to integrate a payment method to start accepting payments for your store.
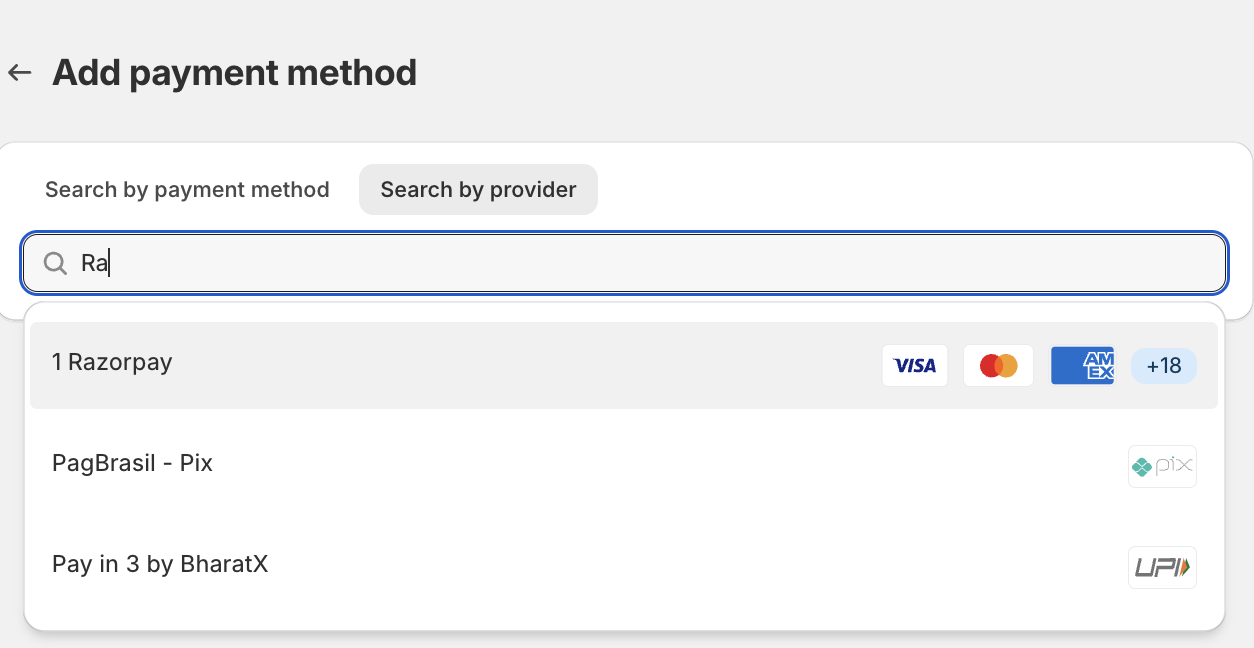
For this head to Settings > Payments > Add payment method.
You can search for your desired payment method and add them to your store. Paypal, Razorpay, and CashFree are some popular payment providers in India, but make sure you check the transaction fee for each as it is different per payment provider.
In the payment section, you will also see two major boxes: Payment capture method and Manual payment methods.
- Payment capture – Select how you want to capture payments
- Manual payment methods – Offer different ways for your customers to complete their payments
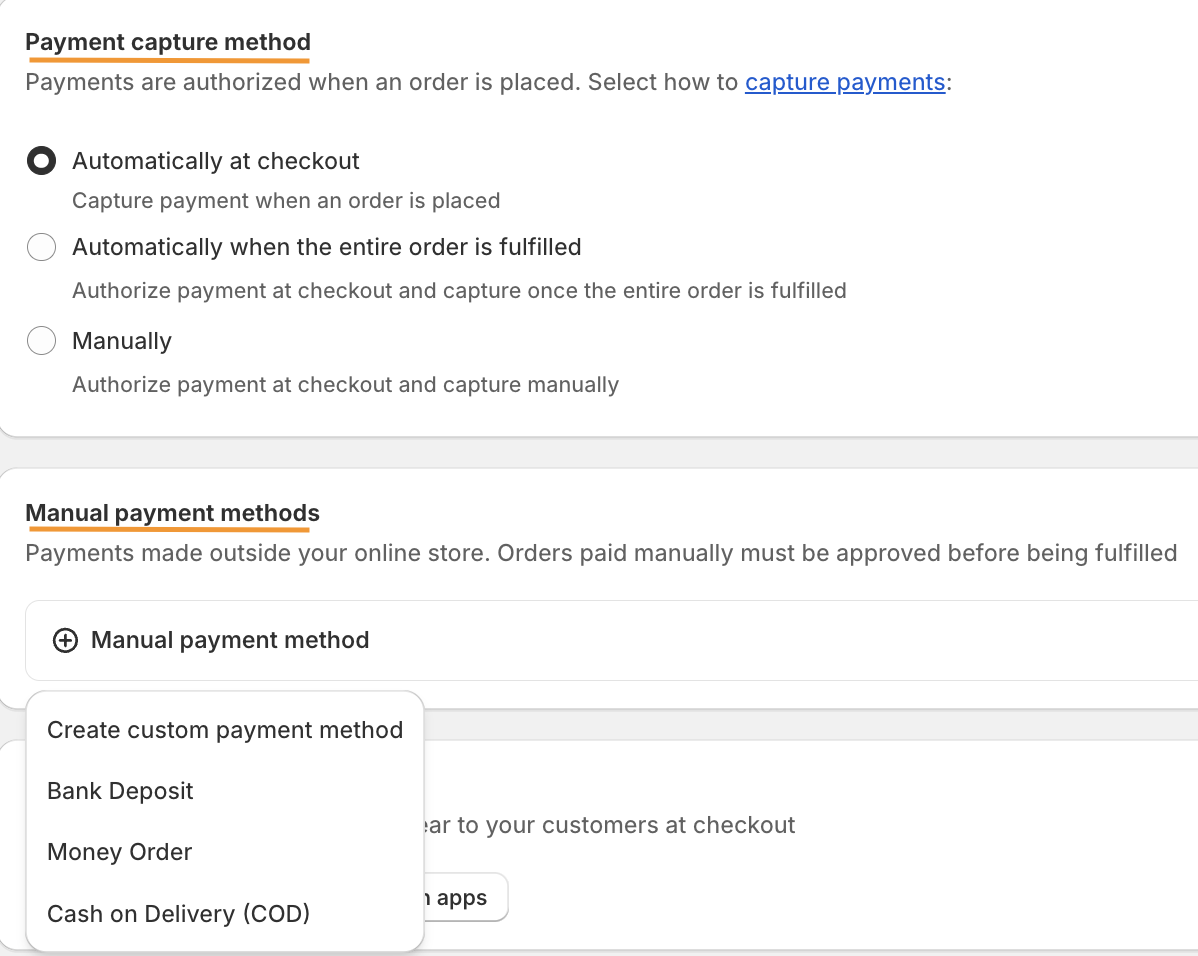
In order to customize your payment method, you can also limit COD to certain locations to make sure your profit is not harmed.
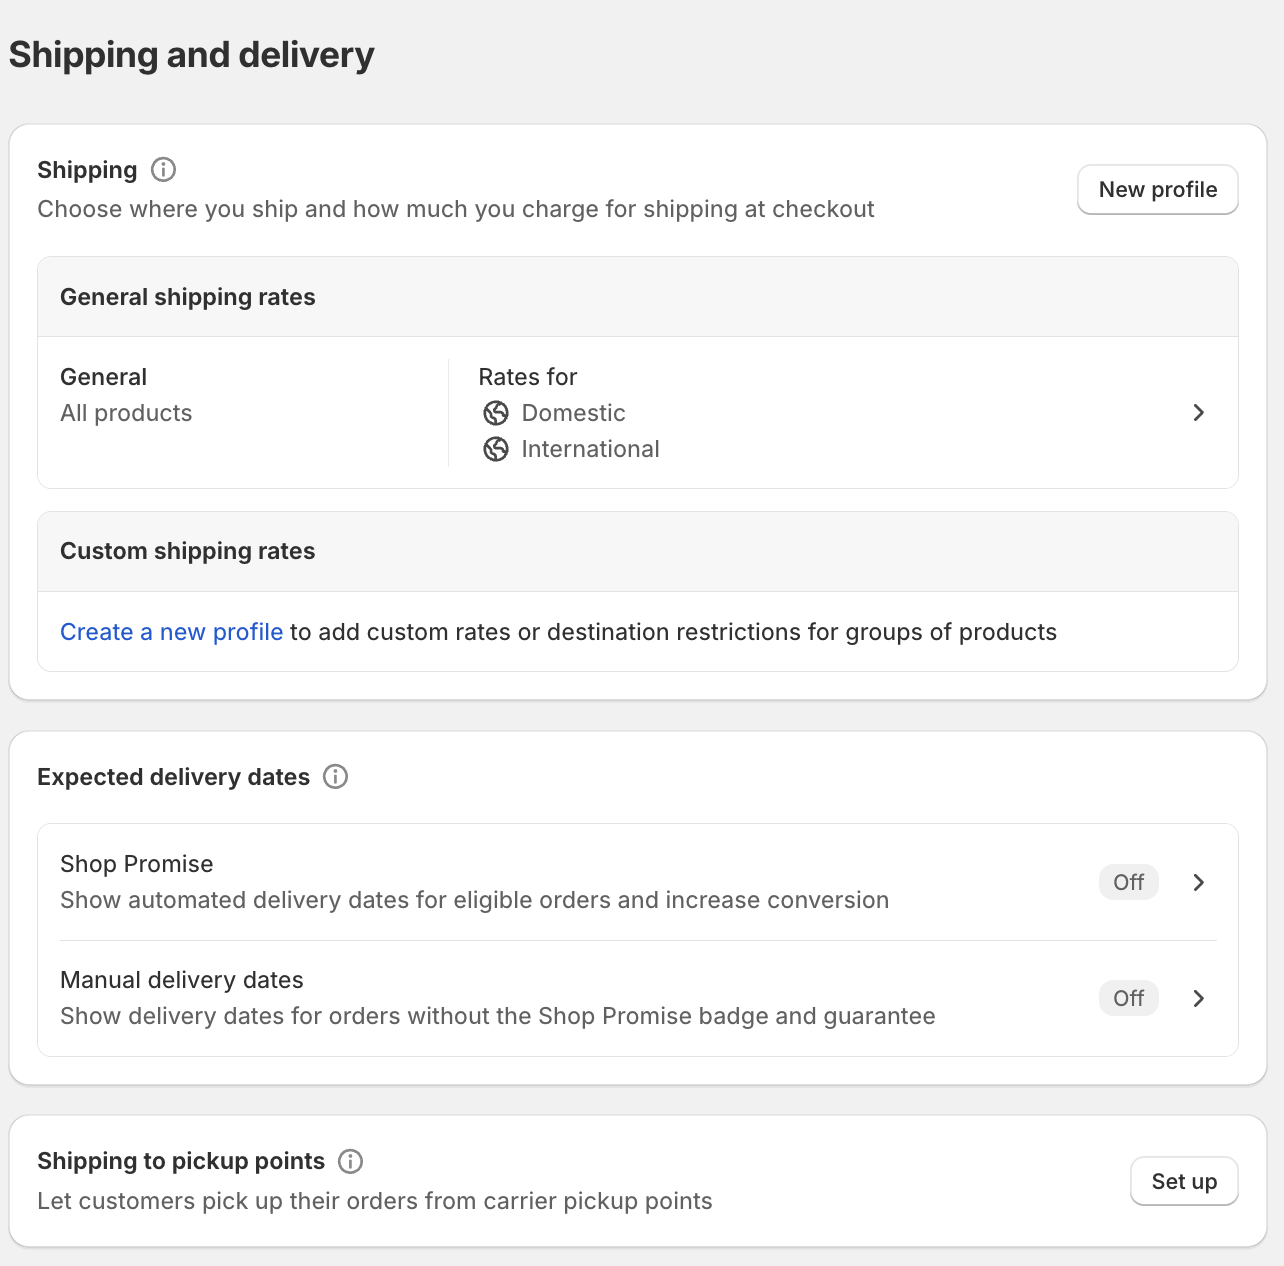
Step 5: Partner with Shipping Carriers
Shopify partners with various shipping providers to deliver your product; FEDEX, DHL, and UPS are popular in India.
From the Shipping and Delivery section, add the needed information.
Step 6: Configure Shipping & Taxes
Now, to set tax and tax rate from the same dashboard, navigate to Taxes and Duties. From the list of countries, select India and set the default rates.
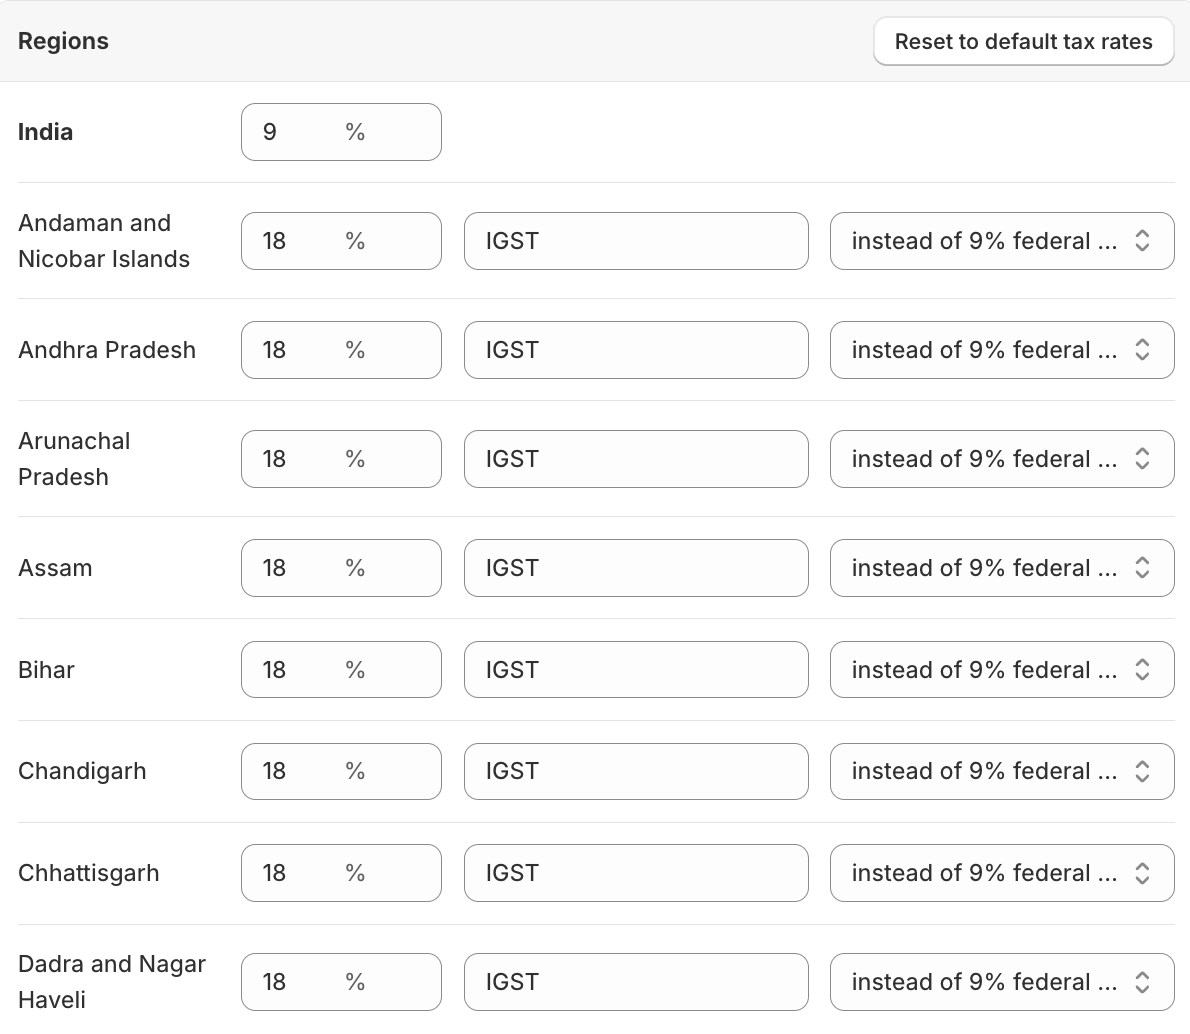
In case you are selling products that need to be taxed at different tax rates, you will need to add tax overrides.
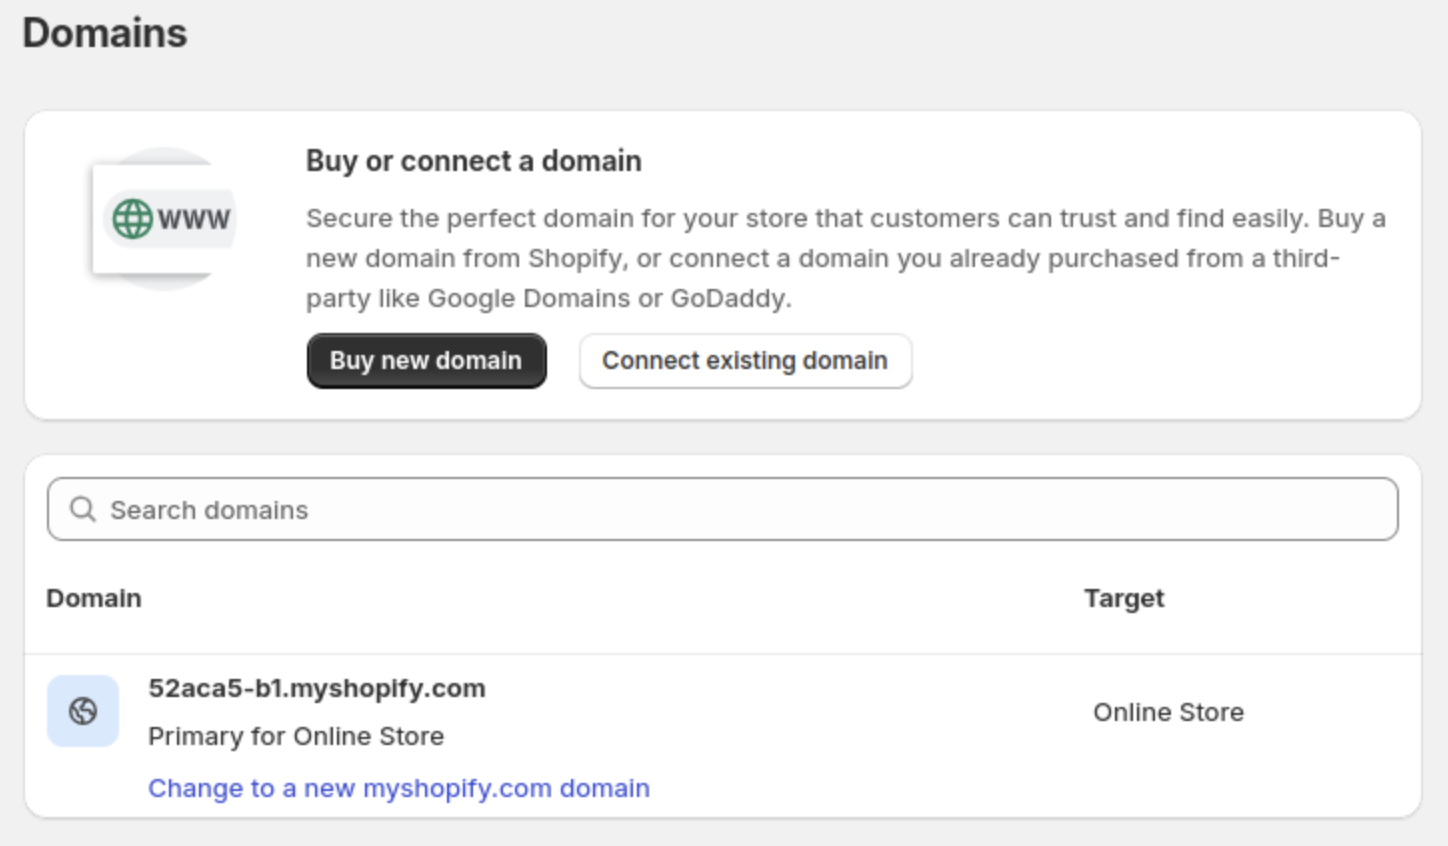
Step 7: Connect a (.com/.in) Domain
Set your Shopify domain to make it easy for your customers to find your store. The default Shopify store gives you a domain like your-store-name.myshopify.com, which has its branding. You can either go with this or use a custom domain.
Step 8: Launch & Market Your Store
After everything looks good, it is time to launch.
Head to the Preferences tab and remove the password protection to make your store live.
When your store is new, it is hard to get traffic instantly, so spread the word on social media and use effective marketing strategies to grow your Shopify store.
While you take marketing measures to spread the word about your store, it is essential to track your store’s performance and user behavior — connect your Shopify store to Google Search Console and Google Analytics.
Better Option: Partner with a Shopify Agent to Launch Your Store
Building an online store is easy, thanks to Shopify, but you need to add powerful elements like SEO in your store to withstand the competition and manage the technicalities to avoid any breakdowns.
Doing this yourself without the right knowledge can slow down your launch time.
That’s why partnering with a Shopify agency like Meetanshi eliminates your need to create or manage anything, as it offers a complete end-to-end solution, helping you build a scalable and stable store on time.
This table will show you why hiring a Shopify developer in India makes a difference.
| Elements | Shopify Agent | DIY Approach |
| Key Focus | To build a successful online Shopify store | While you have many hats to wear, the focus can get diverted here |
| Technical expertise | Instantly offers technical solutions to optimize your store accordingly | You will need to learn the solution and apply them wherever needed |
| You will need to learn the solutions and apply them wherever needed | There is an upfront cost, but the benefits you enjoy outweigh the price you pay | A cheaper option, but in case of any mistake from your end, it can get expensive and affect your sales |
| Overall management and optimization | Works on actionable pointers for your store to drive more business | You might miss elements like page speed optimization, SEO, and more that can slow your store |
As you put your focus on different areas of your business, a Shopify developer will prioritize going over the basic functionalities, adding security measures to keep your store safe, creating custom theme code to add unique features to your store, optimizing your store for speed and better visibility on mobile, and more.
A Shopify agency can easily turn a basic store into a powerhouse that drives sales.
Frequently Asked Questions
Is Shopify Profitable in India?
Yes, with the rapid growth in internet usage and online shopping, users are looking for an online purchase rather than an offline one. If your store is user-driver and works smoothly at each level, then nothing is coming between in making it successful.
How Much Does it Cost to Open a Shopify Store in India?
The Shopify charges in India start at ₹1,499, and other costs here will be your domain registration between ₹1,000-₹1,500 and transaction fees depending on the payment provider.
Does Shopify Need GST in India?
If you are a small business with a turnover of less than ₹40 lakhs, then you might not need GST. Otherwise, you would.
What Are Some Popular Shopify Stores in India?
Some popular Shopify built in India are Yogabars, GoNoise, and Mamaearth.
Launch a Successful Shopify Store
Starting a Shopify store in India is no longer a challenging task.
However, the real challenge is moulding your store to survive other industry players and adding features, functionality, customizations to make it user-friendly.
While this is not a one-person job, our Shopify developer can work with you closely and build a robust Shopify store them that goes above and beyond the basics.
Let our Shopify experts create a custom theme to boost and elevate your customer experience.
Learn More