Want to create product catalogs in Shopify? Good idea!
Product catalogs are immensely helpful in offering product information to customers in one place. They’re like virtual sales reps from your online store.
And you don’t need to hire a professional designer for that. In this tutorial post, I am going to share a super-easy way on how to create a catalog on Shopify.
What is Shopify Product Catalog?
Shopify Product Catalog is the compilation of all the products you sell online. It contains product information like product name, image, prices, and description. Back in time, the physical product catalog helped customers easily explore the products offered by the brand. However, digital product catalogs (PDF) are also becoming popular these days.
Note: Do not confuse Shopify product catalogs with B2b catalogs, which is a feature available to Shopify Plus users only. They’re a set of products that you can choose to sell to B2B companies and customize the buying experience for your wholesale customers.
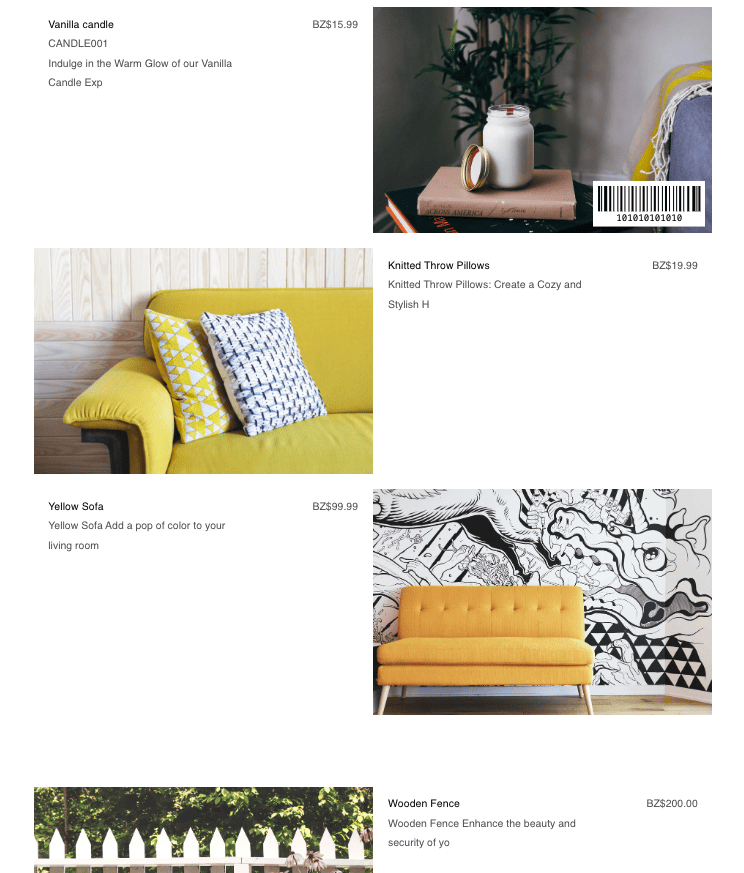
For example, here’s a screenshot of a simple product catalog of a home decor store:
Why Add Product Catalog to Shopify?
Creating product catalogs in Shopify benefits your business in multiple ways, such as:
- Reach customers on other channels, e.g., WhatsApp, through digital product catalogs
- Help B2b visitors download product catalogs and show them to their customers
- Train offline sales reps with product information available in the store
Overall, the benefits of creating product catalogs in Shopify will help you reach more customers, sell more, scale your business, and make more money.
Let’s learn how to make a catalog on Shopify.
How to Create a PDF Product Catalog in Shopify?
The Shopify platform does not offer any default functionality to add product catalog features. Thankfully, you can install the Meetanshi PDF Product Catalog app for that. It’s a free and easy-to-use app that lets you create beautiful catalogs in just a few minutes.
The app allows you to:
- Create customized product catalogs
- Add download/print options for customers
- Option to choose from 15+ beautiful layouts
Let’s go through the step-by-step method on how to create catalog in Shopify using the app.
Step 1: Install Meetanshi PDF Product Catalog App
In the Shopify app store, search for “Meetanshi PDF Catalog” or click here to visit the app page directly.
Click the “Install” button.

Follow the on-screen prompts to install the app into your Shopify store.
Step 2: Create a New Catalog
Start with giving a name to your PDF catalog (for example: New Arrival 2025).
Select the collection page where you want to display the PDF Product Catalog in Shopify. Then, add products that you want to show in your catalog.
You can add products directly, using the product filter option, or select a collection.
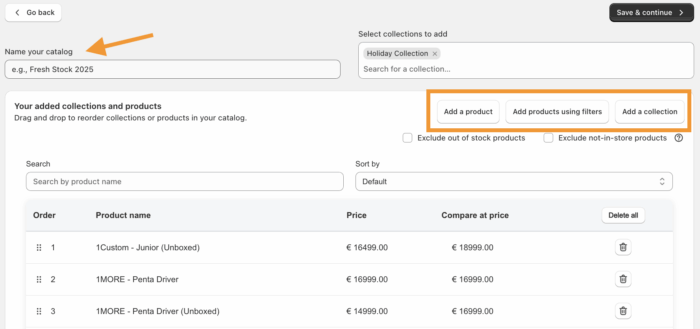
After this, click on Save & continue.
Next, add the general, product, and layout settings.
In general settings:
- Set the font and the color
- Upload your brand color
- Image to go in the front and the back
- & more
In the product settings:
- Select the product attributes you want to display.
- Display a buy now button.
- Set a redirect link when shoppers click on buy now.
- And more
In layout settings:
- Pick an ideal layout to display your store.
You get a live PDF preview to make adjustments to your product catalog.
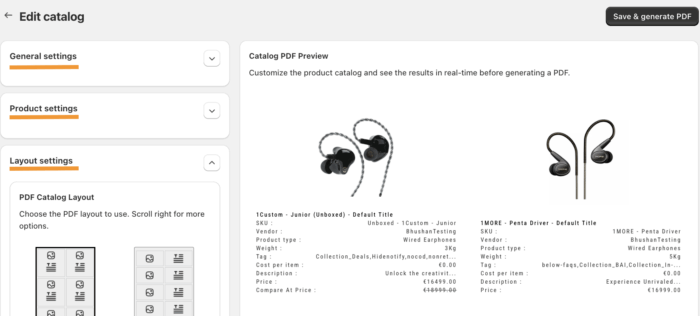
Once done click on Save and Generate PDF.
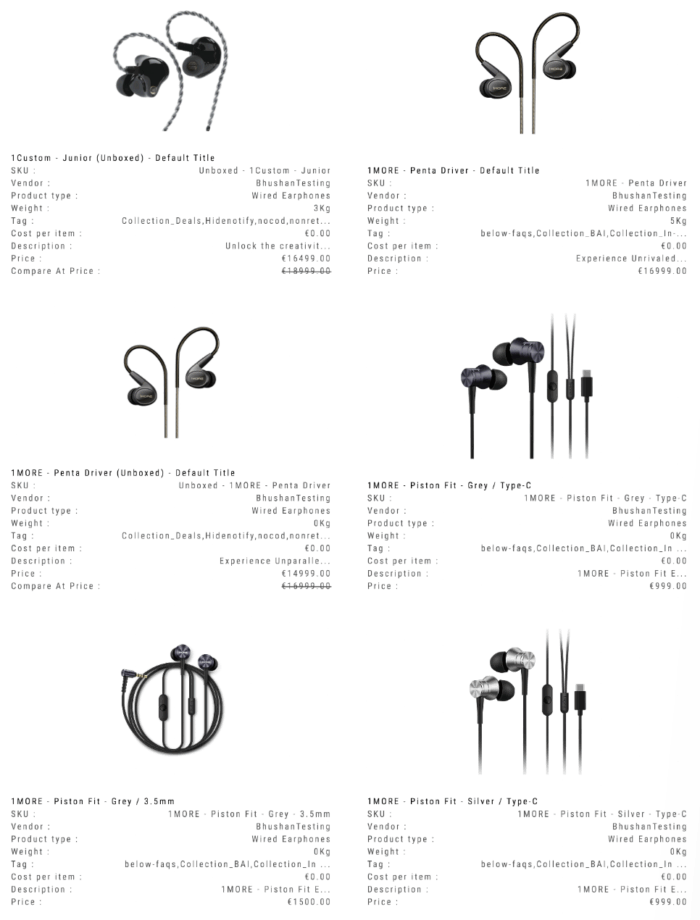
Once created, you can find the product catalog added to the dashboard. Here, you can preview or download the PDF file.

For example, here’s what the created PDF product catalog looks like:
Step 3: Add & Customize Catalog Print Button
The app adds the download/print catalog buttons to the collection pages you set during the catalog creation. But for that, first you’ll need to enable the app from the theme settings.
To do that, go to the app dashboard and click “Theme Settings.”
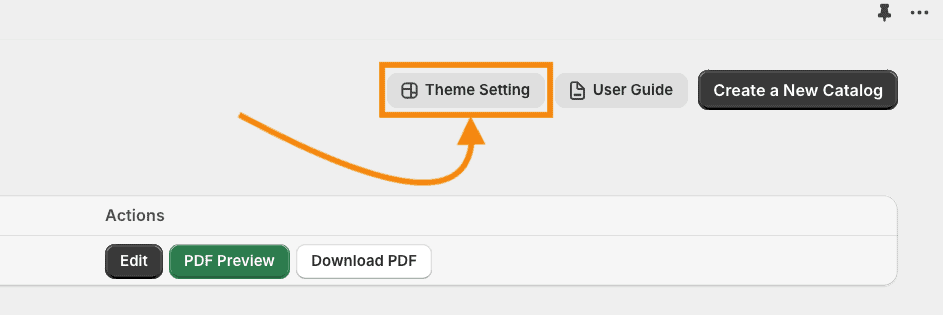
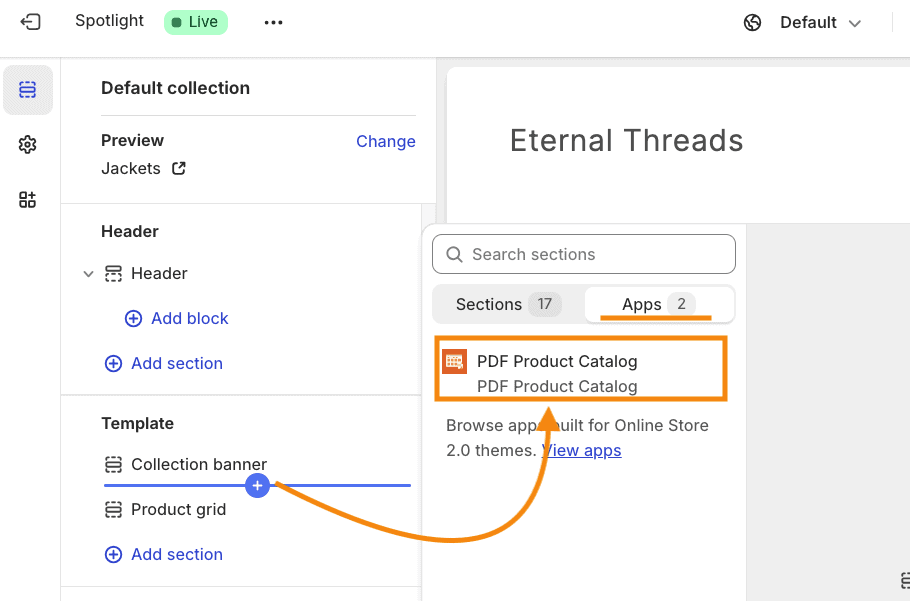
In the theme settings, add a new section for the product catalog button using the PDF Product Catalog app as shown below. (You can add the section wherever you want to add the catalog button on the collection page.)
Now, adjust the PDF Product Catalog button settings as per your needs. Here, you can change the button label, its width, colors, and more.
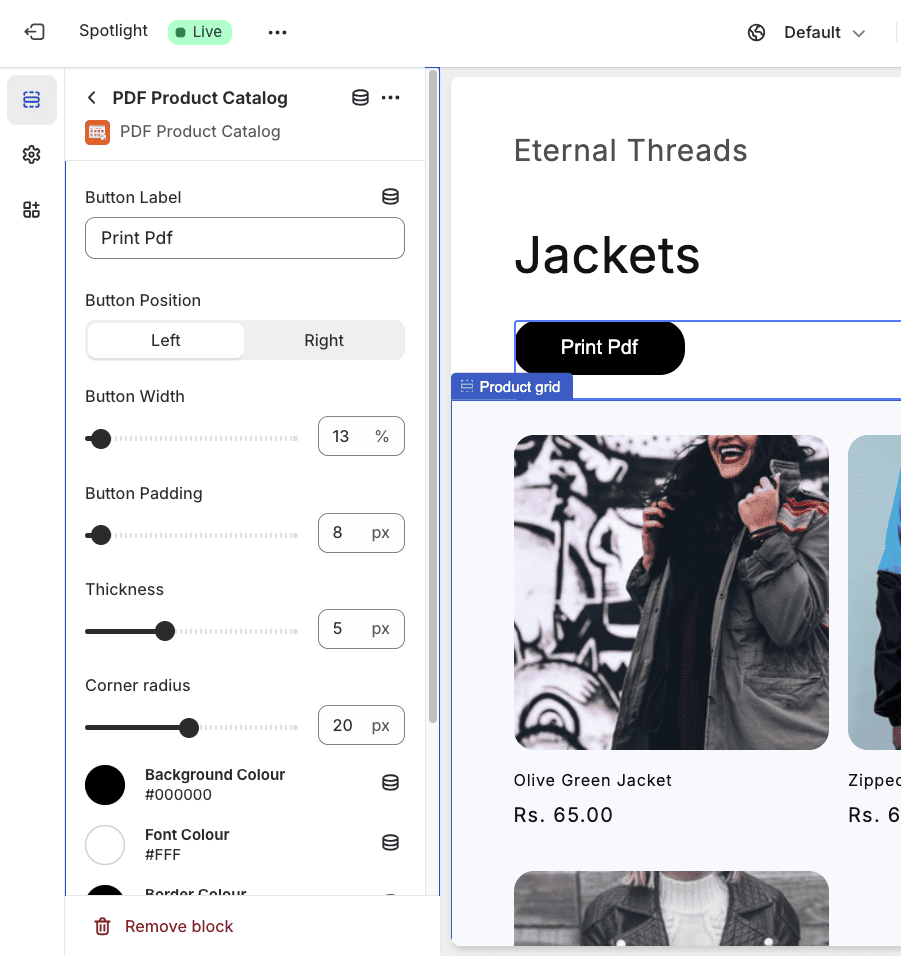
Once done, click the “Save” button on the top-right.
Finally, here’s what the PDF Product Catalog button will look like on the collection page:

The Shopify PDF Product Catalog button will be added to all the collections you’ve created catalogs for. You can view that from the dashboard. And to hide the button on any collection page, simply disable the catalog assigned to it from the dashboard.
That’s how straightforward it is to create catalog in Shopify in minutes.
Turn products into PDF catalogs that your customers can download, print, and share.
Turn Now
Start Creating Beautiful PDF Product Catalogs in Shopify
You see–creating a PDF product catalog on Shopify is straightforward using the Meetanshi PDF Product Catalog app. It’s free to get started and offers a variety of layouts and customization options to design the catalogs as you want.
