Today, I will show you how to charge sales tax on Shopify based on your store’s location.
Collecting sales tax on Shopify is essential to comply with the tax rules, irrespective of your store’s location. Avoiding sales tax can cut down your profit, ultimately affecting your business growth.
So, follow along to avoid this situation.
Prepare Your Shopify Store to Collect Sales Tax
Before we jump into the steps of activating sale tax in your Shopify store, you must have these key components ready.
Firstly, register your business with the local tax agency.
The tax agency will be based on the location of your store. You might be charged for your registration, while some states offer it for free. This completely depends on your area of operation.
After registering, you will receive a Sales tax ID.
The sales tax ID is issued by the tax authorities, allowing you to charge taxes for products or services in the area you are operating in. Also, it helps you to override tax rules and easily create your tax reports.
You can register yourself or take the help of a tax advocate; after you get your sales tax ID, you can start setting up your sales tax for your Shopify store.
How to Charge Sales Tax on Shopify: Step-by-Step
Follow these steps to start your Shopify sales tax setup
Step 1: Communicate Your Store’s Location
Log into Shopify admin and go to Settings > Tax and Duties.
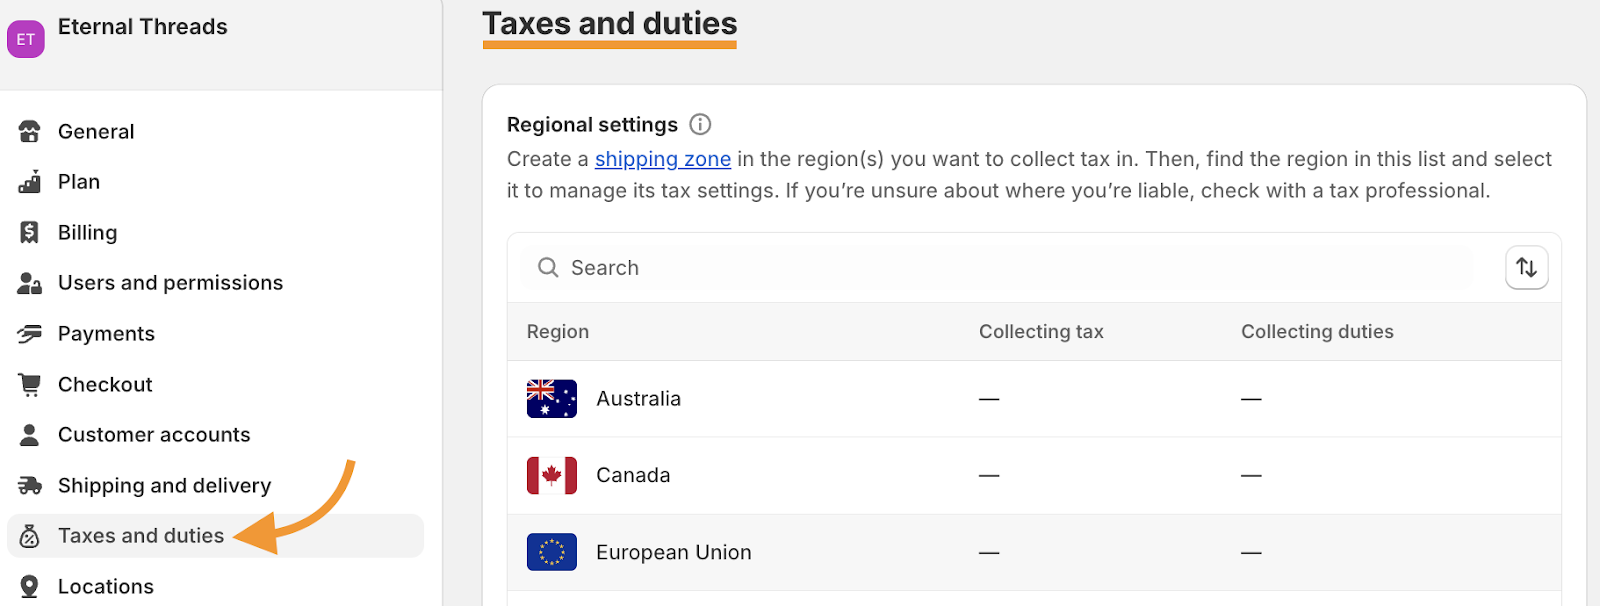
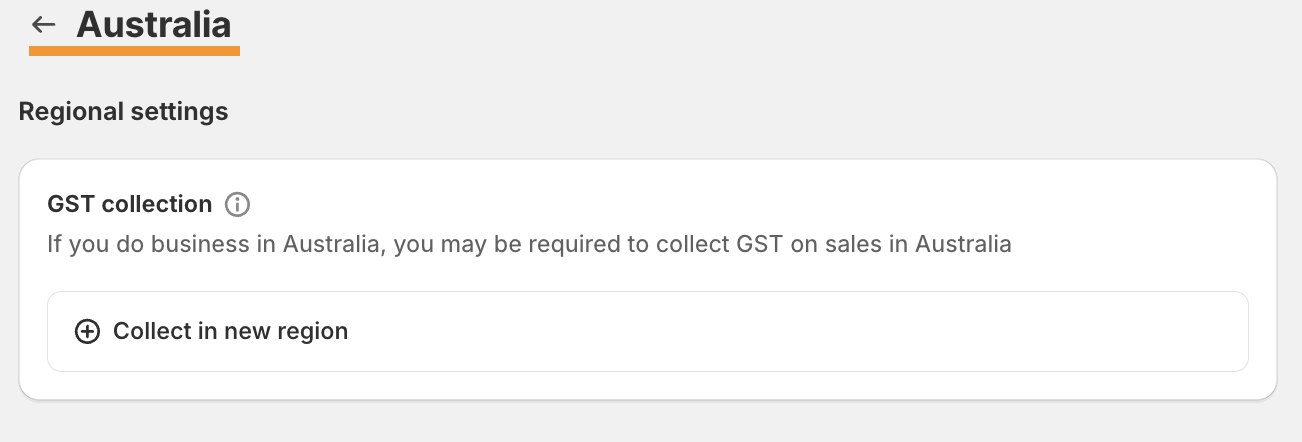
Here you will need to tell Shopify the area your store is operating from. You can go location-specific here, as Shopify allows you to collect taxes from the US, GST in India and Australia, and the EU and UK.
For example, if we selected Australia here, you will have to fill out the GST details.
Step 2: Add Your Sales Tax ID
Scroll down to the Manage tax collection section and click on Start Collection.
Select the state you want to collect sales tax, enter your sales tax ID (you can enter it later if you don’t have one yet), and click on the Collect sales tax button.
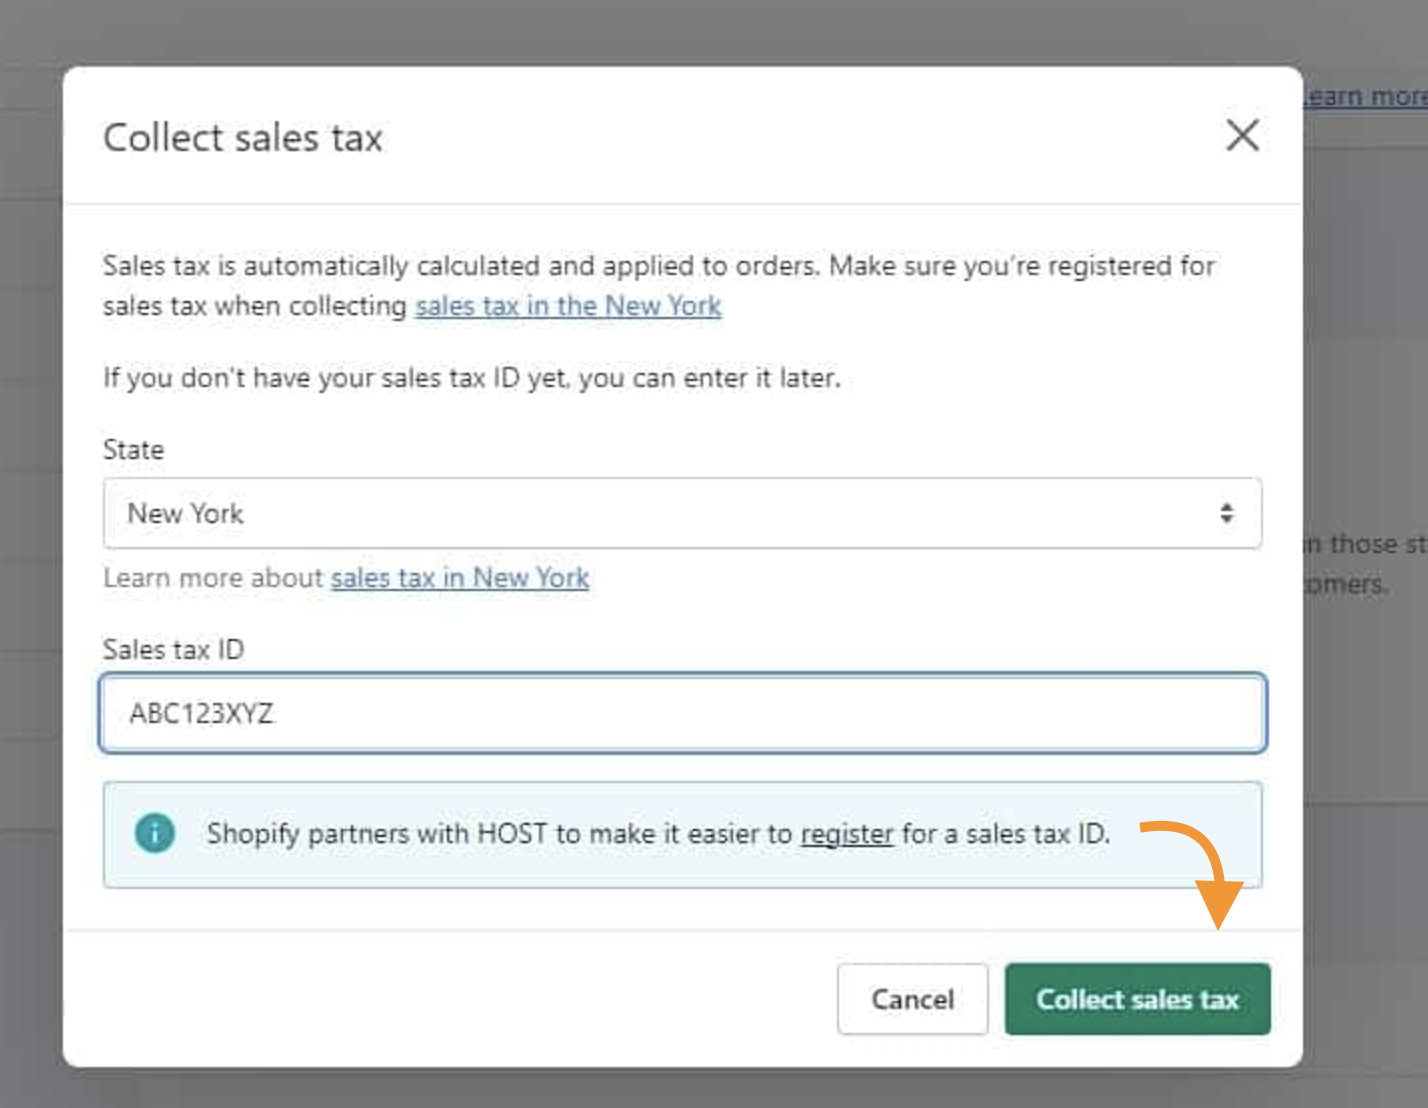
You can repeat this process to add another state.
Step 3: Select Your Tax Calculations
Now, head back to the Taxes and Duties tab, scroll down, and you will find the Global settings section.
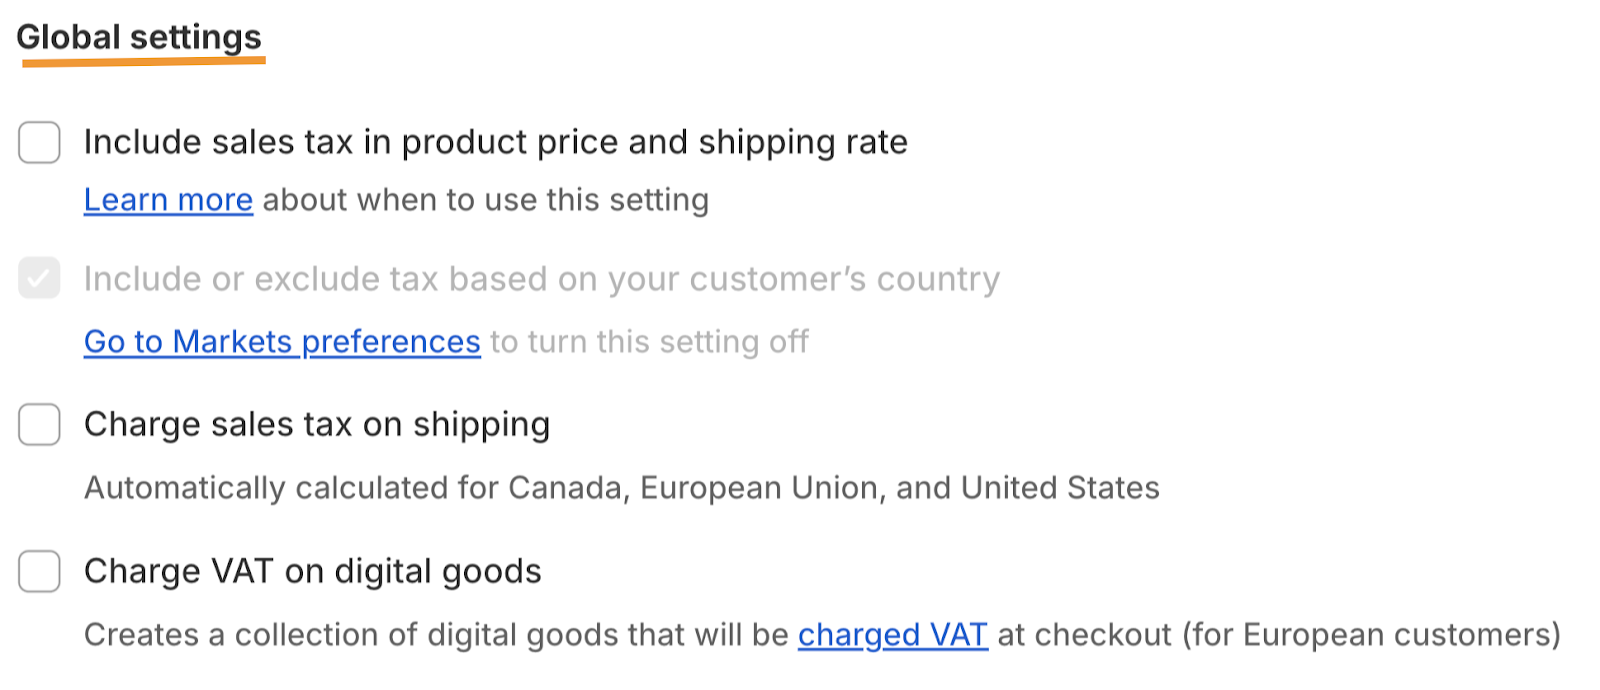
Here, you will find four options to choose from. You can tick multiple checkboxes if required.
- Include tax in prices: Tax will be applied to all products including the shipping cost.
- Include or exclude tax based on your customer’s country: Here, Shopify will automatically decide the tax rate based on the customer’s location.
- Charge tax on shipping rates: You can include your shipping rates for products for US, Canada, and EU transactions.
- Charge VAT on digital goods: You can add VAT for European customers.
Step 4: Add Tax Overrides for Products
In some countries/regions, the default tax rates of Shopify do not apply to certain products, like some essential products and certain types of children’s products, and might be exempt from the tax.
In such cases, you can create tax overrides for certain products. After this, you have finished the setup of Sales tax in Shopify.
Why is Shopify Store Not Charging Taxes?
There can be an unlikely situation where Shopify won’t charge taxes, but you don’t need to worry about it. Check for the common reasons for this and fix them.
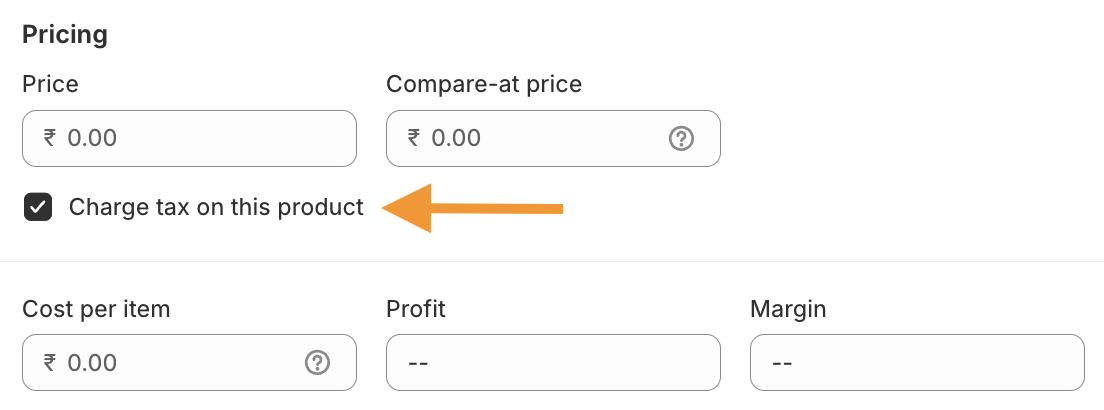
The Product is Not Marked as Taxable
While adding your products to your Shopify store, you missed checking the box that says “Charge tax on this product.”
Simply, head to your Product page, scroll down to the Pricing section and check the Charge tax on this product.
Tax-exempted is Set For a Customer
The second reason why Shopify didn’t collect tax is because the customer was set as tax-exempt. It means that the customer is exempted from paying any tax.
If it is a special case, it is understandable, but if it is was a mistake on your end:
- Go to the Customers page.
- Select the taxable customer
- In the Tax settings, click on Manage, and check the box select Collect tax option.
- Save the setting, and the customer is no more on the tax-exempt list.

Does Shopify Collect and Pay Sales Tax?
No, Shopify doesn’t collect sales tax for you. You are completely accountable as a Shopify store owner to collect and remit the sales tax to the government.
But Shopify comes around in simplifying the process and offers ample resources to manage your taxes better, like:
- They offer tax reports that give you a detailed breakdown of the taxes collected on each order.
- Configure sales tax for international orders like VAT for the EU.
- A handful of Shopify apps to manage taxes based on specific regions.
- They also offer default sales tax rates, which you can cross-check and update periodically in your store.
It is worth noting that a transaction fee is charged of 0.35% for transactions where taxes are calculated.
Frequently Asked Questions
1. Do I Need to Charge Sales Tax on Shopify?
Charging sales tax on Shopify or not depends on the location where you will sell your products. If you are unsure about whether to charge, you can consult local tax professionals.
2. Why Is Shopify Not Charging Taxes out of State?
You will have to use tax overrides and exemptions for your store to collect taxes for purchases outside the states.
3. How To Find Sales Tax Collected on Shopify?
Head to settings > taxes and duties> collected tax report. Here, you will get a detailed report and filter out tax collection state-wise as well.
Easily Create a Taxable Store
Charging sales taxes on Shopify is essential but tricky as well. You can always opt for a Shopify expert to guide you through this process because any mishaps can affect your store’s business.
Don’t leave your store setup to chance—trust the experts to handle it for you!
Hire Us Now