You require specialized workflows that go beyond default functionality.
One of them is adding a custom button to Magento 2 Admin UI component form.
It helps to streamline complex tasks such as syncing products with third-party APIs, triggering custom price calculations, or sending a product through an approval workflow.
Here are the simple steps to adding a custom button to trigger these backend processes directly from the admin interface.
Steps to Add a Custom Button to Magento 2 Admin UI Component Form
We will create a Generate Custom SKU button.
Step 1: Create UI Component XML
Use the code below in the product_form.xml
File located at app/code/Vendor/Module/view/adminhtml/ui_component
<?xml version="1.0"?>
<form xmlns:xsi="http://www.w3.org/2001/XMLSchema-instance"
      xsi:noNamespaceSchemaLocation="urn:magento:module:Magento_Ui:etc/ui_configuration.xsd">

    <settings>
        <buttons>
            <button name="generate_custom_sku"
                    class="Vendor\Module\Block\Adminhtml\Product\Edit\Button\GenerateSku"/>
        </buttons>
    </settings>

</form>
Step 2: Create a button in the GenerateSku.php file
Create the GenerateSku.php file at the location app/code/Vendor/Module/Block/Adminhtml/Product/Edit/Button and use the code below:
<?php

namespace Vendor\Module\Block\Adminhtml\Product\Edit\Button;

use Magento\Framework\View\Element\UiComponent\Control\ButtonProviderInterface;
use Magento\Framework\Registry;

class GenerateSku implements ButtonProviderInterface
{
    protected $registry;

    public function __construct(
        Registry $registry
    ) {
        $this->registry = $registry;
    }

    public function getButtonData()
    {
        $product = $this->registry->registry('current_product');

        if (!$product || !$product->getId()) {
            return [];
        }

        return [
            'label' => __('Generate Custom SKU'),
            'class' => 'primary',
            'on_click' => "setLocation('your_custom_controller_url_here')",
            'sort_order' => 90,
        ];
    }
}
Step 3: View the Button on Product Edit Page
Now, you can clear the cache and check the product edit page. Your new custom button will appear in the top-right corner of the product Edit page, like the one below:
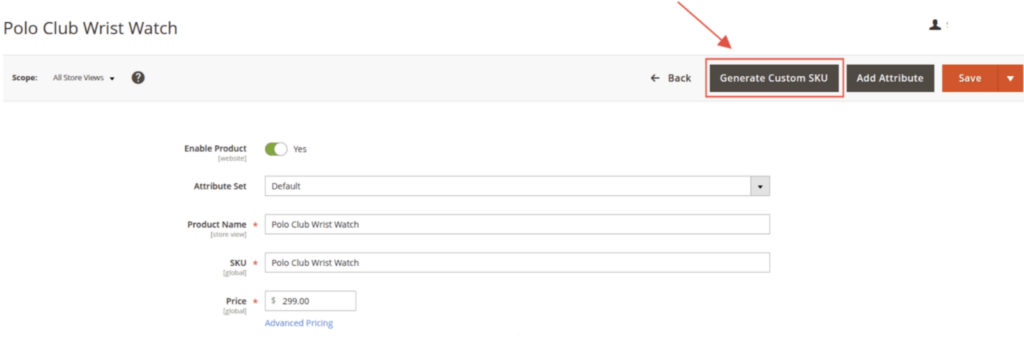
That’s all!
Adding a custom button to the Magento 2 admin UI component form is a clean and scalable way to extend functionality without modifying core files.
