The faster your customers can reach you, the better their experience and the higher the chances of conversions.
One way to achieve this is a click to call button.
It is more like a Telegram chat or Whatsapp chat button you keep on your store, but here, visitors directly call you instead of chatting.
In this blog, get the direct solution to add click to call button in Shopify without any third-party app or need of technical help. Just follow the steps to activate the click to call feature in your store.
What is a Click to Call Button & How Does it Work?
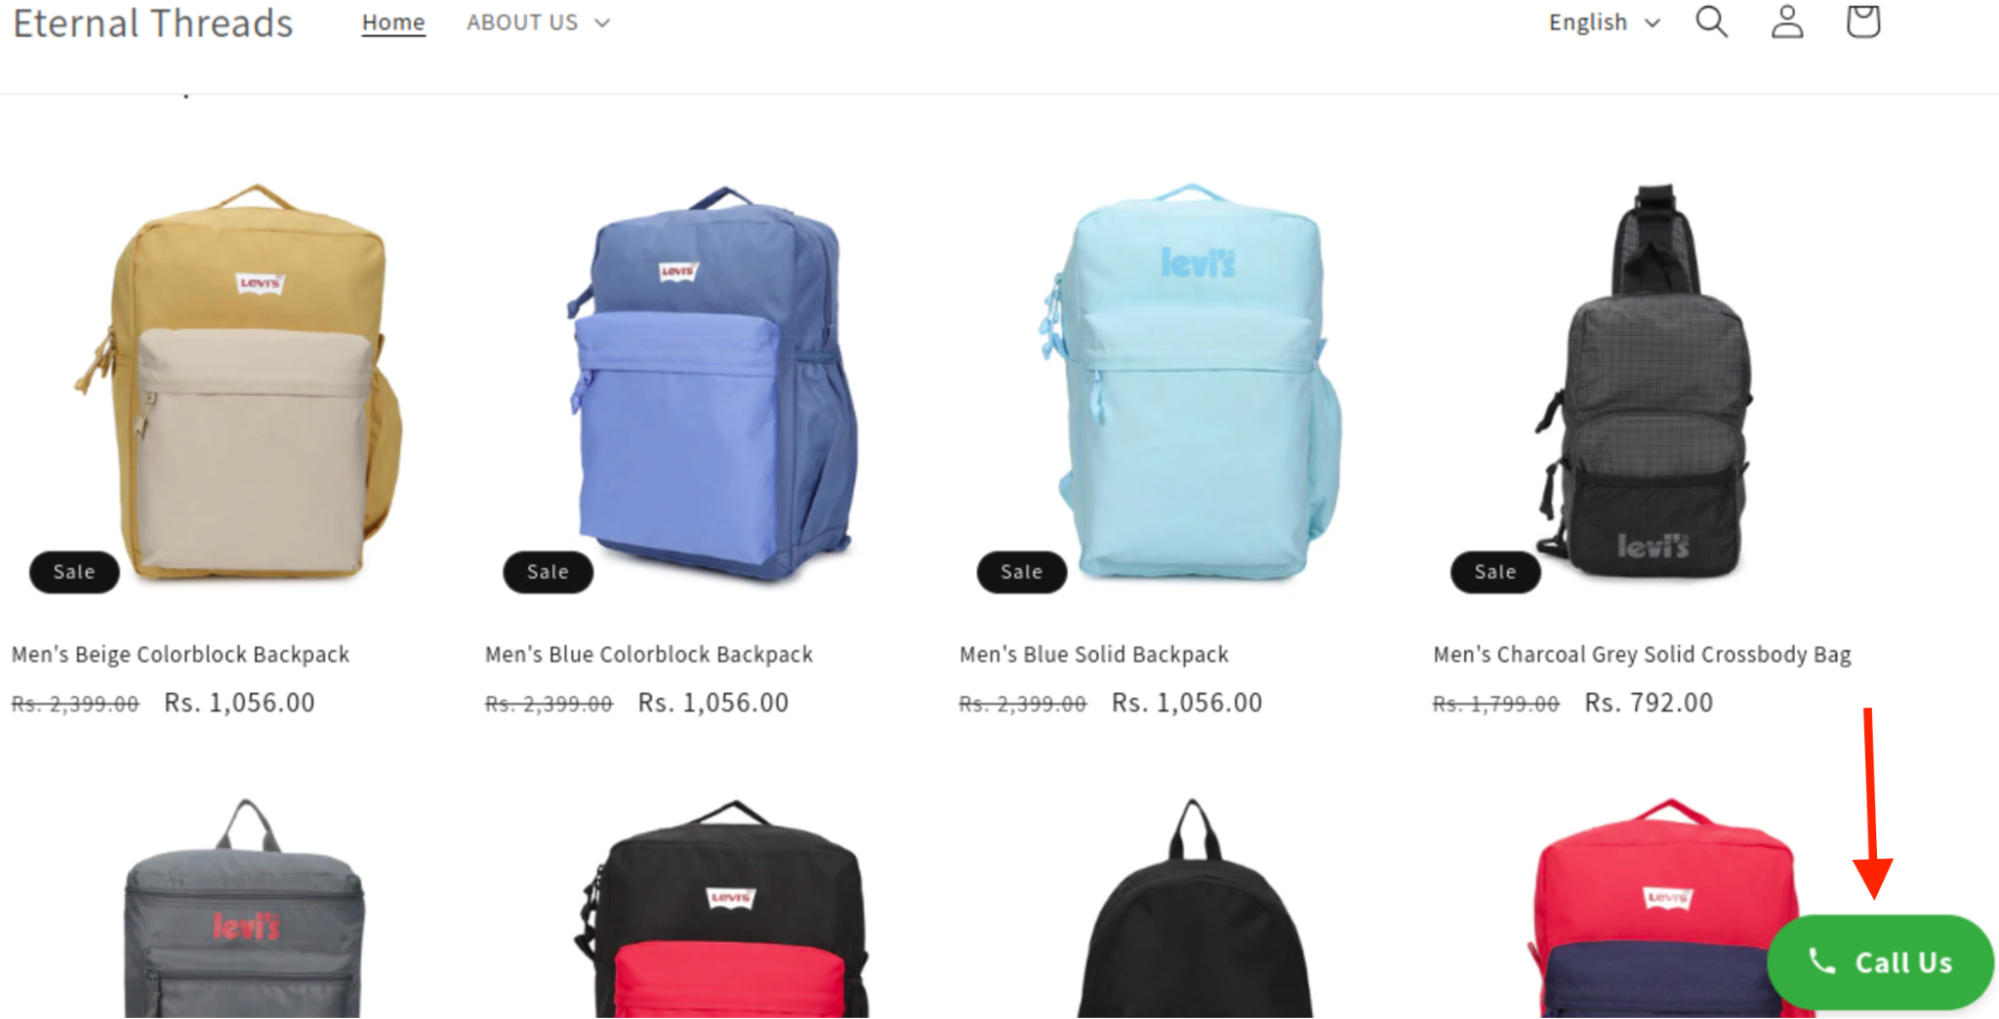
A click to call button is a one-click feature for customers to contact you via call. You can show the Shopify phone call button on various pages of your store like this.
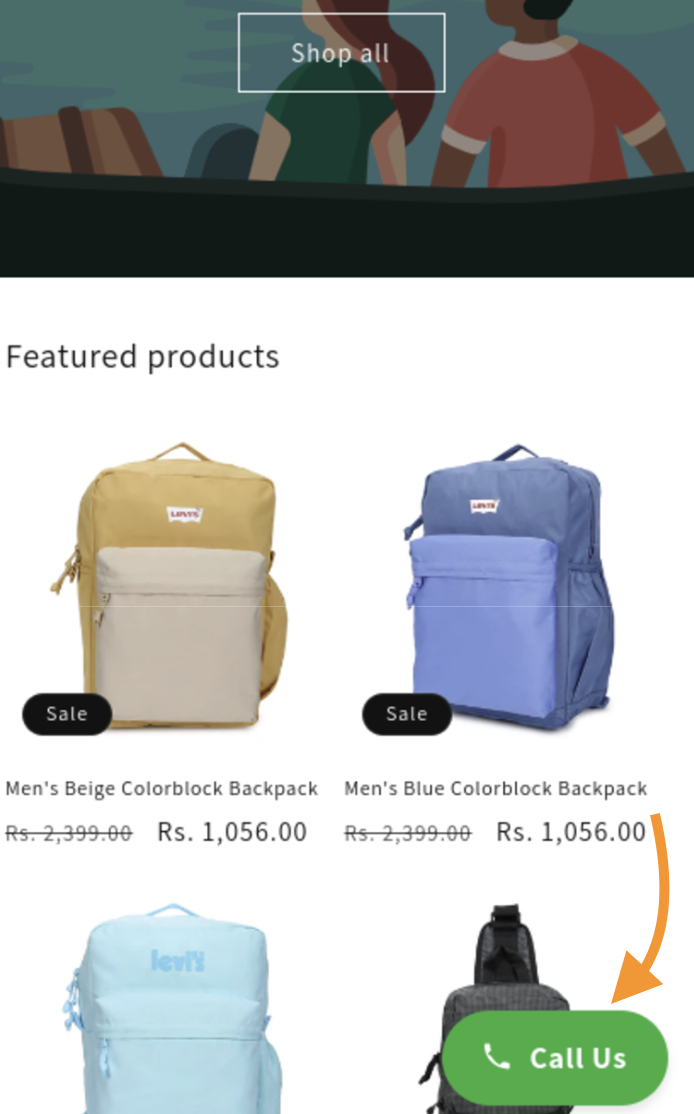
On clicking the button, your customer’s phone dialer pad will automatically open with your phone number pre-filled, which they can directly call.
Making it extremely easy for customers to connect with you on the spot and easy for you to solve their queries instantly. Now, if you are thinking how do I add a call button to Shopify? Here are the 3 easy to follow steps.
Steps to Add Click to Call in Shopify
Step 1: Open the Theme File Editor
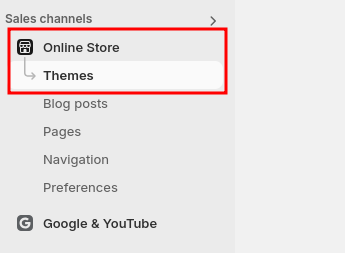
From your Shopify admin panel, head to Online Store > Themes.
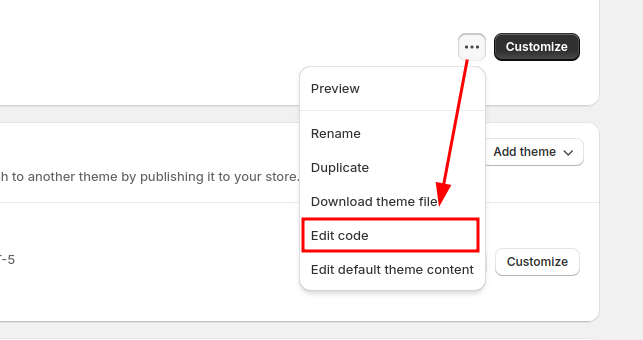
Then, from the right side, click on the three dots next to Customize and select Edit code.
Step 2: Create a click-to-call Snippet
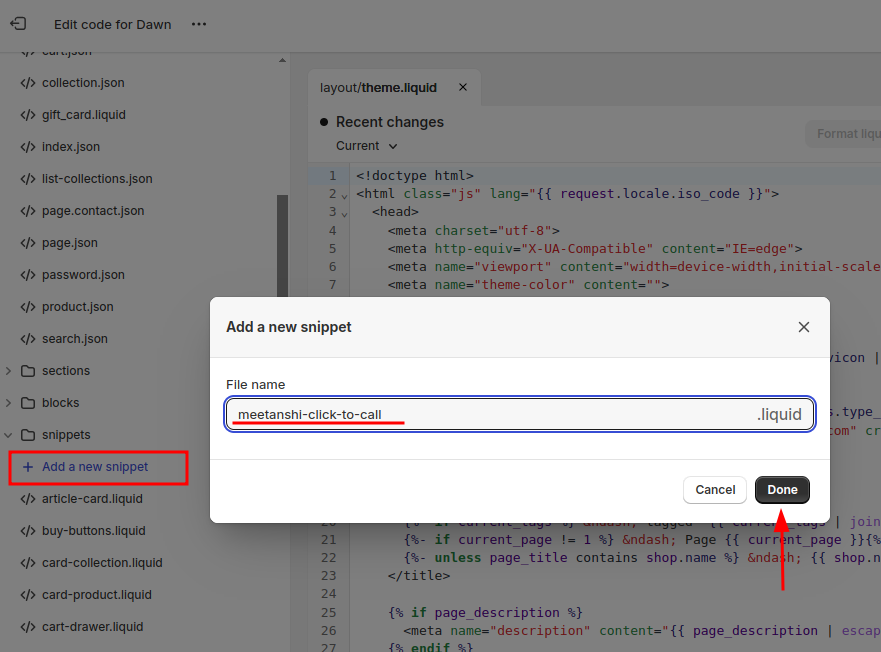
Now from the theme file editor, create a new snippet named “meetanshi-click-to-call” and click Done.
Then add the following code to the snippet:
{% assign call_button_enabled = true %}
{% assign call_button_text = "Call Us" %}
{% assign call_button_number = "+1234567890" %}
{% assign call_button_bg_color = "#28a745" %} <!-- Button background color -->
{% assign call_button_text_color = "#ffffff" %} <!-- Button text and icon color -->
{% assign call_button_size = "16px" %} <!-- Button font and icon size -->
{% assign call_button_padding = "12px 24px" %} <!-- Button padding -->
{% assign call_button_position = "bottom-right" %} <!-- Options: bottom-right, bottom-left -->

{% if call_button_enabled %}
<style>
  .call-button {
    position: fixed;
    {% if call_button_position == "bottom-right" %}
      bottom: 20px;
      right: 20px;
    {% elsif call_button_position == "bottom-left" %}
      bottom: 20px;
      left: 20px;
    {% endif %}
    background-color: {{ call_button_bg_color }};
    color: {{ call_button_text_color }};
    padding: {{ call_button_padding }};
    border-radius: 50px;
    font-size: {{ call_button_size }};
    font-weight: bold;
    text-decoration: none;
    display: flex;
    align-items: center;
    gap: 10px;
    box-shadow: 0 4px 6px rgba(0, 0, 0, 0.1);
    transition: transform 0.3s ease, box-shadow 0.3s ease;
    z-index: 9999;
  }
  .call-button:hover {
    transform: translateY(-3px);
    box-shadow: 0 8px 12px rgba(0, 0, 0, 0.2);
  }
  .call-button svg {
    width: {{ call_button_size }};
    height: {{ call_button_size }};
    fill: {{ call_button_text_color }};
  }
</style>

<a class="call-button" href="tel:{{ call_button_number }}">
  <svg alt=”meetanshi click to call icon” xmlns="http://www.w3.org/2000/svg" viewBox="0 0 24 24" aria-hidden="true">
    <path d="M6.62 10.79a15.053 15.053 0 006.59 6.59l2.2-2.2a1 1 0 011.05-.24c1.12.37 2.33.57 3.54.57a1 1 0 011 1v3.01a1 1 0 01-1 1c-10.37 0-18.81-8.44-18.81-18.81a1 1 0 011-1H4.7a1 1 0 011 1c0 1.21.2 2.42.57 3.54a1 1 0 01-.24 1.05l-2.2 2.2z"/>
  </svg>
  {{ call_button_text }}
</a>
{% endif %}
Make sure to replace the values of the phone number, text, colours, and sizes to customize the click-to-call button as per your needs.
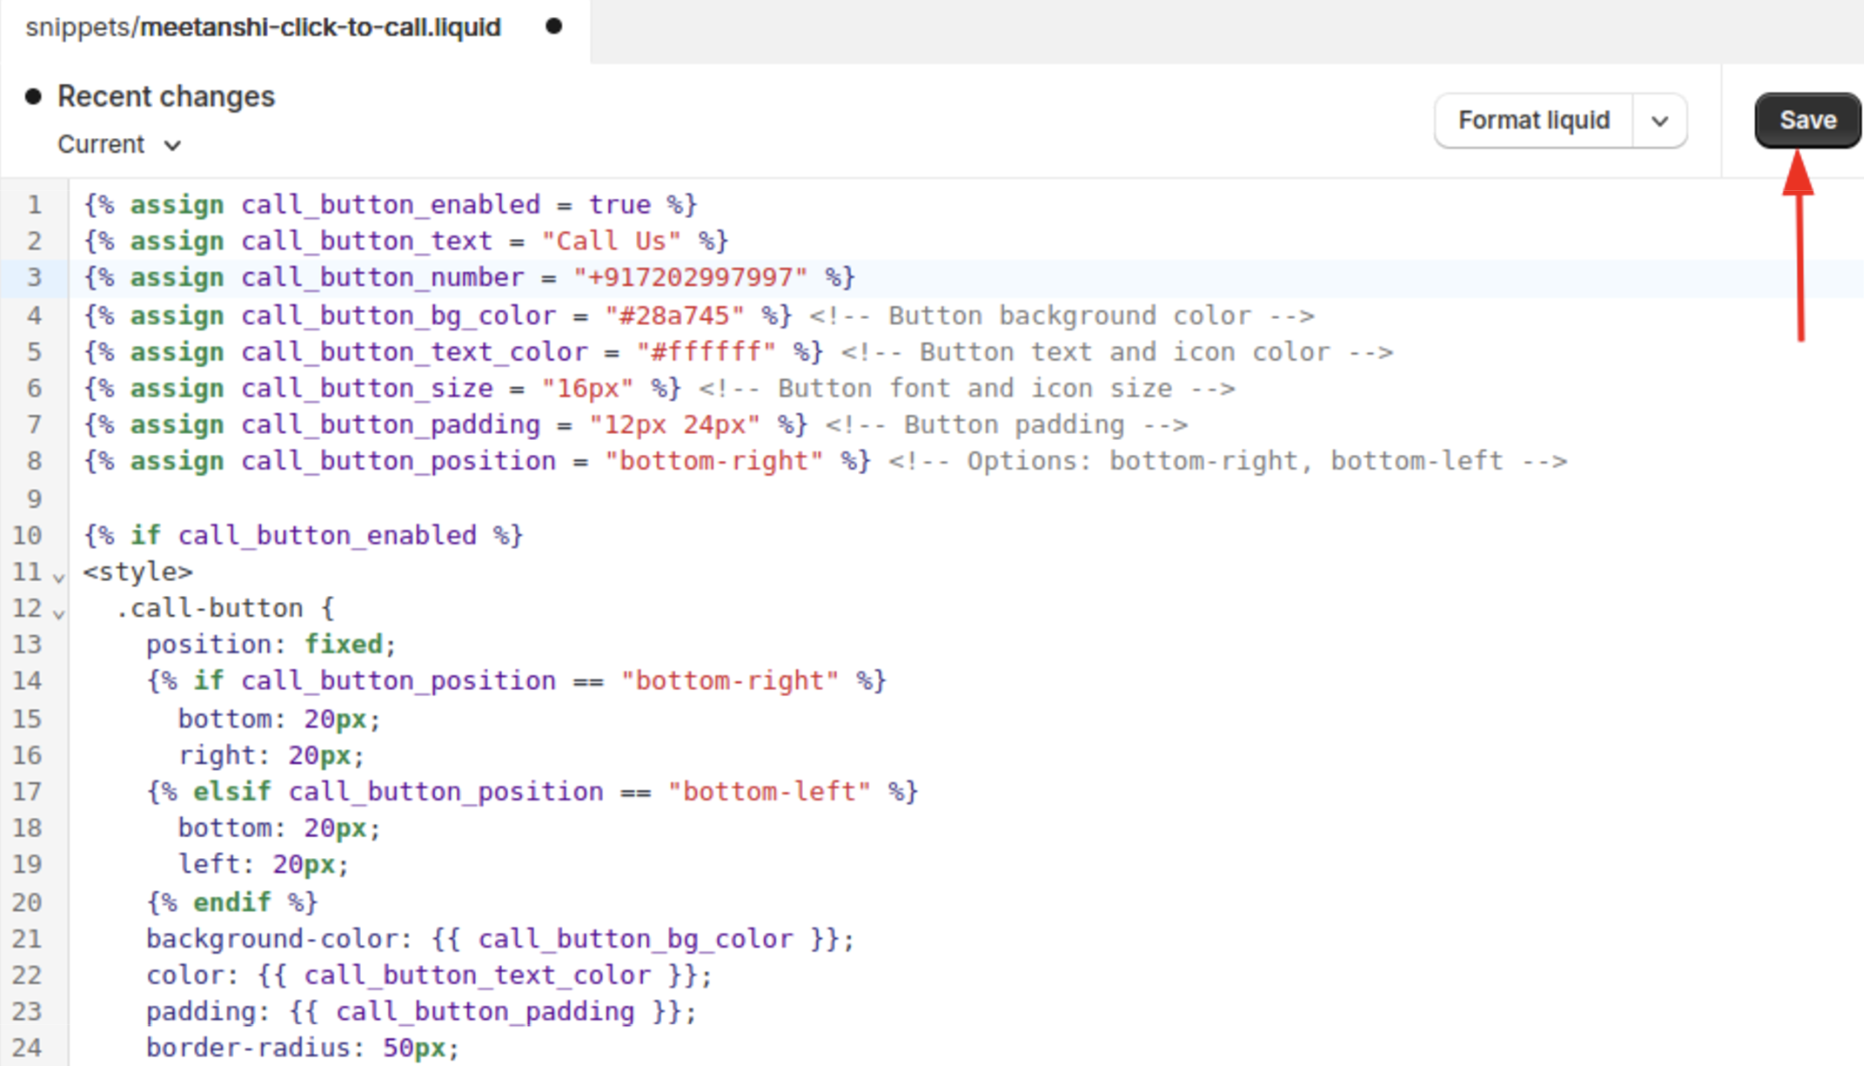
Once done, save the snippet file.
Step 3: Render the Snippet File
Now, open the theme.liquid file and add the following code before the closing </body> tag:
{% render “meetanshi-click-to-call” %}
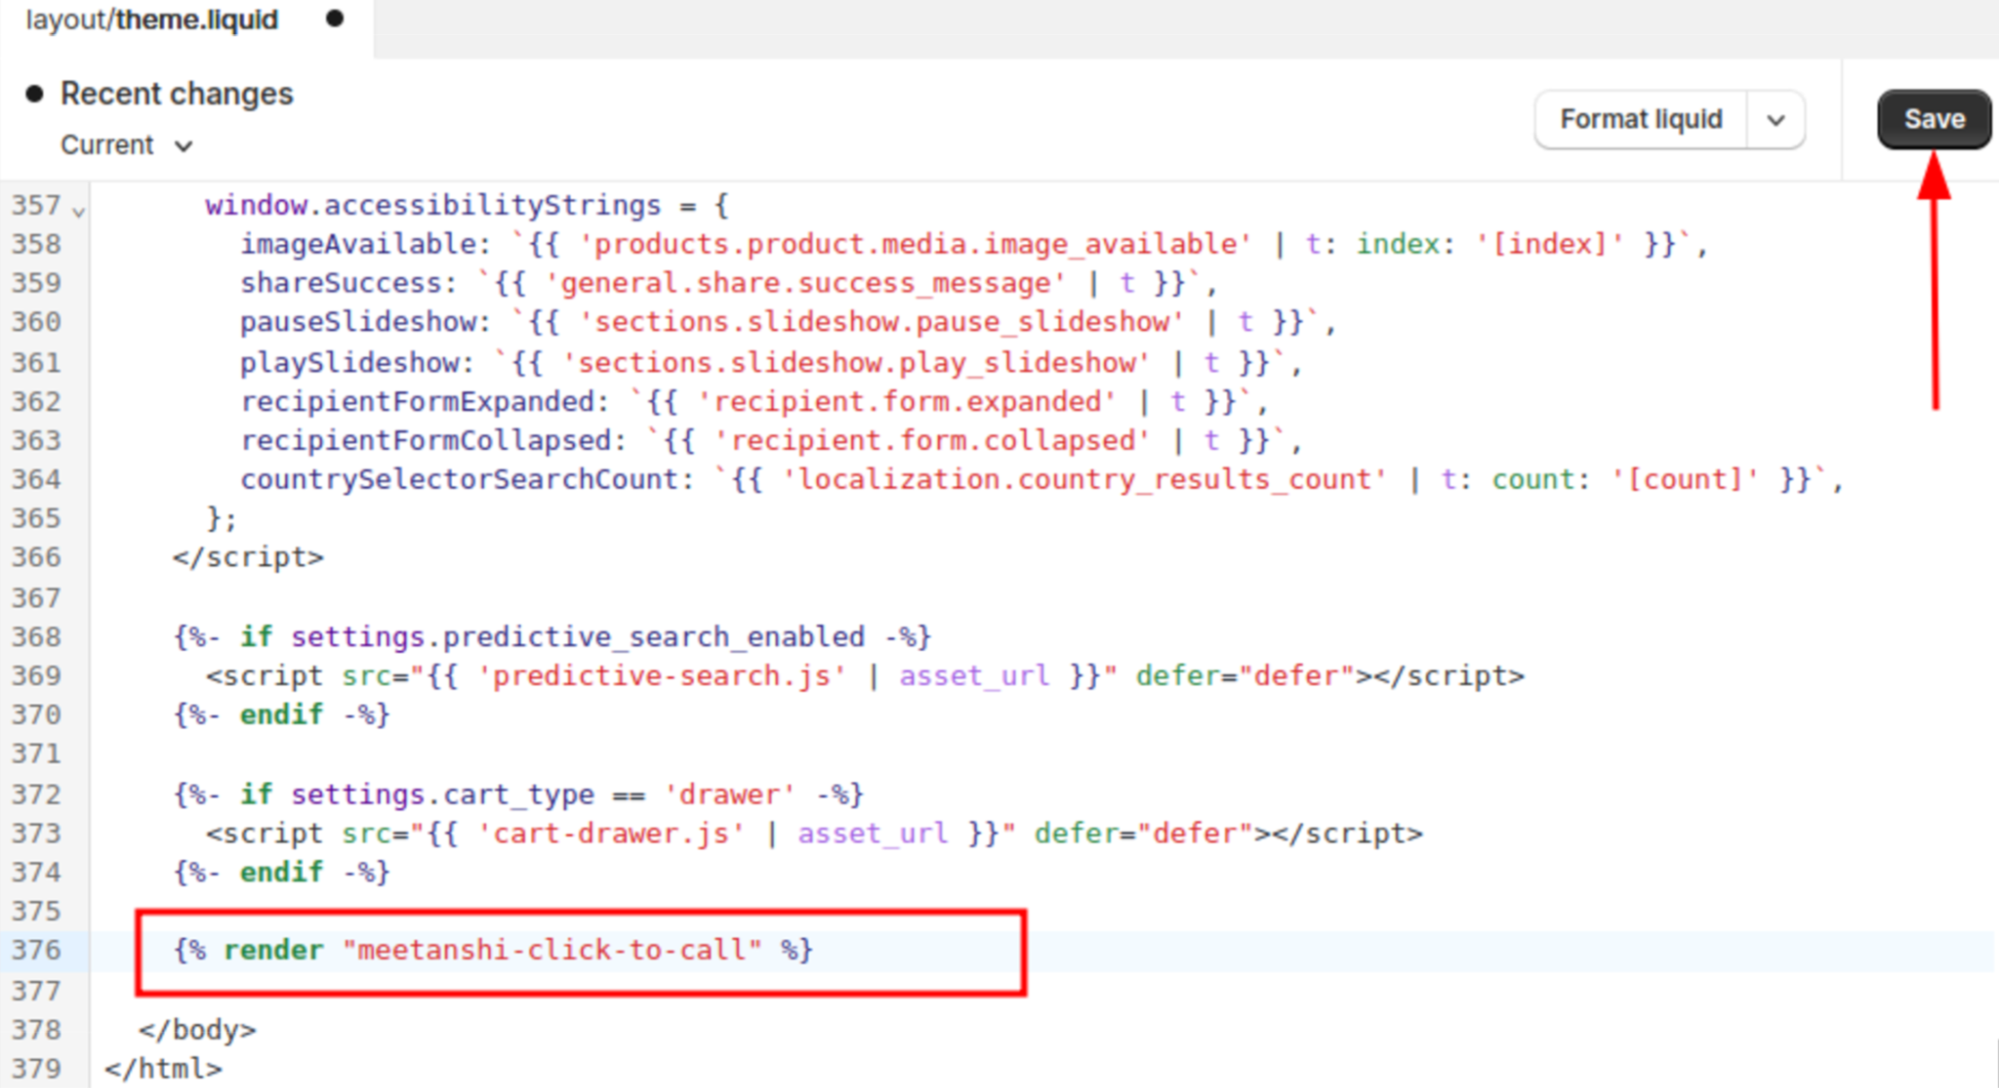
Then, click Save. Take a preview and you will be able to see the click-to-call button in your Shopify store.
Instead of adding any third-party Shopify app that might take up extra space in your backend, you can use the mentioned code in your store directly.
Make sure to edit your phone call while adding the code and using a phone number exclusively for customer support — there are chances of calls going unnoticed if you are busy with other tasks.
