Magento 2 Hyvä theme architecture is different from traditional Magento 2 structure. The main reason is that Hyvä is built to be fast, so it uses much less JavaScript and CSS.
This means that many standard Magento tools and methods that work fine on a regular Luma theme won’t work correctly on a Hyvä theme. You have to change the way you code to fit Hyvä’s lightweight design.
Creating custom modules in Hyvä themes is an essential part of Hyvä development to extend functionality and customize the storefront for Magento 2 developers.
You can easily build a custom module for a Hyvä-powered store following the step by step process mentioned here.
How to Create Custom Module in Hyvä: Step-by-Step
Look at the following directory structure module in the Hyva theme to idea from the below directory structure:
app/code/Meetanshi/HyväCustom/
├── registration.php
├── etc
│ ├── frontend
│ │ └── routes.xml
│ └── module.xml
├── Controller
│ └── Index
│ └── Index.php
├── view
│ └── frontend
│ ├── layout
│ │ └── hyvacustom_index_index.xml
│ ├── templates
│ │ └── banner.phtml
│ └── web
│ └── images
│ ├── banner1.jpg
Now, let’s see the step by step process.
Module setup
Step 1: Create the Following Folders
- app/code/Meetanshi
- app/code/Meetanshi/HyväCustom (Here, “Meetanshi” is the module’s namespace and “HyväCustom” is the module’s name.)
Note: You may need to manually create the “code” folder if it doesn’t already exist within the “app” directory.
Step 2: Create a module.xml File
In the app/code/Meetanshi/HyväCustom/etc create a module.xml file with the below code:
<config xmlns:xsi="http://www.w3.org/2001/XMLSchema-instance" xsi:noNamespaceSchemaLocation="urn:magento:framework:Module/etc/module.xsd">
<module name="Meetanshi_HyväCustom" setup_version="1.0.0"/>
</config>
Step 3: Create a registration.php File
In the app/code/Meetanshi/HyväCustom folder create a registration file to register the module. Implement the below code:
<?php
use Magento\Framework\Component\ComponentRegistrar;

ComponentRegistrar::register(
    ComponentRegistrar::MODULE,
    'Meetanshi_HyväCustom',
    __DIR__
);
Creating a Controller
Step 4: Set the Router
Define the router with routes.xml file in the app/code/Meetanshi/HyväCustom/etc/frontend folder with the below code:
<config xmlns:xsi="http://www.w3.org/2001/XMLSchema-instance" xsi:noNamespaceSchemaLocation="urn:magento:framework:App/etc/routes.xsd">
<router id="standard">
<route id="hyvacustom" frontName="hyvacustom">
<module name="Meetanshi_HyväCustom"/>
</route>
</router>
</config>
We define the frontend router and router with an id “hyvacustom”.
The Magento 2 URL syntax is <frontName>/<controler_folder_name>/<controller_class_name> and according to this, our URL will be hyvacustom/index/index.
Step 5: Create Index File
Create the Index.php file in the app/code/Meetanshi/HyväCustom/Controller/Index folder with the below code:
<?php
namespace Meetanshi\HyväCustom\Controller\Index;

use Magento\Framework\App\Action\Action;
use Magento\Framework\App\Action\Context;
use Magento\Framework\View\Result\PageFactory;

class Index extends Action
{
    protected $resultPageFactory;

    public function __construct(
        Context $context,
        PageFactory $resultPageFactory
    ) {
        parent::__construct($context);
        $this->resultPageFactory = $resultPageFactory;
    }

    public function execute()
    {
        return $this->resultPageFactory->create();
    }
}
Creating a Layout and Template files
In the Hyvä theme, the structure for layout files and templates remains the same as in default Magento 2.
You will still place these files in the view folder inside your module. This folder can also contain sub-folders like adminhtml, base, and frontend to organize your files based on where they are used.
Step 6: Create Hyvä Custom File
Use the below code to create a hyvacustom_index_index.xml file in the app/code/Meetanshi/HyväCustom/view/frontend/layout folder:
<page xmlns:xsi="http://www.w3.org/2001/XMLSchema-instance" layout="1column" xsi:noNamespaceSchemaLocation="urn:magento:framework:View/Layout/etc/page_configuration.xsd">
<body>
<referenceContainer name="content">
<block class="Magento\Framework\View\Element\Template" name="meetanshi.hyvacustom.banner" template="Meetanshi_HyväCustom::banner.phtml"/>
</referenceContainer>
</body>
</page>
Step 7: Create Banner File
Create a banner.phtml file in the app/code/Meetanshi/HyväCustom/view/frontend/templates folder
<section class="bg-[#f7f5f2] pt-6 pb-6 md:pb-6 lg:pb-8 xl:pb-[5rem] 2xl:container">
<div class=" max-w-[905%] sm:max-w-[82%] mx-auto text-center text-xl">
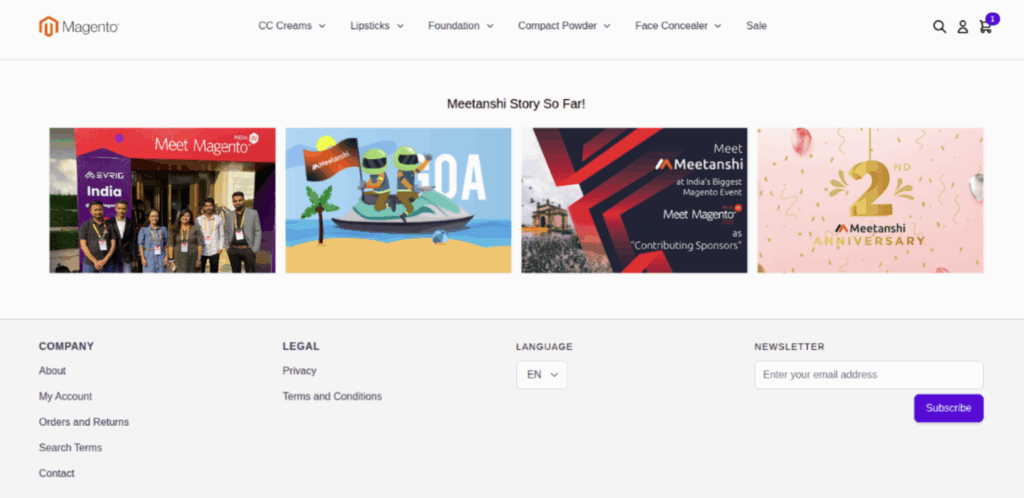
<h3 class="text-[#000000] mb-6">
Meetanshi Story So Far!
</h3>
<!-- <h4 class="hidden md:block font-medium text-[#000000] mb-6">
Explore our ranges
</h4> -->
<div class="grid grid-cols-2 md:grid-cols-4 gap-4 px-4 sm:px-0">
<!-- Chains -->
<a href="https://meetanshi.com" class="relative group block overflow-hidden">
<img
src="https://meetanshi.com/media/wysiwyg/46-meetmagento.jpg"
alt="Ex Chains"
loading="lazy"
class="w-full h-full object-cover transition-transform duration-300 group-hover:scale-105"
/>
</a>
<!-- Necklaces -->
<a href="https://meetanshi.com" class="relative group block overflow-hidden">
<img
src="https://meetanshi.com/media/wysiwyg/24-Team-at-GOA.jpg"
alt="Ex Necklaces"
loading="lazy"
class="w-full h-full object-cover transition-transform duration-300 group-hover:scale-105"
/>
</a>
<!-- Bracelets -->
<a href="https://meetanshi.com" class="relative group block overflow-hidden">
<img src="https://meetanshi.com/media/wysiwyg/21-Meetanshi-as-a-sponsor-in-Meet-Magento-India-2020.jpg"
alt="Ex Bracelets"
loading="lazy"
class="w-full h-full object-cover transition-transform duration-300 group-hover:scale-105"
/>
</a>
<!-- Pendants -->
<a href="https://meetanshi.com" class="relative group block overflow-hidden">
<img
src="https://meetanshi.com/media/wysiwyg/19-Second-Meetanshiversary.jpg"
alt="Ex Pendants"
loading="lazy"
class="w-full h-full object-cover transition-transform duration-300 group-hover:scale-105"
/>
</a>
</div>
</div>
</section>
This file is a bit different from the usual Magento setup as has the Hyvä theme code woven in, which is shaking up the HTML and CSS.
It builds a responsive image gallery section with four square images in a grid, styled using Tailwind CSS, and adds a subtle zoom effect on hover for each image.
Building a custom Hyvä module is about embracing a modern approach to web development.
By using Alpine.js for interactivity and Tailwind CSS for styling, you can create new features that don’t compromise on speed.
This ensures your store remains lightning-fast, providing a superior experience for your customers while meeting your specific business needs.