TinyMCE is a rich-text WYSIWYG editor. It is one of the important elements that admin use frequently in Magento 2 stores. It facilitates the admin to convert HTML text area fields or other HTML elements to editor instances.
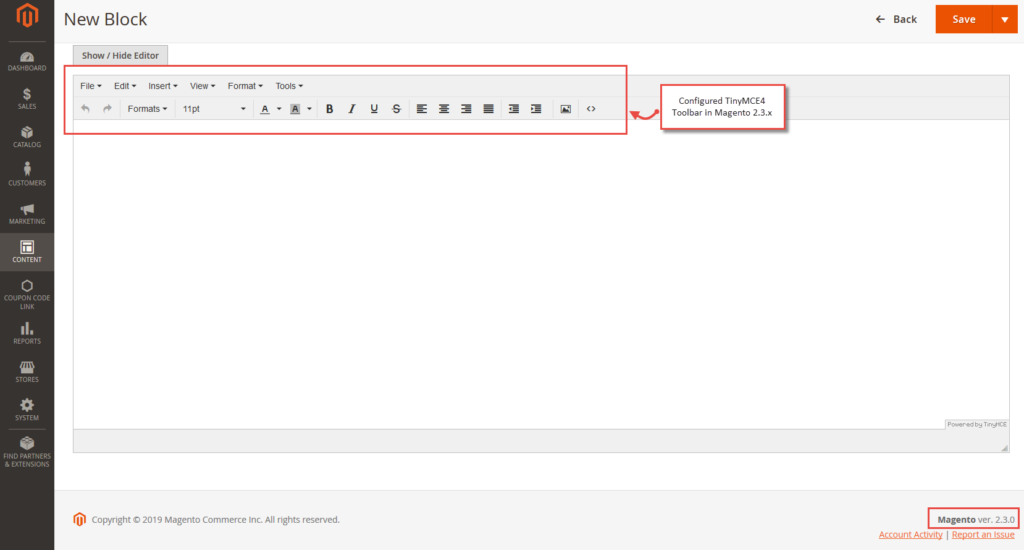
However, with the recent Magento 2.3.x versions, the layout of TinyMCE4 toolbar has changed. The default TinyMCE4 toolbar in Magento 2.3.x versions do not include options like font color, background color, code, color picker, etc. These are the essential options that admin may require often.
The default editor that you get with the Magento 2.3.x versions looks something like this:

Hence, I have come up with a programmatic solution to configure TinyMCE4 toolbar in Magento 2.3.x versions.
This solution uses the method to create plugin in Magento 2 which I have already given earlier.
Method to Configure TinyMCE4 Toolbar in Magento 2.3.x:
1. Create registration.php file in app\code\[Vendor]\[Namespace]\
<?php
        \Magento\Framework\Component\ComponentRegistrar::register(
            \Magento\Framework\Component\ComponentRegistrar::MODULE,
            '[Vendor]_[Namespace]',
            __DIR__
        );
2. Create module.xml file in app\code\[Vendor]\[Namespace]\etc
<?xml version="1.0"?>
    <config xmlns:xsi="http://www.w3.org/2001/XMLSchema-instance" xsi:noNamespaceSchemaLocation="urn:magento:framework:Module/etc/module.xsd">
        <module name="[Vendor]_[Namespace]" setup_version="1.0.0"/>
    </config>
3. Create di.xml file in app\code\[Vendor]\[Namespace]\etc
<?xml version="1.0"?>
    <config xmlns:xsi="http://www.w3.org/2001/XMLSchema-instance" xsi:noNamespaceSchemaLocation="urn:magento:framework:ObjectManager/etc/config.xsd">
        <type name="Magento\Ui\Component\Wysiwyg\ConfigInterface">
            <plugin name="custom_name"
                    type="[Vendor]\[Namespace]\Plugin\Config"
                    sortOrder="10"/>
        </type>
    </config>
4. Create Config.php in [Vendor]\[Namespace]\Plugin\
<?php

    namespace [Vendor]\[Namespace]\Plugin;


    class Config
    {

     protected $activeEditor;

        public function __construct(\Magento\Ui\Block\Wysiwyg\ActiveEditor $activeEditor)
        {
            $this->activeEditor = $activeEditor;
        }

        public function afterGetConfig(
            \Magento\Ui\Component\Wysiwyg\ConfigInterface $configInterface,
            \Magento\Framework\DataObject $result
        ) {

            $editor = $this->activeEditor->getWysiwygAdapterPath();

            if(strpos($editor,'tinymce4Adapter')){

            if (($result->getDataByPath('settings/menubar')) || ($result->getDataByPath('settings/toolbar')) || ($result->getDataByPath('settings/plugins'))){
                return $result;
            }

            $settings = $result->getData('settings');

            if (!is_array($settings)) {
                $settings = [];
            }

            $settings['menubar'] = true;
            $settings['toolbar'] = 'undo redo | styleselect | fontsizeselect | forecolor backcolor | bold italic underline strikethrough | alignleft aligncenter alignright alignjustify | bullist numlist outdent indent | table | image | code';
            $settings['plugins'] = 'textcolor image code';

            $result->setData('settings', $settings);
                return $result;
            }
            else{
                return $result;
            }
        }
    }
That’s it.
After implementing this method, you can use the editor as shown below:
Quite helpful options will now be available in your backend WYSIWYG editor!
I’d be very grateful if you helped share this helpful post on social media to fellow developers!
Thanks!
